Simple (Dental Chart) Invoicing for Dental Practices
How to do a Dental Invoice using the Dental Chart:
- To use the Dental chart on Invoicing in MedDebs or on the diary you must always use the Invoices (Simple) screen option.
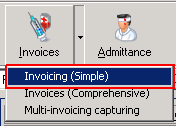
- You can also set the Invoice (Simple) on default in MedDebs or in the Diary at the right top site on Programs >> User Preferences.

- Use the first tab General
and on the default Invoicing method choose the Simple (Dental Chart) option.

- On your billing screen, you can click on the Show Dental Chart button
to display the Dental chart on the billing screen.

- Just to the right next to the Dental chart, there are 3 pictures:
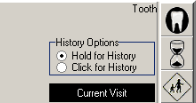
- The first picture is a tooth
; if you click on it and you hold the cursor on the tooth it will show you the tooth History for the Patient.
- Example:
- Before you hold on the tooth:

AND
- While you are holding on the tooth:

- The second picture is a hourglass
that will give you access in the tooth History.
- The third picture
changes the format of the tooth from Adult to Child.
- ADULT CHART:
- CHILD CHART:
- You can insert your code where a tooth number is applicable, and after you have inserted the tooth number you move your cursor to the Dental Chart on to the tooth number, It will also show you the code that you billed on the dental chart.
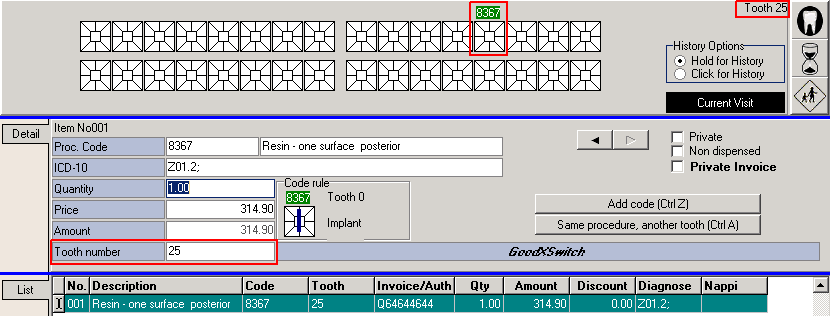
- You can also access the tooth History screen from here by clicking on the hourglass.

- And it will show you the tooth History of the patient that was done in your practice.
- You can also use the Between dates to filter the dates that you want to see the history for the patient and click on the Search button to access the selected dates.
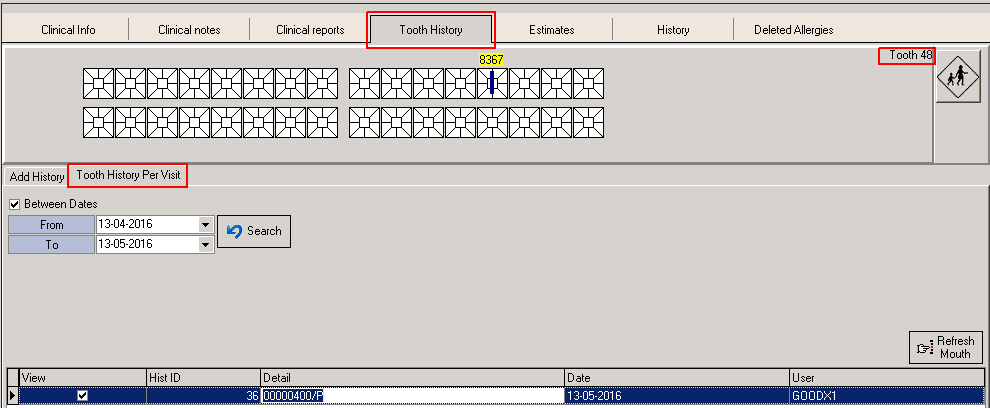
- If you want to add something else that has been done on the patient, Click on the Add History button, Choose the tooth number above on the dental chart and choose the correct description.
- Each description will have its own picture to identify the work that was done on the patient is already.
- If you add something on the Add History it will always have a small (H) above the tooth number on the dental chart.
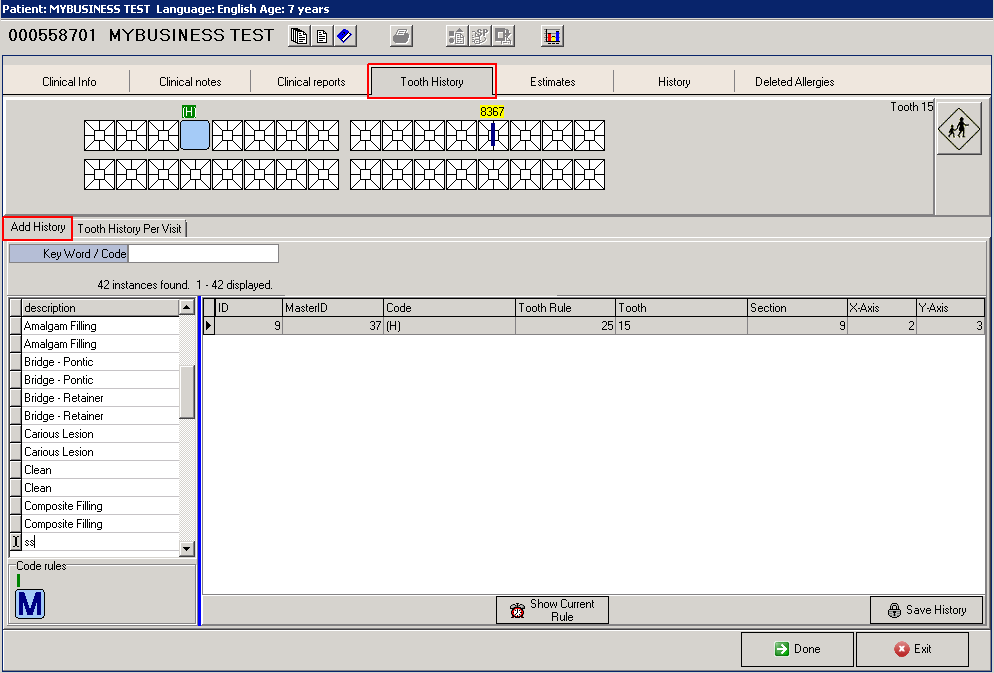
- When you are done click on the Save History button at the bottom.
![]()
Last modified: Thursday, 16 July 2020, 11:07 AM