Account Query: Change Item Details
The account enquiry gives the user quick access to the debtors' account with all the transactions that have been created in the system. This will help respond to the debtor's inquiries about their account, for instance, all outstanding invoices or when was the last time they paid.
Change Item Details gives the user the option to remove and change certain details from the Edit transaction detail screen relating to the items that have been billed.
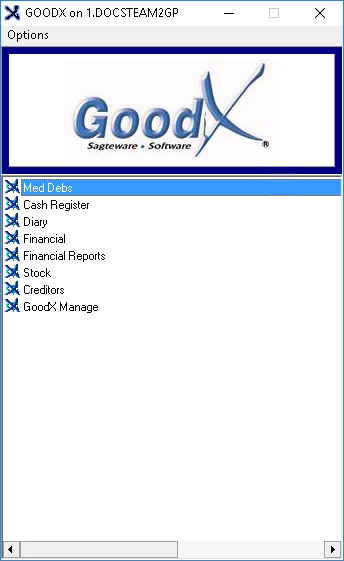
- Log in to the GoodX Desktop App with your GoodX username and password.
- From the Navigator, Double Click on the MedDebs module.

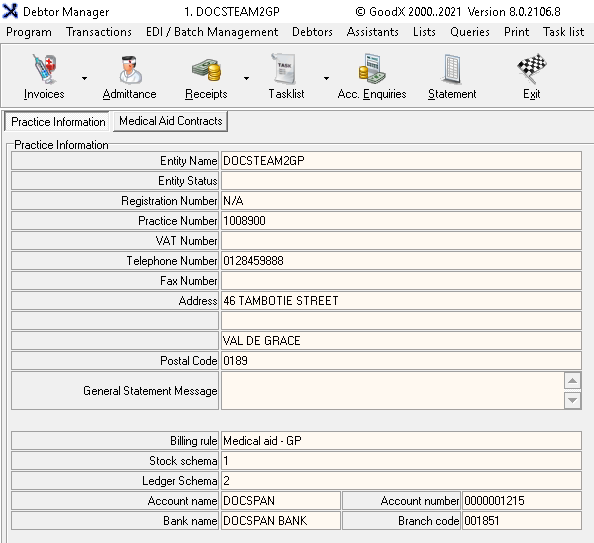
- The Debtor Manager screen will open.

- Click on Admittance on the Toolbar.

- The Main Member Input screen will open.

- Search for the desired debtor using the Search field.

- Click on the Debtor whose account information the user would like to access.

- Click on the Account button or press the F9 key on the keyboard.
- The Account Query screen will open.

- Select the Transaction that the user would like to edit the details of by clicking on it.

- Double Click on the desired line item.

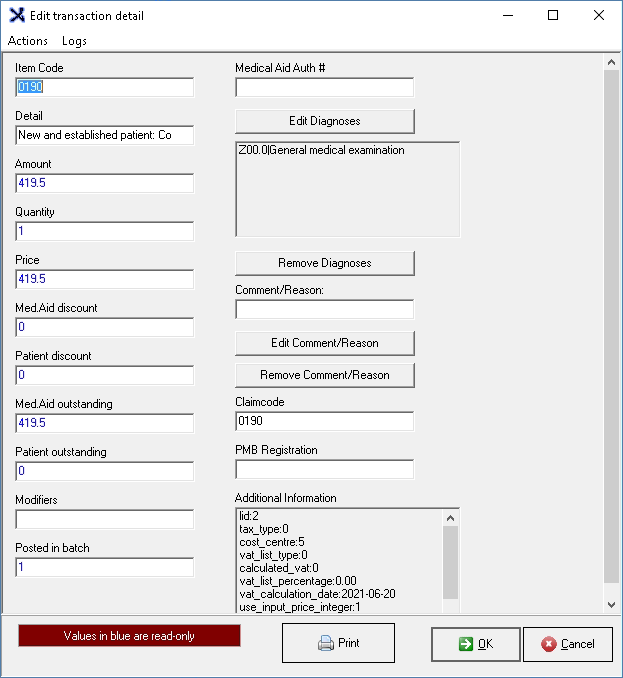
- The Edit Transaction Detail screen will open.

Please Note all values that are blue are read-only and can not be changed, all values in black, the user is able to change.
- An extensive breakdown of the Edit transaction detail screen:
- Item Code: The billing code linked to the item or procedure.

- Detail: A unique detailed explanation and description of the item or procedure.

- Amount: The amount that the item or procedure was billed for.

- Quantity: How many of the item was billed in the specific line.

- Price: The price that is linked to the specific item.

- Med.Aid discount: A discount that was granted to the medical aid.

- Patient discount: A discount that was granted to the patient.

- Med.Aid outstanding: The amount that was posted to the medical aid for which they will be liable on the specific procedure or item.

- Patient outstanding: The amount that was posted to the patients account for which they will be liable on this specific item or procedure.

- Modifiers: A modifier is a code that provides how the Practitioner can indicate that a service or procedure that has been performed has been altered by some specific circumstance but has not changed in its definition or code.

- Posted in batch: The number of items that were posted on the invoice.

- Medical Aid Auth #: The Medical aid must be contacted and arrangement must be done. An authorisation number will be given, and this number must be included when the claim is submitted to the medical aid.

- Click on the Edit Diagnosis button to edit the previously selected ICD-10 diagnosis code.

- The ICD-10 Direct Search screen will open.

- For an extensive explanation of how the ICD-10 Direct Search screen works please refer to the user manual: ICD-10 Codes
- Double Click on a diagnosis to select a new ICD-10 code to add the invoice.

Please Note, more than one diagnosis code can be selected.
- Click on Selection Completed (F2) or press the F2 key on the keyboard when satisfied with the codes that have been selected.

- An Information pop-up will appear to ask if the user would like to change the ICD-10 codes for all the items on the invoice.

- Click on No to cancel the request and return to the Edit Transaction detail screen.

- Click on Yes to change the ICD-10 code and return to the Edit Transaction detail screen.

- Notice the ICD-10 code for the transaction has changed.

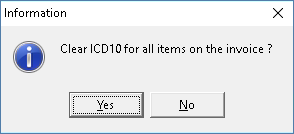
- Click on the Remove Diagnosis button to remove the previously selected ICD-10 diagnosis code.

- An Information pop-up will appear to ask if the user would like to clear the ICD-10 codes for all the items on the invoice.

- Click on No to cancel the request and return to the Edit Transaction detail screen.

- Click on Yes to change the ICD-10 code and return to the Edit Transaction detail screen.

- Notice the ICD-10 code for the transaction has been cleared and the diagnosis field has been greyed out.
- Comment/Reason: If a code has been rejected a comment or reason will be added to advise the reason thereof.

- Click on Edit Comment/Reason to add, edit or change the reason.

- The Medical Aid Rejection codes screen will open.

- Click on the relevant rejection code to select it.

- Click on Cancel to exit the Medical Aid Rejection screen without saving.

- Click on OK to save and return to the Edit Transaction Details screen.

- Notice the Comment/Reason sections information has changed to what the user selected.

- Click on the Remove Comment/Reason button to remove the contents of the Comment/Reason field.

- Notice the Comment/Reason field will be cleared.

- Claim Code: The billing code that was used to claim from the medical aid.

- PMB Registration number: The registration number linked to a Prescribed Minimum Benefit, if applicable.

- Additional Information: Any other information regarding the transaction will be listed in the box, this field is not editable.

- Click on the Cancel button to exit the Edit Transaction Details screen without saving.

- Click on the OK button to save and return to the Edit Transaction Details screen.

- The user will be redirected back to the Account Query screen.

- Click on the Close button to exit the Account Query screen.

- Click on the Exit button to exit the Main Member Input screen and return to the Debtor Manager screen.

Last modified: Wednesday, 18 August 2021, 9:22 AM