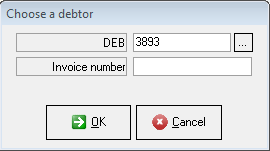
Enter the Debtor Number in the field provided or click on the elipse button (...) to browse for the Debtor
Click on OK
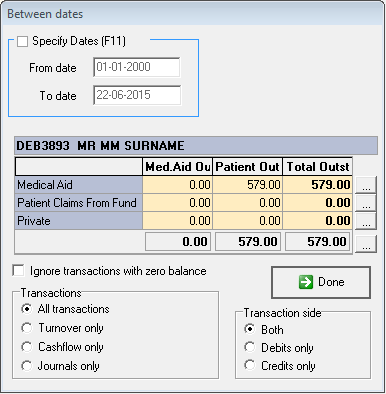
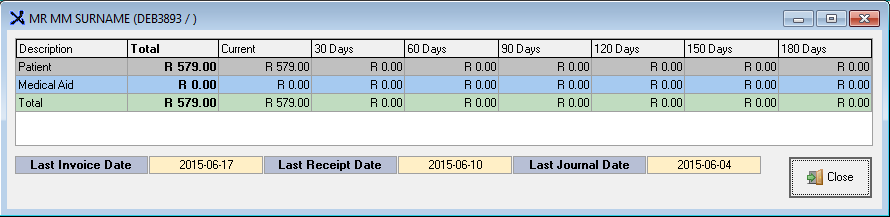
The following Summary Screen may appear depending on your setup. In Supervisor Options, under the Debtor Transaction tab the Display Summary screen before Account query needs to be ticked for this Summary screen to appear
Click on the ellipse button (...) next to the Total Amount to view the Account
Do NOT click on Done as this will take you to the previous screen and you will be requested to enter the Debtor Number again
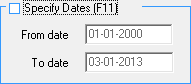
Mark the box or press F11 to only view Invoices between certain dates
Enter the dates in the fields provided
Mark this box to "Ignore Transactions with Zero Balance"
Select the Transactions you want to view
Select the Transaction side you want to view
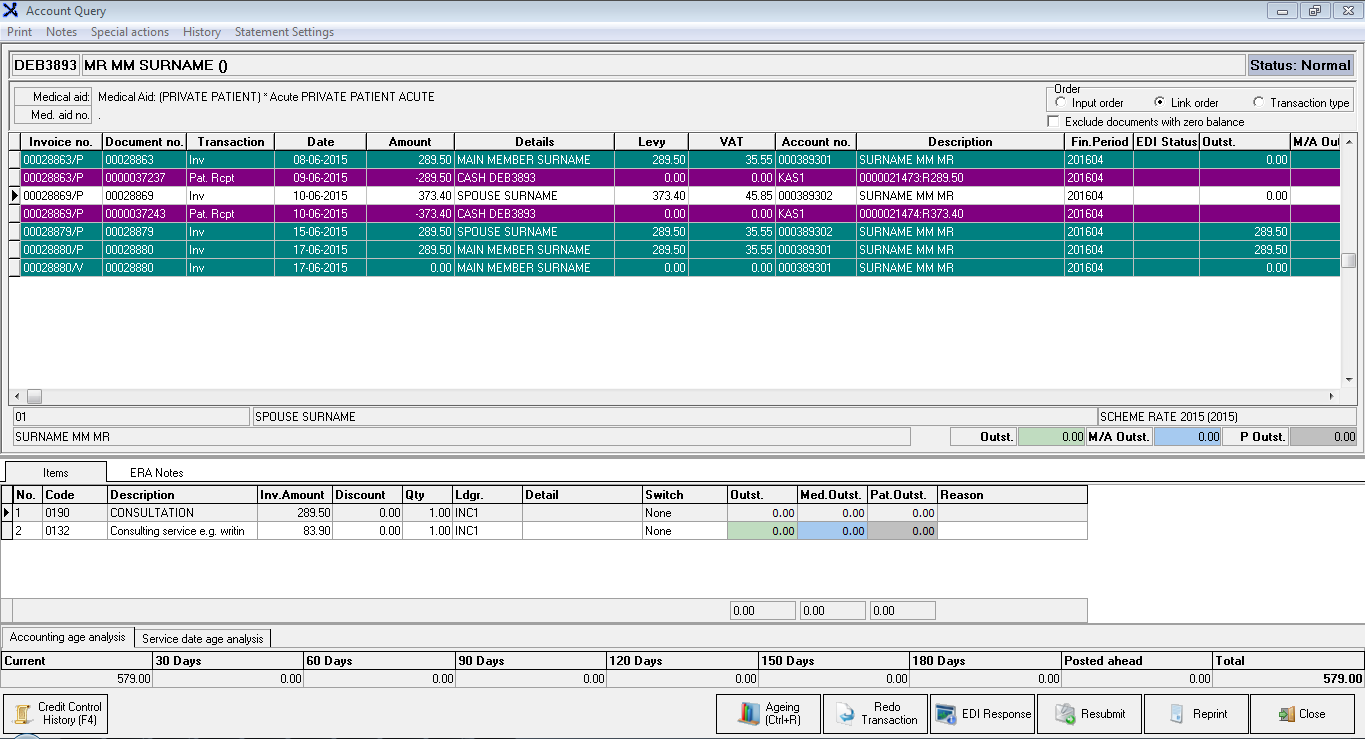
The Account Query screen is displayed
From the Menu Bar you can select to Print (F6), make Notes and view the History (Archived Transactions) of the Account
Select the Order you want the Account to display by choosing Input order, Link order or Transaction type
Tick the "Exclude documents with zero balance" block to view only invoices/transactions with outstanding balances
Transaction History: This window displays ALL the Transactions processed on the Account
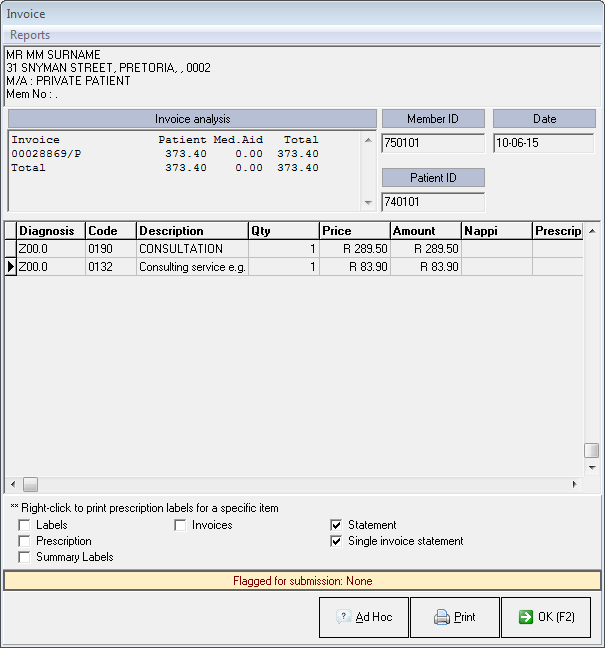
Transaction Detail: This screen displays the Detail of the invoice selected in the top window
Views the Ageing (Ctrl+R) of the Account
Enables you to Redo the Transaction selected. This action will do an automatic Credit Note and populate the same Invoice as initially invoiced. You can now alter the new invoice before posting
View the EDI Response for a selected Invoice
Resubmit the selected invoice via the selected Switch
When clicking on Reprint the following screen will display where you can select to Reprint Labels, Prescriptions, Summary Labels, Invoices,a Statement ora Single Invoice Statement
Enables you to Exit theAccount Query screen
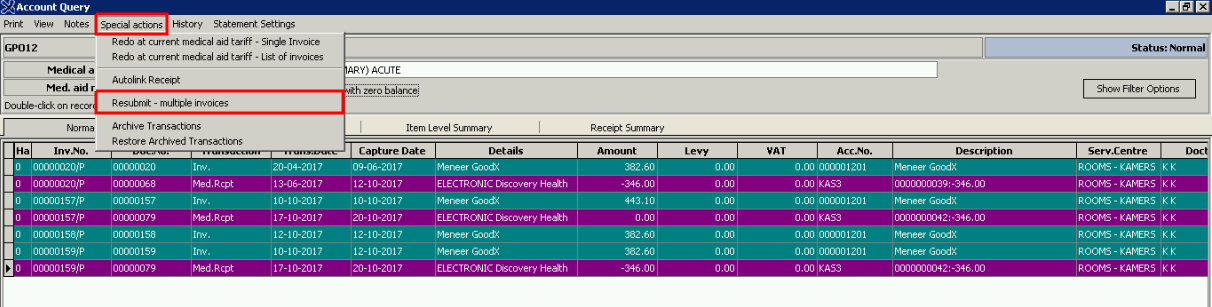
Resubmit Multiple Invoices Function ONLY available in version 8.0
Open the Admittance screen and select the Debtor that you want to submit the Invoices for
Click on Account
Click on Special Actions
Select Resubmit - Multiple Invoices
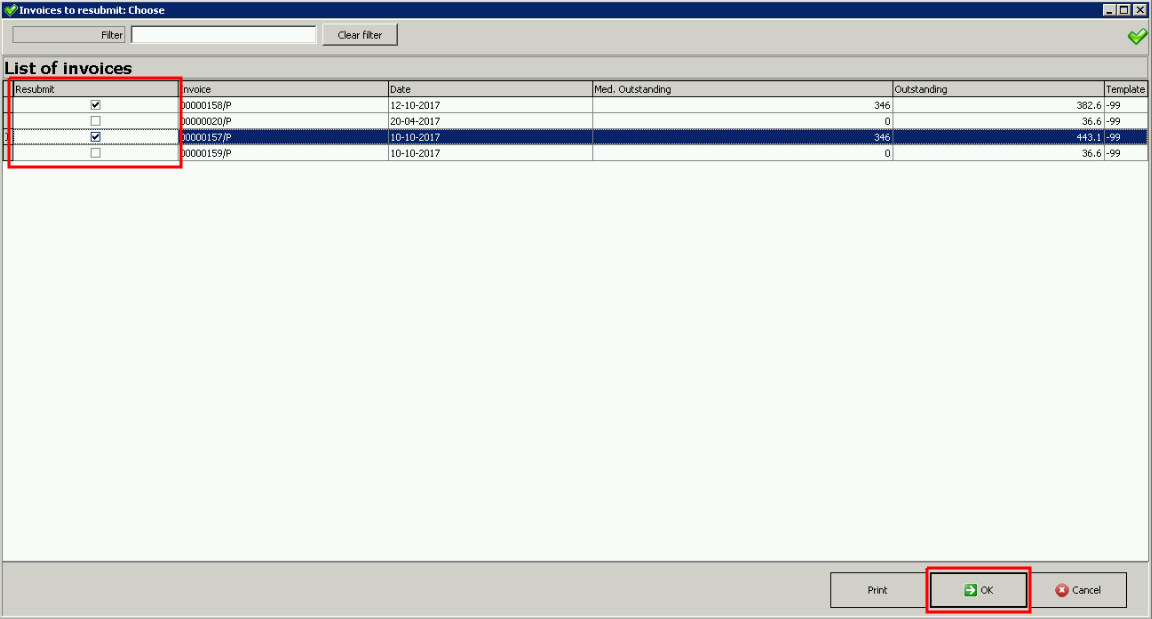
A list of Invoices to Resubmit will be displayed.
Select the Invoices to resubmit by clicking on the tick box in the first column of each line.
Click on OK
A confirmation pop up will show to Confirm if you want to send the claim Now or Later.
Click on "Send Now"
All Invoices that was selected will be resubmitted successfully.
Last modified: Wednesday, 30 August 2023, 11:07 AM