How to Set Up Pills on Customisable Forms
A Pill can be seen as a procedure or action performed on the Patient. When you add or select Pills you can link a Diagnosis, Billing Codes and Considerations that will automatically be added to the Assessment, Planning and Billing section of the Form when selected.
This is standard information automatically included in relevant sections of a Customisable Form, streamlining your documentation process.
- The contents of this user manual will consist of the following information:
- Considerations
- Diagnoses
- Billing Codes
- Script Lines
- Widgets
- This user manual will start on the Editing option of a Customisable form.
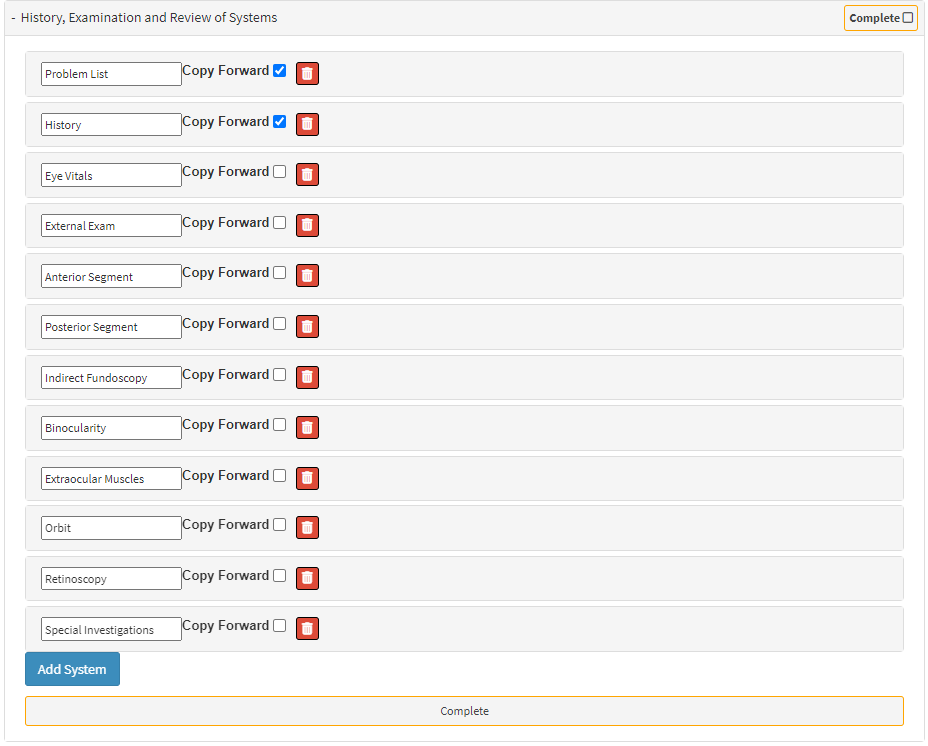
- For more information regarding how to navigate to the Eye Eval 2 Workflow Event screen, please refer to the user manual: How to Build a Custom Eye Evaluation 2 Form.
- Click on a Panel to expand for more options.

- Click on the Add Section button.
![]()
- A New Section will open.

- Click on the +Add Pill button to create a new Pill for this section.
![]()
- A Pill text field will open.
- Click on the Text field to give a Name to the Pill.
![]()
- Click on the Pill to expand for more options.
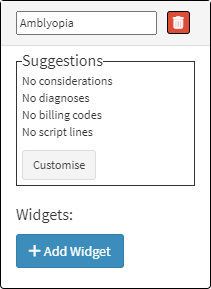
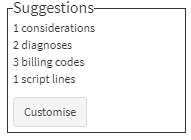
- Suggestions: Suggested options that will be considered for each Pill.

- Click on the Customise button to set up the Suggestions for each Pill.
![]()
- The Customise Suggestions screen will open.
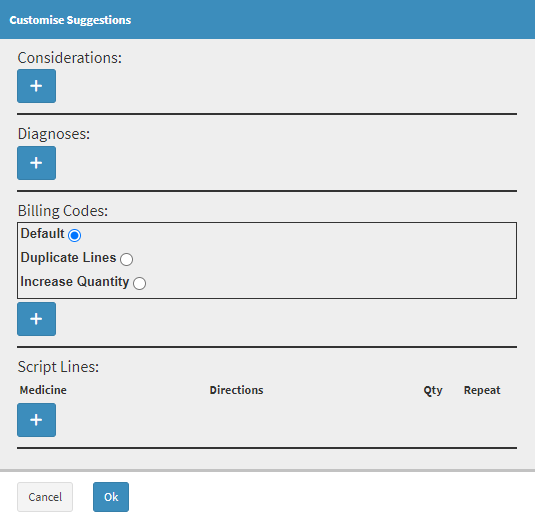
- An explanation will be given for each field and option on the Customise Suggestions screen:
Considerations
Facts to reflect on with regard to the condition of the Patient.
- Click on the + button to add a new Consideration.
![]()
- A new Text field will become available where you are able to add a Consideration for the Pill.
![]()
- Click on the Delete button to remove the Consideration from the Pill.
Please Note: Once the Pill is actioned, the Consideration that has been linked to the Pill will appear in the Assessment, Planning and Billing section of the Form.
Diagnoses
ICD10 codes linked to the Pill that will reflect on the Invoice, Script and other Clinical Documents.
- Click on the + button to link Diagnoses Codes to the Pill.
![]()
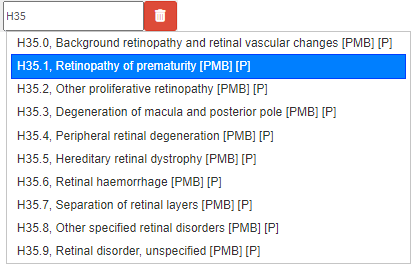
- A new Diagnoses text field will become available where the Diagnosis Code can be added.
![]()
- Click on the Diagnoses field and start typing the name or code of the desired Diagnosis. The list will be shortened according to the information that has been entered.
- Click on the Delete button to remove the Diagnosis Code.
![]()
Please Note: More than one Diagnosis Code can be added to each Pill. Each Diagnosis will need to be added separately, using the + button.

Billing Codes
Billing Codes that will be added when the specific Pill is selected. Billing Codes will be populated in the Lines section of the Assessment, Planning and Billing of the Form. 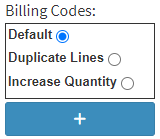
- Click on the relevant Radio button to make a selection:
- Default: The Billing Code added will only have a quantity of one, doesn't matter if actioned on one or both eyes.
- Duplicate Lines: When both the left and right eye have been actioned, there will be Two Billing Lines invoiced, that are identical.
- Increase Quantity: When both the left and right eye have been actioned, there will be one billing line with a Quantity of two.
- Click on the + button to add the Billing Code that will be populated in the Lines section of the Assessment, Planning and Billing of the Form. This code will be added when the specific section is actioned.
![]()
- Click on the Billing Code field to enter the desired Billing Code, the user is able to type the Code or the Name of the Code to start the search. Only 1 character is required to start the search.
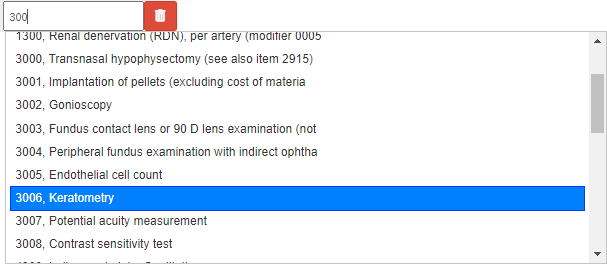
- Click on the Delete button to remove the Billing Code.
![]()
Script Lines
Items that you want to add to the Medicine Items section within the Assessment, Planning and Billing panel of the form. The Items will be added to the form once the specific Pill that they have been set up on is selected.
- Click on the + button to add the Script Items that will be populated in the Lines section of the Medicine Items section of the form.
![]()
- A new Script Line will become available.

- Click on the Medicine field to Add the desired item that you would like to prescribe when the Pill is selected. You are able to type the GMED/0201 Code, the Name or the Nappi Code to start the search. Two characters are needed in order to start the search.
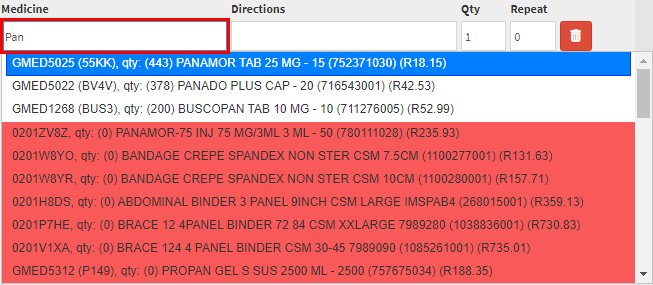
- Click on the Directions field to add the method of how the prescribed items need to be taken/administered.

- Click on the Quantity field to enter the number of this specific item is needed.
![]()
- Click on the Repeat field to add the number of times the item will repeated.
![]()
- Click on the Delete button to remove the Script Line.
![]()
Please Note: More than one Script Line can be added to each Pill. Each Script Line will need to be added separately, using the + button.
- Click on the Ok button to save all the changes that you made.
- The items added to the Pill will now be indicated on the Pill.
Widgets
A Widget is a component on the Pill that you can use to input data, make selections or trigger actions on the specific Pill where the Widget has been set up. A Widget can be a Text/Number field, drop-down menu etc.
- Click on the +Add Widget button to create a new Widget for this section.
- The Add Widget screen will open.
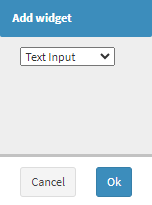
- Click on the Text Input drop-down menu to select what type of Widget will be added to the Pill.

- Text Input: A Text field becomes available where information can be entered.
- Number Input: A Numeric field will become available where a value.
- Dropdown: A Selection can be made, from a list of options.
- The Widget will be added to the Pill.

- For more information regarding how the set-up of the Widget works, please refer to the user manual: How to Set Up Widgets on Customisable Forms.
Last modified: Thursday, 1 August 2024, 11:19 AM