How to Use Story Mode
Why Use This Function:
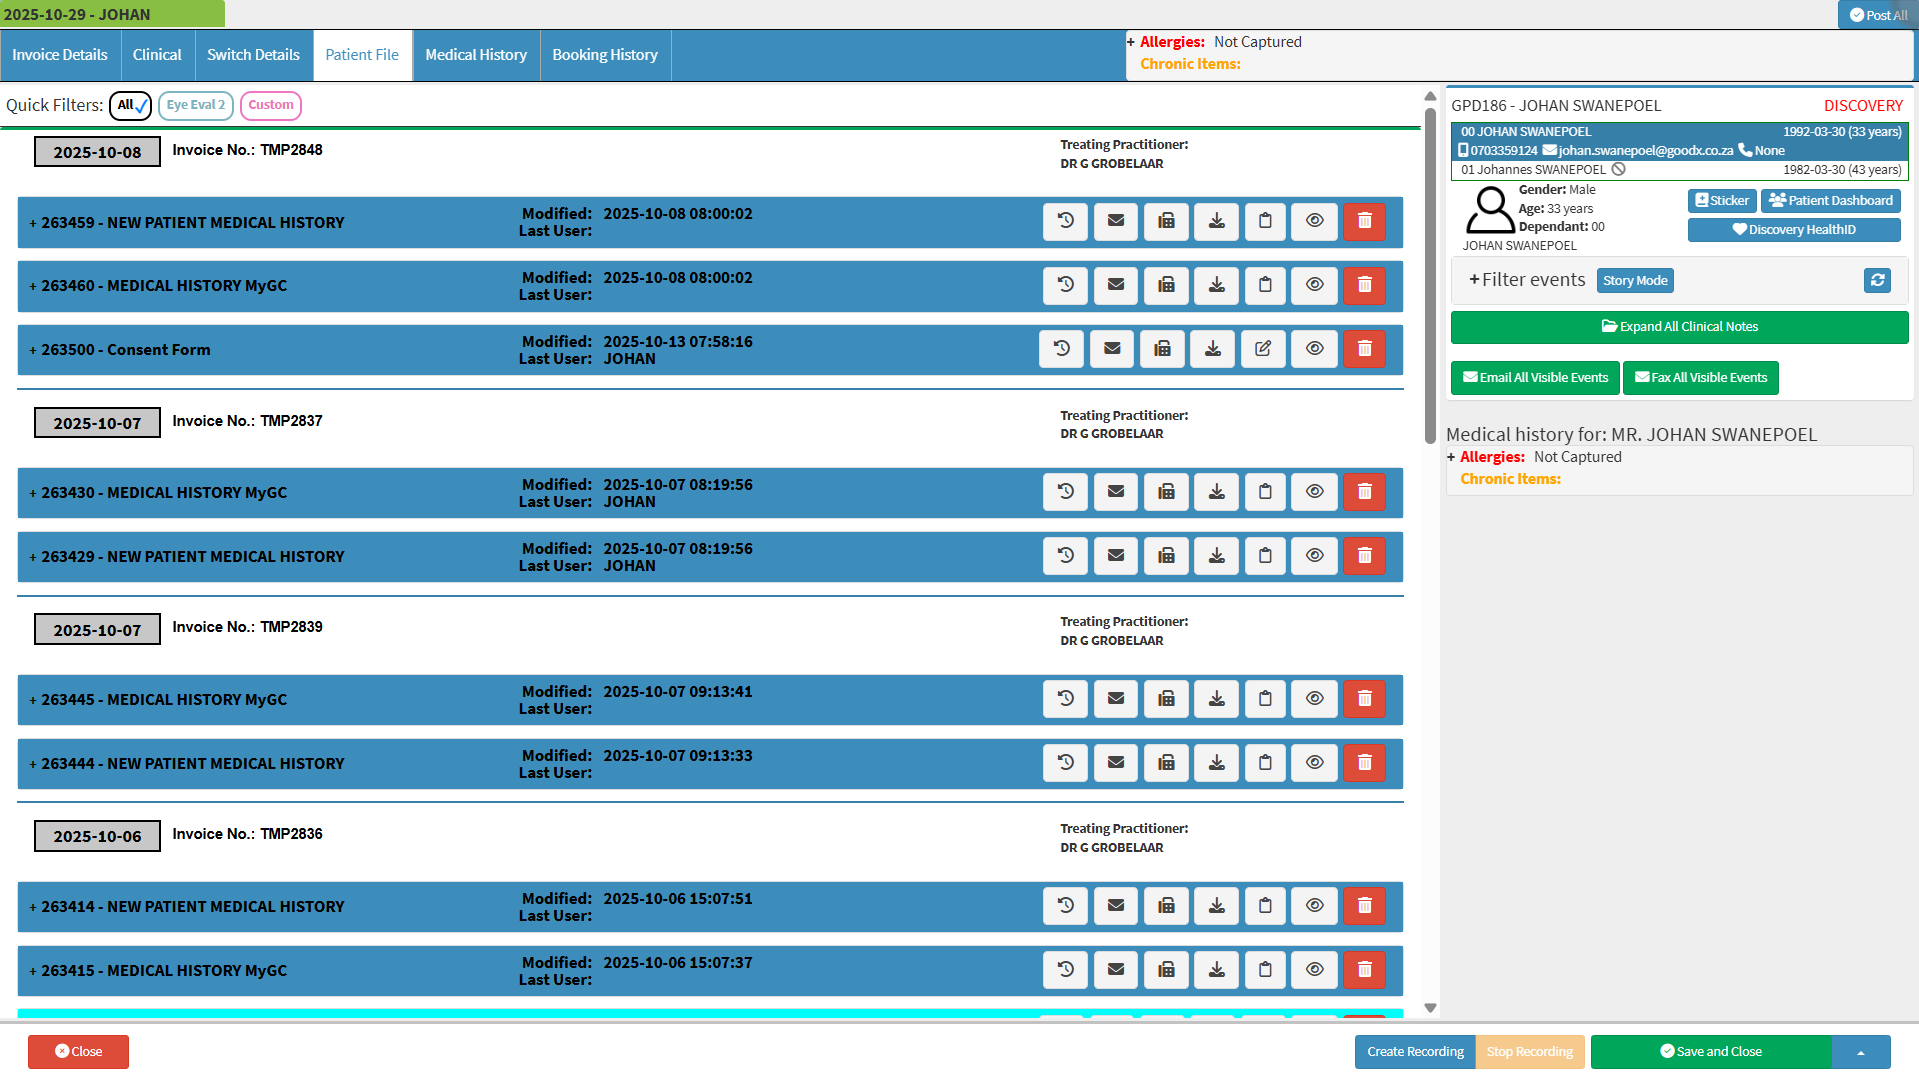
Story Mode provides a clear and intuitive view of the Patient’s Clinical History by presenting Clinical Events in a structured, narrative-like format. It organises related events chronologically and groups them by date, providing a cohesive overview of the Patient’s health journey. This layout enables Practitioners to trace the progression of care more easily, identify clinical patterns, and make well-informed decisions with greater efficiency and insight.- 
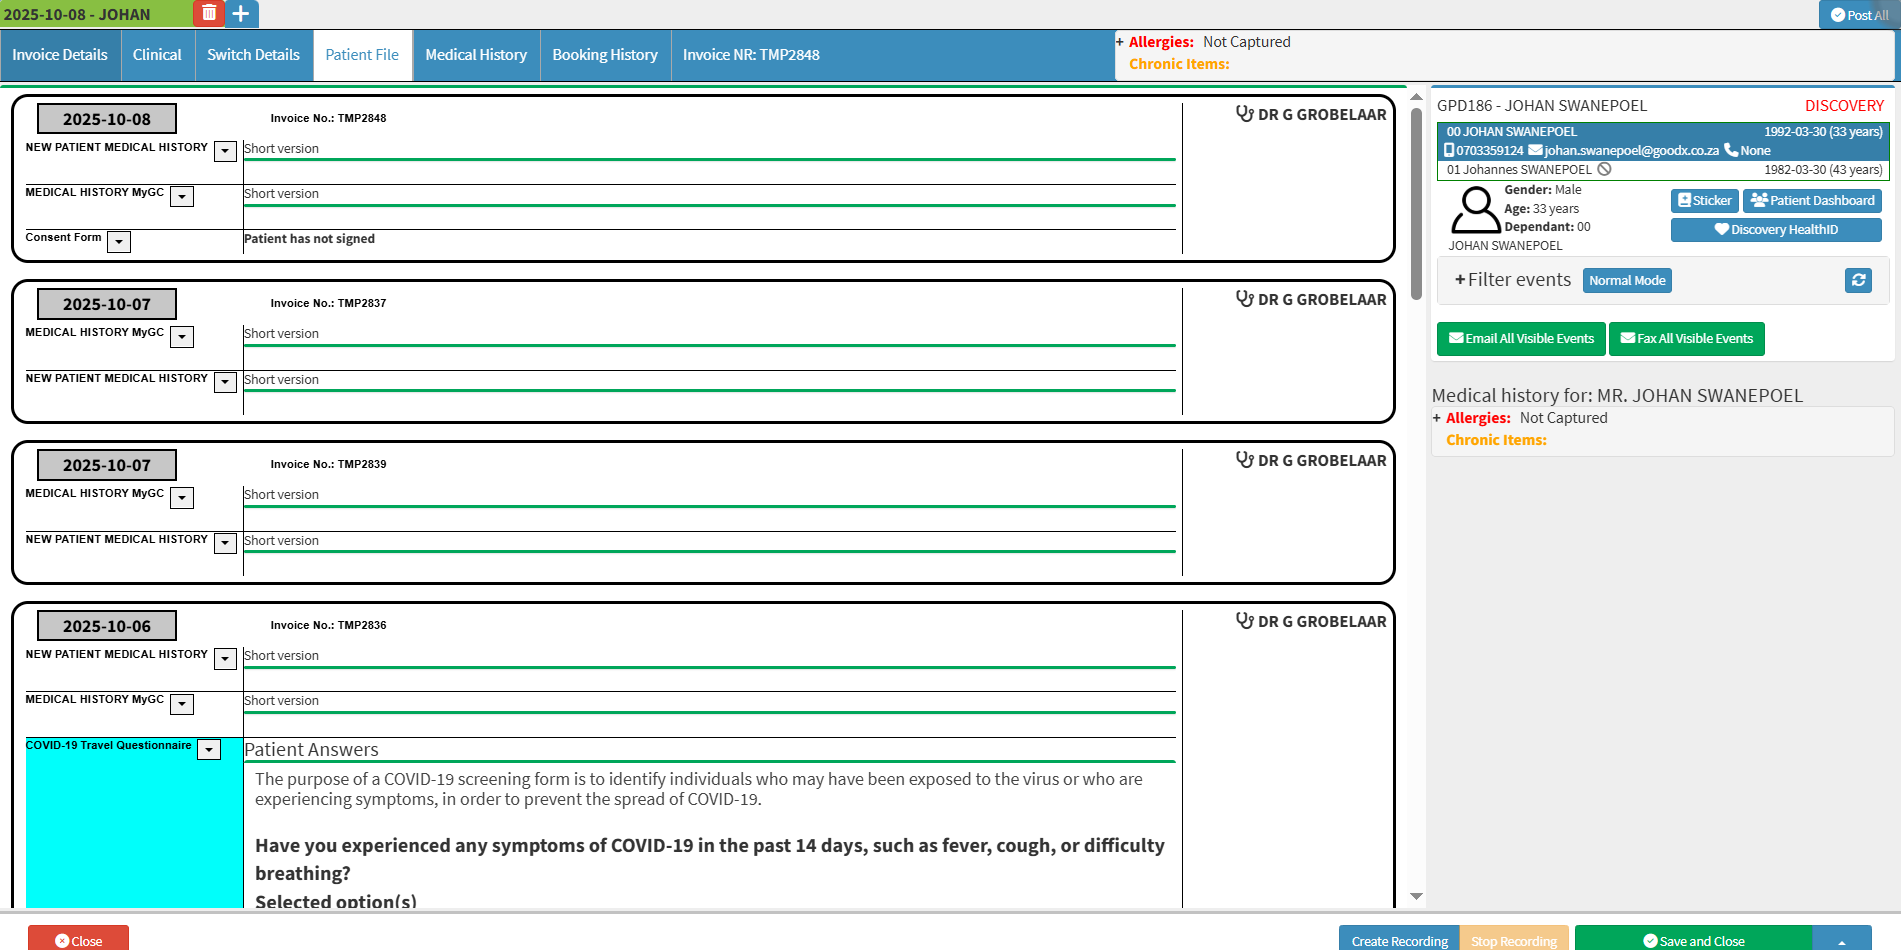
This user manual will start on the Patient File screen, which by default will be displayed in Normal Mode.

- For more information regarding the Patient File screen, please refer to the user manual: Patient File screen: Navigation and Use.
- Click on the Story Mode button to change to Story Mode.
- The Patient File screen will display in a more detailed view when in Story Mode.

- To return to the previous view, Click on the Normal Mode button to change back to Normal Mode.
![]()
💡Please Note: Normal Mode gives a more compact view of the information displayed in Story Mode.
- Click on the Filter Events panel.

- The Filter Events panel will expand.

- Click on the Number of Dates to Load field.

- Type in the number of dates to display.

- Tick the Consent Form checkbox to show all consent forms on the Clinical screen.

- Click on the From field.

- The Date Picker will open.

- Select the date from which the Clinical Events will be filtered.

- Tick/Untick the Show Deleted Events checkbox to show or hide deleted events.
![]()
- Tick/Untick the Show Fully Credited Invoices checkbox to show or hide the Invoices that have already been paid.
![]()
- Tick/Untick the Show Invoices with no Events checkbox to hide invoices with no events.
![]()
- Click on the Email All Visible Events button to send all visible events via email.
![]()
- Click on the Fax All Visible Events button to send all visible events via fax.
![]()
Last modified: Wednesday, 29 October 2025, 9:24 AM