How to Send a Fax from a Clinical Form
Faxing remains essential for swiftly transmitting physical documents, ensuring legal compliance, maintaining security, and verifying signatures in industries like healthcare and finance. It offers a direct, reliable and secure means of communication.
Please Note: To be able to use the Fax function, set up must first be completed. For more information on how to set up Fax, please refer to the user manual: Services.
- This user manual will start on the Clinical screen, with an already completed form.
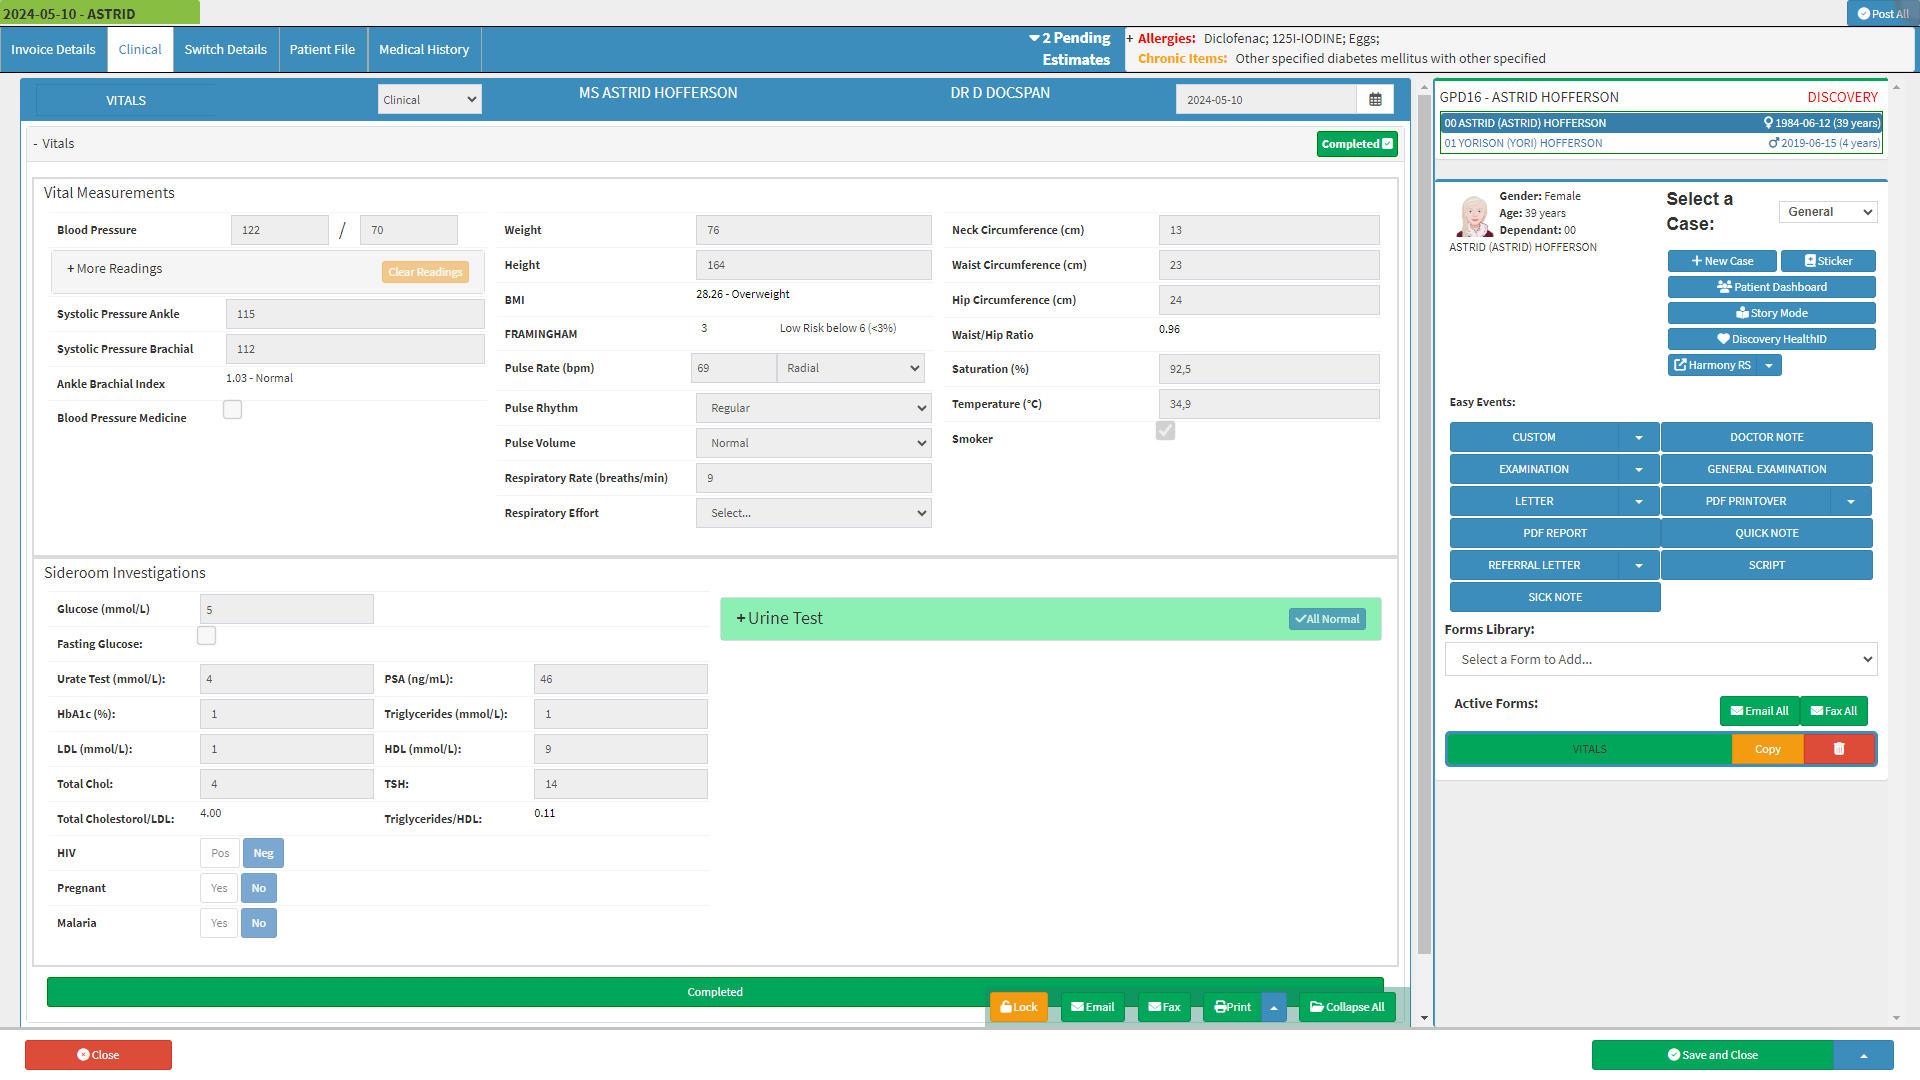
- For more information regarding the Clinical screen, please refer to the user manual: Clinical Screen: Navigation and Use.
- Click on the Fax button.
![]()
- The FAX - Workflow Event screen.
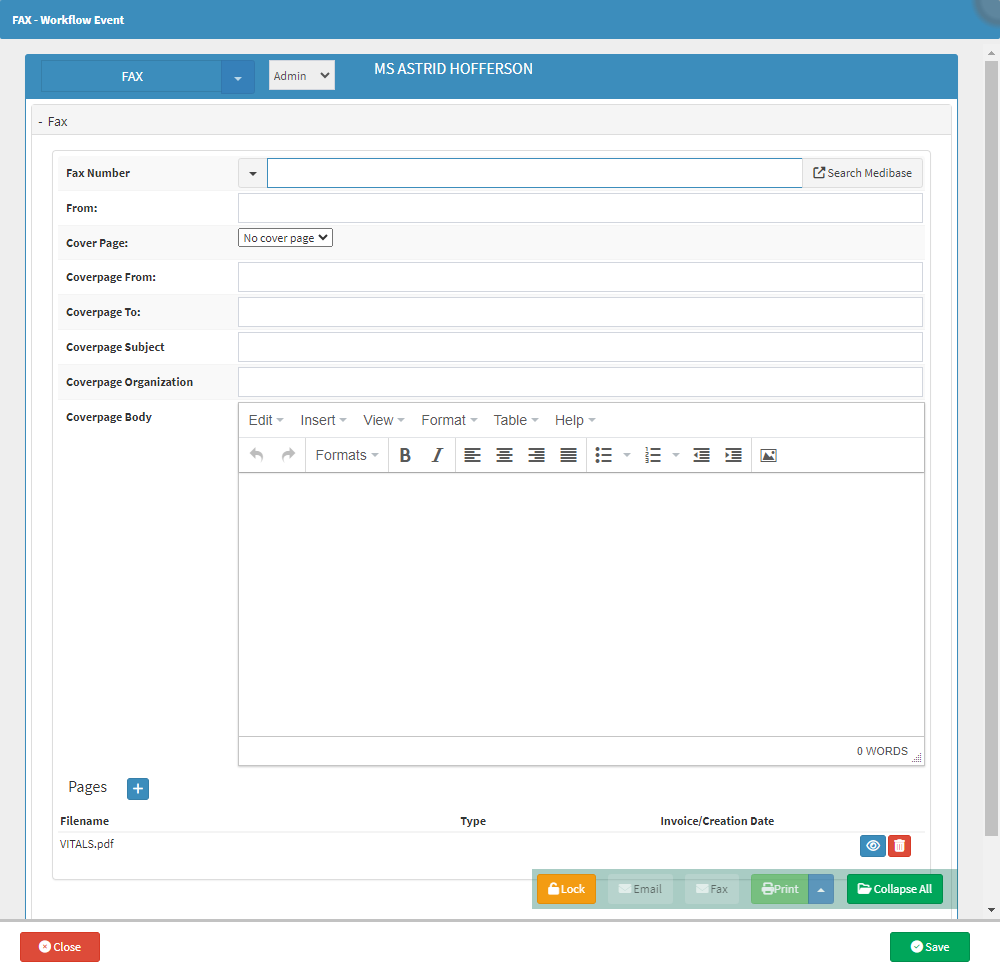
- Complete the fields with the relevant information:
- Fax Number: A Number where facsimile documents can be sent to the Practitioner by use of a Fax machine.
- Type in the Fax Number of the desired recipient.
![]()
- You are also able to select a Practitioner from the Medibase as the recipient of the Fax.
- Click on the Search Medibase button next to the To field.
![]()
- The Medibase Search screen will open.
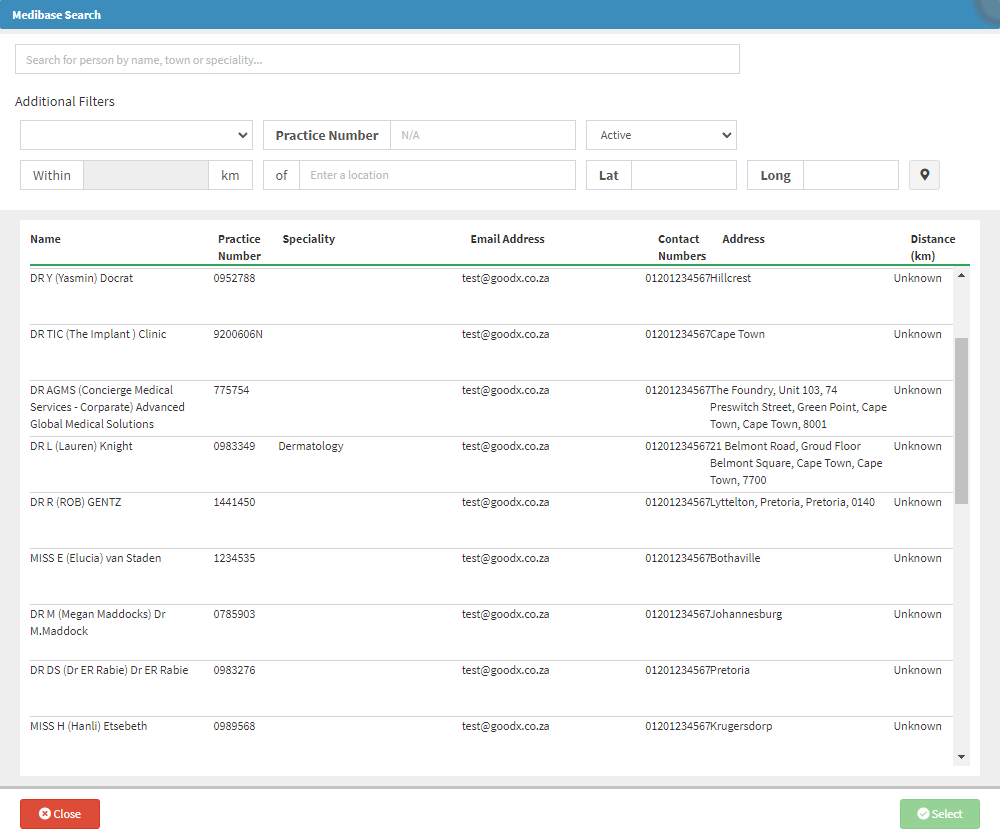
- For an explanation regarding how to search and select a Practitioner from the Medibase List, please refer to the user manual: Medibase List Search.
- Once you have selected the desired Practitioner from the Medibase List the Practitioner's Fax Number will automatically be filled into the Fax Number field.
- From: The Fax Number from where the Fax will be sent.
- Type in the Sender Fax Number.
![]()
- Cover Page: The format of the cover page when the Fax is sent.
- Select the desired type of Cover Page from the drop-down menu.

- Coverpage From: This field includes the Sender's Information. It would include details such as the Sender's Name or Company Name.
- Type in the Sender's Information in the Coverpage From field.
![]()
- Coverpage To: This field includes the Recipient's Information. It typically includes the Recipient's Name or Company Name.
- Type in the Recipient's Information in the Coverpage To field.
![]()
- Coverpage Subject: This field allows the Sender to specify the purpose of the Fax. It's a brief description that helps the Recipient understand the content or reason for receiving the Fax.
- Type the purpose of the Fax in the Coverpage Subject field.
![]()
- Coverpage Organisation: This field includes the Name of the Sender's Organisation . This is especially useful when the Fax is being sent on behalf of a Organisation.
- Type the Name of the Organisation sending the Fax in the Coverpage Organisation field.
![]()
- Coverpage Body: This is the main section of the cover page where the sender can include any additional information or message for the recipient. It could include instructions, reference numbers, or other relevant details related to the Fax transmission.
- Type in the message that the user wants to convey to the recipients of the Email.

- Click on the Add Pages button to Add Attachments.
![]()
- An Attention! screen will open.
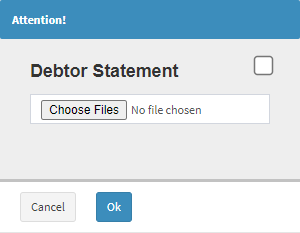
- Tick the Debtor Statement checkbox if you wish to attach the Debtor Statement.
![]()
- Click on the Choose Files button if you wish to attach a file.
![]()
- Click on the Ok button to save the changes made.
![]()
- Click on the Close button to exit the FAX - Workflow Event screen without sending the Fax.
![]()
Please Note: Once the Close button is Clicked, all the information on the FAX - Workflow Event screen will not be saved.
- Click on the Save button to send the Fax to the desired recipient and exit the FAX - Workflow Event screen.
Last modified: Tuesday, 14 May 2024, 3:28 PM