How to Complete the Clinical Procedures Section
The user manual is currently being updated with new features. An updated version will be available shortly. We thank you for your patience.
A Clinical Procedure is a course of action that takes place within the Practice on a regular basis, for example, sutures. The setup of these templates will make the billing quick and effortless for the Practitioner to add the applicable procedures for the Patient.
- The contents of this user manual will consist of the following information:
- Consultations
- Procedures
- Materials
- Add to Invoice
- Create a Script
- This user manual will start on the General Examination form, Diagnosis and Plan panel.

- For more information on how to access the General Examination form, please refer to the user manual: General Examination Overview.
- Click on the Diagnosis and Plan panel.
![]()
- The Diagnosis and Plan panel will expand.
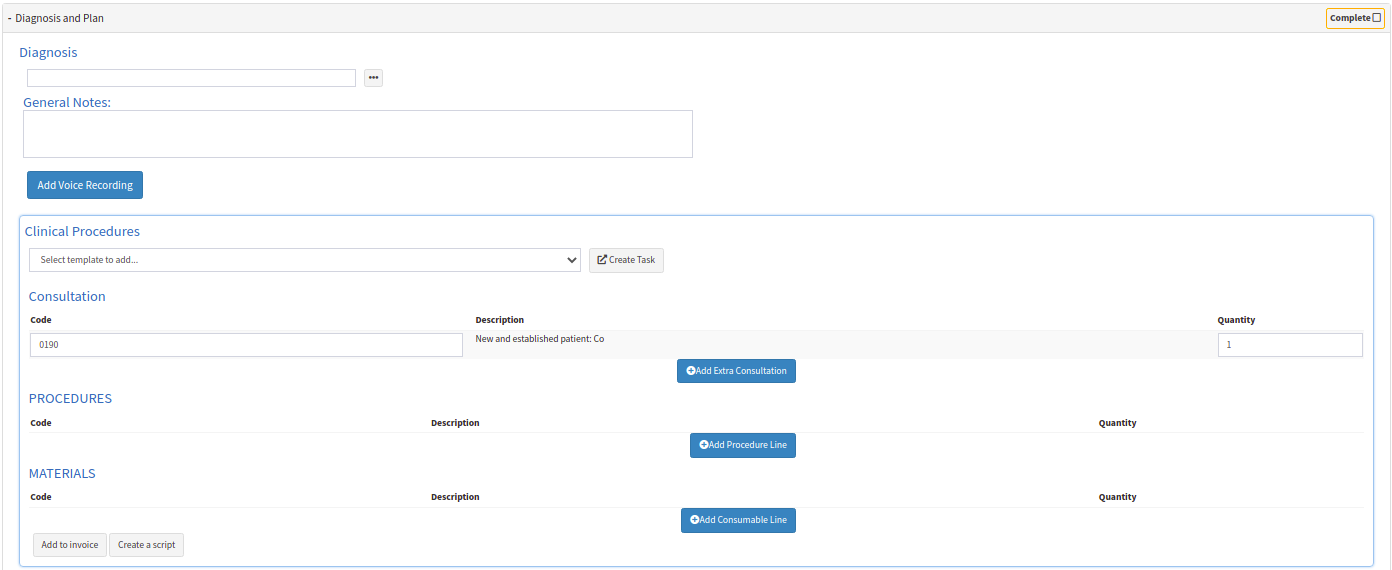
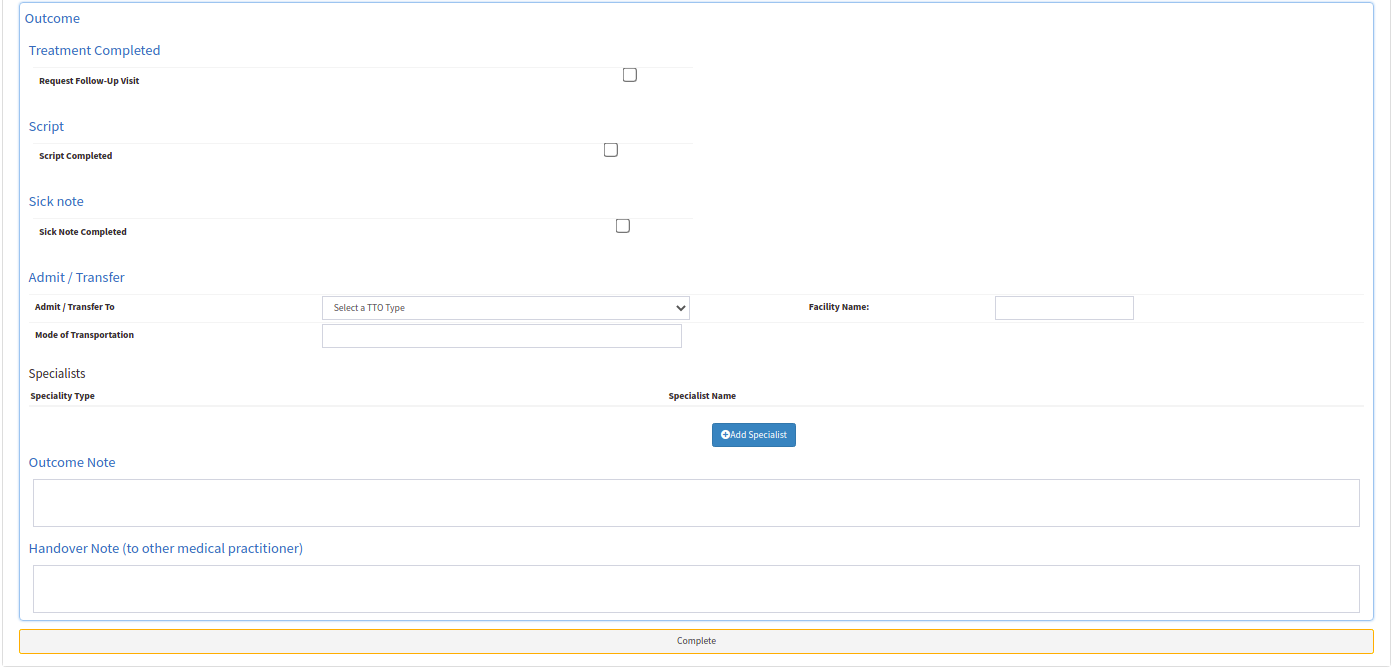
- Navigate to the Clinical Procedures section of the panel.

- Click on the Clinical Procedures drop-down menu to access previously set up procedure templates.
![]()
- The Clinical Procedures drop-down menu will open with previously set up procedure templates.

- Select the relevant Clinical Procedure.
- An additional panel with a previously set up name will appear.

Please Note: If no Clinical Procedures are available, the templates will first need to be set up for use. For more information regarding the setup of the Clinical Procedure templates, as well as how to use the Clinical Procedures templates, please refer to the user manual: Clinical Procedures Macro.
- Click on the Create Task button to create a task from the Diagnosis and Plan screen.
![]()
- Tasks are added to a Task List to prioritise their urgency and to make workflow more efficient. Tasks can also be created for any procedure as a reminder to the Practitioner that the form still needs to be completed even if the procedure has taken place, but is not a necessity. For more information on how to create a task list, please refer to the user manual: Create a New Task.
- A task will automatically be created on the Task Lists screen, which is available under the Communication segment of the Navigation Wheel. For more information regarding how to access the Communication segment, please refer to the user manual: Communication Segment
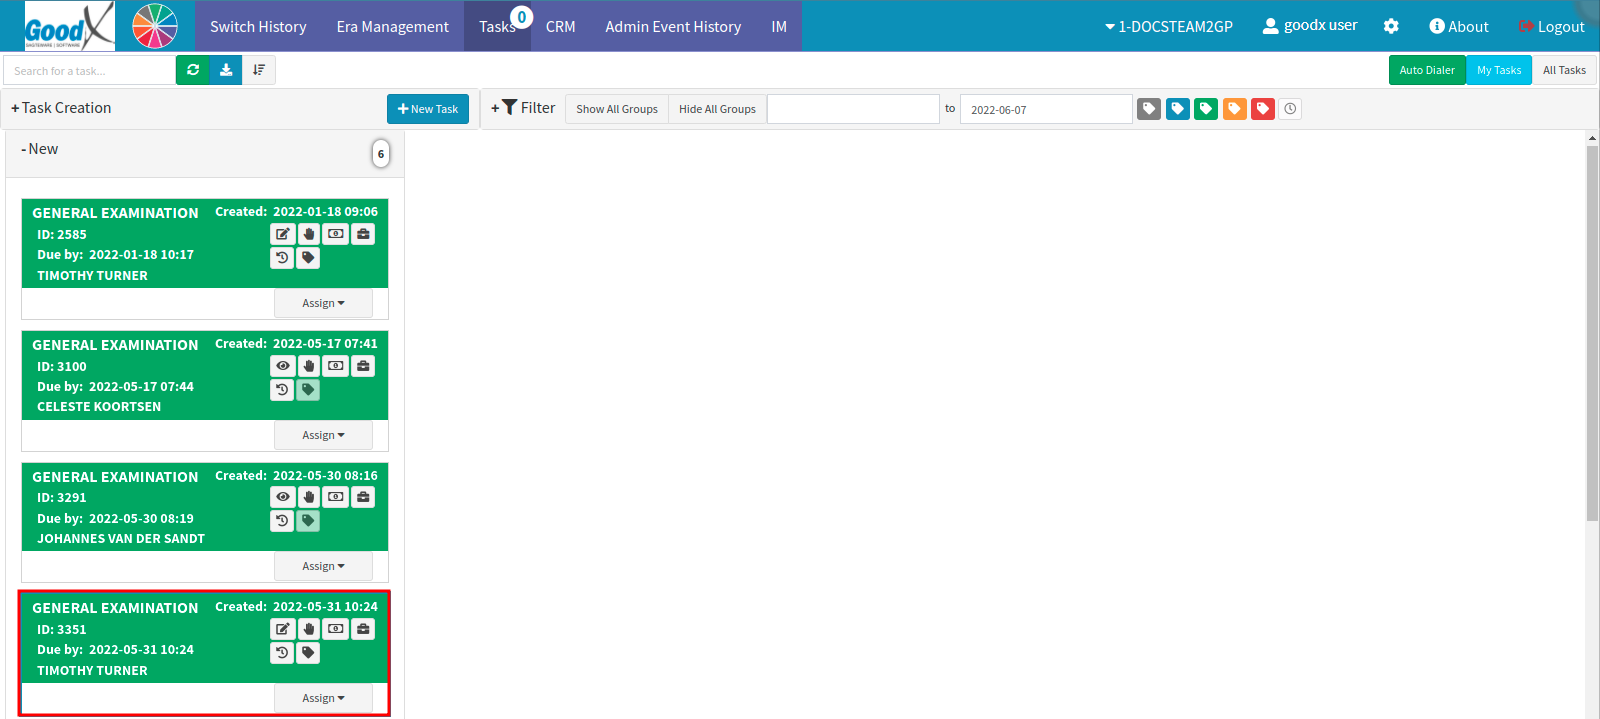
- Click on the newly created task.
- The General Examination - Workflow Event screen will open.
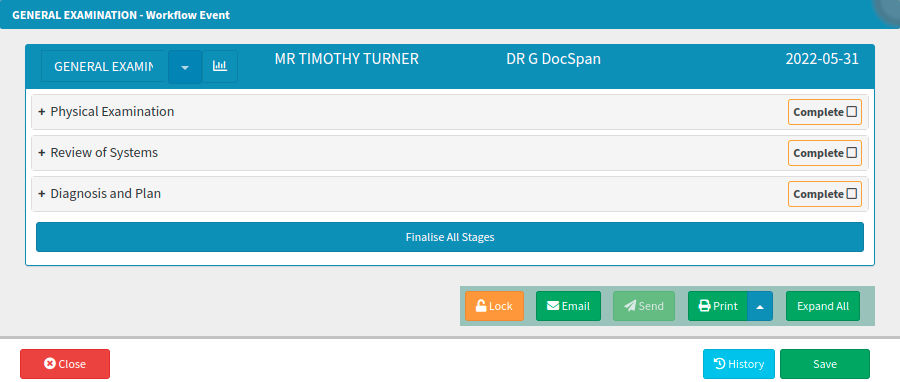
- For more information regarding task lists, please refer to the user manual: Task Lists Screen Overview.
Consultation
Consultations happen when a Patient has a structured conversation with a Practitioner regarding a diagnosis or treatment. If additional Consultations are needed, such as a telephonic discussion or a follow-up visit, the Practitioner would list the extra Consultations for the Patient's invoice.

- Click on the + Add Extra Consultation button to add a line for another Consultation Code.
![]()
Please Note: An extra consultation does not need to be scheduled in order to add procedures or materials to the form.
- A new line will open where the Practitioner can add a Consultation Code.
- Click on the Type to Search field to type a Consultation Code that the Practitioner would like to search for. Only one character is required before the list of Consultation Codes becomes available.

![]()
- Select the desired Consultation Code on the drop-down menu that will become available whilst typing.
![]()
- Once the desired code has been selected, the description of the code will automatically be filled in.
![]()
- The Consultation Code will be added under Consultation.
- The Quantity will always default back to 1, however, the quantity can be amended manually.
- Click on the Quantity field to change the number of Consultations that had occurred.

- Click on the Remove Extra Consultation button to permanently remove the added Consultation Code.
![]()
Please Note: If no additional information is to be added to any other panels on the General Examination form, the user is able to save and exit the form.
Procedures
The Procedure is the process that the Practitioner had to go through to treat the Patient. If the Practitioner required a urine dipstick to be done, or had to give an injection, the Procedures performed will be listed to make the invoicing process more efficient.

- Click on the + Add Procedure Line button to add a line for a Procedure Code.
- The Practitioner will add the Tariff Codes for the procedures that were done under Procedures. A Tariff Code is a code allocated to a procedure or consultation with an amount linked to the code.
![]()
- A new line will open where the Practitioner can add a Procedure Code.

- Click on the Type to Search field to type a Procedure Code that the Practitioner would like to search for. Only one character is required before the list of Procedure Codes becomes available.
![]()
- Select the desired Procedure Code on the drop-down menu that will become available whilst typing.

- The Procedure Code will be added under Procedures.
- The Quantity will always default back to 1, however, the quantity can be amended manually.
- Click on the Quantity field to change the number of times a Procedure was used.

- Click on the - button to remove/delete the added Procedure Code.
![]()
Please Note: If no additional information is to be added to any other panels on the General Examination form, the user is able to save and exit the form.
Materials
Materials are products used during a procedure. Whether a bandage is used to cover an injury, or a needle to insert an intravenous drip, any consumable item is to be listed under the Materials section for stock and invoice purposes.

- Click on the + Add Consumable Line button to add a line for a Consumable Code.
- The Practitioner will add the Tariff Codes (Nappi Codes) for the Materials (Consumables) that were used under Materials. A Nappi Code is a unique identifier for a given ethical, surgical or consumable product that enables the electronic transfer of information throughout the healthcare delivery chain.
![]()
- A new line will open where the Practitioner can add a Consumable Code.

- Click on the Type to Search field to type a Consumable Code that the Practitioner would like to search for. Only one character is required before the list of Consumable Codes becomes available.

- Select the desired Consumable Code on the drop-down menu that will become available whilst typing.

- The Consumable Code will be added under Materials.
- The Quantity will always default to 1, however, can be amended manually.
- Click on the Quantity field to change the amount of a Material that had been used.

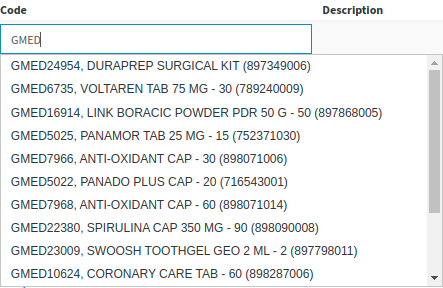
Please Note: Medicines can also be added to Materials by typing the GMED code in the code search field.
- Click on the - button to remove/delete the added Consumable Code.
![]()
Add to Invoice
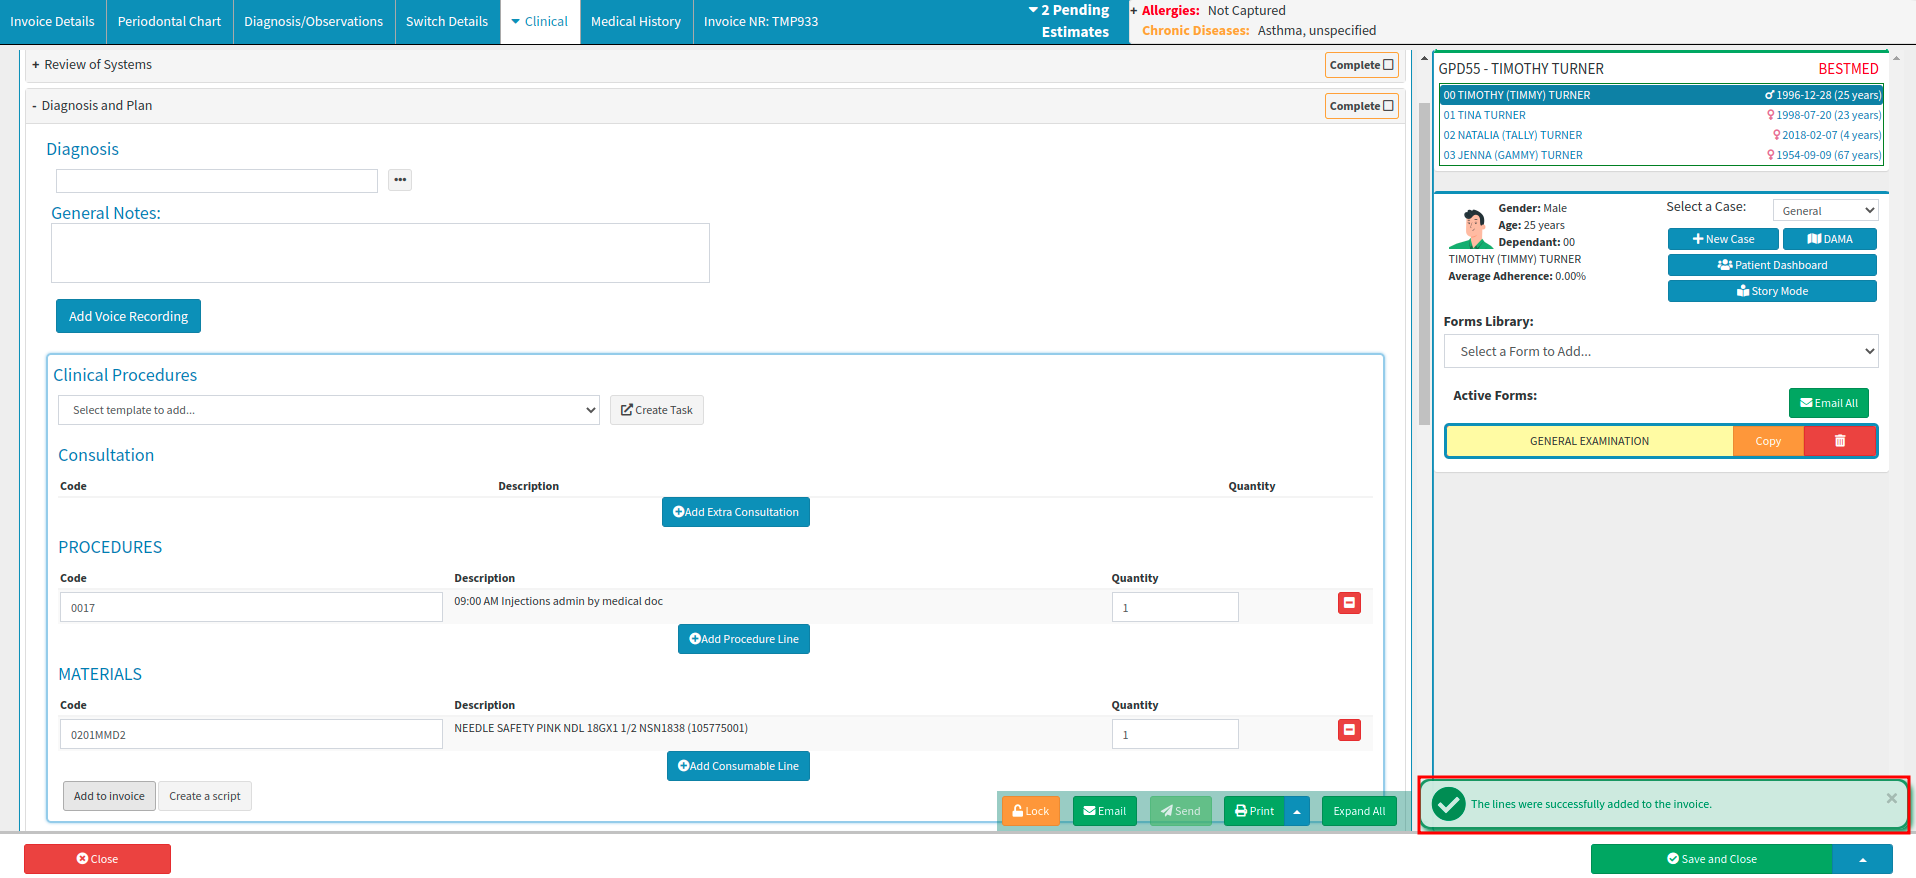
- Click on the Add to Invoice button in the bottom left corner to add the Consultation, Procedure and Material Codes to the Invoice screen.
![]()
- A confirmation message will appear on the bottom right of the screen to indicate that the lines were Successfully Added to the Invoice.
- For more information regarding the Invoice screen, please refer to the user manual: The Invoice Screen.
Create a Script
- Click on the Create a Script button to create a script where the diagnosis will pull through from the General Examination form.
![]()
- A confirmation message will appear on the bottom right of the screen to indicate that there was a New Script Added.
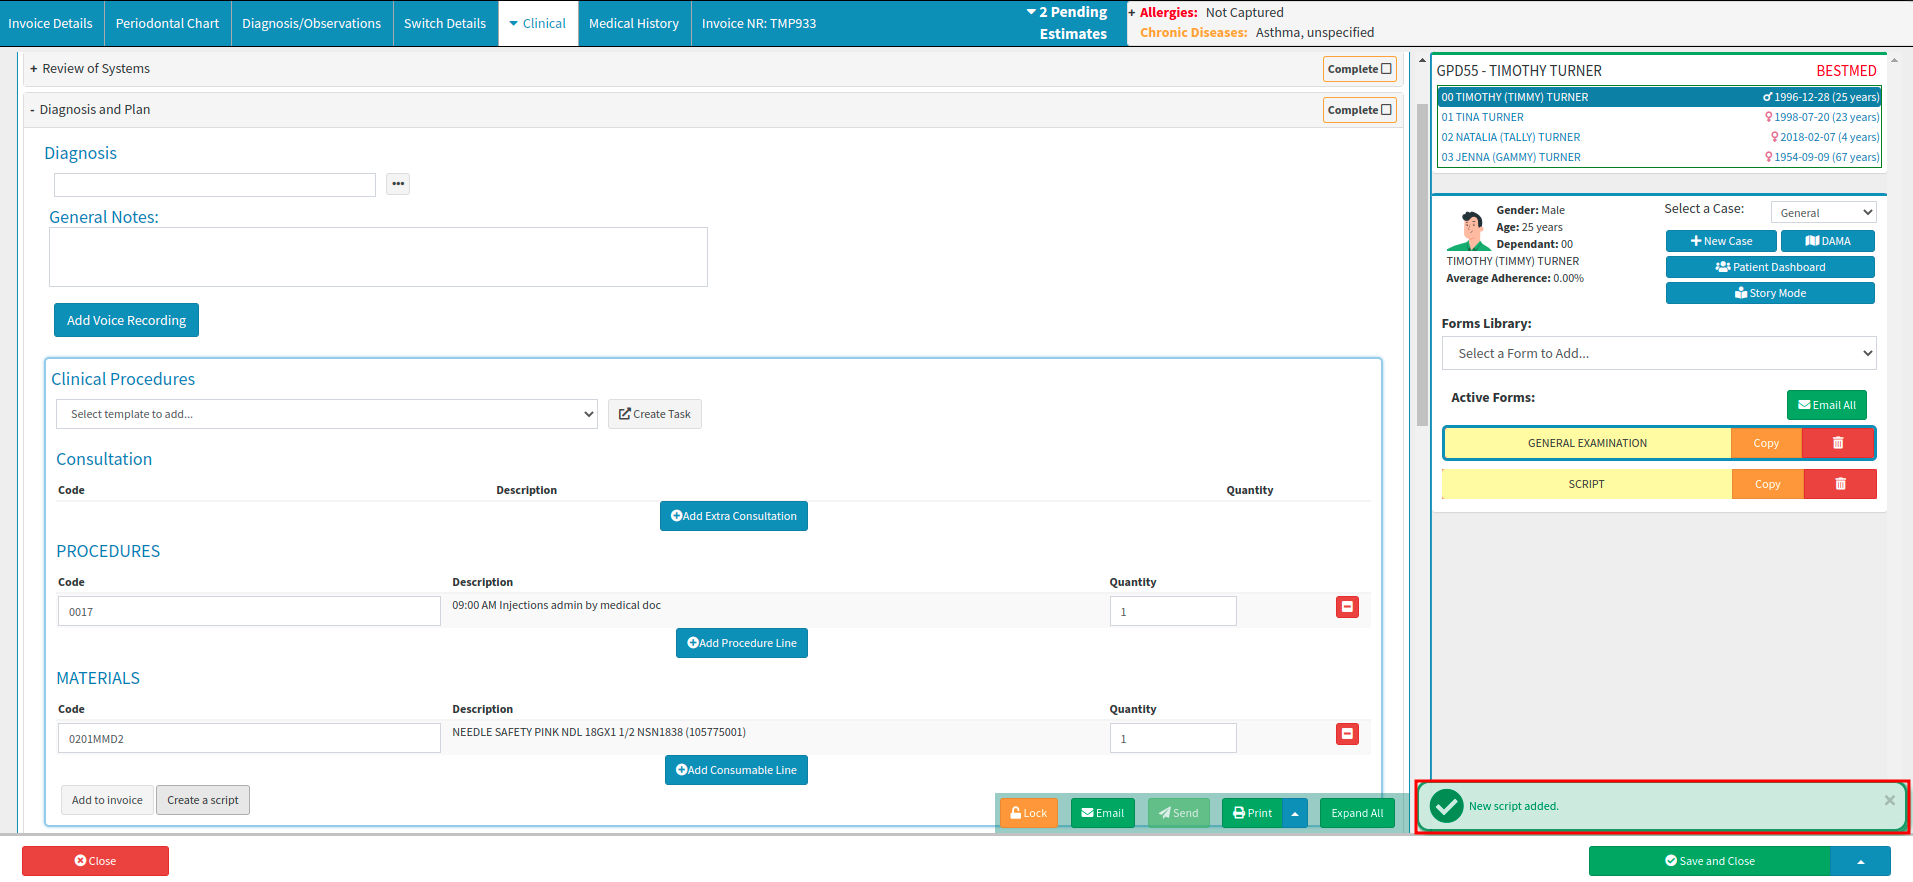
- The Script will be added to the Forms Library as a separate form.
- For more information regarding Scripts, please refer to the user manual: Basic Script Features.
- Click on the Close button to exit the Clinical screen and return to the Diary screen, without saving.
- Click on the Save and Close drop-up menu for more options:
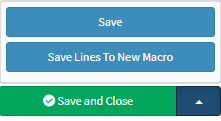
- Click on the Save button to save the information captured on the form.
- Click on the Save Lines To New Macro button to save the lines captured as a Macro.
- Click on the Save and Close button to save the form or the changes made.
![]()