How to Add a Practitioner's Signature to Clinical Forms
Why Use This Function:
Adding a Practitioner’s signature allows you to upload and attach a digital signature to Clinical Forms within the system. Once added, the signature automatically appears on relevant documents, ensuring consistency, professionalism, and compliance with clinical and legal standards.
This offers several benefits, including saving time by removing the need for manual signing, reducing administrative workload, and improving the accuracy and security of records. It also enhances the credibility of electronic documentation, supports a paperless workflow, and helps the Practice maintain a polished, professional image.
The Contents of This User Manual:
- Using Your PIN Code
- Using the Doctor Signature Button
- This user manual will start on the Clinical screen, on an open Clinical form.

- For more information on navigating and using the Clinical screen, please refer to the user manual: Clinical Screen: Navigation and Use.
Using Your PIN
Using a PIN to add a signature ensures that only the authorised Practitioner can apply their signature to a sick note or clinical document. It adds an extra layer of security, prevents unauthorised use, and creates a clear audit trail showing who signed the document and when. This helps protect the integrity of the document while supporting accountability and compliance.
- Click on the Enter Your PIN field.
- Enter your PIN and Click on the Apply Signature button.
- A system message will display confirming your signature has been applied to the document.

- The Practitioner's Signature will now be added to the Clinical Form.

Using the Doctor Signature Button
Using the Doctor Signature button, available on clinical forms that require a Practitioner’s signature, allows you to apply your signature once all clinical information has been completed and reviewed. This helps ensure the document is finalised correctly, confirms authorisation, and reduces the risk of signing incomplete or incorrect information.- Click on the Doctor Signature button.

- The Signature Capture screen will open.

💡Please Note: If the PIN setup has not been completed in the User Settings, then the Load User Signature button will not be available.
- You can now draw your own signature using the desktop mouse or an external signature pad.

- Click on the Save button.
- Alternatively, Click on the Load User Signature button.
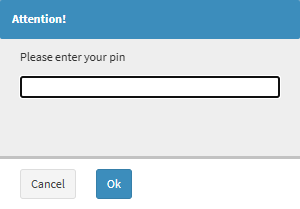
- An Attention! pop-up message will appear requesting your PIN code.

- Enter your PIN and Click on the Ok button.

- A Practitioner's Signature will now be added to the Clinical Form.

💡Please Note: Adding a Practitioner’s signature may automatically complete certain clinical forms, indicating that the form has been finalised and no further input is required.
- Click on the Save and Close button to finalise any changes made.