The Smart Sticker Report displays all Patients who are registered for Smart Sticker Protocols. When configured correctly, Smart Stickers can also track PMBs within your Practice. These Stickers allow Practitioners to define medical guidelines that outline the steps to follow when investigating specific findings on a Patient or managing certain conditions.
?Please Note: In order for the Smart Sticker Report to show, Smart Stickerswill need to be created and added to Patients. For more information regarding how to create Smart Stickersand add them to Patients, please refer to the user manuals: Smart Stickers Screen: Navigate and Use and Add a Smart Sticker Protocol to a Patient.
The Contents of This User Manual:
Report Filters
Screen Columns Action Buttons
Columns
Page Options
Smart Sticker Sidebar
This user manual will start on the Clinical Reports tab, Clinical Review screen.
For more information on how to navigate to the Clinical Reports tab, please refer to the user manual: Reports Segment.
Click on the Smart Sticker tab.
The Smart Sticker screen will open.
An explanation will be given for each field and option on the Smart Sticker screen:
Filters
Filters are tools or functionalities that allow you to narrow down or refine the results displayed on the Smart Sticker screen.
?Please Note: Not all the fields are required to be filled in to search for a Patient. Three characters are needed in the field for the search to be valid. The more information that is entered into the fields the more refined the search will be.
Click on the Default Filter drop-down menu to select the filter that will be used.
Click on the Patient Name field to enter the name of the Patient you are searching for.
Click on the Patient Surname field to enter the surname of the Patient you are searching for.
Click on the PatientID No. field to enter the ID number of the Patient you are searching for.
Click on the Patient Mobile No. field to enter the Mobile number of the Patient you are searching for.
Click on the Debtor Account Identifier field to filter results by the Account Number linked to the Debtor responsible for the Patient’s Account.
Click on the Patient File No. field to filter or search by the Identifying Number linked to the Patient’s physical file.
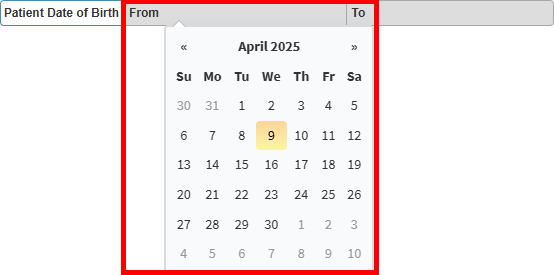
Click on the From field to select the starting Date of Birth using the DatePicker.
Click on the To field to choose the ending Date of Birth range from the Date Picker.
.
?Please Note: If you are looking for a specific Date, the From and To fields information can be the same. These fields can also be entered manually using the yyyy-mm-dd format.
Click on the From field to enter the minimum Patient Age in years.
Click on the To field to enter the maximum Patient Age range in years.
?Please Note: If you are only looking for Patients of one specific Age, the From and To fields information can be the same.
Click on the Gender drop-down menuto select the relevant option on the listthat has become available.
?Please Note: Only one Gender can be selected at a time.
The Patient Active slider is automatically set to show all the Active Patients.
Click on the Patient Active slider to show all Patients.
Click on the Patient Active slider to show Patients that are Inactive.
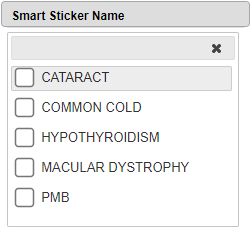
Click on the Smart Sticker Name field to select the desired Smart Sticker, then Tick the checkbox next to the name on the available list.
Click on the Current State Name field to select the State Name of the Protocol, then Tick the checkbox next to the desired Current State Name on the available list.
?Please Note: Only one character is needed in order to start the Search.
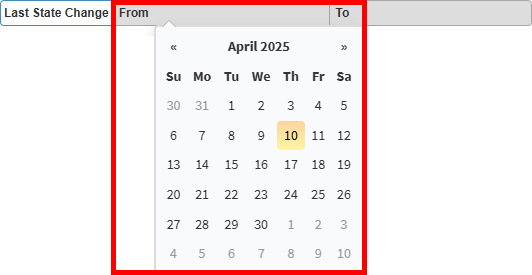
Click on the From field to select the date the Smart Sticker Protocol's state was changed from the Date Picker that becomes available.
Click on the To field to select the date the Smart Sticker Protocol’s state was changed to, using the Date Picker that becomes available.
The Finalised slider is automatically set to show all the Smart Sticker Protocols.
Click on the Finalised slider to show all Unfinalised Smart Sticker Protocols.
Click on the Finalised slider to show all Finalised Smart Sticker Protocols.
Click on the Update Results button to refresh the Smart Sticker List after the Filters have been selected.
Click on the Reset Filters button to clear the Filters that have been set.
Screen Columns Action Buttons
Several additional Options are available for the Columns. These additional Options are to help you adjust the Report to refine the search and give more specific results.
Click on the Select All Results button to select All the Results currently displayed on the List.
Click on the Expand Widths button to auto-fit the Column Width to the information within all columns.
Click on the Reset Widths button to restore the original Widths after any modifications were done.
Click on the Sort Coloums button to sort the Columns in the order that you desire.
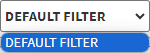
Click on the Default Layout drop-down menu to select the type of layout that will be used for the screen.
?Please Note: The Smart Sticker Report screen only has the option to be displayed using the Default Layout and no other options are available for the layout of the Report screen.
Columns
All the information on the Report screen is divided into Columns to logically group related information together.
Debtor Account Identifier: The Account Number associated with the Debtor that is responsible for the Account of the Patient that has been registered for the Smart Sticker Protocol.
Patient File No.: The Identifying Numberthat is associated with the Patients'hard copy file.
Patient Name: The Name of the Patient that has been registered for the Smart Sticker Protocol.
Patient Surname: The Surnameof the Patient that has been registered for the Smart Sticker Protocol.
Patient Date of Birth: TheYear,Month,Day (yyyy-mm-dd) when the Patient was born.
Patient Age: How old the Patient is in years.
Patient Gender: The medical-related Gender of the Patient.
Patient Inactive Reason: The Reason thePatienthas been marked as Inactive.
Smart Sticker Protocol Name: The Name of theSmart Sticker Protocol that the Patient has been registered for.
Smart Sticker State Name: TheName of the State that theSmart Sticker Protocol is currently in.
Last State Change: The Date, when the State of the Smart Sticker Protocolwas Last Changed.
Finalised: Indicates whether the Smart Sticker Protocolshave been Finalised.
Patient Cell No.: A Mobile Number where the Patient can be reached by telephone.
Patient Email: An EmailAddresswhere the Patient can receive Emails.
Page Options
All the additional options that are available for the page.
Click on the Previous button to navigate to the Previous Page.
Click on the Page Number button to navigate to the desired Page.
Click on the Next button to navigate to the Next Page.
Click on the Items drop-down menu to select the number of items that will be displayed on the screen.
Click on the Export to PDF button to save a PDF file of all the data as a comprehensive report.
Click on the Export to PDF drop-up menu to access the Export Consolidated PDF option that allows you to generate a single document that combines all the data from multiple sources to provide an overview.
Click on the Export to CSV button to save the Reportin a CSV format.
Smart Sticker Sidebar
The Sidebar is an extended screen with shortcut buttons on the right-hand side, where more options are available for the Smart Sticker screen.


 .
.