Examination Form: Navigation and Use
Why Use This Function:
The Examination form is a fully customisable form that may be adjusted to the unique Practitioner's needs and is used to capture the results of a series of tests performed on the Patient by the Practitioner. Practitioners can draw on the supplied images and upload images from an external source to make visual indications. The form allows the Practitioner to bill the Patient whilst completing the form as billing codes are automatically added when the test results are completed.💡Please Note: The Examination form will be blank, until it has been set up to your needs and a Workflow Event Template is created. Set up needs to be done before the form can be used. For more information regarding how to set up the Examination form, please refer to the user manual: How to Set Up a Customisable Examination Form.
💡Please Note: An example will be used for this user manual that contains all the options that are possible for you to add to your Examination form when set up.
- Systems Selector
- Panel Buttons
- How Panels Work
- Split Section
- Notes
- Billing
- Images
- Available Images
- Add Custom Image
- Pills
- Widgets on Pills
- Widgets
- Assessment, Planning and Billing
- Complete
- Print and Download
- This user manual will start on the Diary screen.
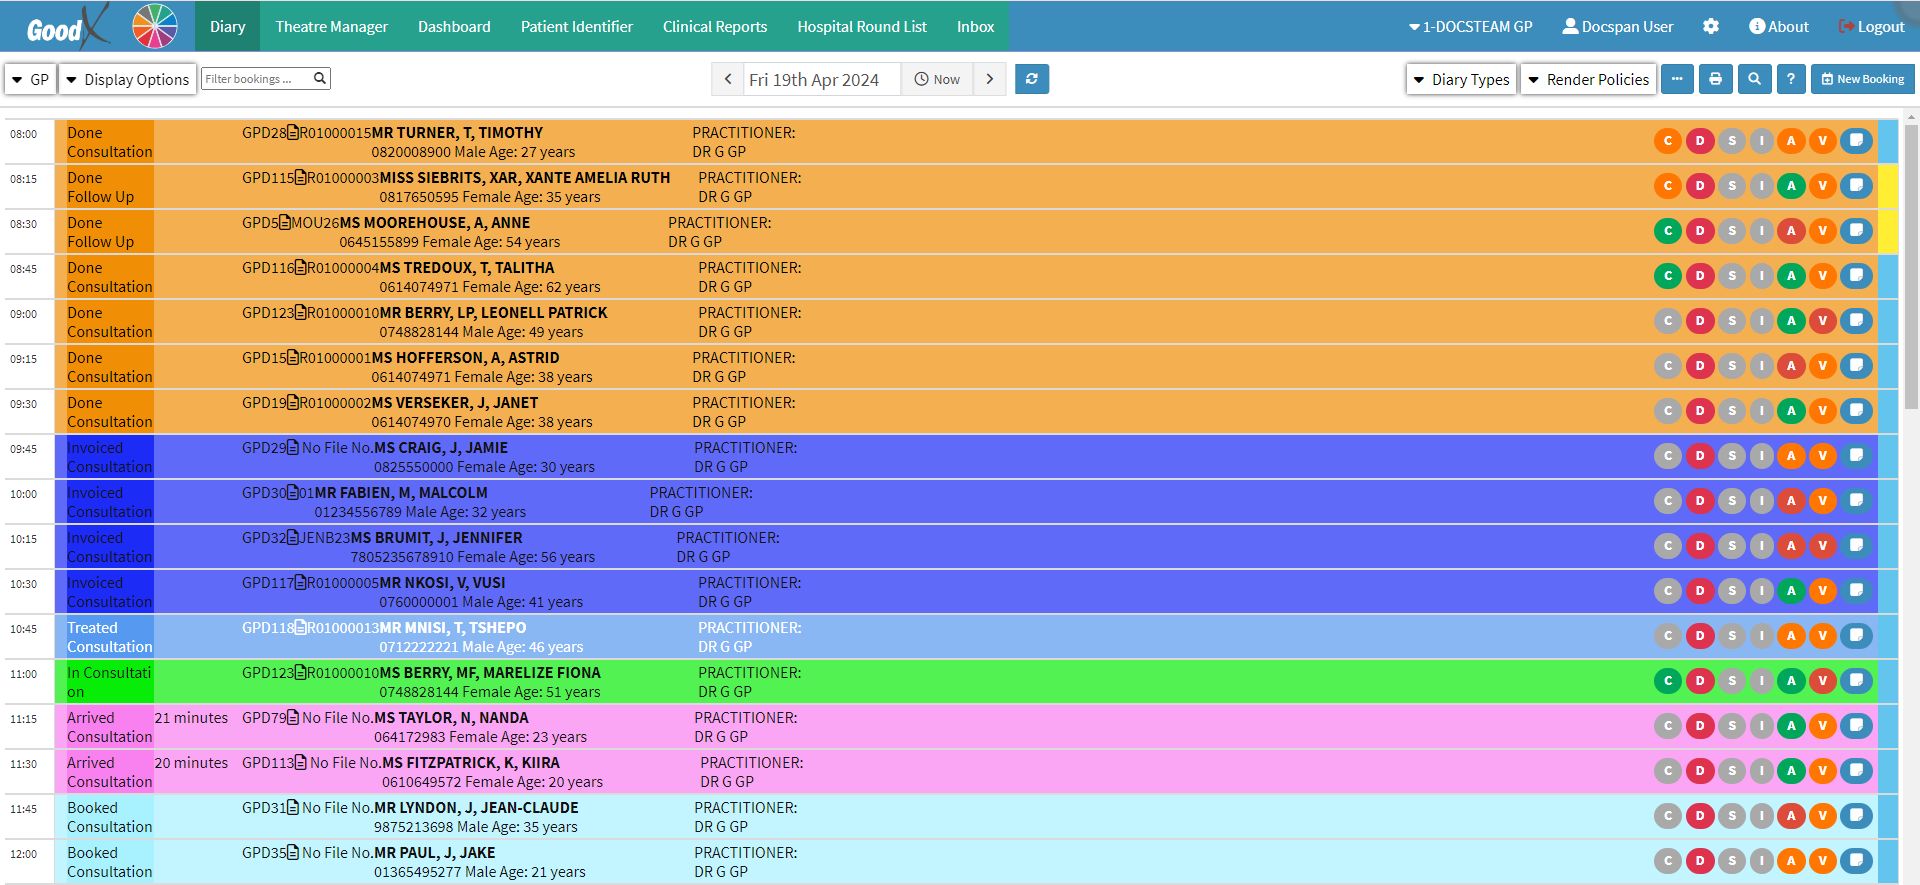
- Click on the booking of the desired Patient.

- The Diary sidebar will open.
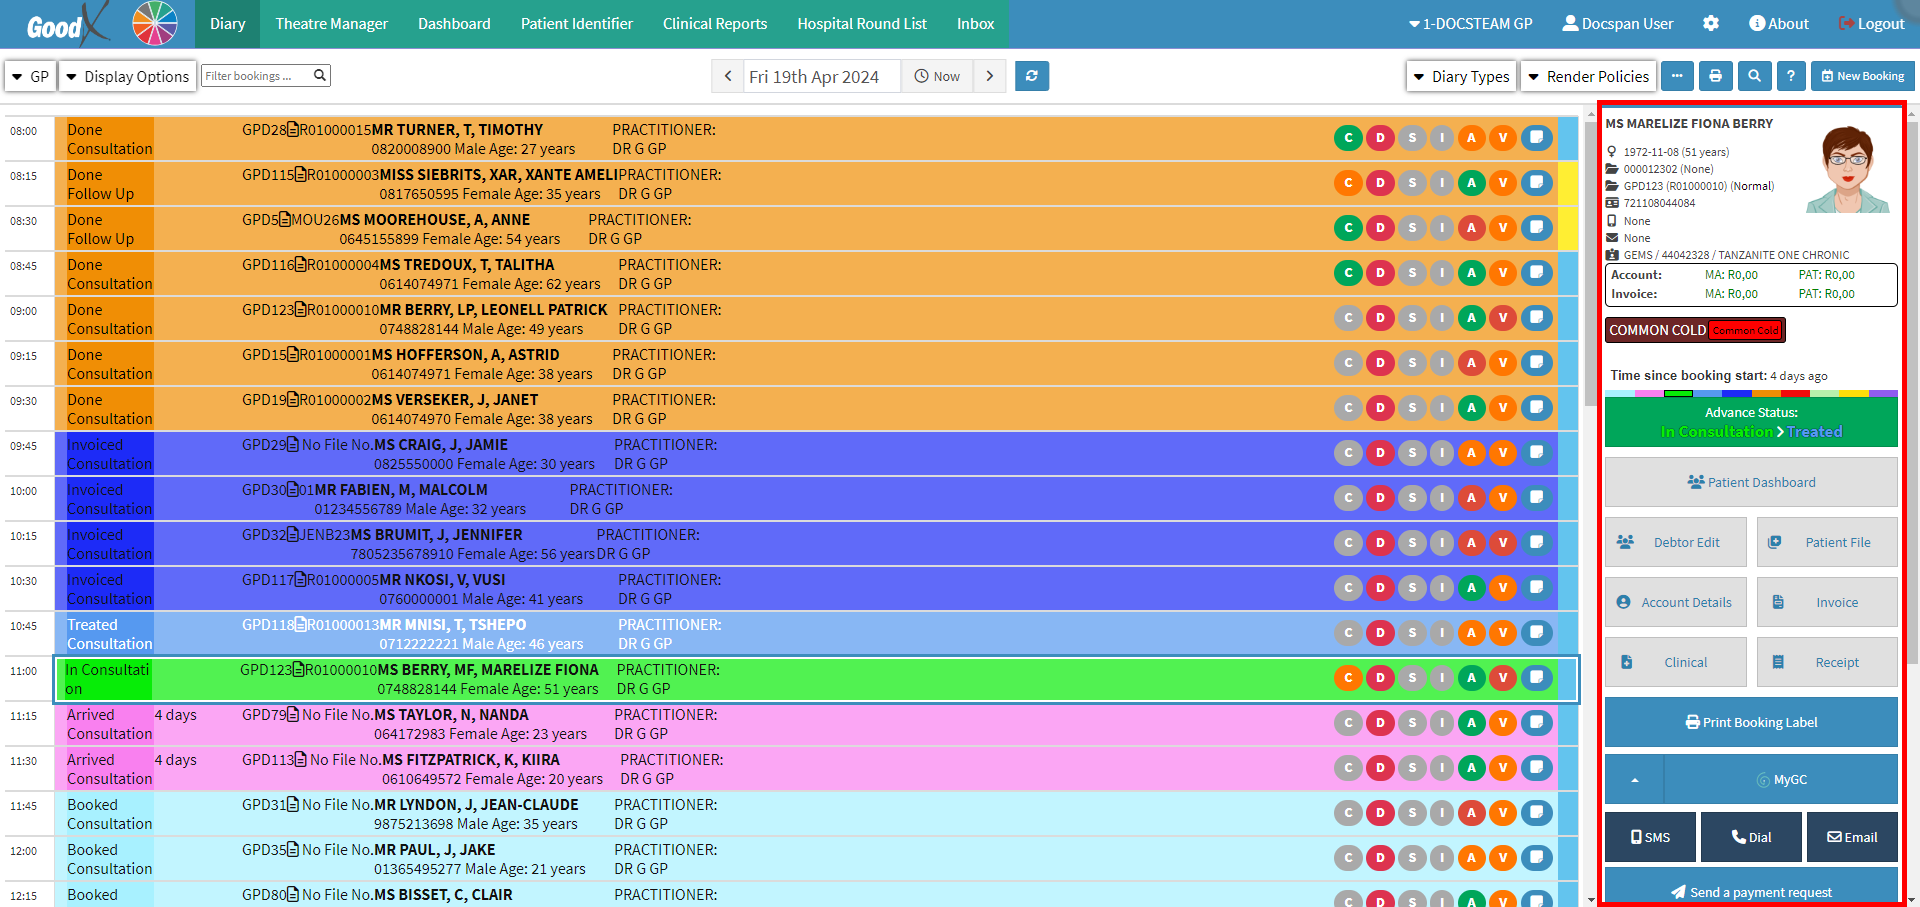
- Click on the Clinical button.

- The Clinical screen will open.
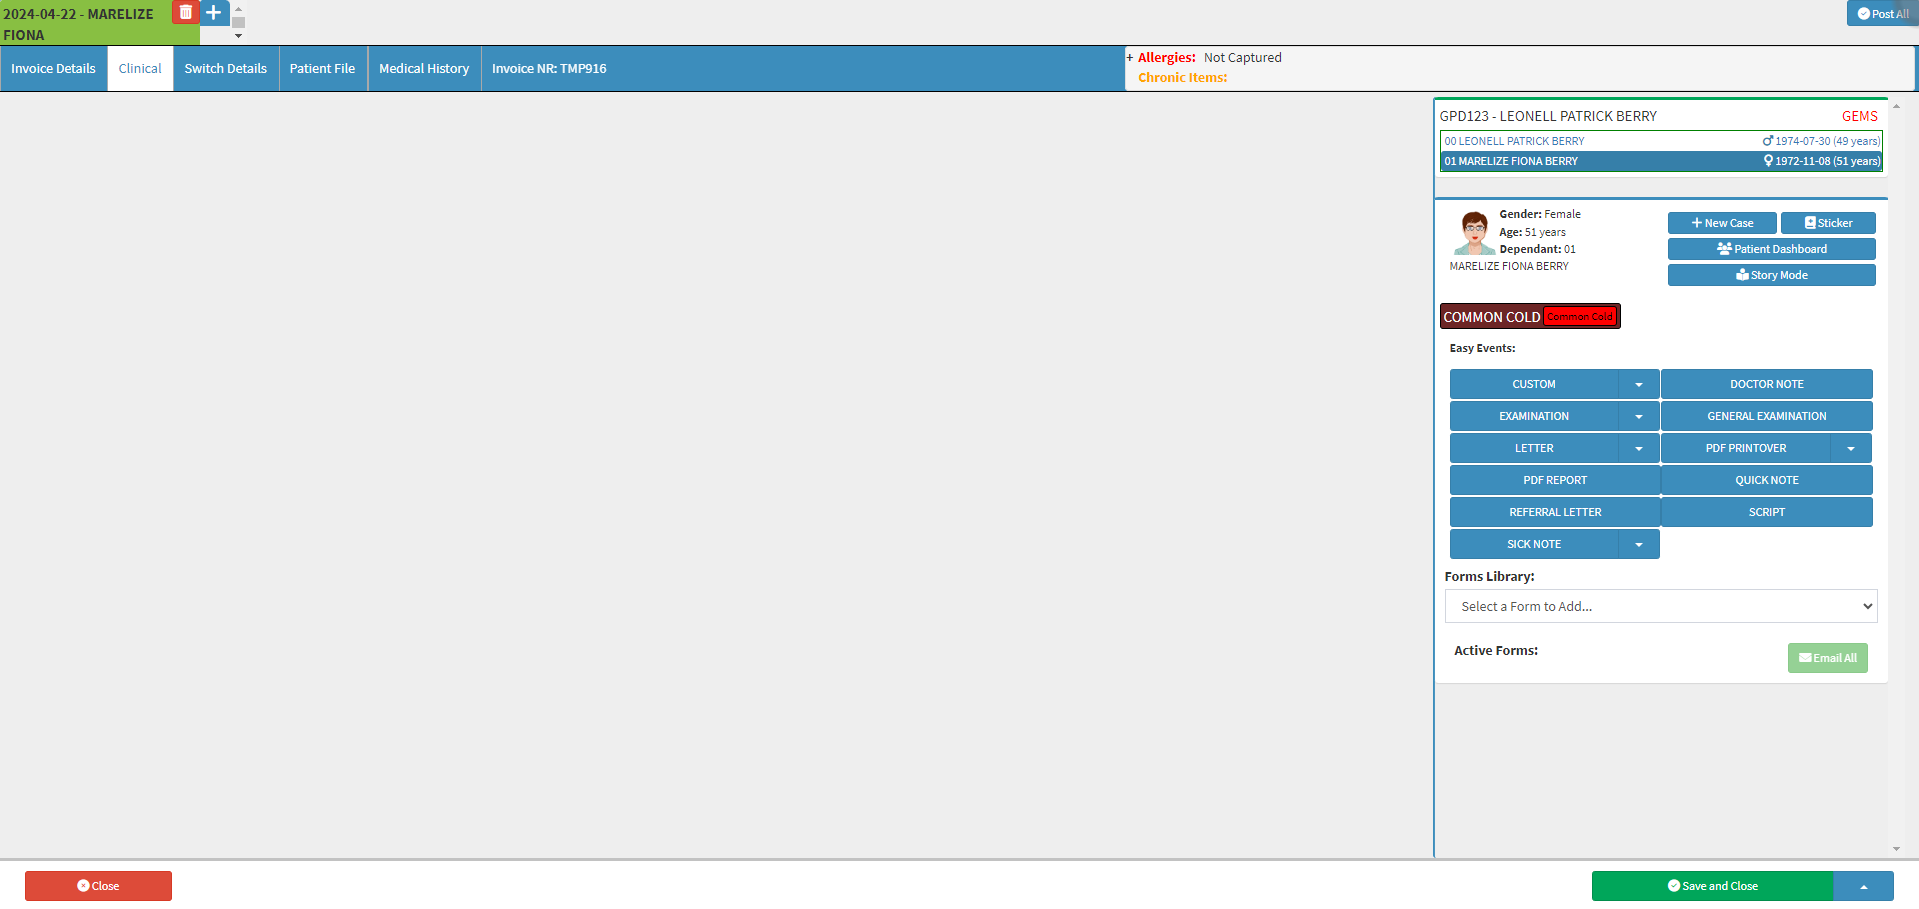
- Click on the Forms Library drop-down menu on the Clinical sidebar and select Examination.
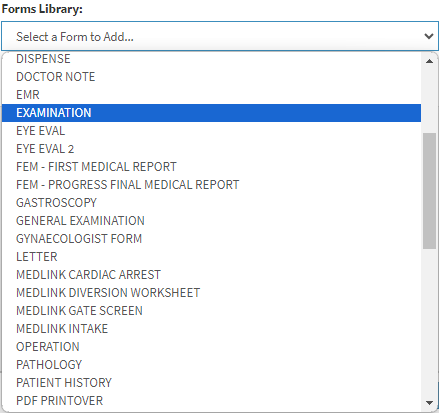
- The Examination form will be added to the Clinical sidebar under the Active Forms section.

- Click on the Template drop-down menu to select the desired Template, if you do not wish to use the default.
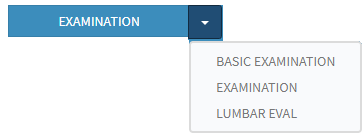
- The selected Template will open.
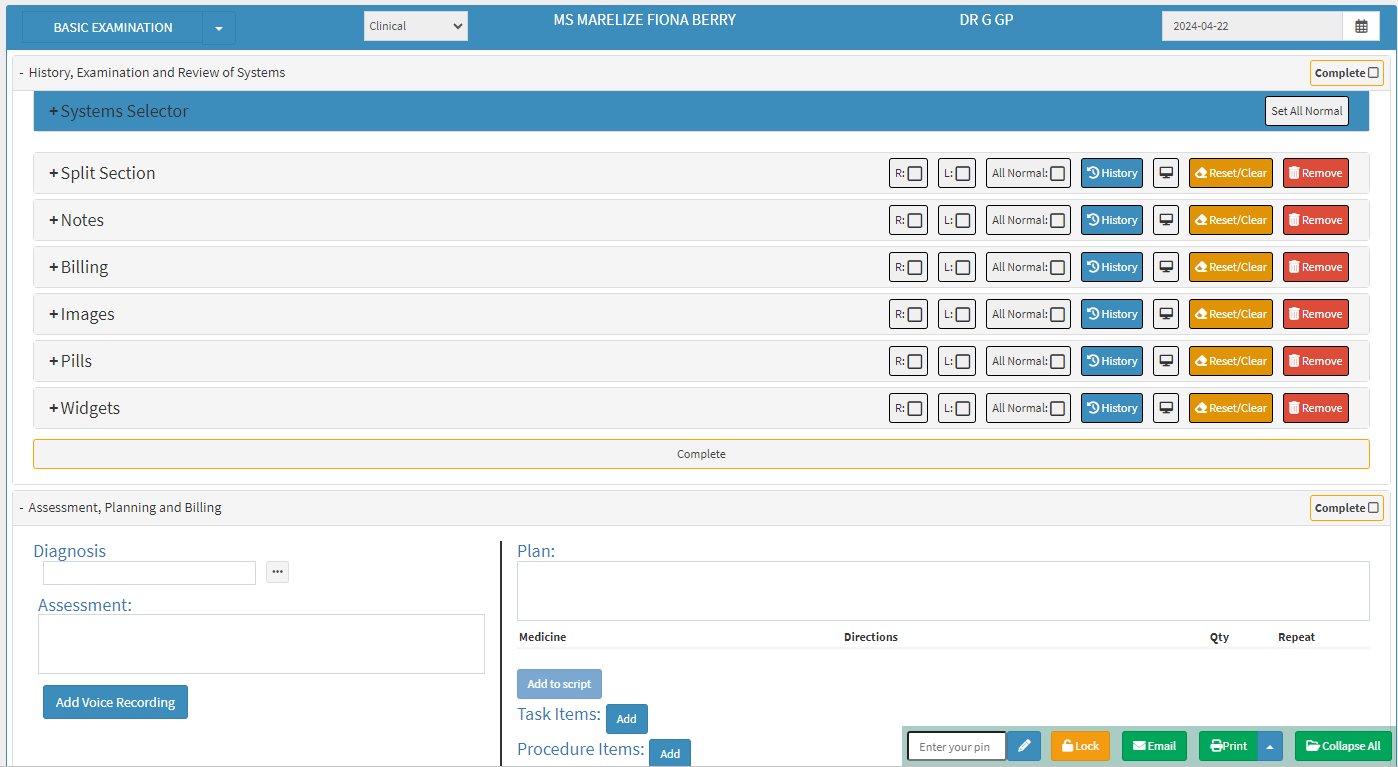
Systems Selector
Allows the Practitioner to choose and select which panels and/or sections will appear on the form. Practitioners can select only the panels that they will require, and all the other panels will be hidden. Panels can easily be made visible again if the need arises.- Click on the Systems Selector panel.
- The Systems Selector panel will expand.

- For more information regarding the Systems Selector, please refer to the user manual: Examination Form: Systems Selector.
Panel Buttons
Action buttons which are located on a Panel. These buttons are additional options that are available to the specific panel on which they are found.![]()
- For more information regarding each button on the panel, please refer to the user manual: Examination Form: Panel Buttons.
How Panels Work
Each panel will operate consistently, meaning that the main actions of opening the panel will be the same for all panels.- Click on the desired Panel.
![]()
- The Panel will expand.

- Click on the Unchecked button for the section to open.
![]()
- The Contents of the section will open. The Uncheck button will be highlighted in red and the button's name will change to Findings to indicate that findings have been added to the panel.

💡Please Note: The contents of each section is determined by the setup.
- Click on the Findings button to indicate Normal findings.
![]()
- The Findings button will change to green to show that the conclusion which has been made is Normal.
![]()
💡Please Note: Clicking the Normal button will close all additional options in the section and the section will be marked as Unchecked.
💡Please Note: If the Alternate Normal Description has been changed with the setup, the Normal button will display the chosen description.Split Section
Divides Images, Conclusions and Widgets for both the left and right sides of the body, so that each side can be completed separately.
- Click on the Copy to Other Side button to copy all the information from one side to the other and vice versa.
![]()
- Click on the <<>> button to select both sides.
![]()
💡Please Note: The <<>> button can be used to advance the Status of both sides of the section.
Notes
Any information regarding the Patients' symptoms and conditions using Text and/or Voice Recordings.
- Click on the Notes field to enter the relevant information.

- Click on the Add Voice Recording button to capture audio notes regarding the Patient's symptoms and conditions.
![]()
- The Voice Record screen will open where the Practitioner can record the relevant and desired notes.
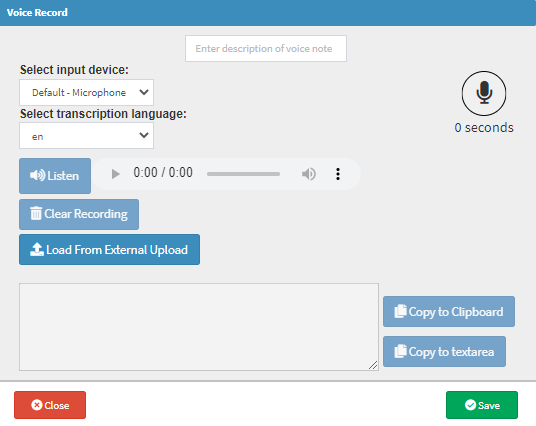
- For more information regarding how to make voice notes, please refer to the user manual: How to Add Voice Recording.
💡Please Note: Once the Voice Recording has been recorded and saved the Voice Note will be added to the panel.

Billing
Billing Codes can be set that will be actioned as soon as the Panel is selected.- Click on the Unchecked button of the section where Billing Codes have been set up.
![]()
- The pre-set-up Billing Codes will automatically be added under the Lines section of the Assessment, Planning and Billing.

Images
Drawings, Illustrations and Photos can either be added with the setup or while you are using the form.
Available Images
Images that have been added to a section when the setup of the form was done.
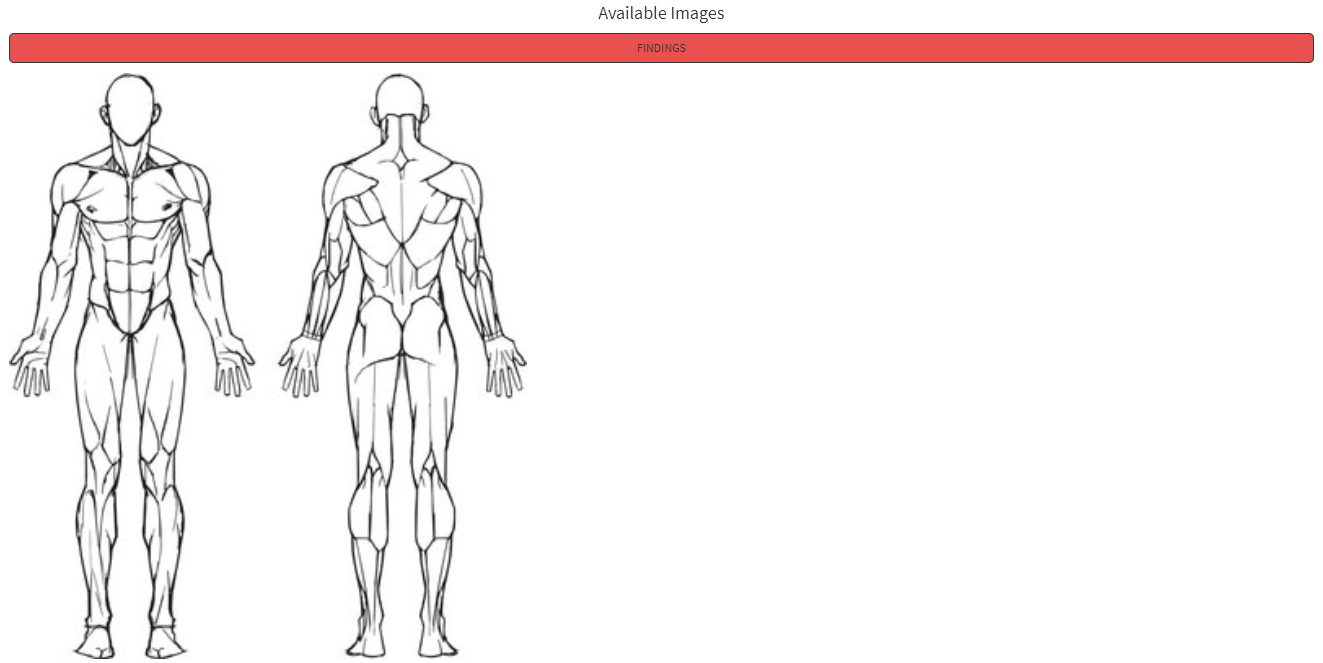
- Click on the Image to open the Video Capture screen to make indications on the Uploaded Image.
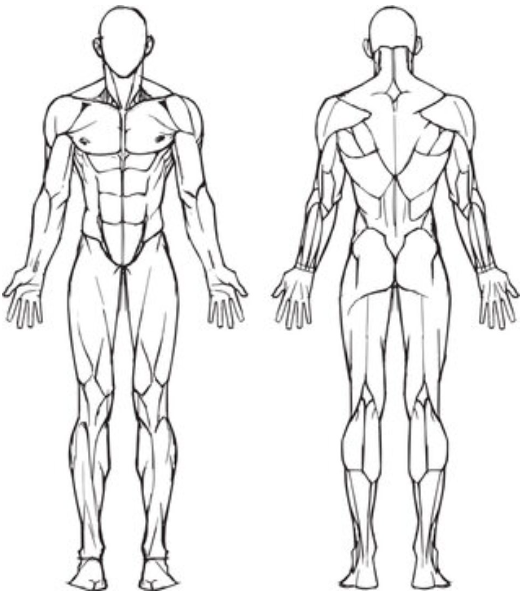
- The Video Capture screen will open.
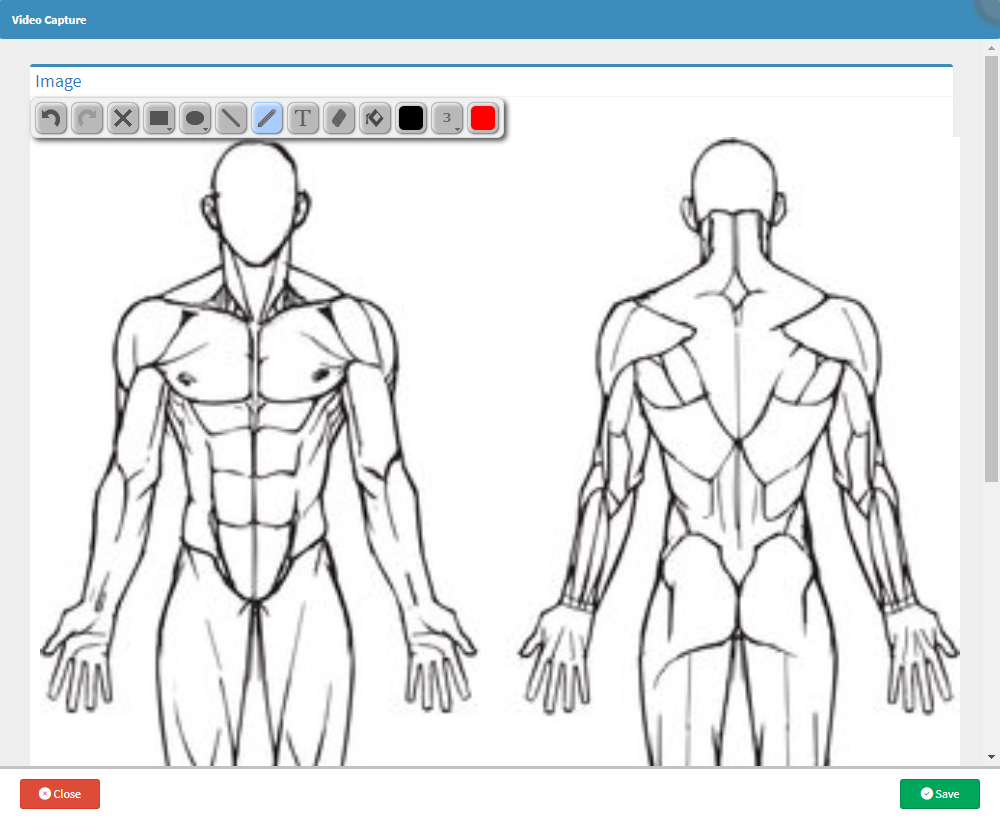
- For more information regarding how the Video Capture screen works, please refer to the user manual: How to Upload an Image/Photo.
Add Custom Image
Allows the Practitioner to upload pictures, scans, X-rays, and to draw images relating to the Examination.- Click on the + Add Image button to upload the desired Images.
![]()
- The Video Capture screen will open where you can take images, upload pictures from a device, draw free-hand images or upload images from an external source.

- For more information regarding how the Video Capture screen works, please refer to the user manual: How to Upload an Image/Photo.
Pills
A Pill can be seen as a procedure or action performed on the Patient. Pills are versatile and can have several different actions that will be available when each Pill is actioned.
- Click on the desired Pill to action it.
![]()
- The Pill that was actioned will be highlighted in red.
![]()
💡Please Note: All Pills that don't have Widgets linked to them will have a Text field that can be used, for additional notes.
- Pills can be customised to have different actions that are triggered when the Pill is selected:
- Considerations: Adds the linked information to the Considerations section of the Assessment, Planning and Billing.

- Diagnosis: Pre-setup Diagnosis Codes linked to the Pill will be added to the Diagnosis section of the Assessment, Planning and Billing.
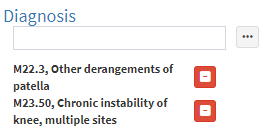
- Billing Code: Billing Codes linked to the Pill will automatically be added to the Lines section of the Assessment, Planning and Billing.

- Script Lines: Medicine items added to the Pill during setup will be added to the Medicine section the Assessment, Planning and Billing.

Widgets on Pills
When a Pill is selected it will have a separate action that has been attached to it.
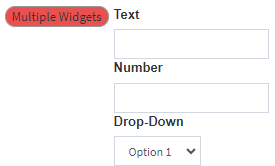
- An explanation will given for each type of Widget that can be added to a Pill:

- Text Input: A Text field will be added to the Pill.
- Click on the Text field to enter the desired information.

- Number: A Numerical value can be entered into the field, that has been added to the Pill.
- Click on the Number field to add a numerical value.
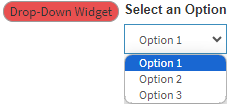
- Drop-Down: Adds a Drop-Down menu, from which an option can be selected.
- Click on the Drop-Down menu to select an option from the list that has become available.
- For more information regarding how to set up Pills, please refer to the user manual: How to Set Up Pills on Customisable Forms.
Widgets
A Widget is a component that you can use to input data, make selections, or trigger actions on the specific Field/Pill where the Widget has been set up. An array of Widgets are available, such as Text/Number fields, drop-down menus etc.
💡Please Note: Certain Widgets are used specifically for eye-related examinations. For more information regarding these Widgets, please refer to the user manual: How to Set Up Widgets on Customisable Forms.

- Text Input: The desired information can be entered into the field, using letters and numbers.
- Click on the field to enter the information that is required.

- Number Input: Numerical values are used to enter the desired information into the field.
- Click on the field to enter the information that is required.

- Number (Column Selector): Values are selected between a specific range using columns to choose the result.
- Click on the + button to add a new Record.
![]()
- The Number (Column Selector) screen will open.
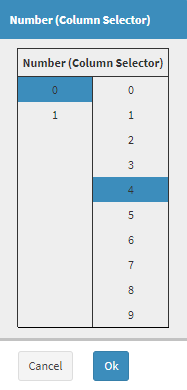
- Click on the Ok button.
![]()
💡Please Note: The result can also be entered manually into the field.

- Drop-Down: A selection can be made by selecting one of the options available on the drop-down menu.
- Click on the drop-down menu to select an option from the list.
![]()
- Record: Records can be logged depending on the fields that have been set up for the Widget.
- Click on the Add+ button to open the Record screen to enter the relevant information.
![]()
- The Record Widget can have different types of fields that will be available to choose from:

- Click on the Text field to enter the desired information.

- Click on the Number field to enter the desired information.

- Click an option in the Drop-down field to make a selection.

- Click on the Time field to manually enter a time using a 24-hour (hh:mm) time format.

- Alternatively, select the time from the Time picker.
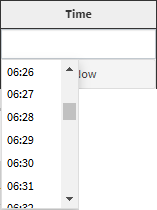
- Click on the + Now button to add the current time to the Time field.

- Click on the Date field to manually enter the date in a yyyy-mm-dd format.

- Alternatively, select the date from the Date picker.

- Click on the + Now button to add today's date to the Date field.

- Click on the Ok button to add the information to the form.
![]()
- The Record will be added to the form.

💡Please Note: The information can be edited once it has been added to the form if the need arises.
- Click on the Delete button to remove the Record from the form.
![]()

- Blood Pressure: Systolic and Diastolic fields will be available where the Blood Pressure can be captured.
- Click on each field to add the relevant information.
- Click on the + button to add the Blood Pressure using a column selector.
![]()
- The Blood Pressure screen will open, where the selections can be made.
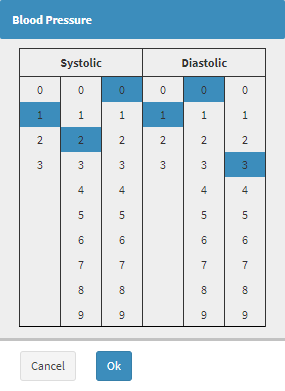
- Click on the Ok button.
![]()
- The Systolic and Diastolic fields will be filled in.

💡Please Note: All Widgets can be named according to the information required, during set-up.
Assessment, Planning and Billing
The Assessment, Planning and Billing section on Workflow Event Forms is an overall summary of the Patient's health after all tests were performed, what the Treatment Plan will be based on the Assessment, as well as the Billing codes based on the tests performed. Each test's Billing Codes will be automatically added to the Billing section for fast and efficient billing. 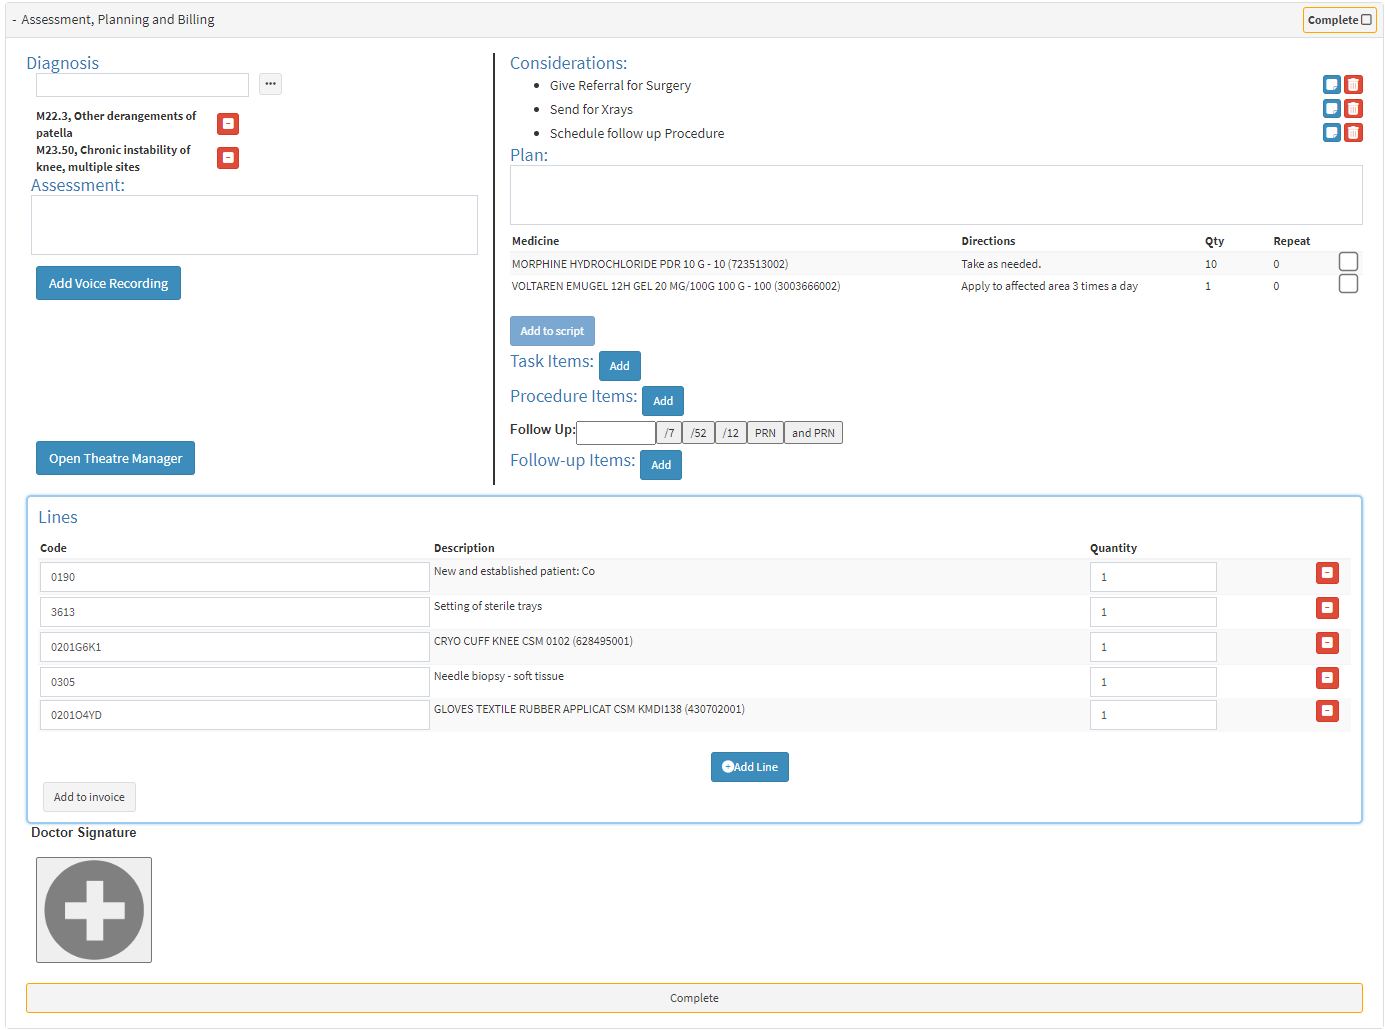
- For more information regarding each field and option within this section, please refer to the user manual: Examination Form: Assessment, Planning and Billing.
Complete
Once satisfied with the information added to the form, the form can be completed.- Click on the Complete button to complete the Examination.
![]()
- The button will change to Completed and the form will be marked as Completed at the top of the screen.
![]()
Send a copy of the Examination via electronic mail.
- Click on the Email button to send a copy of the Examination via electronic mail to the desired recipients.
![]()
- The Email - Workflow Event screen will open.
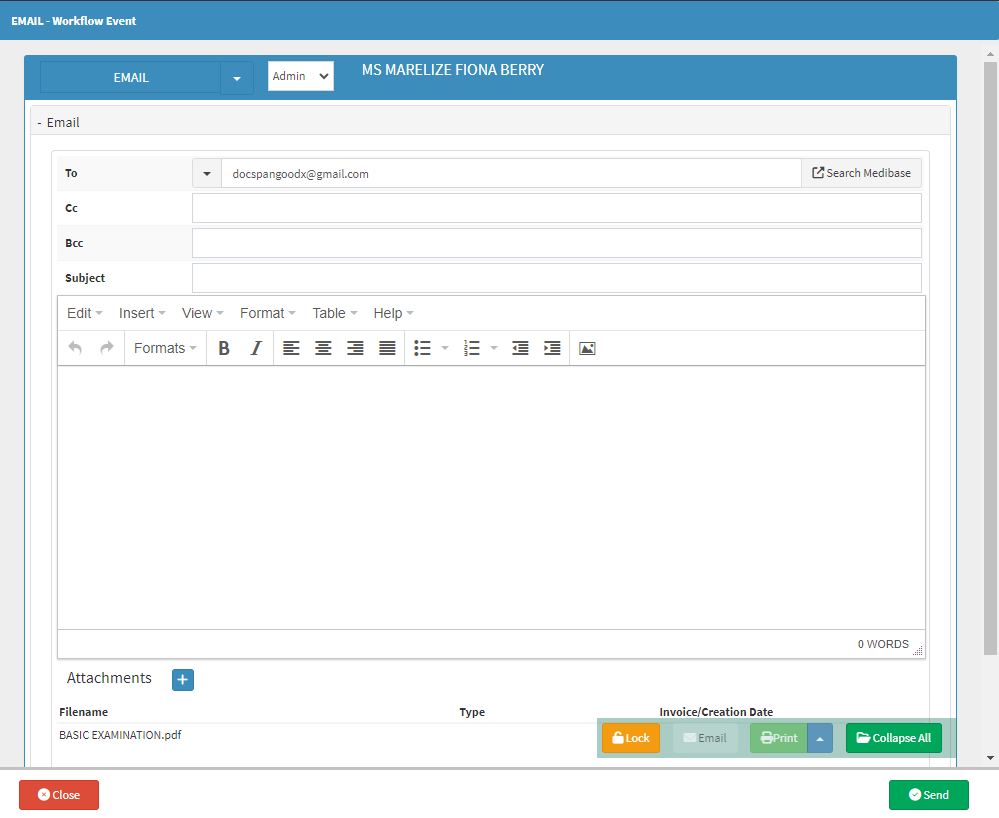
- For more information regarding how to Send an Email, please refer to the user manual: Send an Email.
Print and Download
Print out a hard copy of the evaluation that can be filed in the Patient's hard copy file, or save a PDF (Portable Document Format) copy to your device.
- Click on the Print button to open a preview to Print a hard copy of the Examination.
- Click on the Print drop-up menu to open additional options.

- Click on the Download button to save the Examination as a PDF (Portable Document Format) to the user's computer.