How to Set Up the Assessment, Planning and Billing Section on Customisable Forms
The Assessment, Planning and Billing section on Workflow Event Forms is an overall summary of the Patients health after all tests were performed, what the Treatment Plan will be based on the Assessment, as well as the Billing codes based on the tests performed.
Assessment: A Comprehensive Summary of the Patient's condition after all tests and examinations have been completed, taking into consideration all the information that has been added during the examination.
Planning: Observations and Considerations that were made during the exam are used to get a conclusive diagnosis of the Patient's current health issues. The Practitioner is then able to devise a plan for the best course of treatment. As part of the Planning, you can schedule Theatre procedures, log Tasks and create Follow-up examinations to ensure that the Patient is getting the most efficient care.
Billing: During the examination, Billing Codes can automatically be added as the tests are performed to ensure accurate and efficient Billing, as each Procedure and test associated with a specific Billing Code can then be directly added to an Invoice for fast billing.
- The contents of this user manual will consist of the following information:
- Template Description
- Placeholders
- Assessment, Planning and Billing
- Diagnosis
- Assessment
- Theatre Manager
- Considerations
- Plan
- Task Items
- Procedure Items
- Follow-Up Items
- Lines
- Doctor Signature
- This user manual will start on the Workflow Event Templates screen of the Examination form.
- For more information on how to navigate to the Workflow Event Templates screen, please refer to the user manual: How to Set Up a Customisable Examination Form.
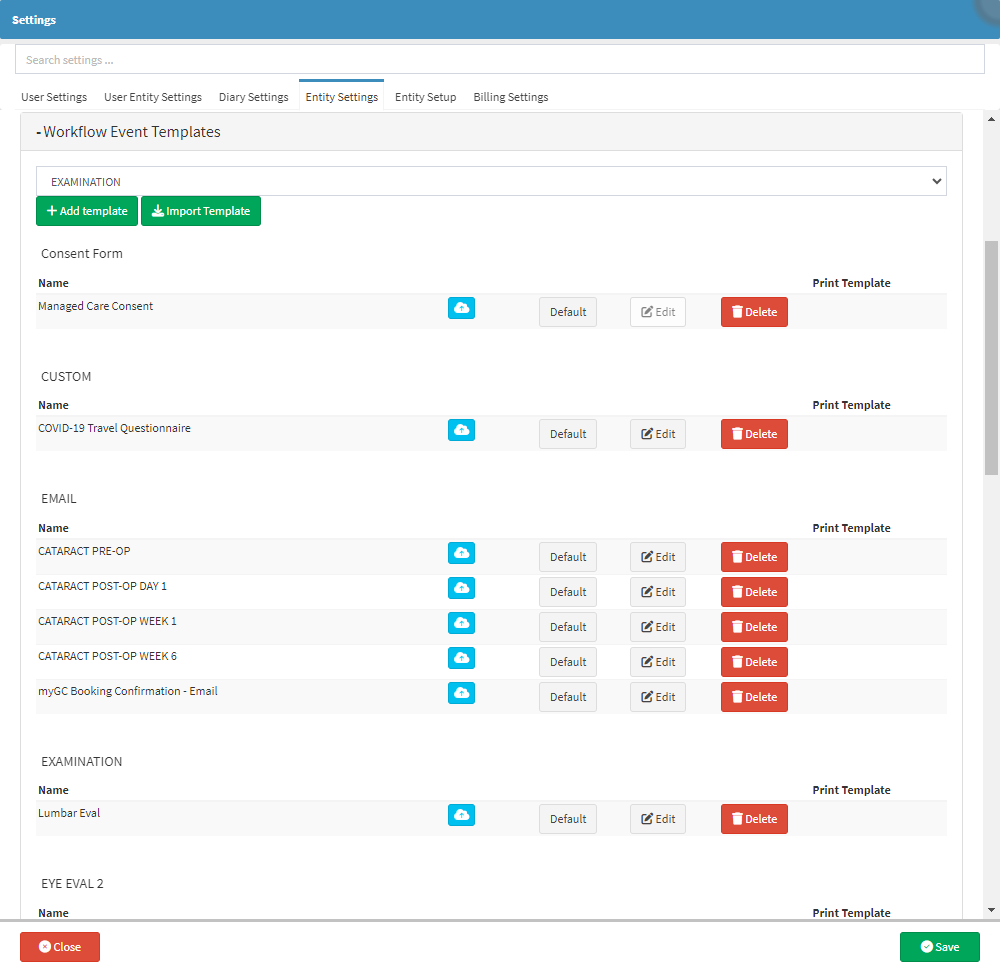
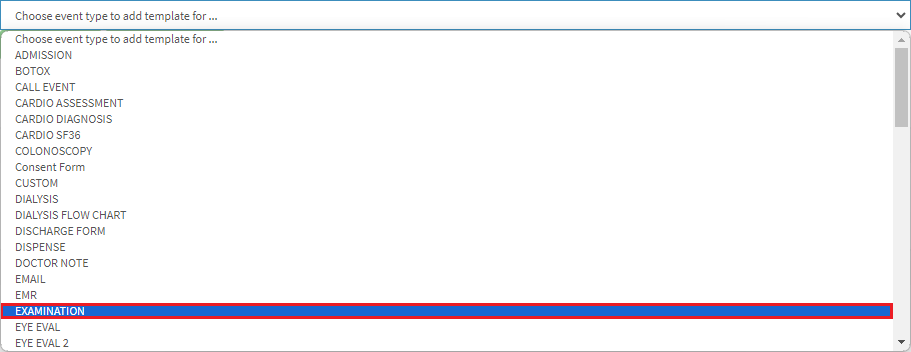
- Click on the Choose Event Template Type to Add Template for... drop-down menu.

- Select the Examination option.
- Click on the Add Template button.
![]()
- The Workflow Event Template screen will open.
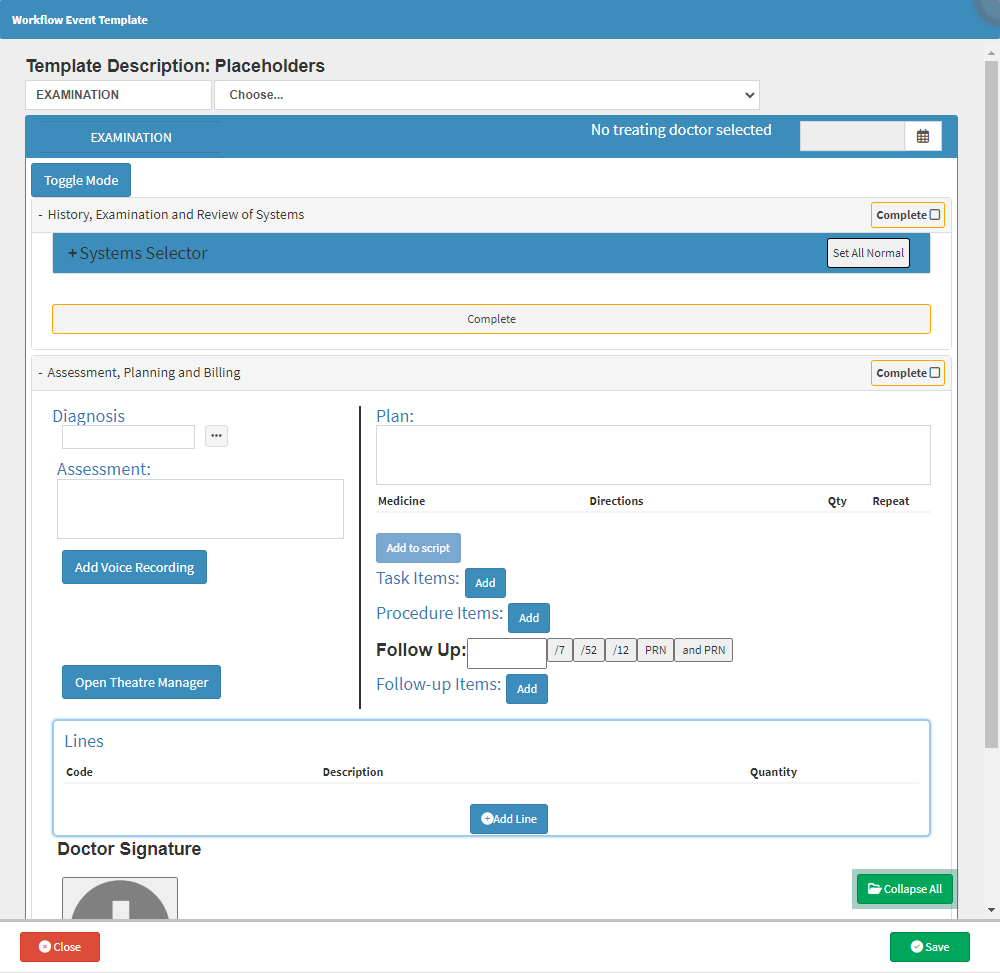
- The following information needs to be completed in order for the Workflow Event Template to be set up:
Template Description
A unique Name needs to be given to the Template in order to be identified when selected and used.
- Click on the Template Description field and Type a Name for the Template.

Placeholders
The Placeholders can be used to pull through information from the system automatically without entering it manually.
- Click on the Placeholders drop-down menu to select the relevant Placeholder to add.
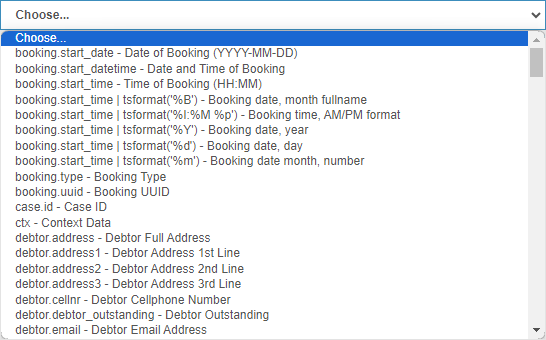
- For more information on how to use Placeholders, please refer to the following user manuals: Workflow Event (WFE) Placeholders, How to Use Placeholders
Assessment, Planning and Billing
A comprehensive overview of the Patient's condition following the completion of all diagnostic tests. The Treatment Plan will be determined based on the Assessment of the Patient's condition. Billing is determined by the tests conducted, with each test's Billing Code automatically added for fast and efficient billing.
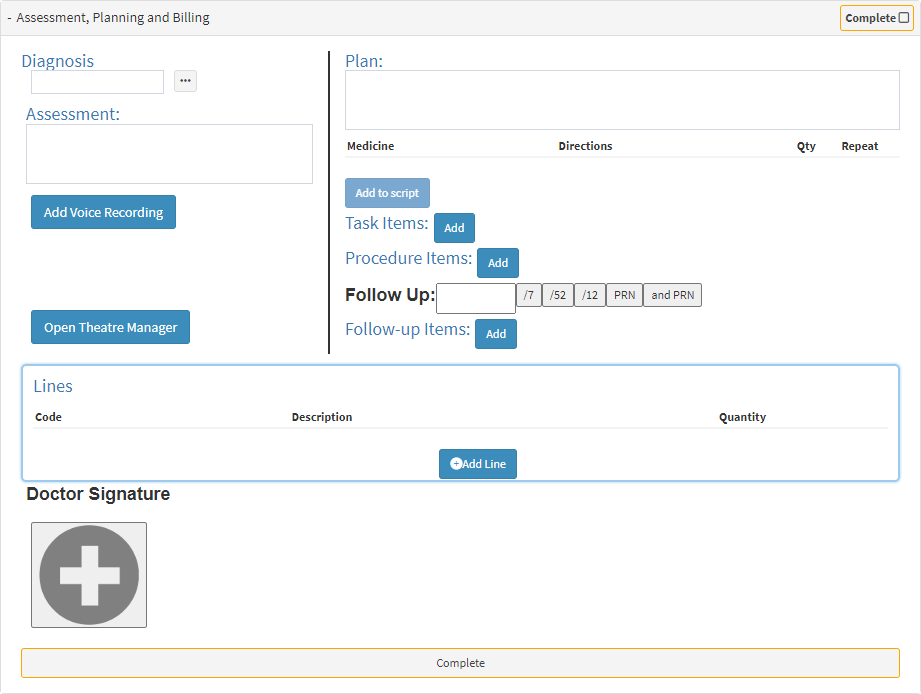
- An explanation will be given for each option and section within the Assessment, Planning and Billing panel:
Diagnosis
- Add a Diagnosis by entering the ICD-10 code or name of the Diagnosis in the Diagnosis field.
![]()
- Alternatively, Click on the ... (ellipse) button to open the ICD-10 Builder screen to select a Diagnosis code from the list.
![]()
- For more information regarding the ICD-10 Builder screen, please refer to the user manual: Procedure/Material/Medicine/Macro/ICD-10 Search Code Lookup.
- Click on the Delete button to Remove a code from the list.
![]()
- Click on the Assessment field to add your Notes.

- Click on the Add Voice Recording button to add a Voice Note to your Notes.
![]()
- For more information on how to Add a Voice Recording, please refer to the user manual: How to Add a Voice Recording.
- Click on the Open Theatre Manager button to access the Theatre Management screen.
![]()
- For more information regarding the Theatre Manager screen, please refer to the user manual: Theatre Manager: Navigation and Use.
Considerations
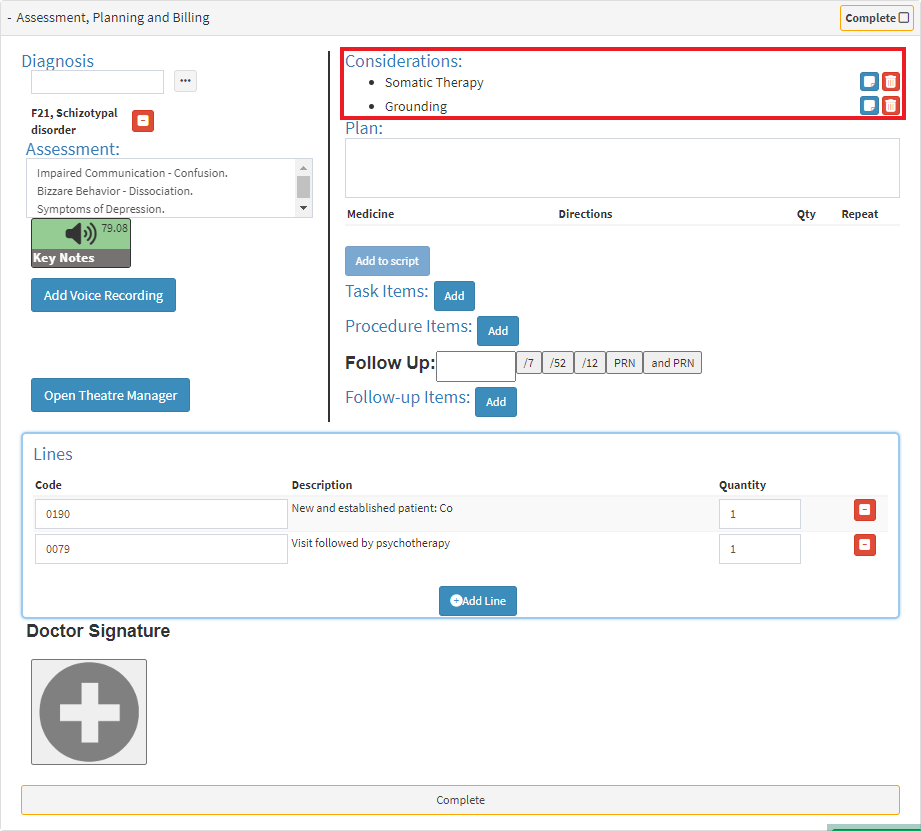
- For more information on How to Set Up and Use Considerations, please refer to the user manuals: How to Set Up Pills on Customisable Forms, Examination Form: Navigation and Use.
- Click on the desired Consideration to copy the Name of the Consideration into the Plan field of the Plan section.

- Click on the Copy button to Add the Consideration to the Assessment field of the Assessment section.
- Click on the Delete button to remove the Consideration from the list.
![]()
![]()
Plan
- Click on the Plan field to add Notes.

- Medicine Items: Items that have been set up with the customisation of the form will automatically appear in the Plan section when the Considerations were selected on which Script Items were added.
- Tick the corresponding checkbox of the Script Item that you want to add to a Script.

- Click on the Add to Script button to add the selected Items to a Script.
![]()
Please Note: The Add to Script button will only be available once Script Items have been selected.
- A new Script Workflow Event will be added to the Active Forms section of the Patient.

Task Items
- Click on the Add button to insert a new Task Item.
![]()
Please Note: Task Items do not appear on the form when it is Printed, as they are Administrative features and not Clinically relevant.
- The New Task Item screen will open.

- Add the Title information in the Title field.

- Add any additional Request information in the Request field.

- Add any additional Detail information in the Detail field.

- Add any additional Notes in the Notes field.

Procedure Items
- Click on the Add button to Add a new Procedure Item.
![]()
Please Note: Procedure Items do not appear on the form when it is Printed, as they are Administrative features and not Clinically relevant.
- The New Procedure Item screen will open.
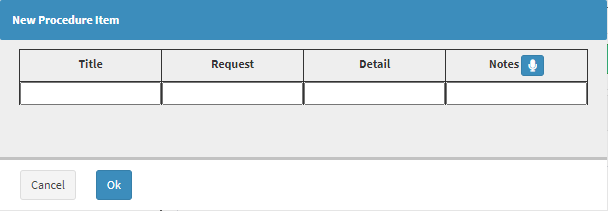
- Add the Title information in the Title field.

- Add any additional Request information in the Request field.

- Add any additional Detail information in the Detail field.

- Add any additional Notes in the Notes field.

Follow Up Item
- Click on the Add button to Add a new Procedure Item.
![]()
Please Note Follow-Up Items do not appear on the form when it is Printed, as they are Administrative features and not Clinically relevant.
- The New Follow-Up Item screen will open.
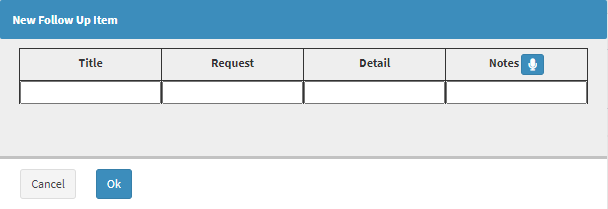
- Add the Title information in the Title field.

- Add any additional Request information in the Request field.

- Add any additional Detail information in the Detail field.

- Add any additional Notes in the Notes field.

Lines
- Click on the Add Line button to insert a new Billing Code to the form.
![]()
- A new Line will become available.

- Click on the Type to Search... field to enter the desired Billing Code, you are able to type the Billing Code or the Name of the Billing Code to start the Search. Only 1 character is required to start the search.
![]()
- Click on the desired Option to make a selection. The Billing Code will now be added to the list of Line Items.

- Click on the Add to Invoice button to add all the Billing Codes in the Lines section to an Invoice.
![]()
Doctor Signature
- Click on the + button.
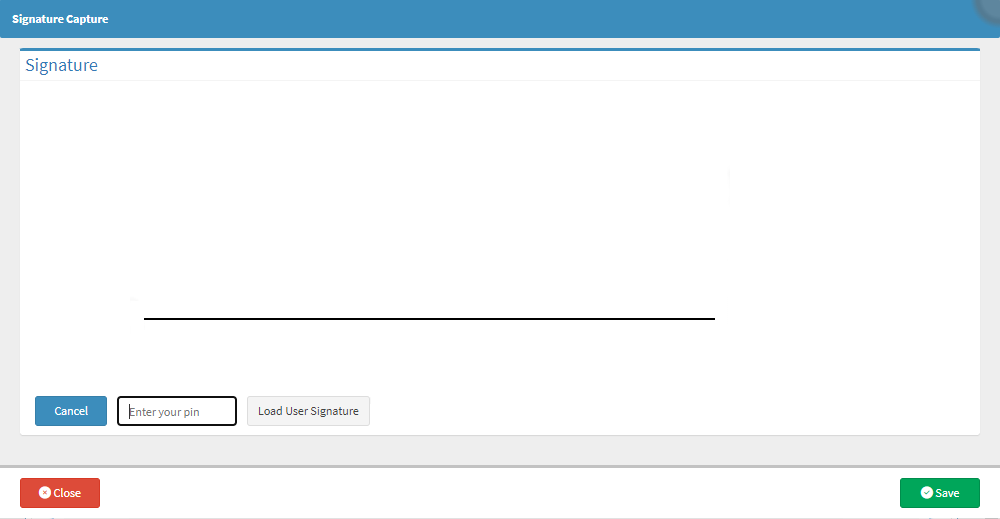
- The Signature Capture screen will open.
- For more information on how to Add a Signature, please refer to the user manual: How to Add a Doctor Signature.