Smart Stickers: Default State
The user manual is currently being updated with new features. An updated version will be available shortly. We thank you for your patience.
A Default State allows the Practitioner to set up a standard treatment plan for the DAMA Protocol. A Protocol with a default state will always use the information that has been set up as the first option that the system will revert to when a DAMA Protocol is added to a Patient.
- The contents of this user manual will consist of the following information:
- Enter State
- Change State
- WFE
- Time Check
- Finalise
- Delete State
- Timer Daily
- Change State
- WFE
- Time Check
- Finalise
- Delete State
- Timer Monthly
- Change State
- WFE
- Time Check
- Finalise
- Delete State
- Save and Close
- This user manual will start on the Disease Administration and Management Assistant screen.

- For an extensive explanation of how to Navigate to the Disease Administration Management Assistant screen and how the Disease Administration Management Assistant works, please refer to the user manual: DAMA - Disease Administration and Management Assistant Overview.
- An explanation will be given for all the options in the Default section:

Enter State
An Enter State is the stage into which a Protocol will enter once the Protocol is added to the Patient. Users are able to select and set up the states that will be used by default.
- Click on the +Enter State button to add a default state to the Protocol.
![]()
- An Enter State event will be created for the Protocol.

- An explanation will be given for each option available for the Enter State event:
Change State
- Click on the Change State button to add a Change State action to which the current state of the Protocol can be changed, to a new stage in the Disease Administration process.
![]()
- A Change State action will be created for the Protocol.

Time Check
- Click on the Time Check button to create a new Time Check that the user is able to use to change the stage of the Protocol.
![]()
- Time Check options will become available:

Please Note: The Time Check ensures that the action only executes after the specified amount of time has elapsed since the last state change/booking date.
- An explanation will be given for each option:
![]()
- Action from: When the state of the Protocol will change.
- Click on the Action from... drop-down menu to select the desired option.

- Select an option from the list that has become available:
- From State Change: The stage of the Protocol will change to the next stage once the Protocol reaches a certain age.
- From Last Booking Date: The stage of the Protocol will change to the next stage from when the initial booking was made.
![]()
- =: The time evaluator that determines when the state of the Protocol will change.
- Click on the = drop-down menu to select the desired option.

- Select an option from the list that has become available:
- =: Equals to the amount of time that will be considered when the state will change.
- <: The amount of time that will be considered when the state will change before the allocated time, for example, 1 hour before.
- >: The amount of time that will be considered when the state changes after the allocated time, for example, 1 hour after.
- repeat: The state will be repeated.
![]()
- 1: The amount of time that will be used to determine when the state changes.
- Click on the 1 field to change the amount of time that will be used. The field is a numerical field and will only allow the user to use numbers.
![]()
- Days: The time frame that will be used to determine when the state of the Protocol will change.
- Click on the Days drop-down menu to select the desired timeframe.

- Select an option from the list that has become available:
- Days: One day equals to a 24-hour period.
- Weeks: A week is equal to 7 days.
- Months: A month ranges anywhere from 28-31 days. An example of a month is from 20 September to 20 October.
- Years: A period of 365/366 days.
- Click on the Remove Time Check button to delete the information without saving the changes that have been made.
![]()
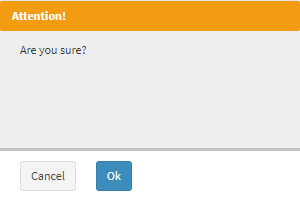
- An Attention! pop-up will appear to ask the user whether they are sure that they would like to remove the Time Check from the Protocol.

- Click on the Cancel button to ignore the request and return to the Disease Administration and Management Assistant screen.
![]()
- Click on the Ok button to go ahead and delete the Time Check of the Change State from the Protocol.
![]()
- The Time Check for the Change State will be removed from the Protocol.
Please Note: Only one Change State action can be added per Enter State event.
- Click on the Delete button to remove the Change State action from the Enter State event.

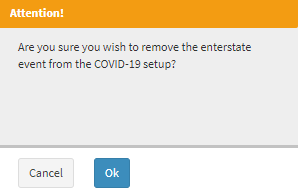
- An Attention! pop-up will appear to ask the user whether they are sure, that they would like to remove the Enter State event from the setup.

- Click on the Cancel button to ignore the request and return to the Disease Administration and Management Assistant screen.
![]()
- Click on the Ok button to go ahead and delete the Change State action from the Enterstate event.
![]()
- The Change State action will be removed from the Protocol.
WFE
- Click on the +WFE button to add a Workflow Event Template to the Protocol.
![]()
- A WFE action will be created for the Protocol.

- An explanation will be given for each field and option:
![]()
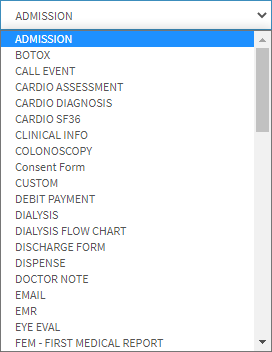
- Admission: A list of Workflow Events forms that can be used to add to the Protocol.
- Click on the Admission drop-down menu to select a Workflow Event from the list that becomes available.

Please Note: The Workflow Events that appear on the list is dependent on the setup of the Practice. For more information regarding the Workflow Events, please refer to the Clinical Book sections: General Examination Forms and Special Investigation Forms.
![]()
- Template: A Template is a predesigned layout of the Workflow Event form that already includes the framework and structure for the final document.
- Click on the Template drop-down menu to select the desired template that the user wishes to use.

Please Note: The templates that display for each Workflow Event will need to be set up by the user. For more information on how to set up these templates, please refer to the user manual: Workflow Event Templates.
- Click on the Time Check button to create a new Time Check for Workflow Events that will be sent or created when a user adds a Patient to a DAMA Protocol.
![]()
- Time Check options will become available:

- For an explanation of how the Time Check works please refer to the section in this user manual: Time Check.
- Click on the Delete button to remove the WFE action from the Enter State event.

- An Attention! pop-up will appear to ask the user whether they are sure, that they would like to remove the WFE event from the setup.

- Click on the Cancel button to ignore the request and return to the Disease Administration and Management Assistant screen.
![]()
- Click on the Ok button to go ahead and delete the WFE action from the Enter State event.
![]()
- The WFE action will be removed from the Protocol.
Please Note: The Practitioner is able to add more than one Workflow Event that will be triggered when the Protocol is added to the Patient.
Finalise
- Click on the +Finalise button to add a finalise action to the Protocol, which will determine when the Protocol will end.
- A Finalise action will be created for the Protocol.

- Click on the Time Check button to create a new Time Check for the finalisation of the DAMA Protocol.
![]()
- Time Check options will become available:

- For an explanation of how the Time Check works please refer to the section in this user manual: Time Check.
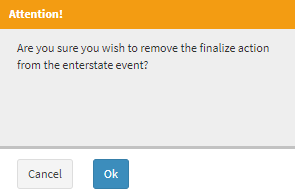
- Click on the Delete button to remove the Finalise action from the Enter State event.

- Click on the Cancel button to ignore the request and return to the Disease Administration and Management Assistant screen.
![]()
- Click on the Ok button to go ahead and delete the Finalise action from the Enter State event.
![]()
- The Finalise action will be removed from the Protocol.
Delete State
- Click on the Delete button to disable the Enter State event for the Protocol.

- An Attention! pop-up will appear to ask the user whether they are sure that they would like to remove the Enter State event from the Protocol.

- Click on the Cancel button to ignore the request and return to the Disease Administration and Management Assistant screen.
![]()
- Click on the Ok button to go ahead and remove the Enter State event from the Protocol.
![]()
- The Enter State event will be removed from the Protocol.
Timerdaily
Allows the Practitioner to set triggers that will occur on a daily basis.- Click on the +Timer Daily button to add a daily trigger to the Protocol.
![]()
- A Timer Daily event will be created.

Please Note: timerdaily triggers will occur on a daily basis.
- An explanation will be given for each option available for the Timer Daily event:
Change State
- Click on the +Change State button to add a Change State action to which the current state of the Timer Daily event can be changed, to a new stage in the Disease Administration process.
![]()
- A Change State action will be created for the Timer Daily event.

- For more information regarding how to set up Change State actions, please refer to the sub-section Change State under the section, Enter State of this user manual.
WFE
- Click on the +WFE button to add a Workflow Event Template to the Timer Daily event.
![]()
- A WFE action will be created for the Timer Daily event.

- For more information regarding how to add Workflow Events to the Timer Daily event, please refer to the sub-section WFE under the section Enter State of this user manual.
Finalise
- Click on the +Finalise button to add a Finalise action to the Protocol, which will determine when the Protocol will end.
- A Finalise action will be created for the Protocol.

- For an explanation of how the Finalise action works, please refer to the section in this user manual: Finalise.
Delete State
- Click on the Delete button to disable the Timer Daily event for the Protocol.

- For more information regarding deleting/disabling events on Protocols, please refer to the sub-section Delete State under the section Enter State of this user manual.
Timermonthly
Allows the Practitioner to set triggers that will occur on a monthly basis.
- Click on the +Timer Monthly button to add a monthly trigger to the Protocol.
![]()
- A Timer Monthly event will be created.

- An explanation will be given for each option available for the Timer Monthly event:
Change State
- Click on the Change State button to add a Change State action to which the current state of the Timer Monthly event can be changed, to a new stage in the Disease Administration process.
![]()
- A Change State action will be created for the Timer Monthly event.

- For more information regarding how to set up Change State actions, please refer to the sub-section Change State under the section Enter State of this user manual.
WFE
- Click on the WFE button to add a Workflow Event Template to the Timer Monthly event.
![]()
- A WFE action will be created for the Timer Monthly event.

- For more information regarding how to add Workflow Events to the Timer Monthly event, please refer to the sub-section WFE under the section Enter State of this user manual.
Finalise
- Click on the +Finalise button to add a Finalise action to the Protocol, which will determine when the Protocol will end.
- A Finalise action will be created for the Protocol.

- For an explanation of how the finalise action works, please refer to the section in this user manual: Finalise.
Delete State
- Click on the Delete button to disable the Timer Monthly event for the Protocol.

- For more information regarding deleting/disabling events on Protocols, please refer to the sub-section Delete State under the section Enter State of this user manual.
Save and Close
Allows the user to save any changes that have been made and close the screen.
- Click on the Close button to exit the Disease Administration and Management Assistant screen and return to the Cash Register Management screen.
![]()
- Click on the Save button to save any changes that have been made. The Disease Administration and Management Assistant screen will close and the user return to the Cash Register Management screen.