Basic Script Features
Basic Script Features are all of the features that are available by default on the Script screen and do not require any additional customisation or setup. A Script is a document that is used as a form of communication between the Practioner and Pharmacist. The Script feature is used to create a script for a Patient. The Script is used to prescribe medication as a treatment/cure once the patient is finished consulting with the Practitioner. The Patient will take the Script to the Pharmacy to collect the medication that the Practioner has prescribed.
The Practitioner will be able to select generic items and build directions for use on the items that have been prescribed, and there is a possibility to repeat previous Scripts.
- There are 3 ways that a patient is able to obtain a prescription from the Practice:
- Outcome of a consultation with a Practitioner - When a Patient has consulted with a Practitioner and the Patient needs to get medication to manage/treat their condition, the necessary medication will be prescribed to the Patient during the consultation.
- Chronic Medication Renewal - The Patient has made a booking specifically to get a renewal prescription of the medication that they use to treat a chronic condition.
- Telephonically - A Patient that is known to the Practice calls in and asks for the Practitioner for a prescription for a specific medication. A task will be created as a reminder for the Practitioner to create the script. The Practitioner will leave the prescription with the receptionist, and the patient does not need to make an appointment with the Practitioner. Patients whose chronic conditions are under control can also make use of this method. A task will be created as a reminder for the Practitioner to create the script.
Please Note: For an extensive explanation of the different entry points of a script, please refer to the user manual: Different Script Entry Points.
- The contents of this user manual will consist of the following information:
- Navigating to the Script screen
- Accessing the Script From
- Easy Events
- Forms Library
- Creating a New Script
-
Preview of Script that will be printed or emailed
- Log in to the GoodX WebApp using your GoodX username and password.
- The Main Diary screen will open.
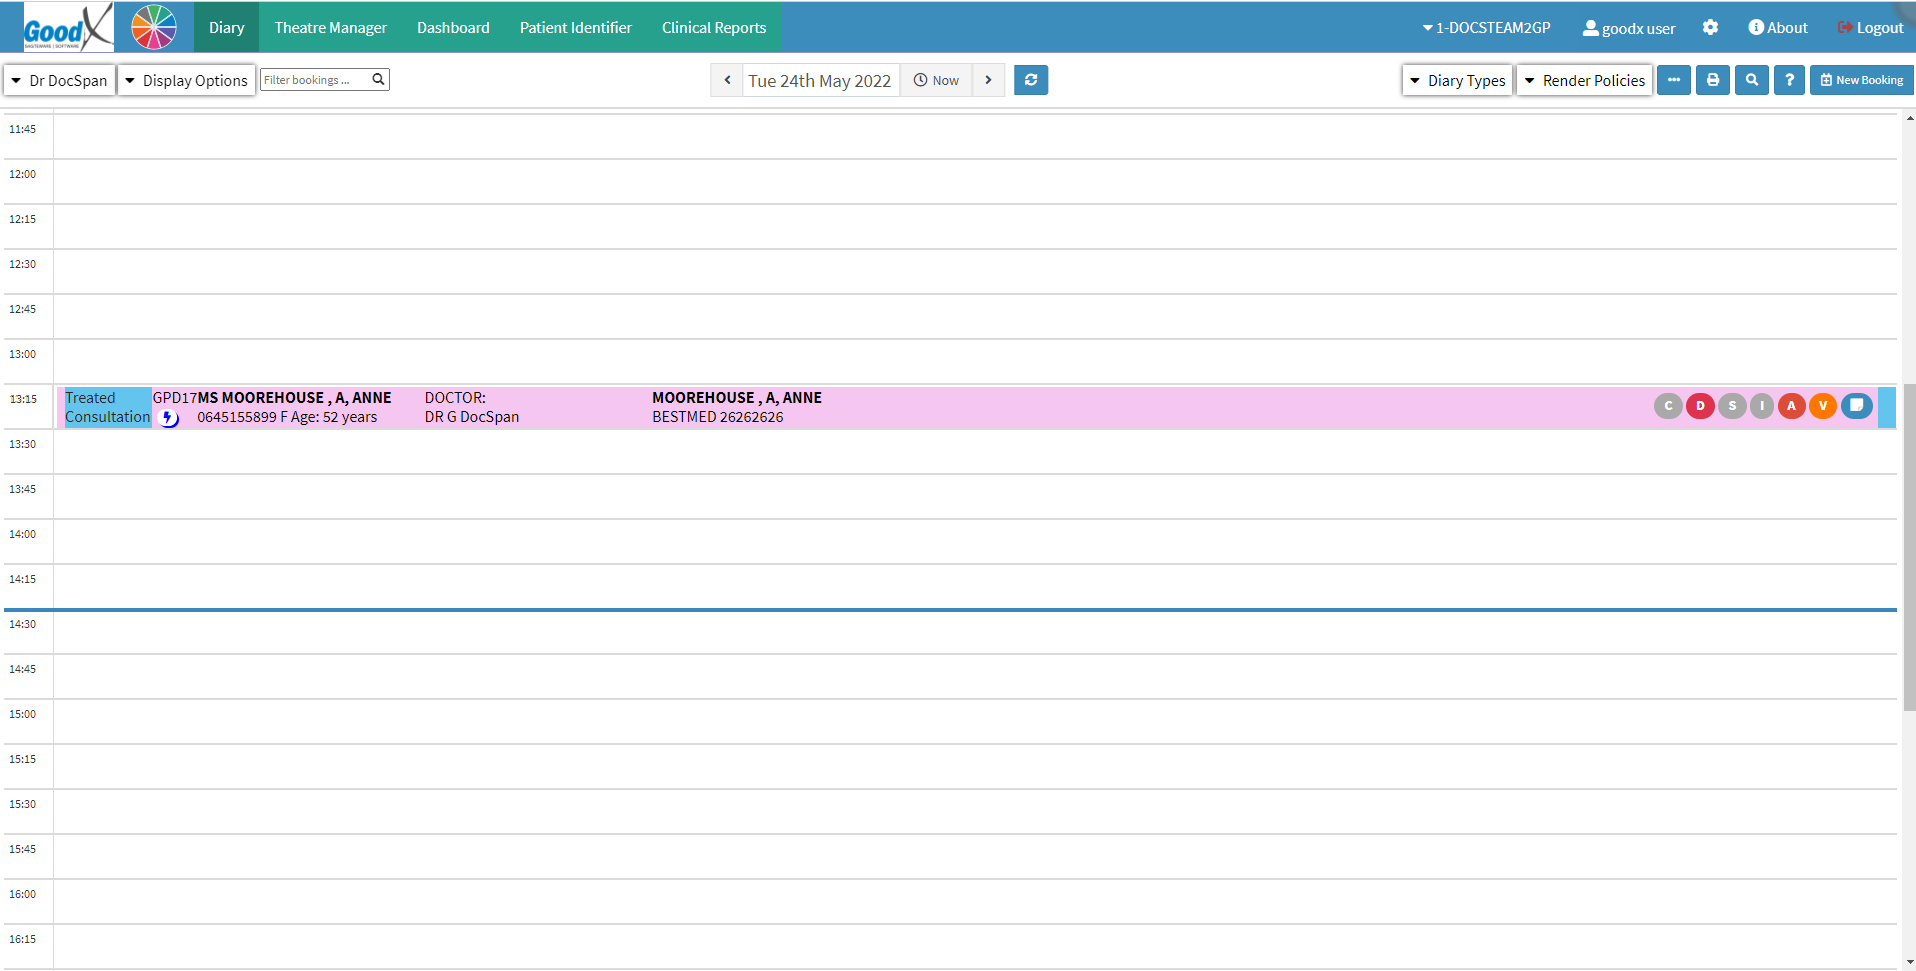
Navigating to the Script screen
Where to access the script screen.- Click on the booking of the Patient for who a Script will be made.

- The Diary sidebar will open.
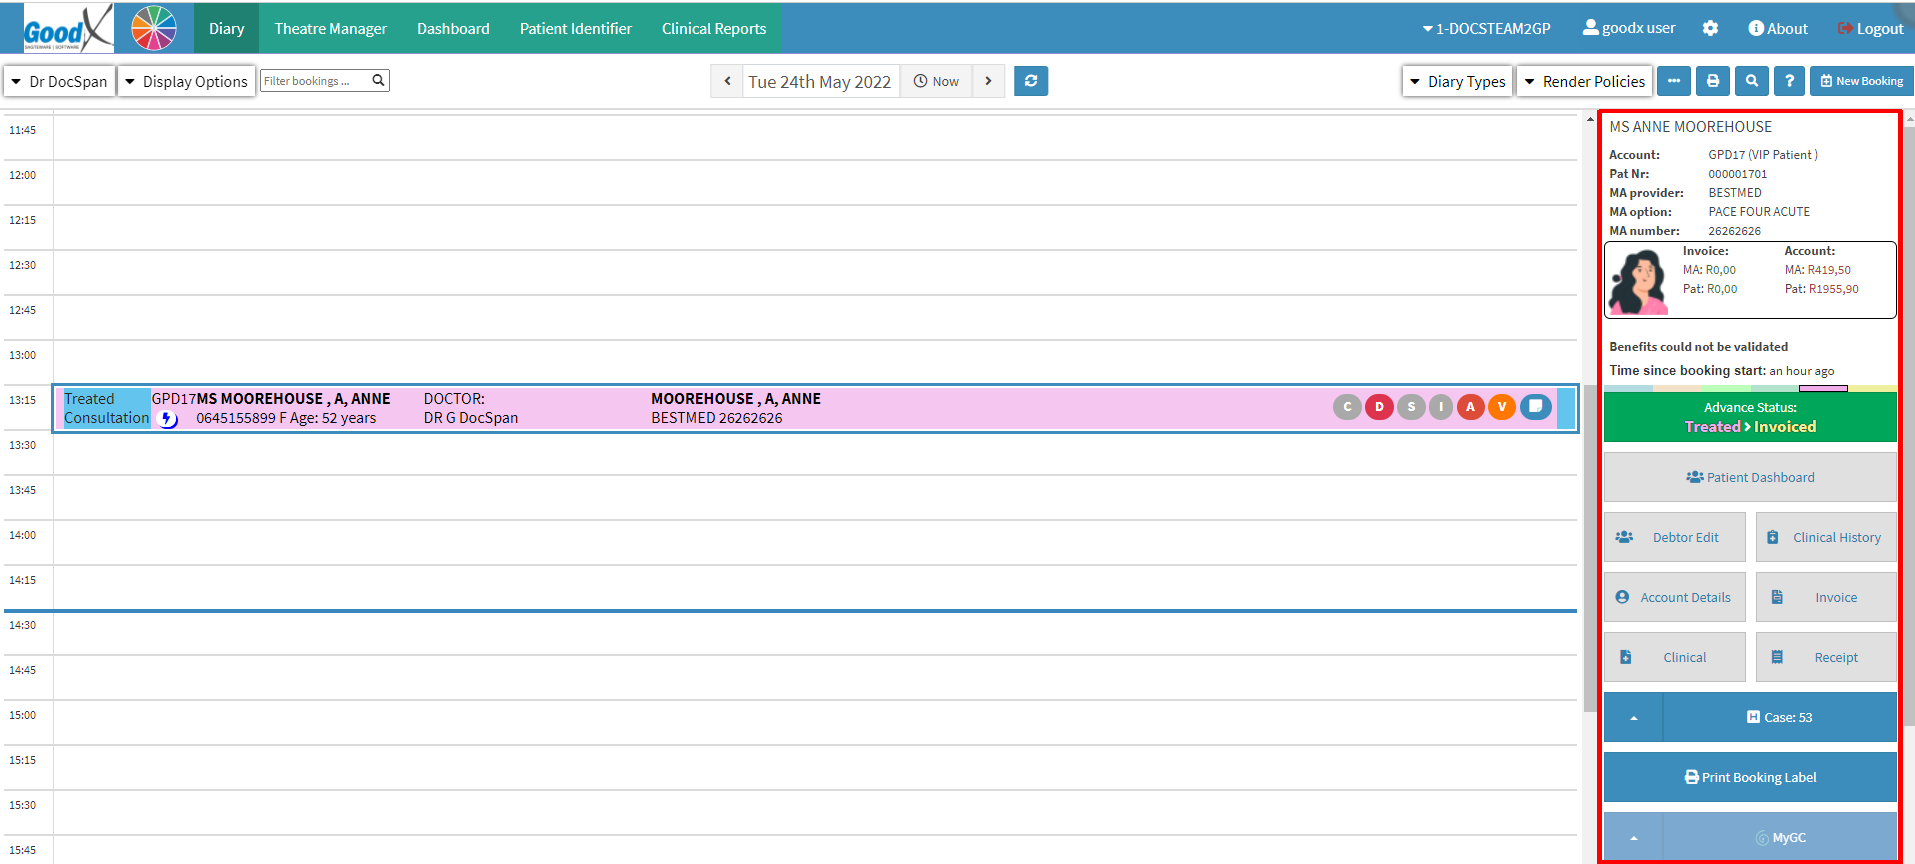
- Click on the Clinical button on the sidebar.

- The Clinical screen will open.
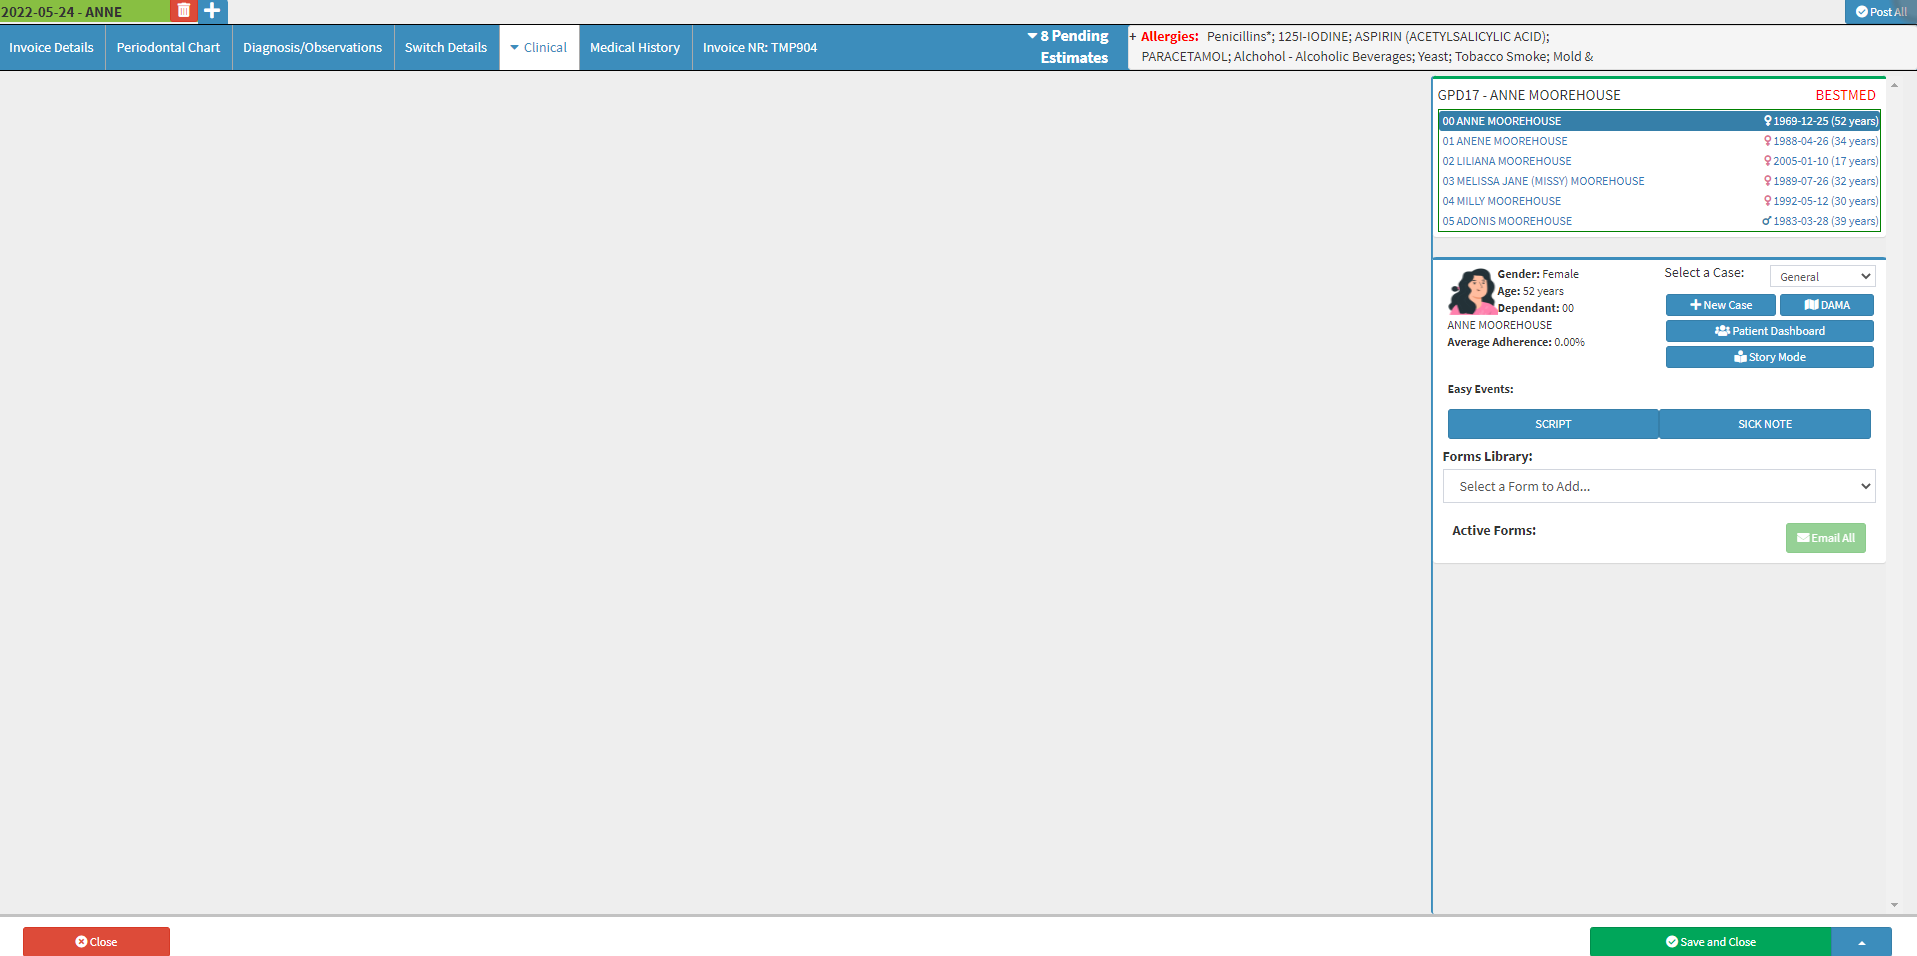
Accessing the Script From
The Script can be accessed from two different places on the Clinical screen: Easy Events (when set up) and from the Forms Library.Easy Events
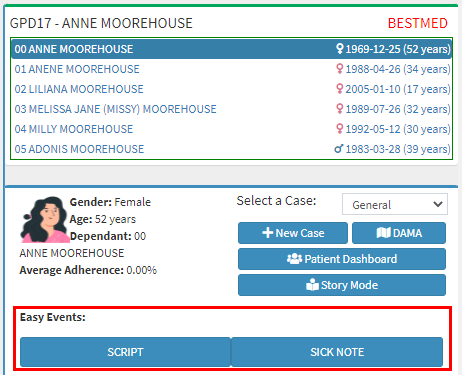
- Click on the Script button under the Easy Events section on the sidebar.

- The Script screen will open.
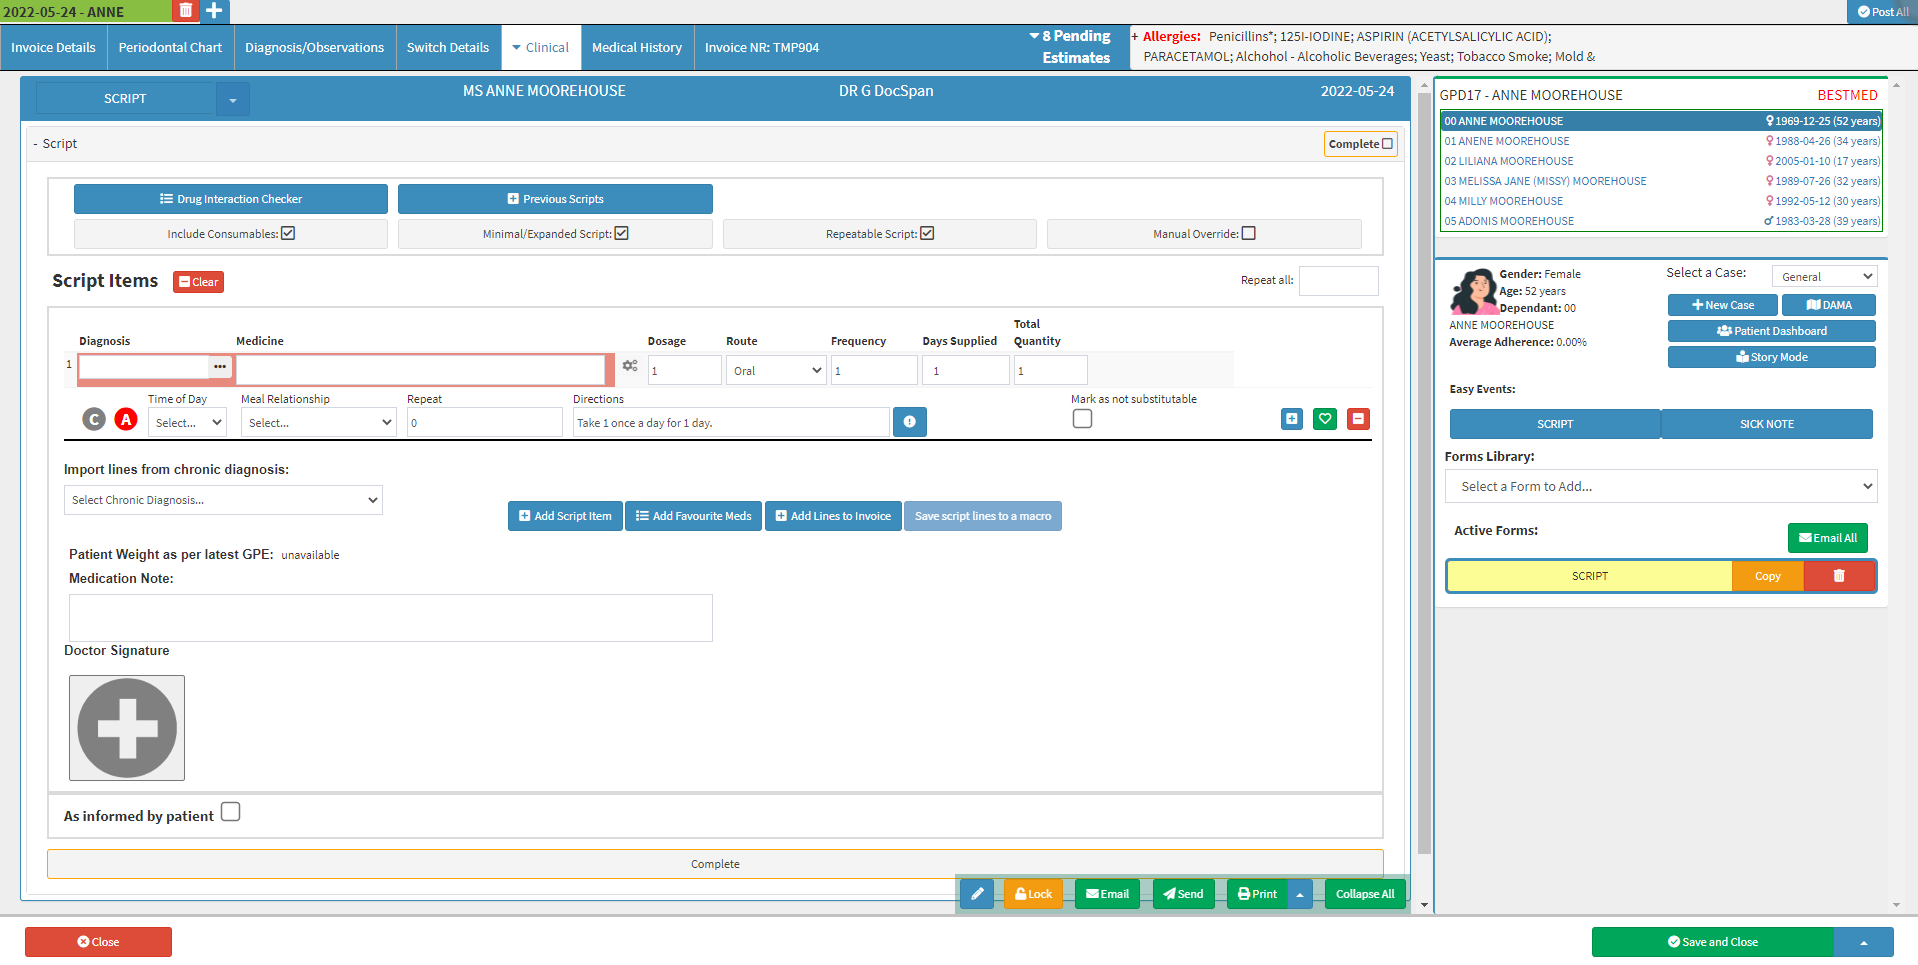
- The Script will be added to the Active Forms section in the side panel.

Forms Library
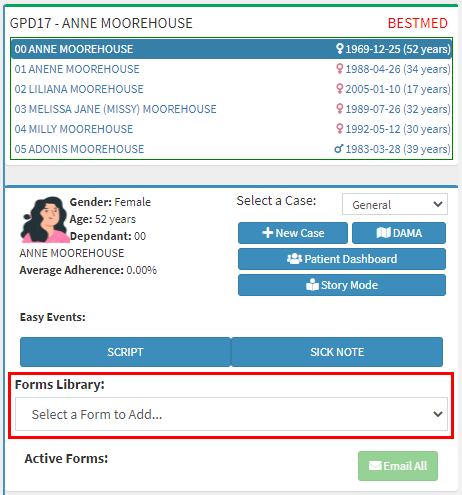
- Click on the Forms Library drop-down menu.
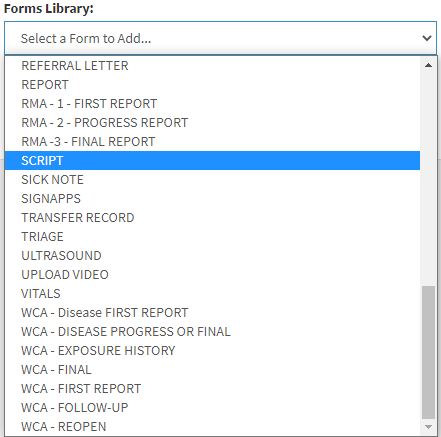
- Click on Script.
- The Script screen will open.
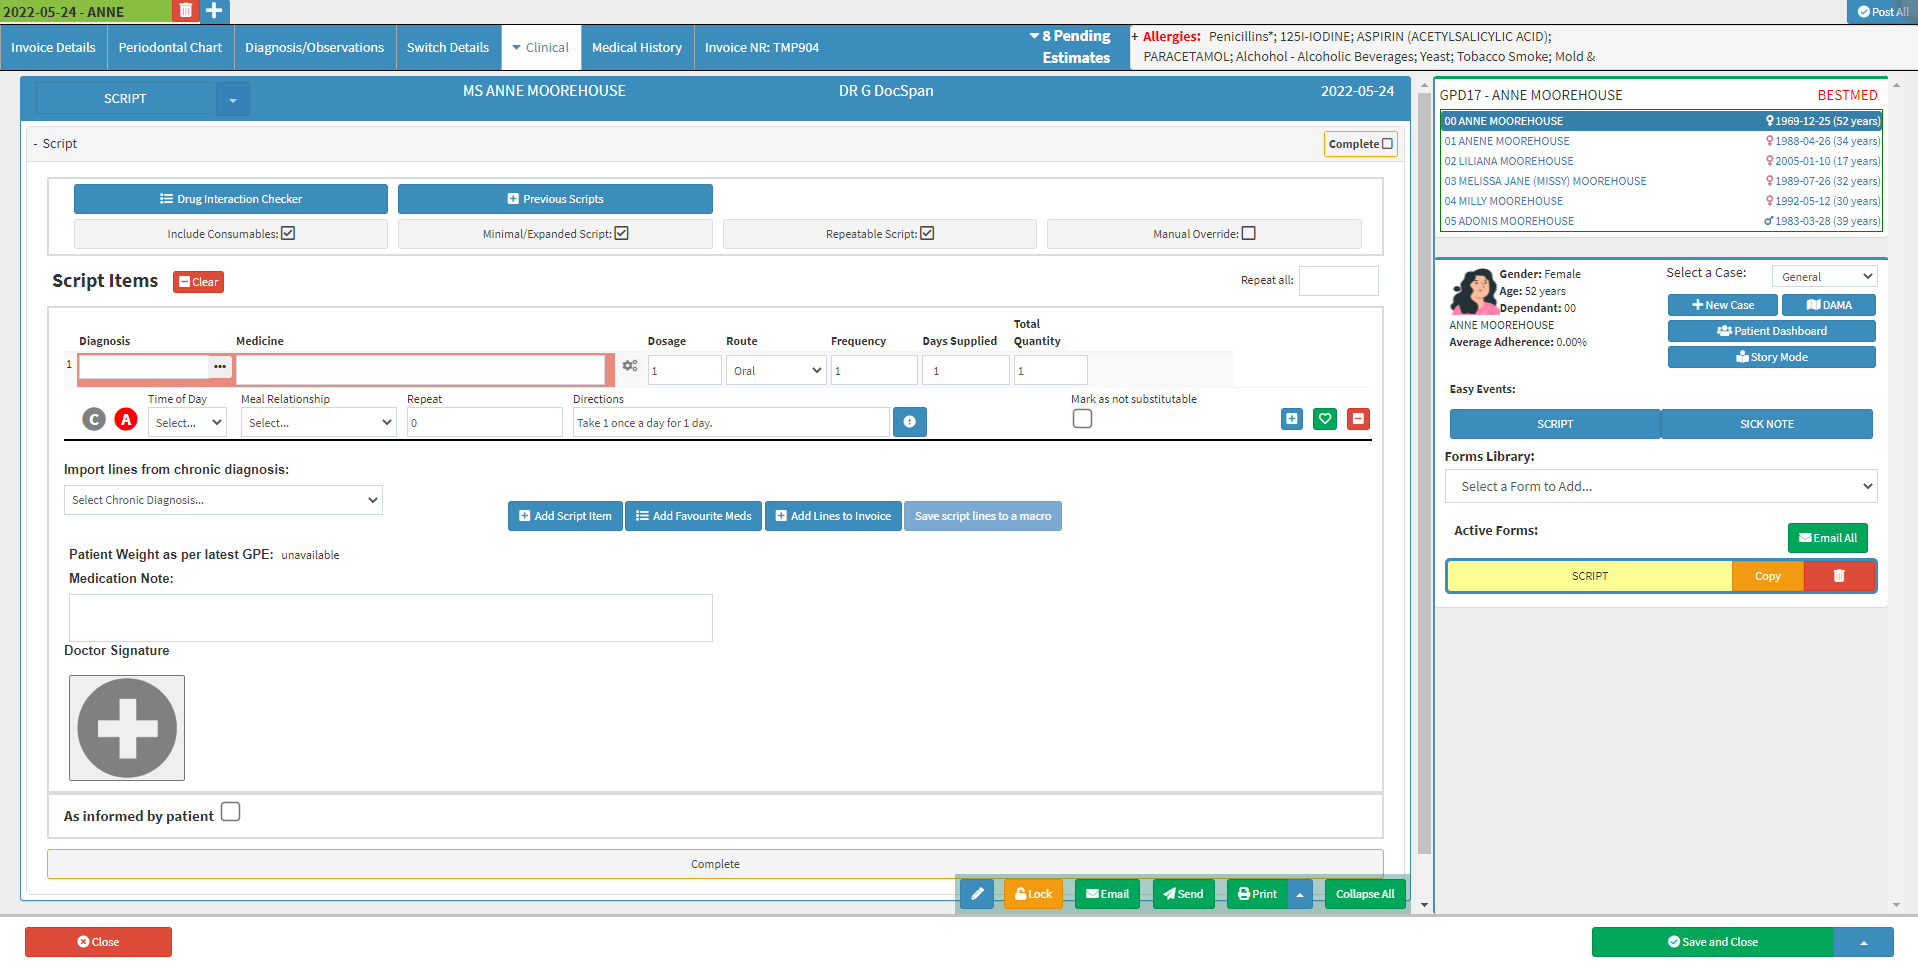
Please Note: The Script will be added to the Active Forms section in the side panel. Please see the explanation in the Easy Events section of this user manual.
Create New Script
Demonstrates to the Practitioner what options to select and the fields that need to be completed in order to create a new Script.
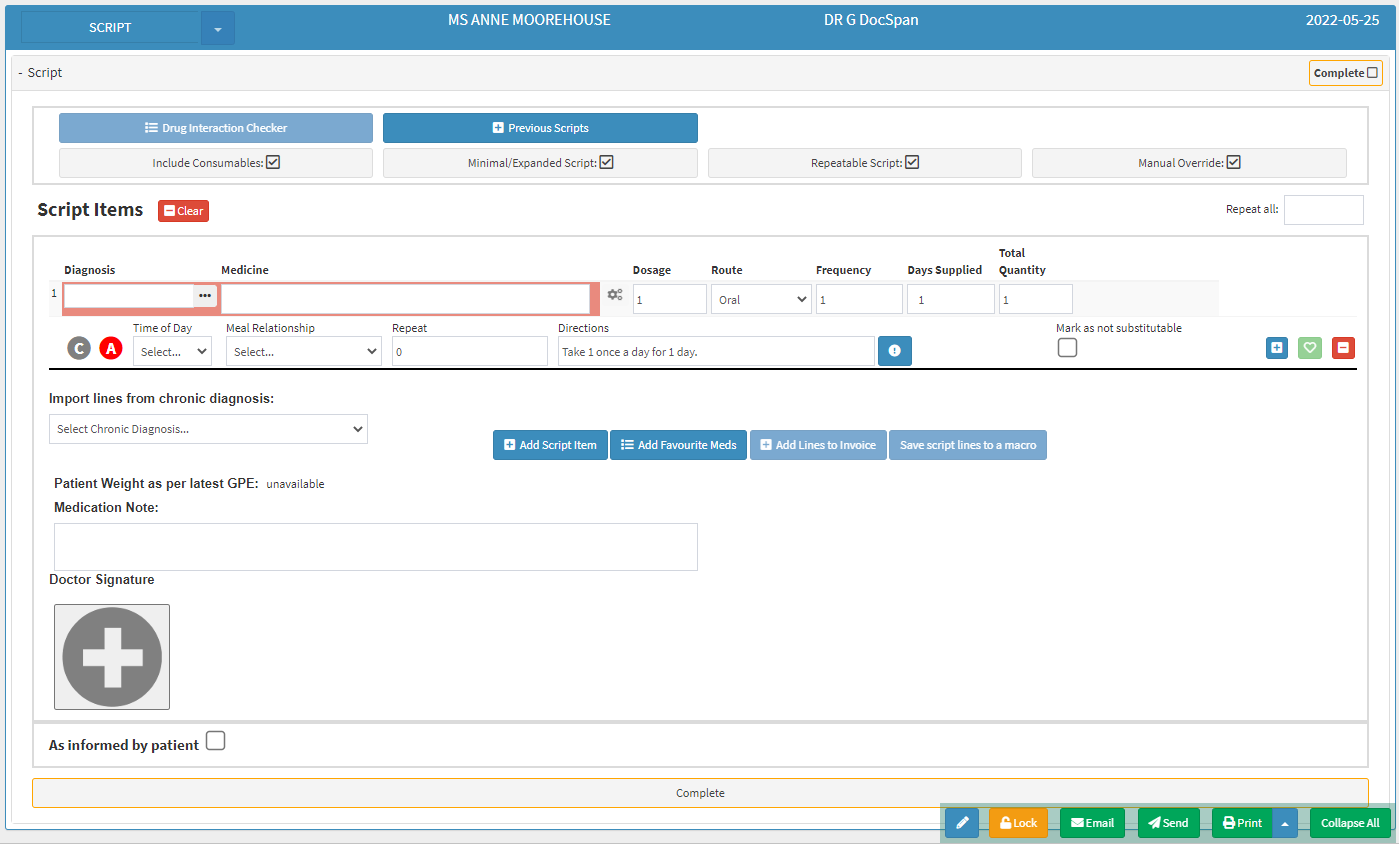
- An explanation will be given for each field that needs to be completed and every option that the Practitioner needs to select in order to create a Script:
Please Note: Fields that are highlighted in red are compulsory fields, the script can not be saved if these fields have not been completed.

- C: Chronic - An illness persisting for a period longer than 12 Months or constantly recurring is classified as a Chronic Condition.
- For more information on Chronic Scripts and how to create a Chronic Script, please refer to the user manual: Chronic Scripts.
- A: Acute - An Acute medical condition is severe and suddenly onset and can describe anything from a heart attack to a burn wound.
- By default, Acute will be selected and will automatically change to Chronic when an item is repeated for 6 months.
- Add the Diagnosis by entering the ICD-10 code or name of the Diagnosis in the Diagnosis field.
- Use the ... (ellipse) button to open the ICD-10 Builder screen to select a diagnosis code from the list.

- For more information regarding the ICD-10 Builder screen, please refer to the user manual: Procedure/Material/Medicine/Macro/ICD-10 Search Code Lookup.
- Add the item that will be prescribed by typing the name or item code of the medication in the Medicine field to add it to the line.

- A list will appear as the user types, from which the Practitioner is able to choose the medication that they would like to prescribe. The list will include the GMED or 0201 code, the Name of the item, the size of the pack, preferred quantity to prescribe, Nappi Code and SEP Price.

Please Note: The list of results will disappear if the user takes too long to make a selection.
Please Note: When a Practice does Stock Management and the item is out of stock or the Practice does not stock the item, they are still able to prescribe the items. The items will be highlighted in red, as they are marked as inactive on the system. Prescribing inactive/out-of-stock items will not affect stock levels within the Practice.

- Click on an item to add the desired item to the Script line.
- Add directions of how and when the prescribed item is to be used in the Directions field, the field can be used as a free text field.

- Users are now able to use the default Prescription Codes that have been set up in the Desktop App. Shortcodes allow Practitioners to create and use preset directions that are used most frequently to save time while creating the prescription.
- For more information on how to set up Prescription Codes in the Desktop App, please refer to the user manual: Prescription Codes.
- Type the shortcode of the signata that would like to be added to the item in the Directions field.

- The system will automatically generate the directions corresponding to the shortcode in the Directions field.

- Add the Total Quantity that will be prescribed.

- Add the number of times that the item will be repeated in the Repeat field.

- Tick the Mark as not substitutable checkbox to advise the pharmacist that they will not be allowed to substitute the item with a generic or similar product of another brand.

- Click on the + button to add another line to the Prescription.

- Click on the Green Heart button to add the line as a favourite item. Favourite items are set up so that the Practitioner is able to easily access items that they prefer to prescribe or prescribe on a regular basis.
- To use favourite codes while creating a Script, please refer to the user manual: Advanced Scripting & Generic Medicine.

- Click on the - button to delete the corresponding script line.

- Click on the Expand button to expand the Directions Builder.
- The line will expand and the Directions Builder will open.

- For more information regarding the Directions Builder, please refer to the user manual: Directions Builder.
- Completed script fields will look as follows:

- Add notes to the Script regarding the medications that have been prescribed by clicking on and typing in the Medication Note field.

- Add a Signature to the Script by clicking on the + button in the Doctor Signature section to add a signature to the Script.

- For more information on how to set up a default Doctor Signature, please refer to the user manual: How to Add a Doctor Signature.
- If left blank, the Practitioner is able to manually sign the prescription.

- As Informed by patient: Indicates that the Practitioner was advised by the Patient what medications they are using, generally used for chronic medications prescribed by other Practitioners.
- Click on the Complete button to complete the Script.
![]()
- The button will change to Completed and will be marked as Completed at the top of the screen.
- An explanation will be given for the additional options that are available for the Script.

- Add Signature: Allows the Practitioner to add an electronic signature to the Script.

- Lock: Will permanently lock the form for all users, making it will be impossible to edit it again and cannot be undone.

- Email: Allows the Practitioner to email the Script to the Patient, which will automatically mark the Script as Completed.
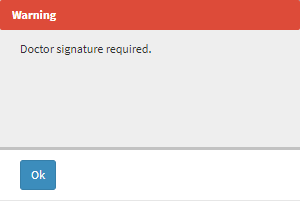
Please Note: It is mandatory to digitally sign a Script before emailing it to the Patient. The program will prevent the Script from opening the e-mail page until the Script has been electronically signed so that the Script is not sent unsigned to the Patient.
- A Warning will appear to advise that a Doctor signature is required.
- For more information regarding sending an email, please refer to the user manual: Email/Print Forms.
- Click on the Send button to send the prescription to the Dis-Chem Pharmacy of the Patients' choice.
- For more information on sending a Script to a Dis-Chem Pharmacy, please refer to the user manual: Dis-Chem Pharmacy Integration.
- Click on the Print button to open a preview to allow the Practitioner to print a hard copy of the Script and will automatically mark the Script as Completed.
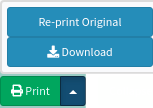
- Re-print Original: Allows the Practitioner to reprint the original Script. A watermark will appear to advise that it is a copy of the original when printed.
- Download: Downloads the current Script to the computer.
- Save and Close: Will save and close the Script and return to the main Diary screen and will automatically mark the Script as Completed.

- Save: Saves the content of the Prescription.
- Save Lines to New Macro: Allows the user to save all the lines on the Script as a Billing Macro in Billing Settings.
- For more information regarding Billing Settings, please refer to the user manual: Billing Settings.
- Click on the Close button to exit the Script without saving it.

Preview of Script that will be printed or emailed

Please Note: A QR code will appear on the Script (if set up), allowing the Pharmacist to validate the integrity of the Script, mark the items as dispensed, make sure of the authenticity of the document and prevent duplication so that Patients do not take the prescription to multiple pharmacies to be filled. For more information regarding how to activate QR codes on Scripts, please refer to the user manual: Entity Settings.
- For more scripting features please refer to the user manual: Advanced Scripting & Generics.