Patient File Screen Sidebar: Navigation and Use
Why Use This Function:
The Patient File sidebar is an extended panel on the right-hand side of the Patient File screen that provides quick access to additional functions and information related to the Patient’s Clinical History. It allows you to view and manage key clinical and administrative details without navigating away from the main Patient File, improving workflow efficiency and ensuring that important information is always easily accessible. This sidebar enhances clinical decision-making, supports accurate recordkeeping, and helps maintain a streamlined and organised Patient management process.
The Contents of This User Manual:
- Personal Information
- Sticker Button
- Patient Dashboard Button
- Smart Sticker Protocols
- Filter Events
- Expand All Clinical Notes
- Email All Visible Events
- Fax All Visible Events
- Medical History
- This user manual will start on the Patient File screen.
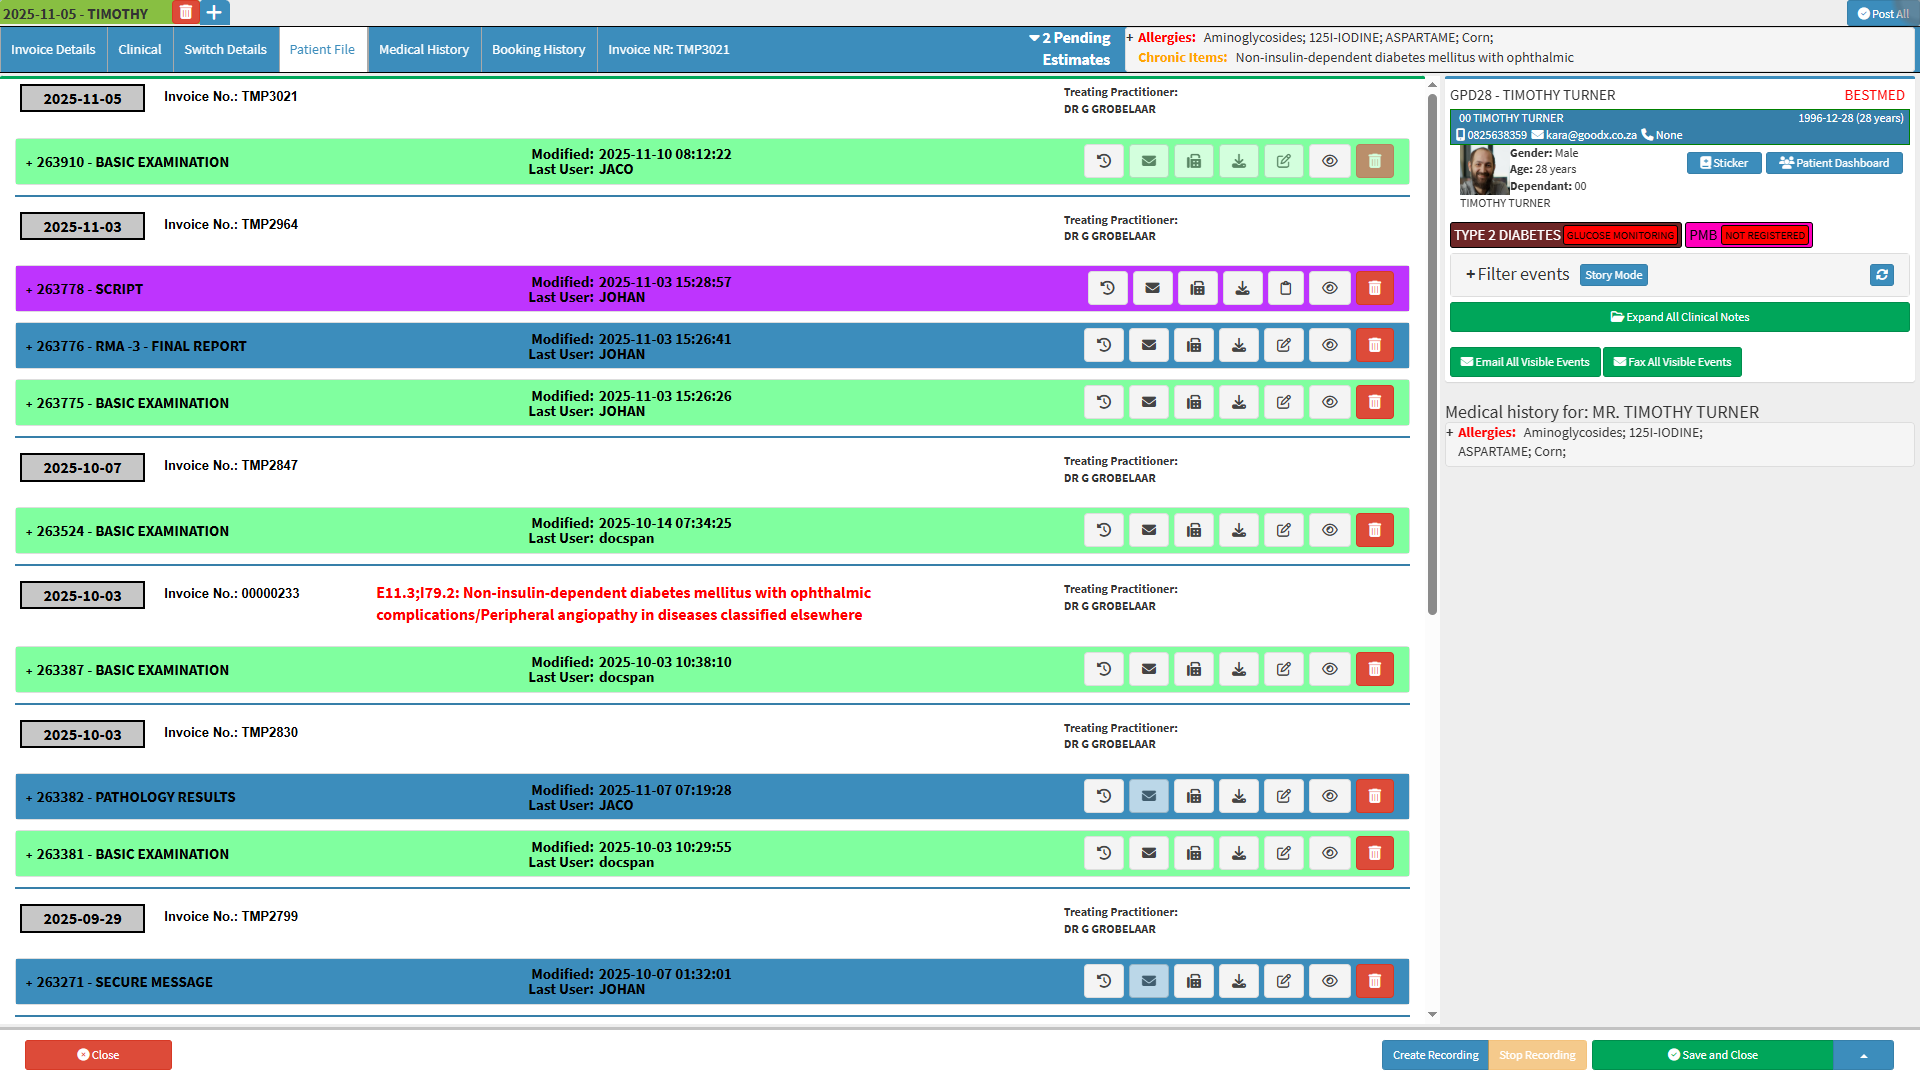
- For more information regarding the Patient File screen, please refer to the user manual: Patient File Screen: Navigation and Use
Personal Information
This section displays the demographic details of the Patient whose file is being accessed. It includes essential identifying information such as Debtor Number, Name, Surname, Medical Aid, Contact Details, Date of Birth, gender, etc. Maintaining accurate Personal Information ensures that all communication, billing, and clinical records are correctly linked to the right Patient, supporting accurate reporting and compliance with data protection standards.
- An explanation will be given for the information and options available:
- Debtor Number (GPD28): The system-generated Account Number of the Debtor.
- Debtor Name and Surname (TIMOTHY TURNER): The name and last name of the person who is responsible for the payment of the Account.
- Medical Aid (BESTMED): The Name of the company with whom the Debtor has Medical Aid or Insurance
- Date of Birth (1996-12-28): The Date (yyyy-mm-dd) the Patient was born.
- Cellphone Number (0825638359): The Cellphone Number of the Patient.
- Email Address kara@goodx.co.za: The Patient's Email Address.
- Home Number (None): A Landline Number where the Patient can be reached.
- Profile Picture: A photo by which the Patient can be identified.
- Gender (Male): The medical-related Gender of the Patient.
- Age (27 years): The current Age in years to indicate how old the Patient is.
- Dependant (00): A Number allocated to the Patient, for Patients who have Medical Aid, which will correspond to the Dependant Number, on the Medical Aid policy.
Sticker Button
View the Smart Sticker Protocols that the Patient has already been registered for and add the Patient to a New Smart Sticker protocol.
- Click on the Sticker button to view or update the Protocol.
![]()
- The Link Smart Sticker Protocol to Patient screen will open.
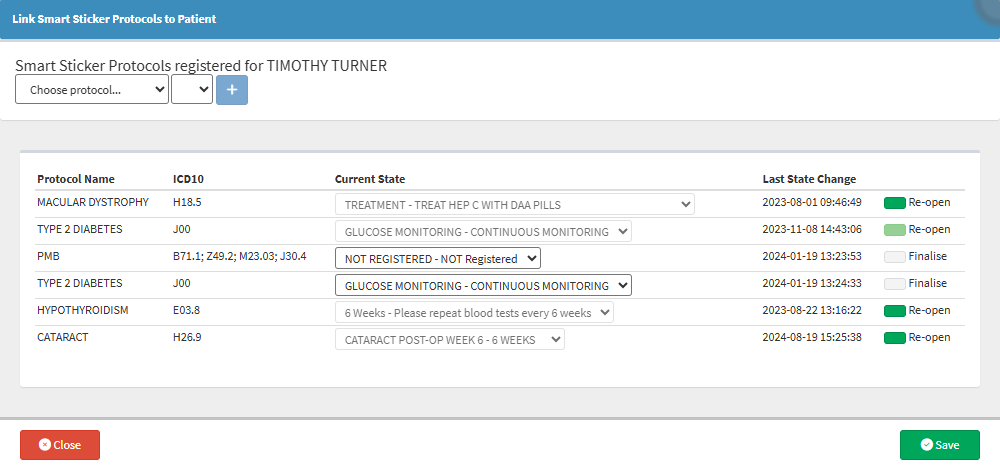
- For more information regarding the Link Smart Sticker Protocols to Patient screen, please refer to the user manual: Add a Smart Sticker Protocol to a Patient.
Patient Dashboard Button
An overview of the Patient's details and their past Clinical Data, starting from their initial visit to the Practice.- Click on the Patient Dashboard button.
![]()
- The Patient Dashboard will open.
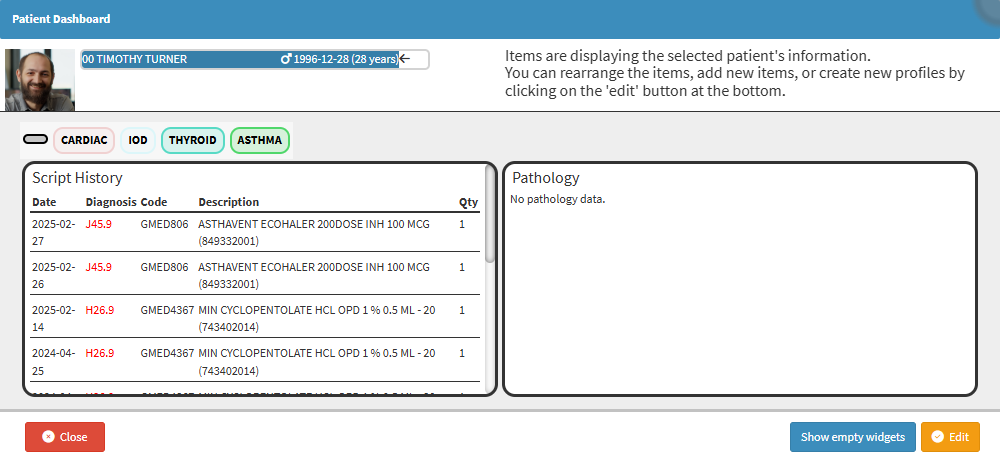
- For more information regarding the Patient Dashboard, please refer to the user manual: The Patient Dashboard.
Smart Sticker Protocols
A visual indication of the Smart Sticker Protocols that the Patient is currently registered for.Filter Events
Allows you to change the view of the Patient File screen and filter the information to be displayed.
- Click on the Filter Events panel.
![]()
- The Filter Events panel will expand.
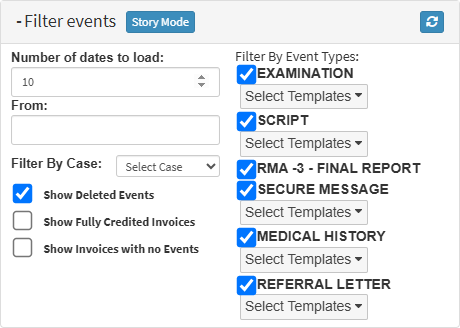
- For more information regarding how to use the Filter Events panel, please refer to the user manual: How to Use Story Mode.
Expand All Clinical Notes
This option will expand all Clinical Events in the Patient File screen, displaying full details for each event at once. This is useful when you want to see all information without opening each Clinical Event individually.
- Click on the Expand All Clinical Notes button.
![]()
- The Clinical Notes of all the Clinical Events will expand.
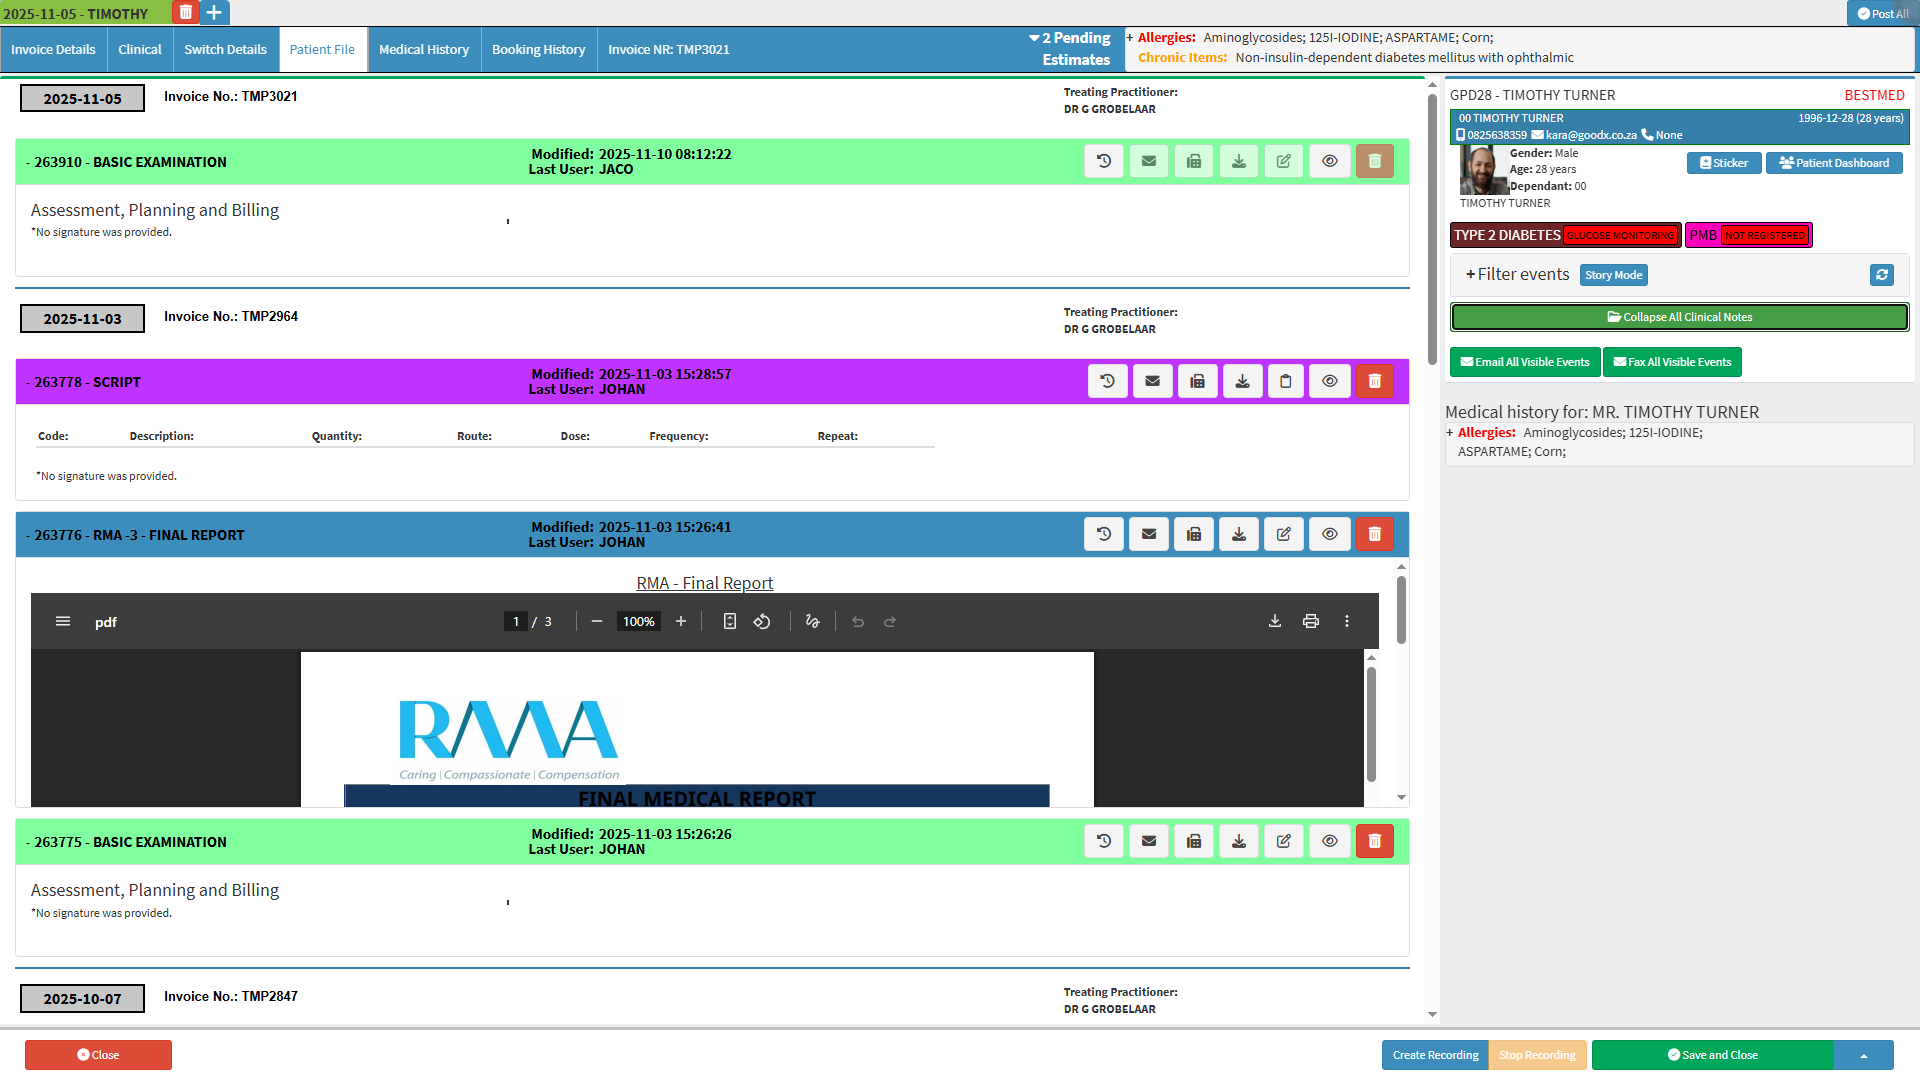
Click on the Collapse All Clinical Notes button to collapse all Clinical Notes back to their original, compact view.
![]()
Email All Visible Events
Send all currently visible Clinical Events in the Patient File screen via email. Only the events that are displayed based on your current filters or view settings will be included. This allows you to quickly share multiple Clinical Events without having to email them individually.
- Click on the Email All Visible Events button.
![]()
- The Email - Add/Edit Workflow Event screen will open with all the visible Clinical Events as Attachments.
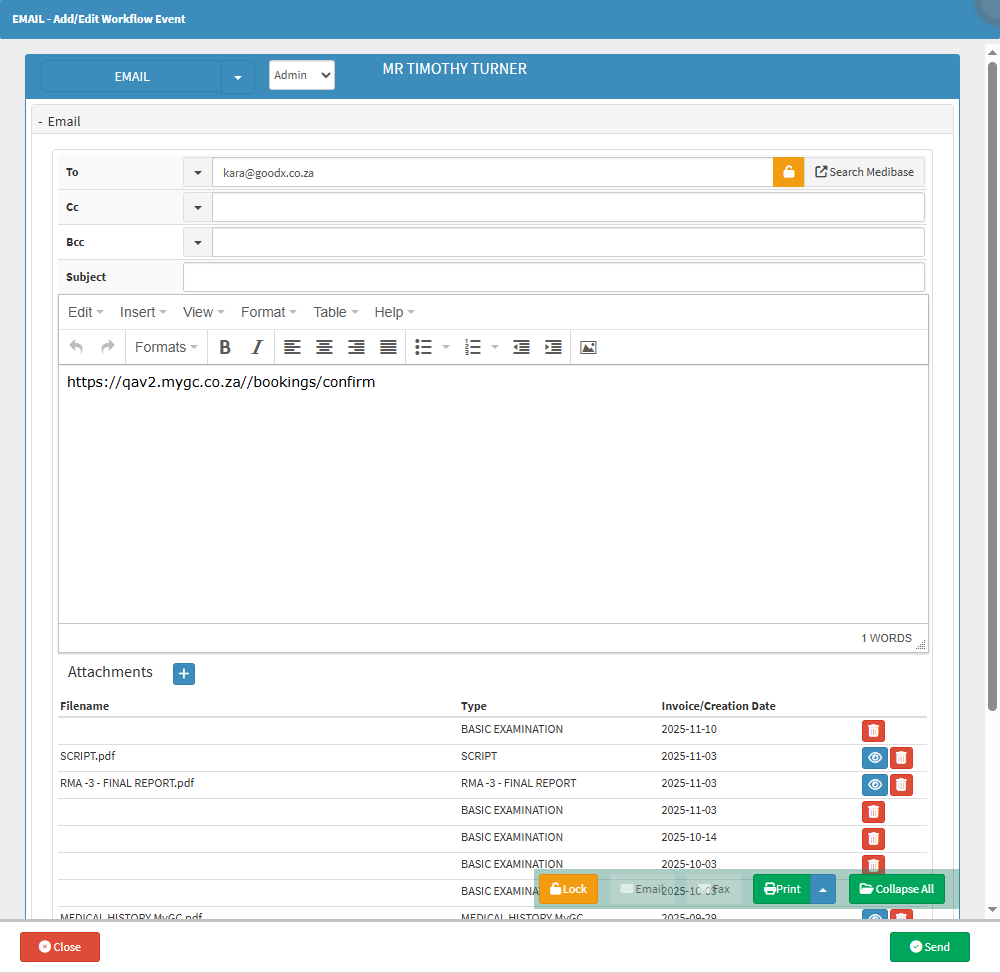
- For more information regarding the Email - Add/Edit Workflow Event screen, please refer to the user manual: Send an Email.
Fax All Visible Events
You can use this option to fax all currently visible Clinical Events in the Patient File screen. Only the events displayed based on your current filters or view settings will be sent. This allows you to quickly fax multiple Clinical Events at once without sending them individually.
- Click on the Fax All Visible Events button.
![]()
- The Fax - Add/Edit Workflow Event screen will open with all the visible Clinical Events as Pages.
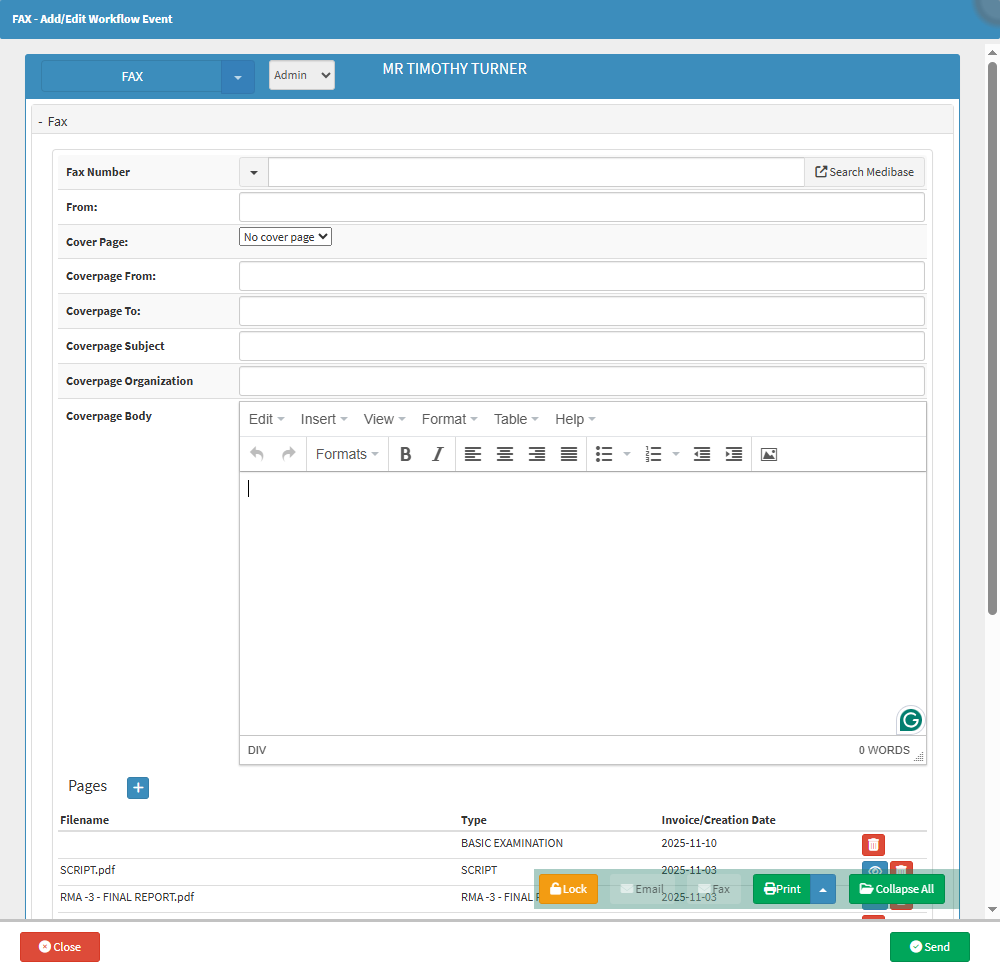
- For more information regarding the Fax - Add/Edit Workflow Event screen, please refer to the user manual: How to Send a Fax from a Clinical Form.
Medical History
A comprehensive record of a Patient's past Health Conditions, Illnesses, Surgeries, Treatments, Medications, Allergies, and Family Medical History. It provides essential information to understand the Patient's health status, identify potential risk factors, and provide appropriate medical care.
- Click on the Allergies panel.
![]()
- The Medical History panel will expand.
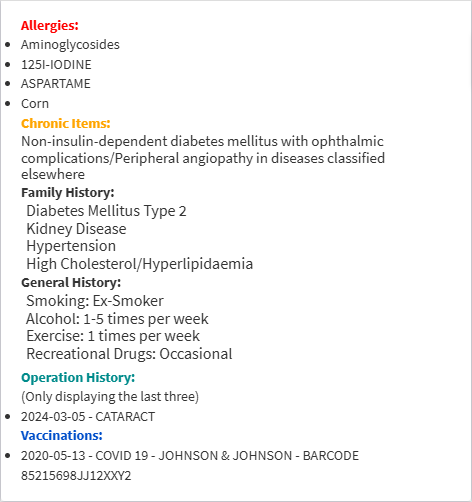
- For more information regarding the Medical History tab, please refer to the user manual: Clinical Screen: Navigation and Use.
- Click on the Save and Close up arrow button for more saving options.
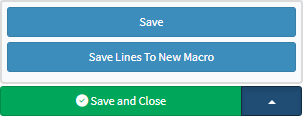
- Save: Saves the changes that have been made without closing the screen.
- Save Lines To New Macro: Allows you to create a new Macro.
- Click on the Save and Close button to save any changes made and return to the previous screen.
![]()