Authorisation Setup
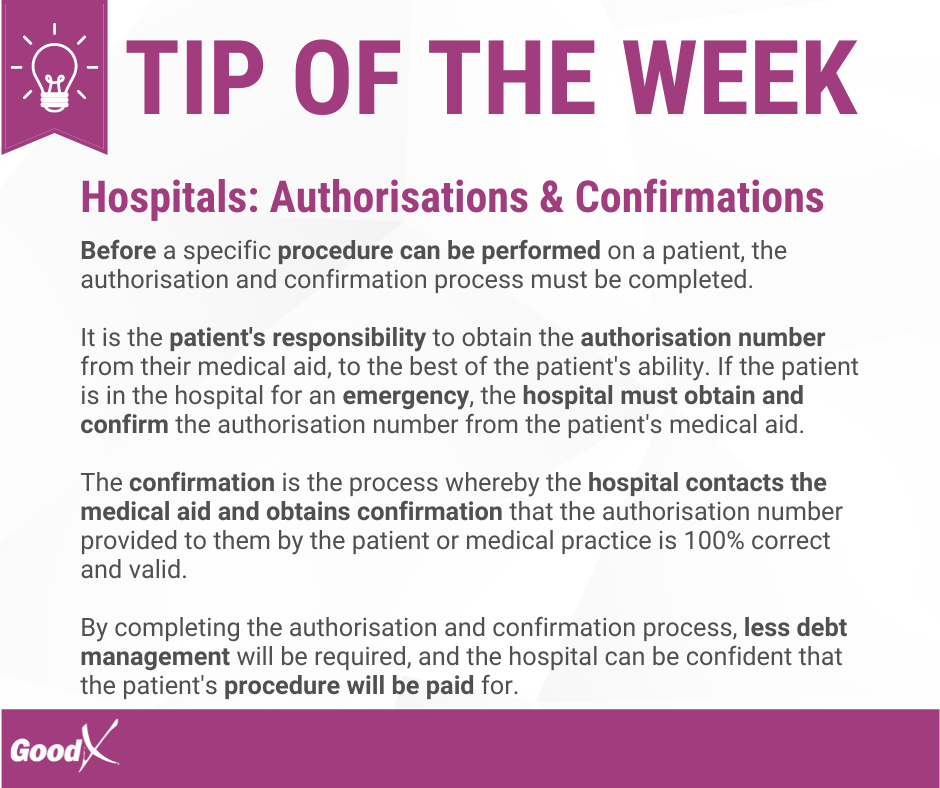
An Authorisation is a process that gives permission for a certain treatment or procedure that must be done on the patient.
The treatment or procedure must first be approved before a treatment or procedure can be started for a Medical aid patient.
The Medical aid must be contacted and arrangements must be made. An authorisation number will be given, and this number must be included when the claim is submitted to the medical aid.
- Log in to the GoodX Web App with your GoodX username and password.
- The GoodX Diary main screen will open
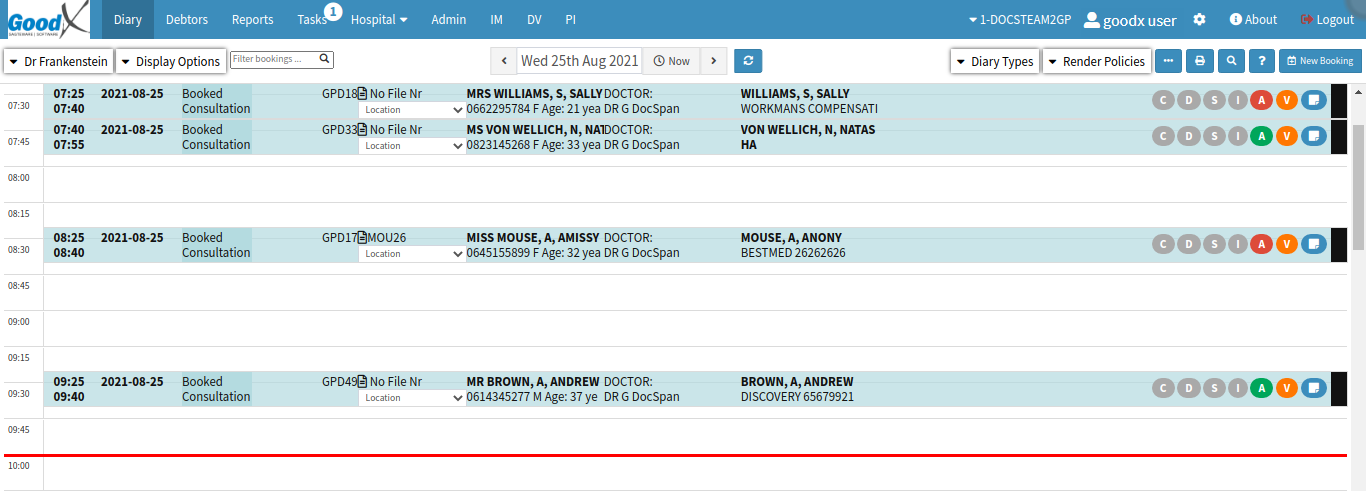
- Click on the Debtors tab.
![]()
- The Debtors screen will open.

- Click on the Search for a Debtor field to search for the desired by Name, ID, Medical Aid number, Debtor number, or file number. The list will shorten as the user types.
- Or Click on the Ellipse (...) button to open the Debtor Search screen.
- Click on the desired debtor to select it.

- The debtor sidebar will open.

- Click on the Debtor Edit button.
- The Debtor Details screen will open.
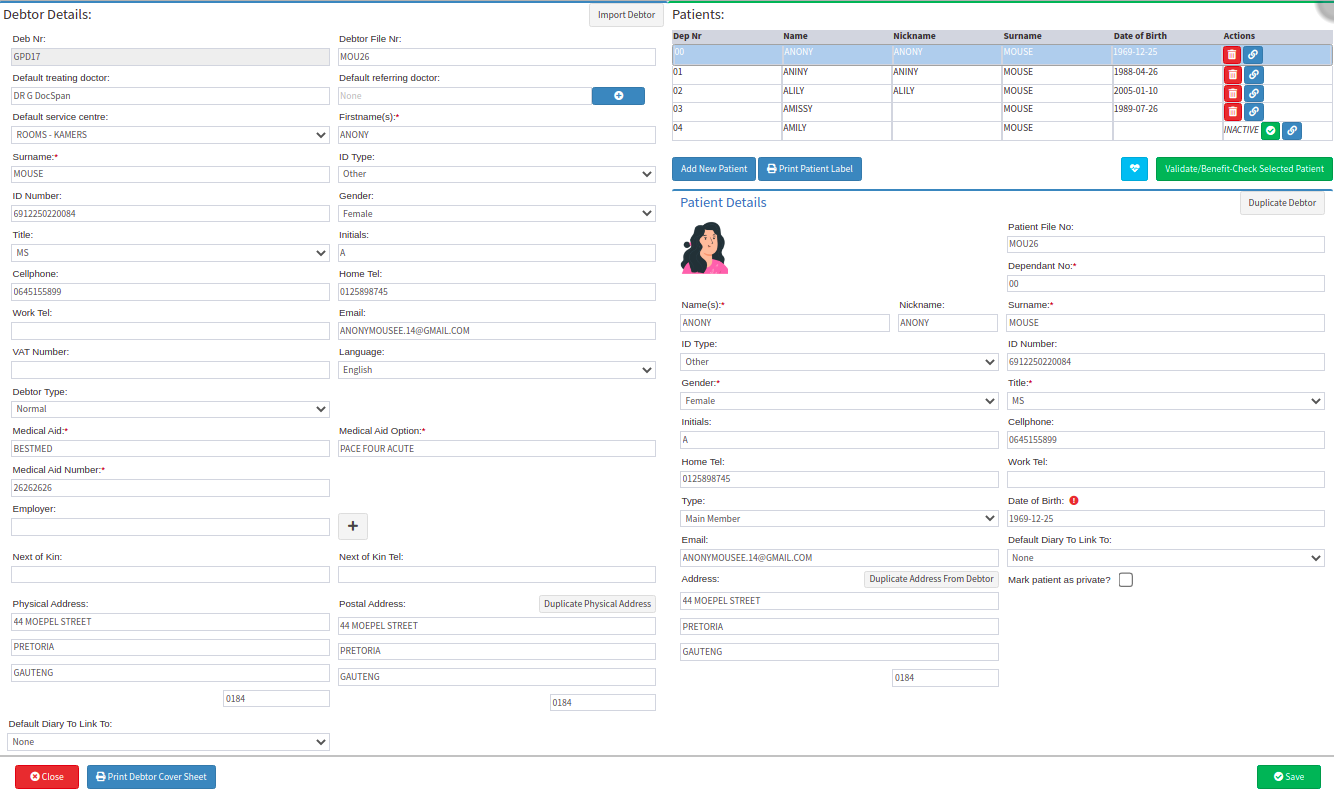
- Click on the Blue heart button.
- It is possible to hover over the button to see the function description. An Add Authorisation indication will appear.

- The Clinical Info Screen will open.

- Select a patient by clicking on them in the patient section, the selected patient will be indicated by a blue arrow.

- Click on the Add button to add a new Authorisation to the selected patient.
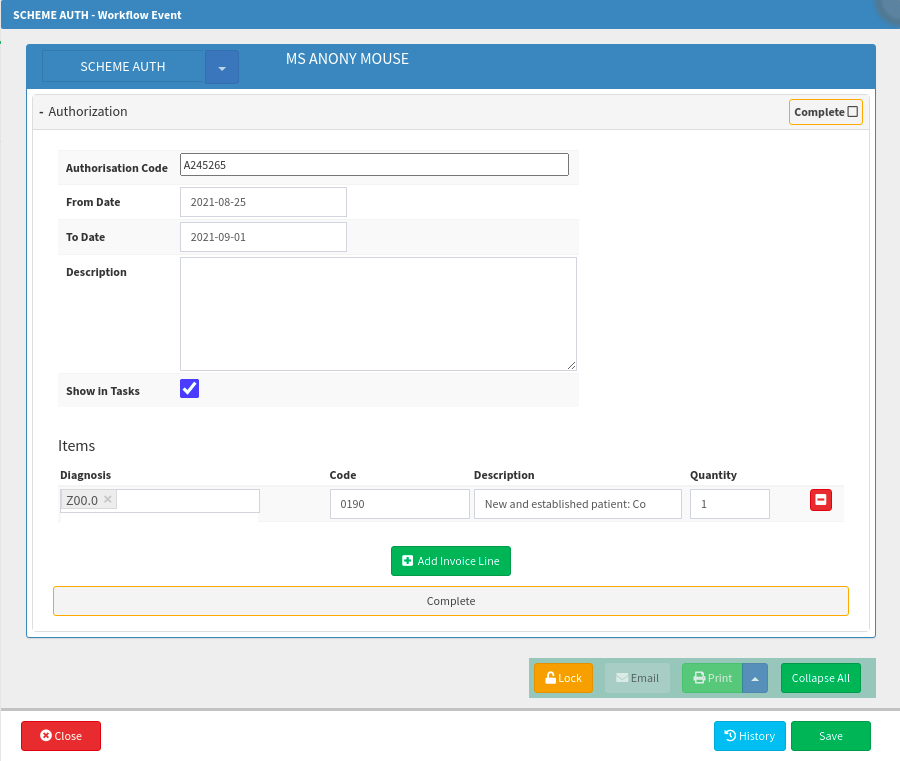
- The SCHEME AUTH - Workflow Event screen will open.
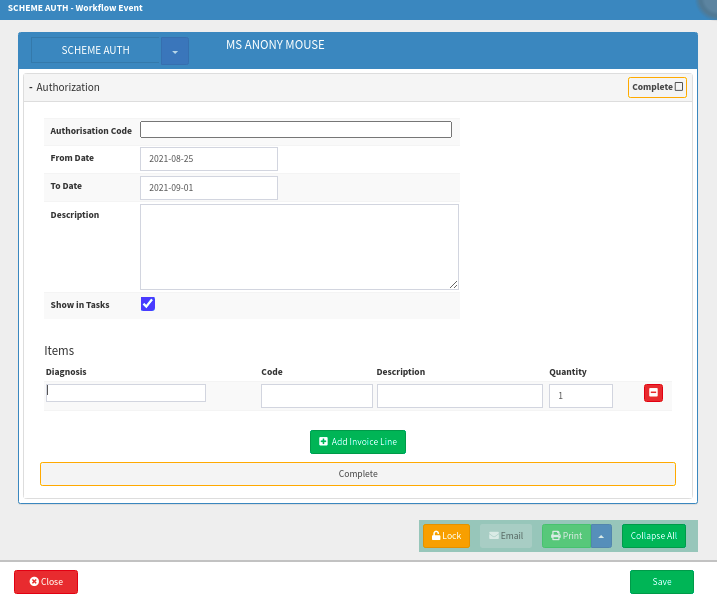
- An explanation of each field that needs to be completed will be given:

- Authorisation Code: The number received from the medical aid to approve certain procedures and treatments. This is a text field.

- From Date: The date from when the authorisation will start. This will be automatically set to today's date.
- Click on the From Date field to open the calendar to select the date from when the authorisation will start.
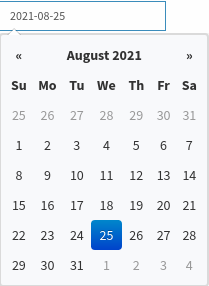
- Click on a date to select it.

- To Date: The date to when the authorisation will be valid. This will automatically be set to 7 days from the From Date.
- Click on the To Date field to open the calendar to select the date to when the authorisation will be valid.

- Click on a date to select it.

- Description: Any additional details relating to the authorisation, this is a free text field that can be filled in.

- Show in Tasks: Allows the user to select that the authorisation will be created as a new task.
- Tick the checkbox to activate that the authorisation will show in tasks.
- For more information on how tasks work, please refer to the user manual: Task Lists.

- Items: A list of Procedures, Treatments, Medicine and Materials that authorisation has been given for.

- Diagnosis: The ICD-10 diagnosis code that is associated with the line item.
- Click on the Diagnosis field to input the diagnosis code, the list will shorten as the user types.
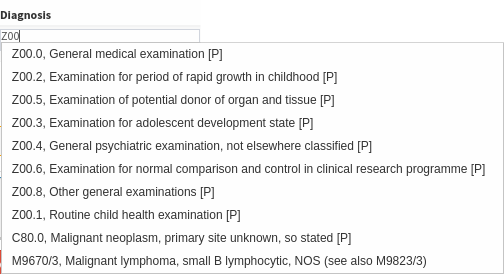
- Click on the desired option from the list to select it.

- Code: The billing code that has been authorised by the medical aid.
- Click on the Code field to input the billing code. The list will shorten as the user types.
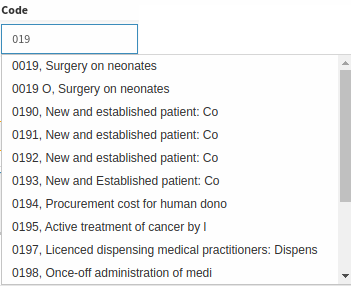
- Click on the desired option from the list to select it.

- Description: The system will automatically input the billing code description that is associated with the billing code in the description field.

- Quantity: The number of the specific billing item that has been authorised. This is a numeric field.
- Click on the - button to remove the corresponding line.
![]()
- Click on the Add Invoice Line button to add a new invoice line.
- Click on Close to close the screen without saving the information that was added. The screen will close and return to the Clinical Information Screen.

- Click on Save to save the information. The screen will close and return to the Clinical Information Screen.

- The Authorisation that has just been saved will appear in the Previous Authorisations section.

- Click on View to see the details and Edit a selected Authorisation.

- The SCHEME AUTH - Workflow Event screen will open to View and Edit the selected Authorisation entry.
- Click on Close to close the screen after it was viewed. The screen will close and return to the Clinical Information Screen.

- Click on Save to save the information if any of the details have been changed. The screen will close and return to the Clinical Information Screen.

- Click on Close on the Clinical Info Screen, the screen will close and return to the Diary Screen.

Last modified: Wednesday, 19 July 2023, 8:32 AM