How to Add New Dependants (Patients)
Why Use This Function:
All Patients will need to be added as Dependants on a Debtor's file. The Debtor who is responsible for payment of the Account can add as many Dependants as necessary, for example, their wife/husband, child or grandparent. If the Debtor is a member of a Medical Aid, all added Dependants are automatically listed as Medical Aid Patients. If one or more of the Dependants are not listed on the Medical Aid card, they must be marked as a Private Dependant.
💡Please Note: To Add a New Dependant, a Debtor will need to exist or a Debtor will need to be created. For more information on how to create a new Debtor, please refer to the user manual: Create New Debtor.
The Contents of This User Manual:
- Add New Patient
- Patient Details
- Gap Cover
- Validate/Benefit Check
- Authorisation
- Print Patient Label
- This user manual will start on the Diary screen.
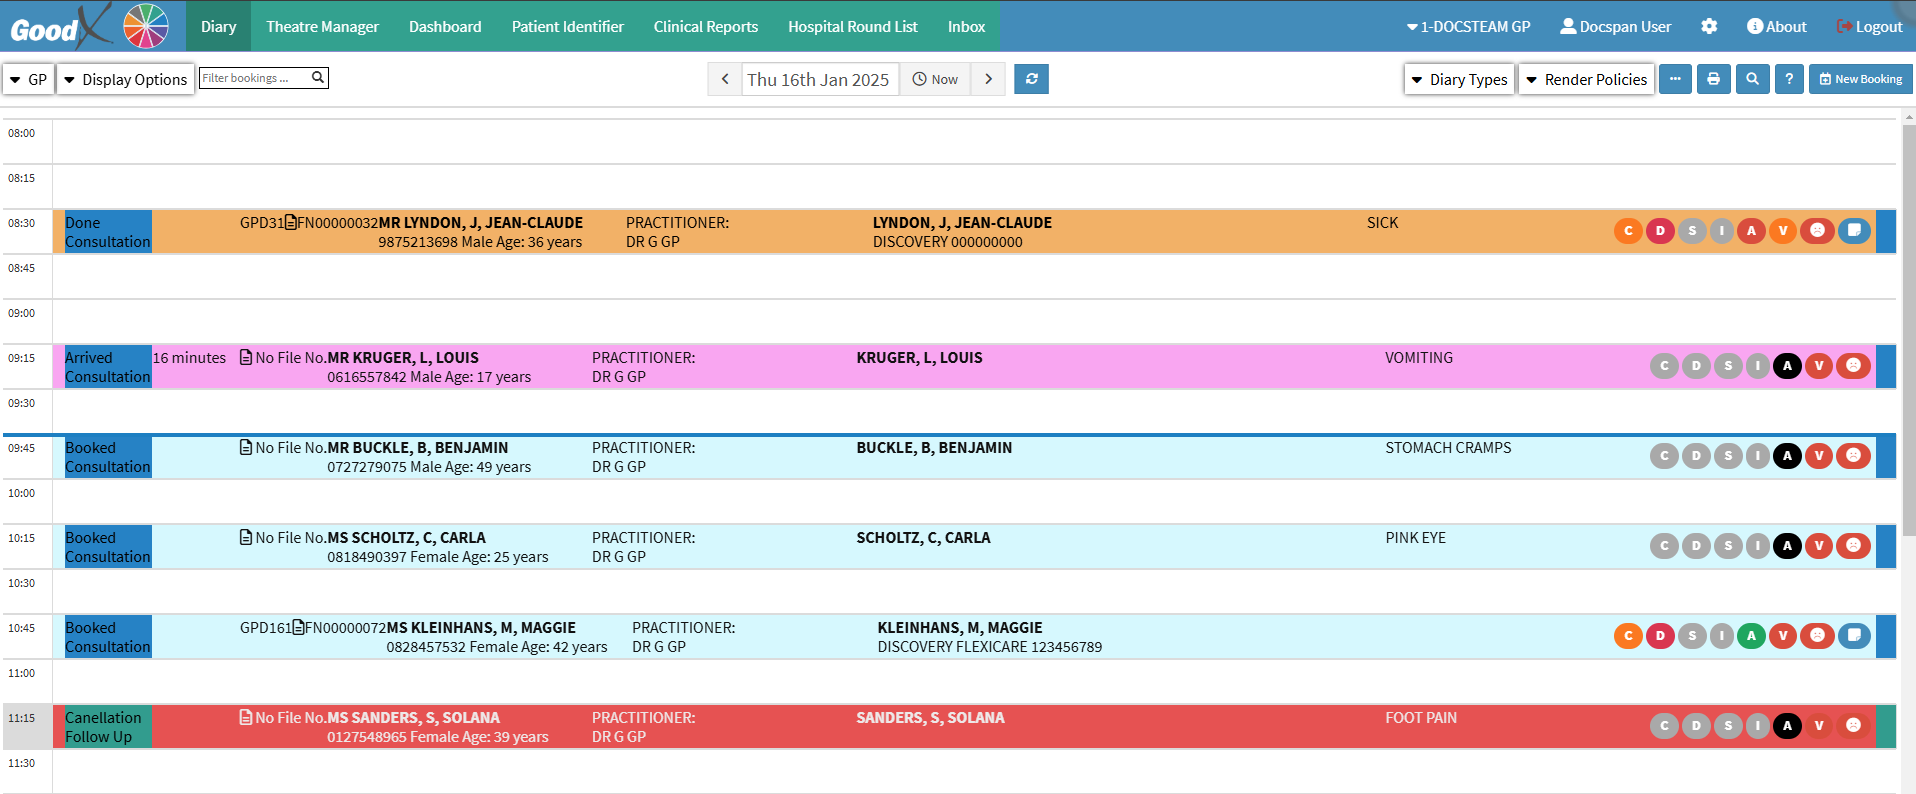
- The Add New Dependants function is accessible from two access points:
- A Diary Booking
- The Debtors Tab
From a Diary Booking
- Click on the desired Booking for whom you would like to add a new Dependant.
- The Diary sidebar will open.
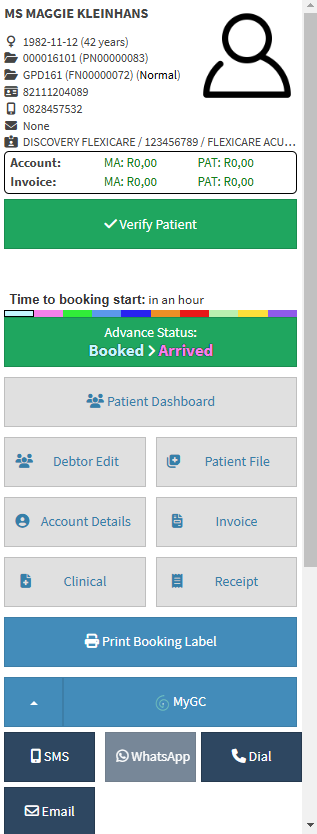
- Click on the Debtor Edit button.

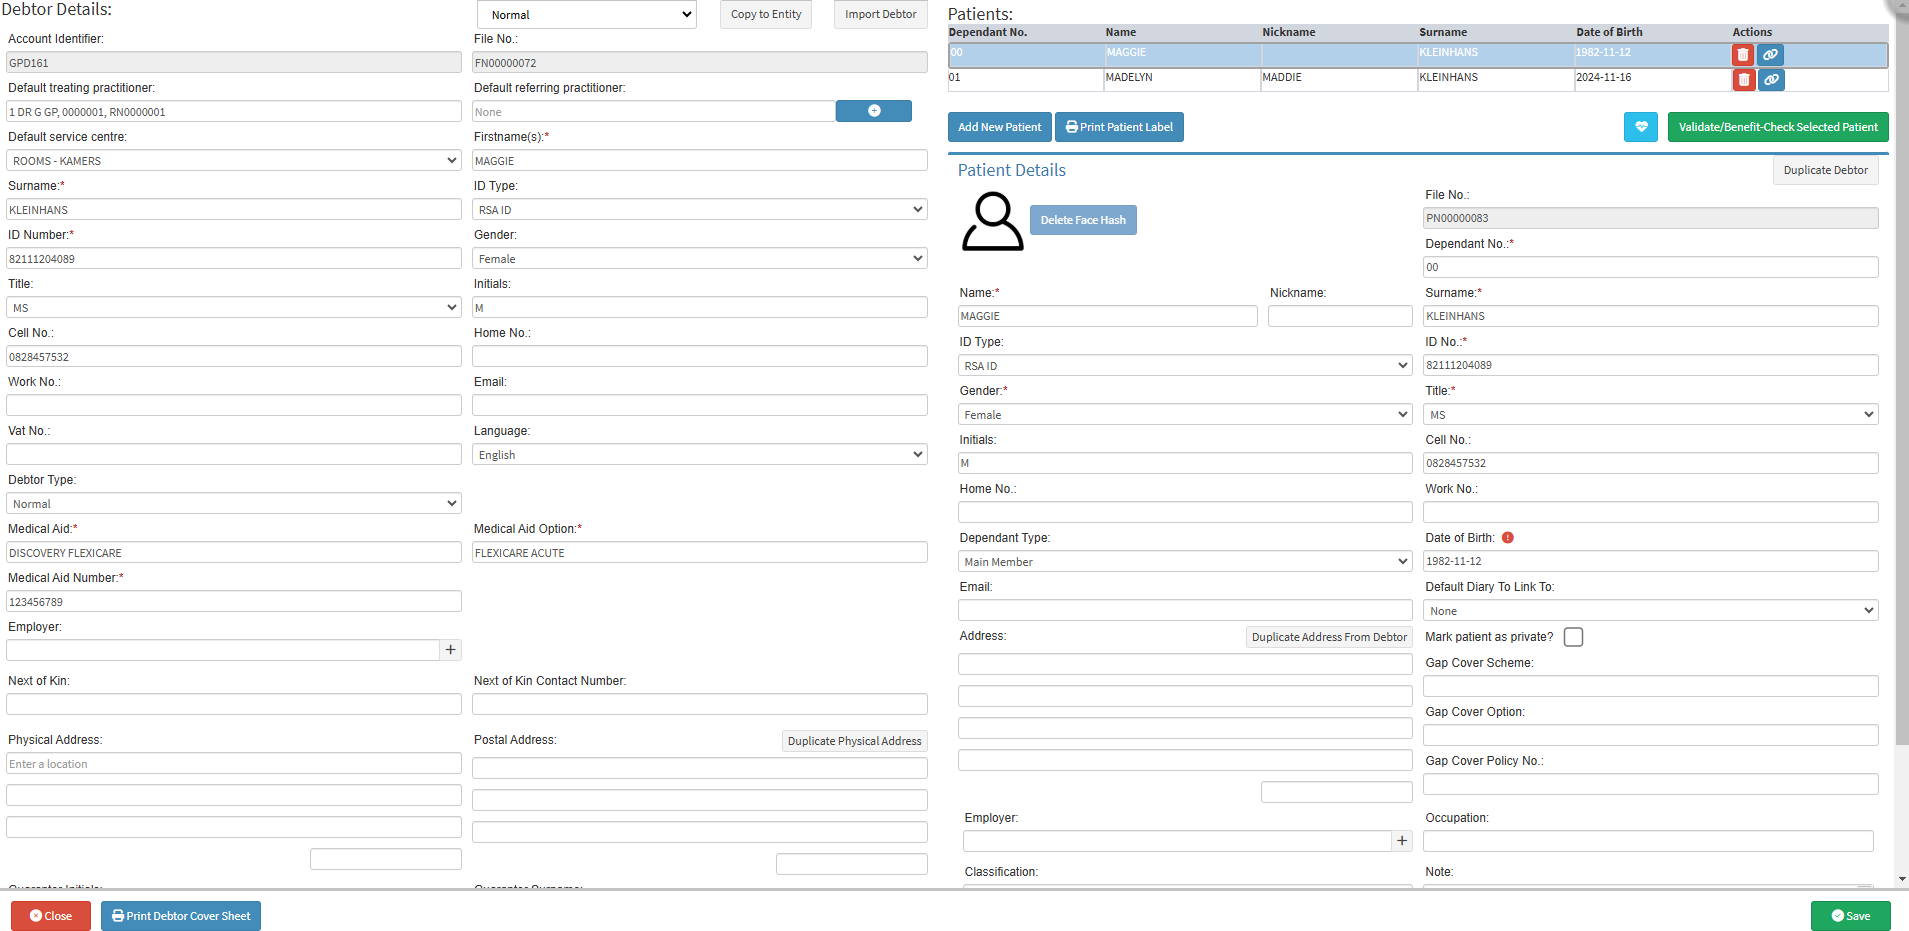
- The Debtor Edit screen will open.
From the Debtors Tab
- Click on the Navigation Wheel on the Navigation Bar.

- The Navigation Wheel will open.
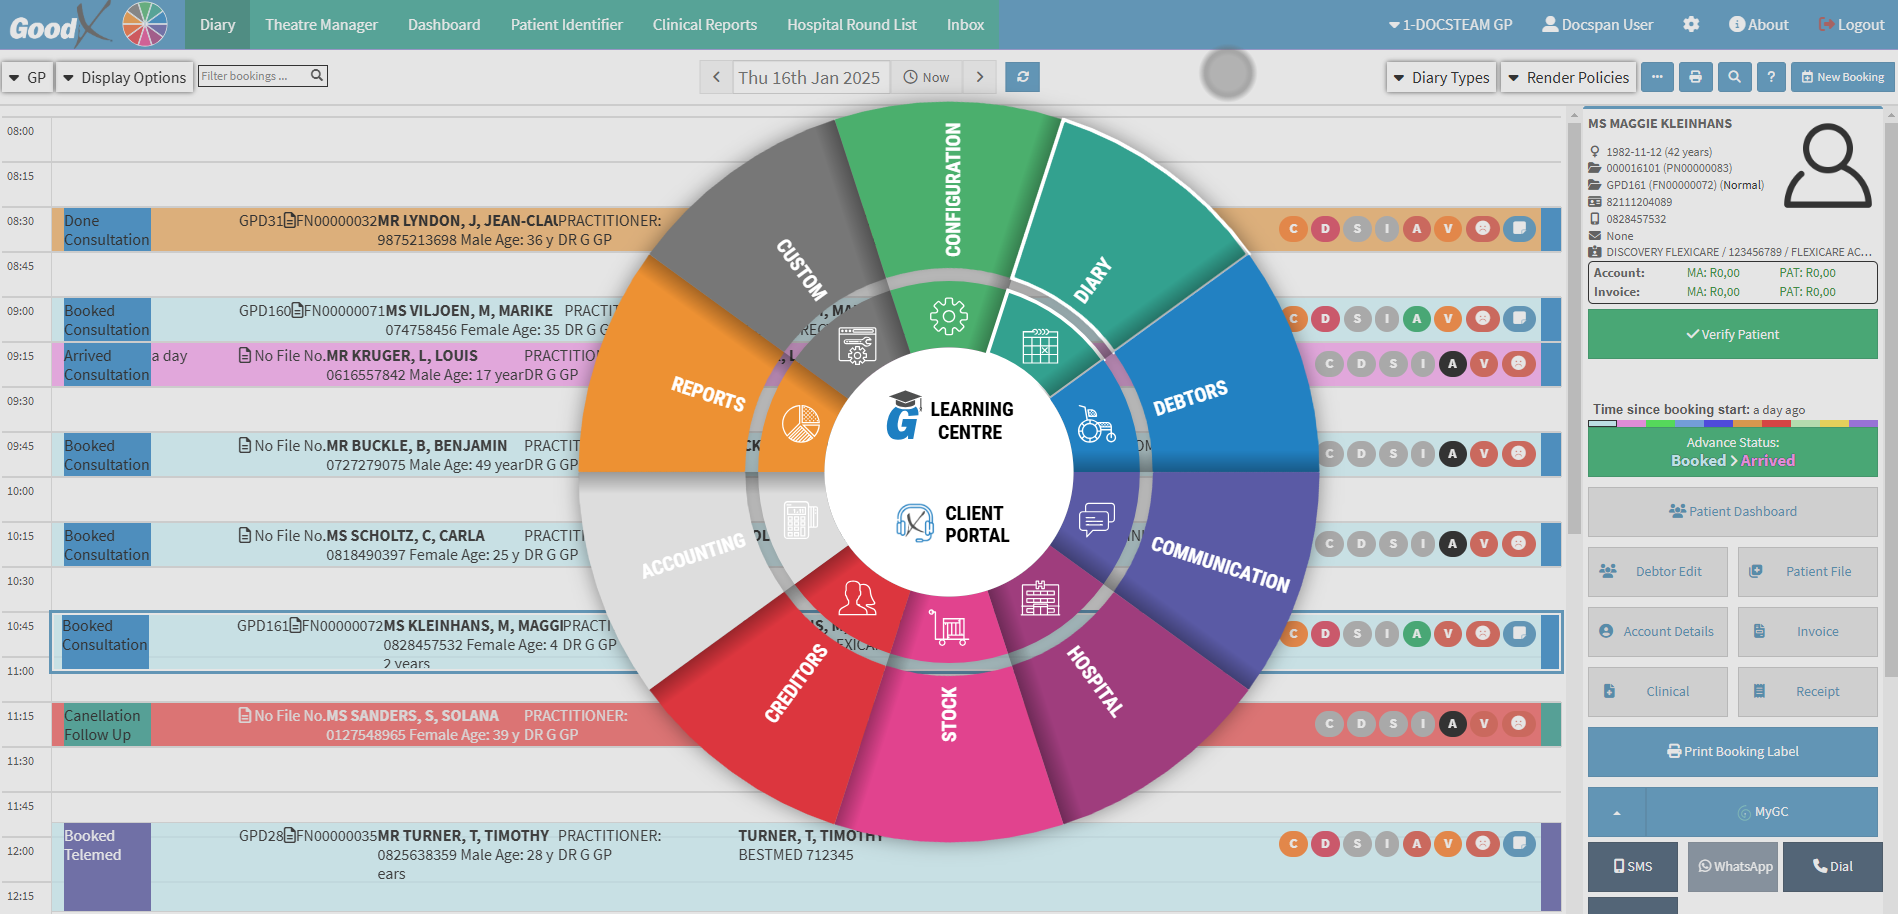
- Click on the Debtors segment.

- The Debtors screen will open.
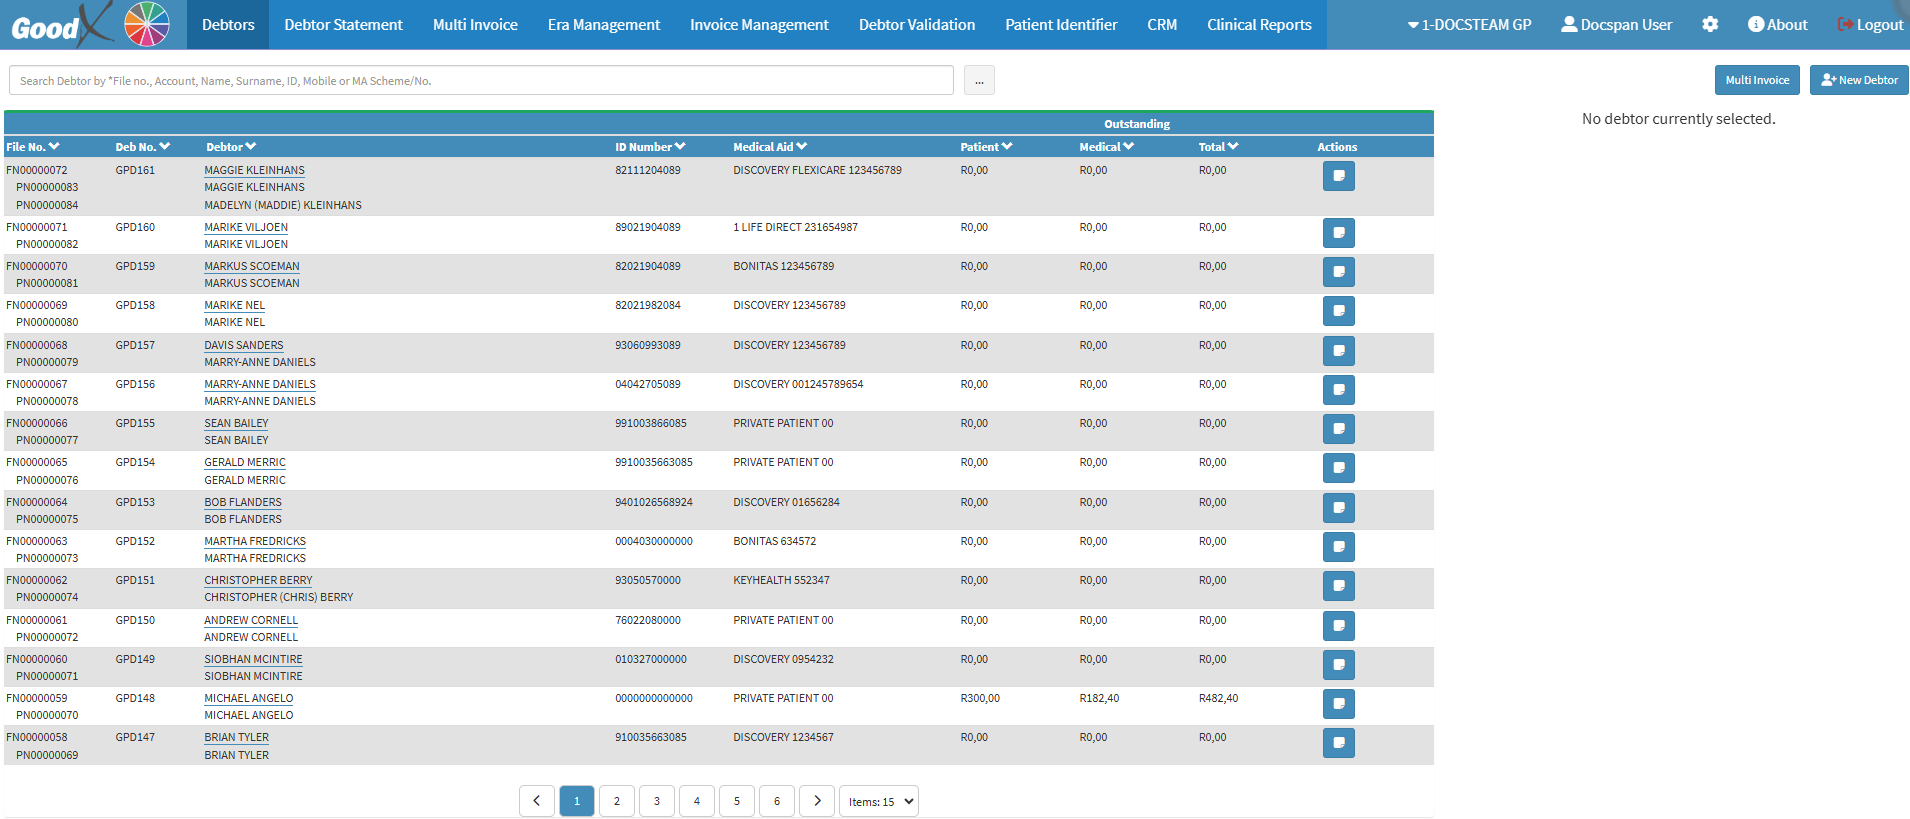
- For more information on how the Debtor List screen works, please refer to the user manual: Navigating the Debtor Screen.
- Click on the Search bar to enter the information of the Debtor for whom you would like to add Dependants. You will only need to type one character for the list to start shortening to the desired results.
- For more information on how to search on the Debtors screen, please refer to the user manual: Debtor Search.
- Click on the desired Debtor.

- The Debtor sidebar will open.
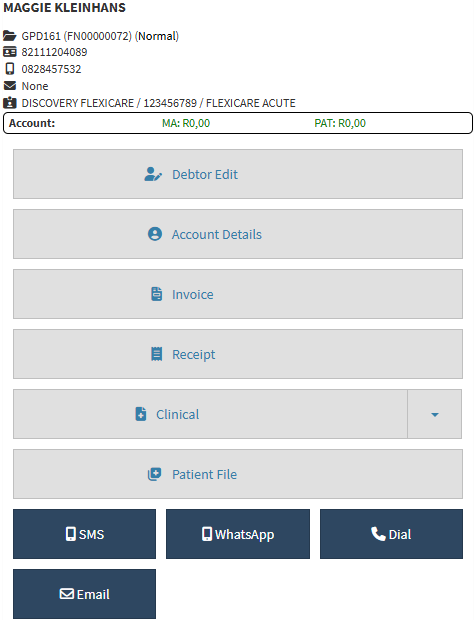
- Click on the Debtor Edit button.

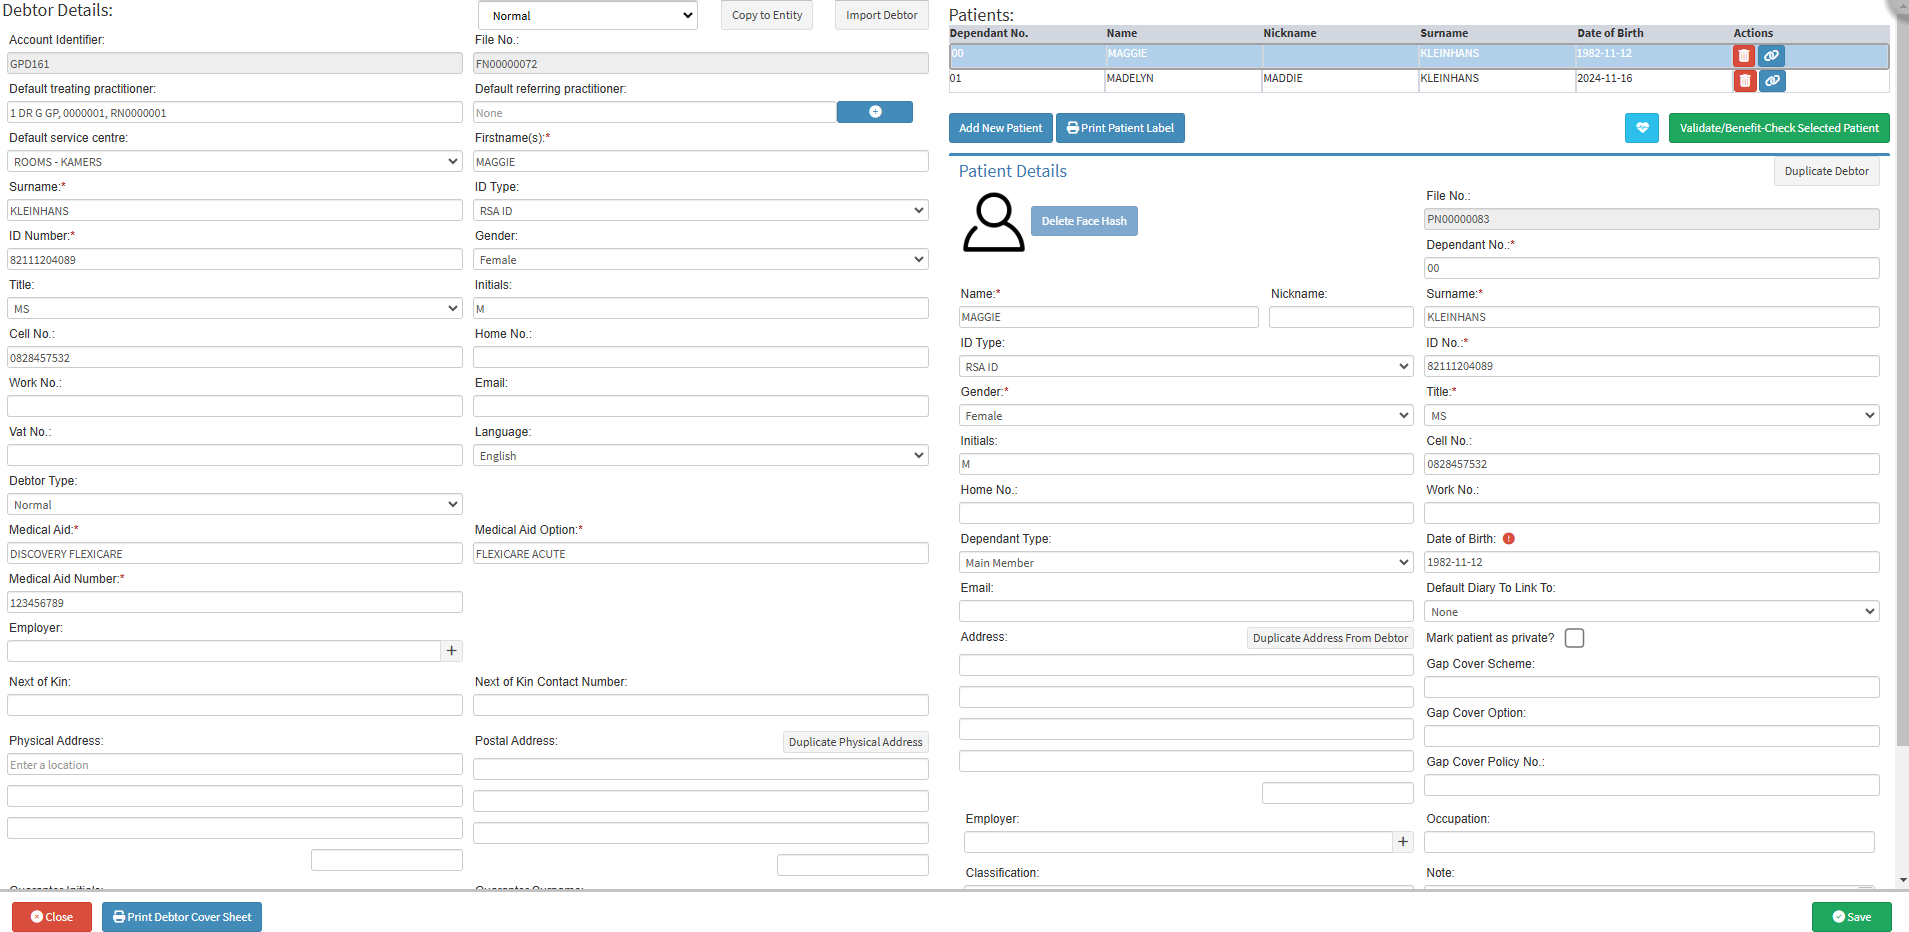
- The Debtor Details screen will open.
Add New Patient
Allows you to link a Patient to a Debtor file that has already been created or is in the process of being created.- Click on the Add New Patient button to add a Patient to the Debtors electronic file as a Dependant.
- A New Patient line will be added under the Patient section.

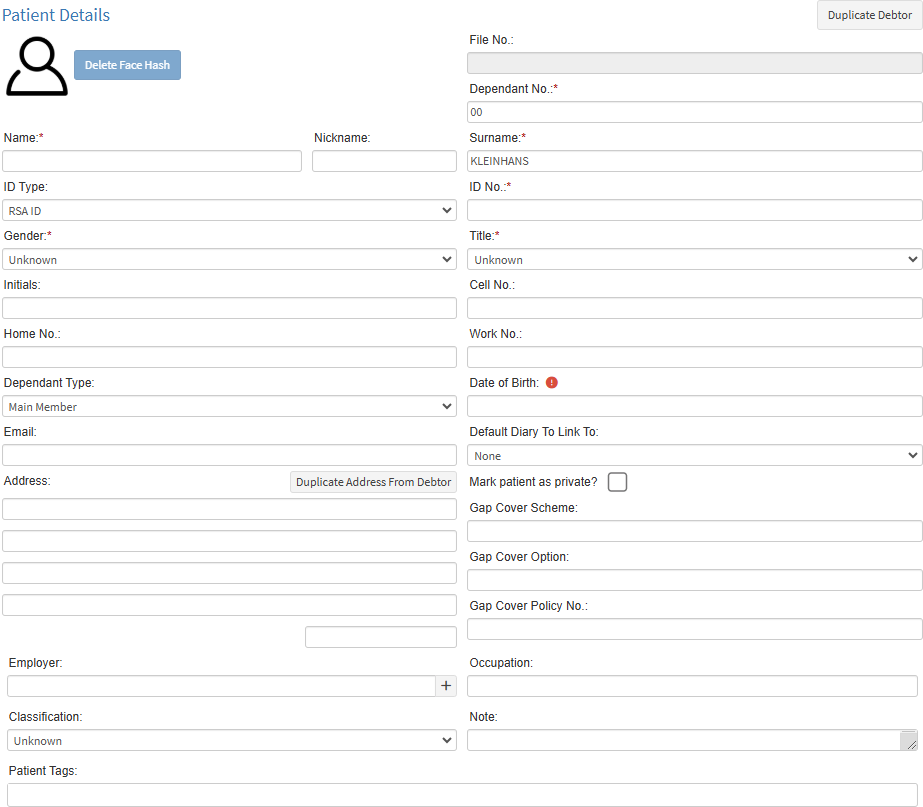
- The Patient Details section will be blank.
💡Please Note: The Patients' information can be imported from the Medical Aid if they are a member. To see how to import a Patient, please refer to the user manual: Patient Validation, Dependant Data, New Debtor Import and Benefit Check.
Patient Details
All the personal details of the person who will be consulted by the Practitioner. Please complete as much information as possible.- Click on the Duplicate Debtor button to copy the details of the Debtor to the Patient fields, if the Patient is also the main member.
![]()
- Click on the Profile picture to upload an image or take a picture of the Patient as their Profile picture. For an extensive explanation on how to upload an image, please refer to the user manual: Video Capture Screen: Navigation and Use.

- The Delete Face Hash button feature will be unavailable and will only become available once an image has been uploaded to the file and then removed in order to permanently delete the image from the database. Once the photo is deleted, the Debtor can't be identified in the Patient Identifier tab. For more information on how to remove the profile picture and the Delete Face Hash button, please refer to the user manual: Patient Identifier - Face Hash Button.
![]()
- Complete the relevant fields or Select an appropriate option:
- Click on the Name(s) field to enter the full name of the Patient as stated on their official identification documents.
- Click on the Nickname field to enter the name that the Patient prefers to be called.
![]()
- Click on the ID Type drop-down menu for options to become available to select the type of identification that the Patient is using.

- Select an option from the list that has become available:
- RSA ID: The official identification book or card, issued in South Africa by the Department of Home Affairs.
- Passport: An international document that certifies the identity and nationality of a person. Usually used as identification when the person is outside of their country of residence.
- Other: Any alternate form of identification. This option can be selected if the person doesn't have their information available, or if the person is unable to provide information and their identification is unknown.
- Click on the Gender drop-down menu to select an appropriate option.

💡Please Note: The Gender will automatically be selected based on the ID Number that was entered, using the ID Number validation, but the Gender can be changed to be more inclusive of the Debtor's preference.
- Click on the Initials field to enter the first letter of each name of the Patient. The field will be completed automatically once the first names are entered.
![]()
- Click on the Home No. field to enter a landline number where the Patient can be reached telephonically.
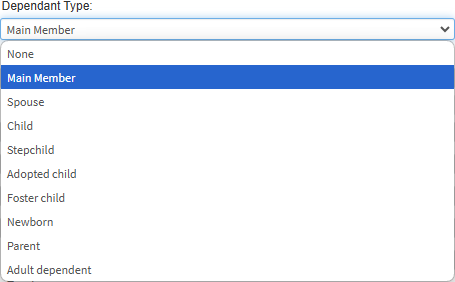
- Click on the Dependant Type drop-down menu to select an appropriate option.
- Click on the Email field to enter a mailing address where communication can be sent to the Patient. An email address will be validated using specific criteria, such as an @ sign. The Email field will be highlighted red if the email is invalid.
![]()
- Click on the Address field to enter the address manually.
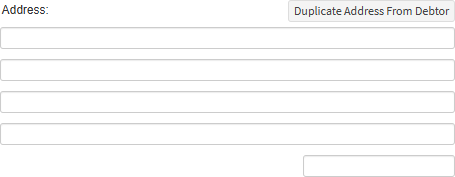
- Click on the Duplicate Address From Debtor button to copy the information over from the Debtor's Physical Address fields.
![]()
- Click on the Employer field and start typing the name of the desired employer. 3 characters are required before the list becomes available.

- Select the desired Employer on the drop-down menu that will become available whilst typing, to link the option to the new Debtor. If the Employer is not found, a new one will need to be created.
- Click on the + button to add a new employer's information to the system that has not been added yet.
- For more information on how to add a new employer, please refer to the user manual: Create New Employer.
- Click on the File No. field to enter the number associated with the Patient's hard copy file.
-
Click on the Dependant No. field to enter a number allocated to the Patient, for Patients that have Medical Aid, this will correspond to the Dependant number on the Medical Aid policy.
![]()
-
Click on the Surname field to enter the Surname of the Patient as stated on their official identification documents.
![]()
- Click on the ID No. field to enter the official identification number of the Patient. The ID Number should be between 6 and 13 digits. For an explanation of how an RSA ID number validates, please refer to the glossary entry: ID Number RSA.
![]()
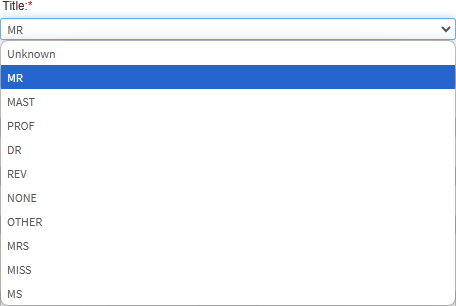
- Click on the Title drop-down menu to select an appropriate option.
- Click on the Cell No. field to enter the cellular or mobile number where the Patient can be reached. Cellphone numbers need to have at least 10 digits to be valid.
-
Click on the Work No. field to enter a telephone number where the Patient can be reached at their place of work.
![]()
-
Click on the Date of Birth field to enter the year, month, day (yyyy-mm-dd) when the Patient was born.
💡Please Note: This field will fill in automatically when the ID Number field has been filled in.
💡Please Note: Ensure that if a Passport Number or Identification Number other than an RSA ID number is used, the Date of Birth field will need to be filled in manually.
- Click on the
Default Diary To Link drop-down menu to select an appropriate option.

- Select an option from the list that has become available:
- The options available will be dependent on the setup of the Practice.
- Tick the Mark Patient as Private? checkbox to mark the Patient as a private Patient.
![]()
Gap Cover
A short-term insurance policy usually covers the difference when Practitioners charge more than what the Patient is covered by their Medical Aid.
- For an extensive explanation of what Gap Cover is and each field, please refer to the user manual: GAP Cover.
- Click on the Occupation field to enter a job or profession of the Patient that they do to earn an income, for example, Technician, Lawyer, Plumber, Teacher, etc.
![]()
-
Click on the Classification drop-down menu to select an appropriate option.

- For an extensive explanation of how to create custom Classifications, please refer to the user manual: Patient Setup.
-
Click on the Patient Tags field to enter the Patient Tags that will serve as a sub-class to the Classification when more information is required about the Patient's selected classification.
-
For an extensive explanation of how to create custom Patient Tags, please refer to the user manual: Patient Setup.
- Click on the Note field to enter any additional notes regarding the Patient.
Validate/Benefit Check
- Click on the Validate/Benefit-Check Selected Patient button to validate the Patient's information with the Medical Aid.
![]()
- For more information regarding the validation of a Patient, please refer to the user manual: Patient Validation, Dependant Data, New Debtor Import and Benefit Check.
Add Authorisation
Permission from the Medical Aid for certain treatments or procedures to be done on the Patient.- Click on the Add Authorisation button.
- The Clinical Information screen will open.
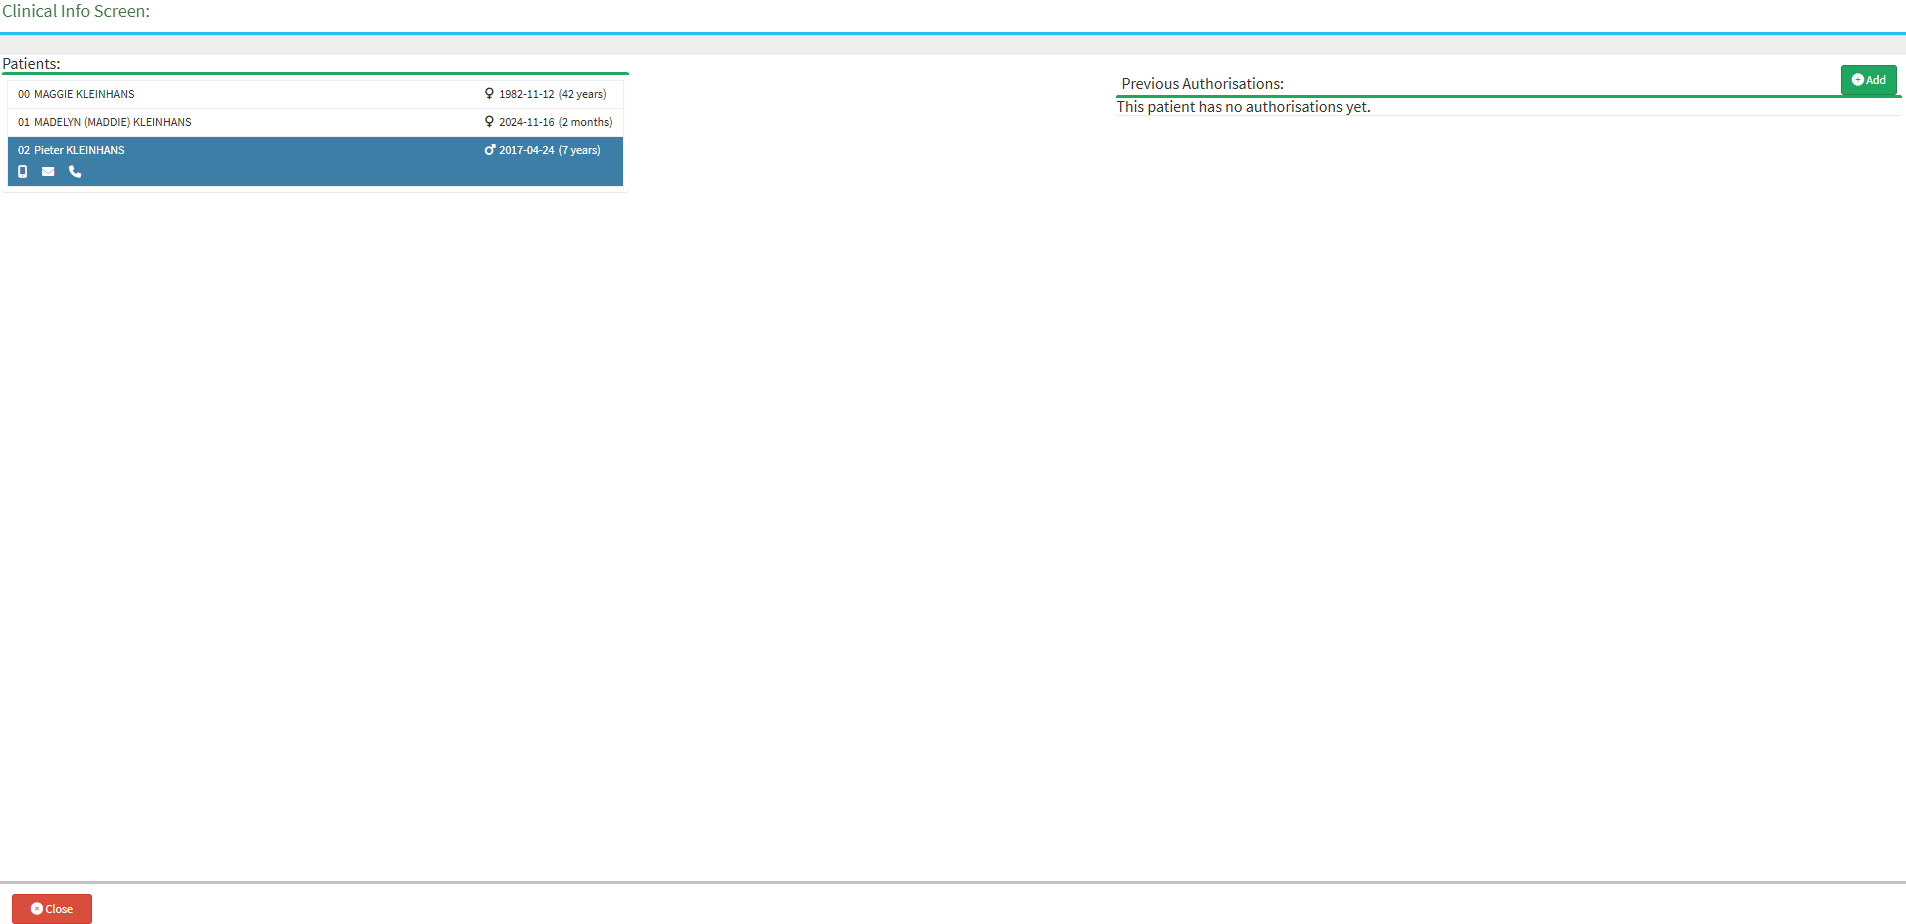
- For an extensive explanation of how to set up Authorisation for a Patient, please refer to the user manual: Authorisation Setup.
Print Patient Label
- Click on the Print Patient Label button to print a label for the Patient.
![]()
- For an extensive explanation of how to print a Patient Label, please refer to the user manual: Print Patient Label.
- Click on the Save button to save all the details that have been entered.