How to Book a New Patient
Why Use This Function:
Booking an appointment for a Patient who has never visited the Practice before helps ensure their place in the schedule without needing their full details upfront. Only basic information is required, such as Name, Surname, Contact Number, and ID Number. Once the Patient arrives, their full electronic file can be created and completed with all the necessary details.
The Contents of This User Manual:
- From the Timeslot
- From the New Booking Button
- This user manual will start on the Diary screen.
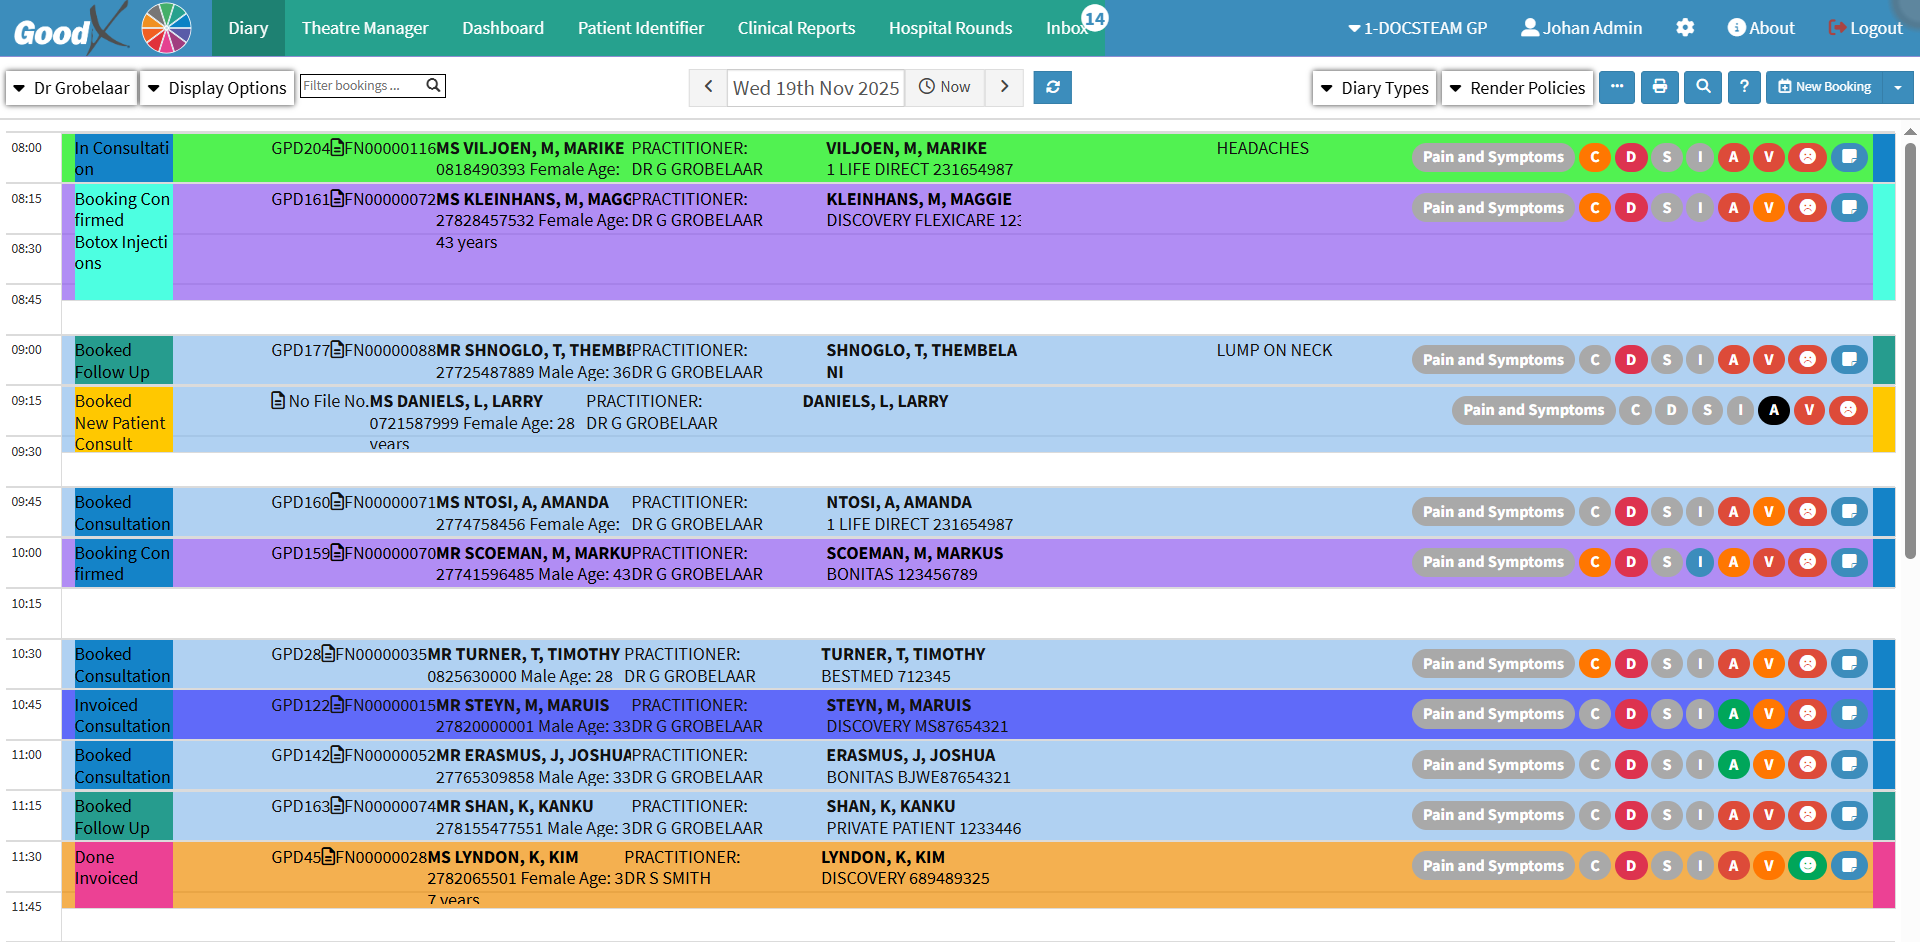
From The Timeslot
You are able to create a new booking using the Timeslots.
- Double-click on the Timeslot where you would like to make the booking.

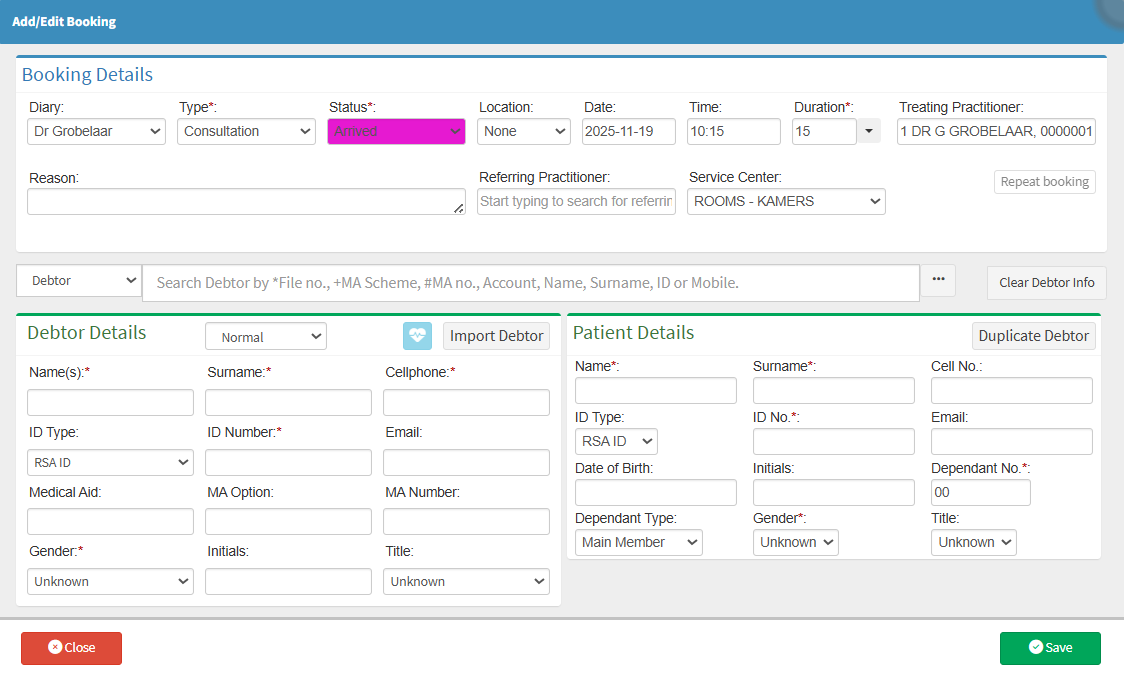
- The Add/Edit Booking screen will open.

- Complete the relevant information about the Debtor and Patient.
- For more information on the fields available, please refer to the user manual: Add/Edit Booking Screen: Navigation and Use.
💡 Please note: Fields marked with a red asterisk (*) are compulsory fields.

💡 Please note: The Patient section must be completed for every Debtor, even when the Debtor is also the Patient. Use the Duplicate Debtor button if the Debtor and Patient are the same.
- Click on the Save button.
![]()
- The Add/Edit booking will close and return to the Diary screen, where the booking that has been made will now appear in the selected timeslot.

💡Please note: The Patient has not yet been added as a Debtor and therefore does not have an account. The Patient must first be added as a Debtor before any transactions or notes can be recorded for them. For more information on how to add the Patient as the Debtor, please refer to the user manual: How to Create a New Debtor.
From The New Booking button
You can also make bookings by clicking the New Booking button.
- Click on the New Booking button.
![]()
💡Please Note: The New Booking button is set up according to the Practice's needs and can be removed in the settings if required. For detailed instructions, please refer to the following User Manual: User Entity Settings: General Settings: Navigation and Use.
The Add/Edit Booking screen will open.
- Please follow the steps in the previous section to complete the Booking.