How to Import Data from the Grand Central Members List
Why Use This Function:
Importing Debtor or Patient Information from myGC Syncvites on the Debtors screen allows you to view all completed demographic requests in one central location. This streamlined process ensures that patient and debtor details are captured efficiently, reducing the need for manual data entry and minimising errors.
By linking each response directly to the correct Debtor or Patient file, you maintain accurate, up-to-date records, which are essential for smooth billing, claims processing, and overall practice management. Keeping demographic information well-organised also improves communication with patients and reduces administrative workload, allowing your team to focus more on providing quality care.
💡Please Note: A Demographic Request needs to be completed by the Patient in order for their details to be obtained from the Grand Central List. For more information regarding how to send a Syncvite, please refer to the user manual: Debtor Demographic Syncvites.
💡Please Note: It is imperative to ensure you are on the correct Debtor as there is a possibility that you will override Debtor information.
- This user manual will start on the Diary screen.
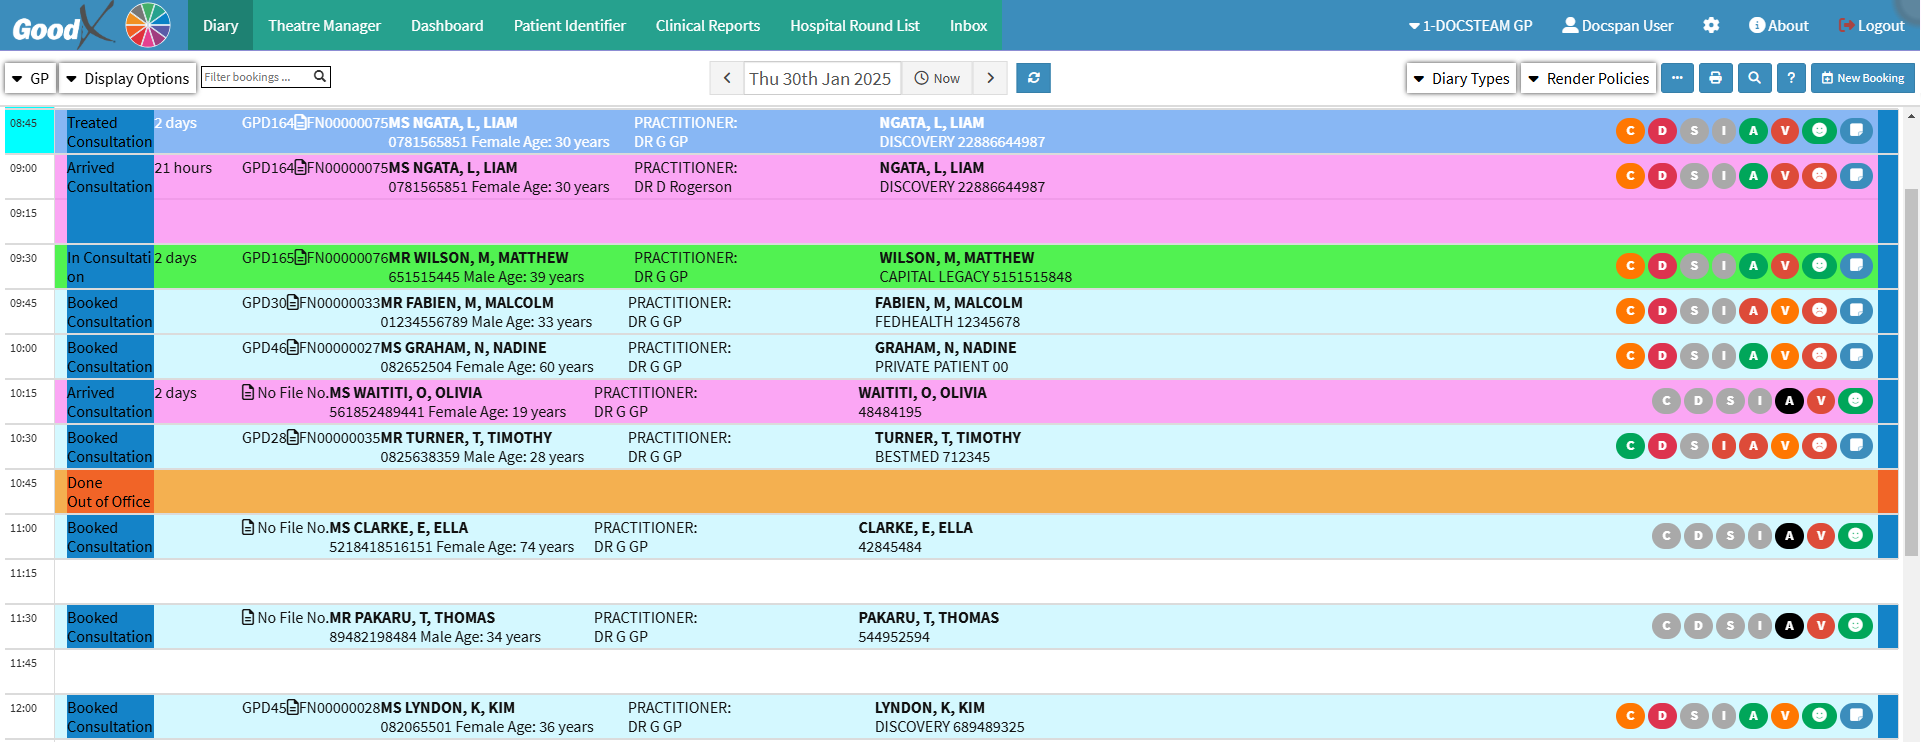
- Click on the Booking of the Patient for whom you would like to Import details from myGC.

- The Diary sidebar will open.

- Click on the Debtor Edit button.

- The Debtor Details screen will open.
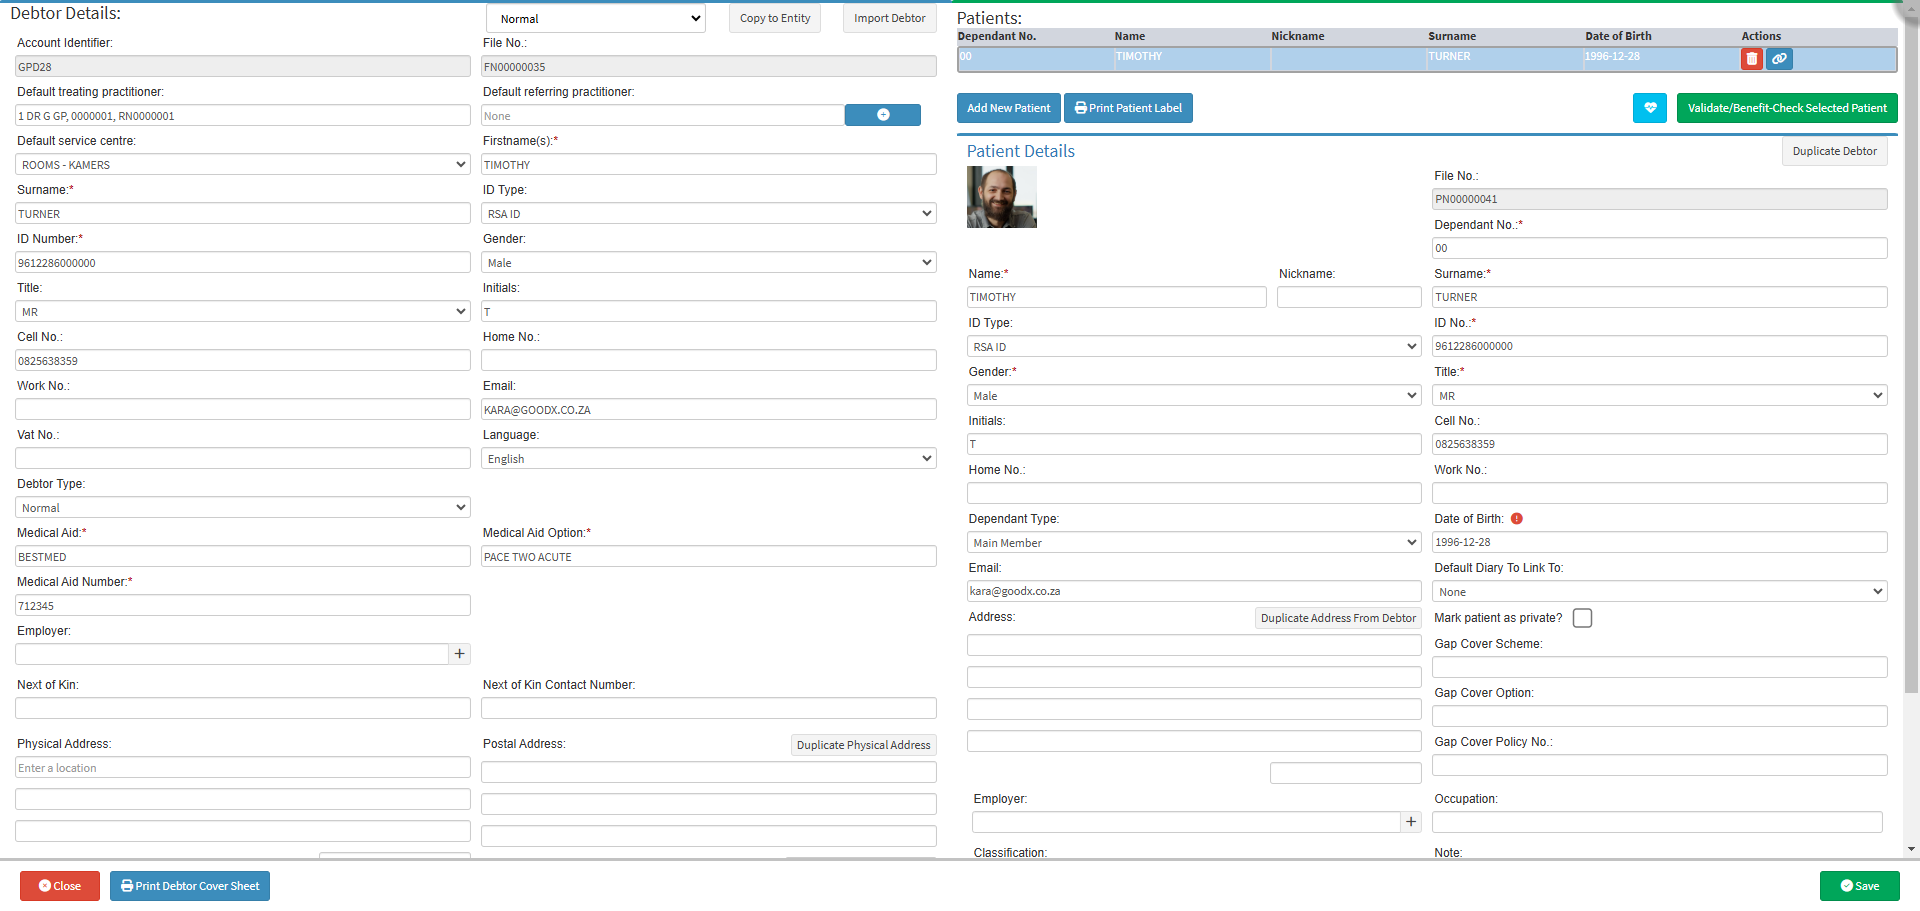
- Click on the Import Debtor button.
![]()
- The Debtor Import screen will open.
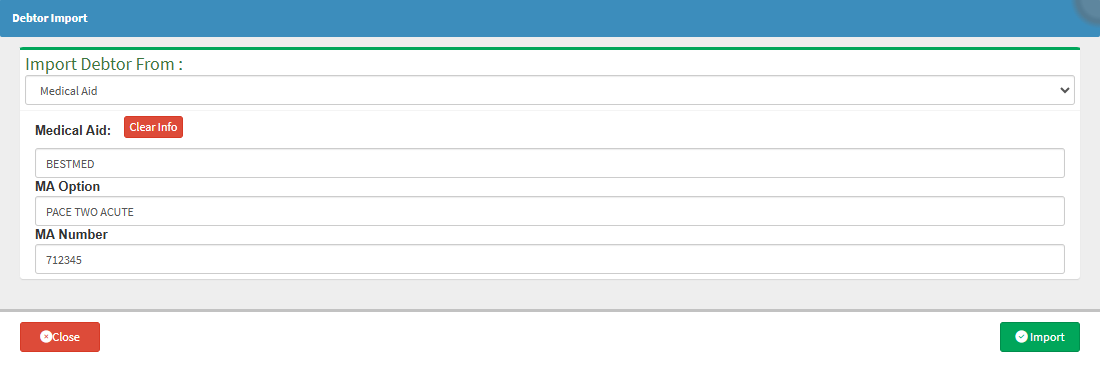
- Click on the Import Debtor From drop-down menu and select the option Grand Central Members.

- The Grand Central Members List will open.

- For more information regarding the Grand Central Members List, please refer to the user manual: Grand Central Members List: Navigation and Use.
- Click on the Patient whose data you want to import from myGC.

- Click on the Import button.
![]()
- The Debtor Update screen will open.
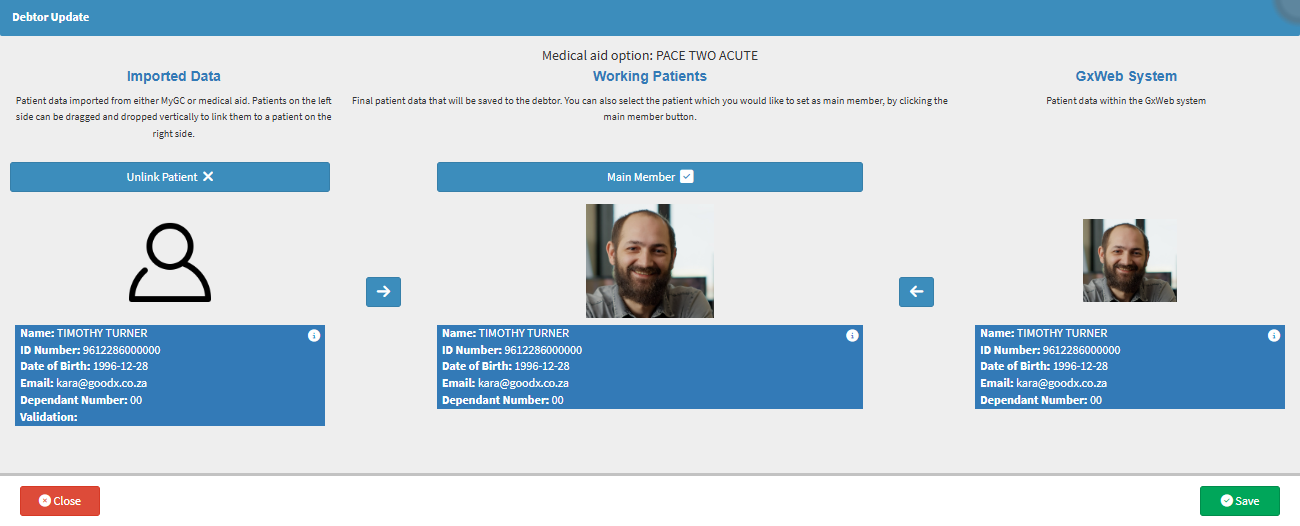
- The Debtor Update screen is divided into 3 sections:
- Imported Data: The data that the Patient has filled in on their myGC app.
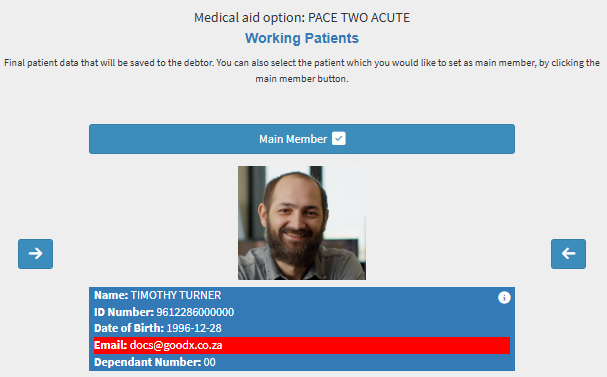
- Working Patients: The final data that the system will use to save.
- GX Web System: The data that is currently on the GoodX Web system.
- Click on the Unlink Patient X button to remove the Patient from the Debtor.
![]()
- The imported Patients' details will be removed.
- Click on the Main Member button to make the Patient the Main Member (Debtor).
![]()
- Click on the Import Data button to copy all the details from the Imported Data section to the Working Patient section.
![]()
- Only the data that differs will be copied to the Working Patients section and will be highlighted in red.
- Click on the Revert button to override the new data and revert back to the data that is saved on the GoodX Web.
![]()
💡Please Note: Any data changes will be discarded.
- Click on the Save button to save any changes that you made.
![]()