Debtor & Patient Documents: Navigation and Use
Why Use This Function:
Debtor & Patient Documents are securely stored in the respective Debtor or Patient file and play a crucial role in maintaining accurate and comprehensive records for the Practice. These documents ensure compliance with legal and administrative requirements while facilitating efficient Patient management. Examples of such documents include a valid Medical Aid card for verification of benefits, an Identification Document to confirm the Patient’s identity, signed Terms and Conditions outlining the agreement between the Practice and the Patient and/or Debtor, and Consent forms required for medical procedures or data sharing and any other relevant documentation that you require.
💡Please Note: You are able to set up which documents are required for each Debtor/Patient. This ensures consistency and helps guide uploaders on which documents they need to upload. For more information, please refer to the user manual: Document Settings.
The Contents of This User Manual:
- Saved Documents
- Upload Documents
- Add New
- This user manual will start on the Diary screen.
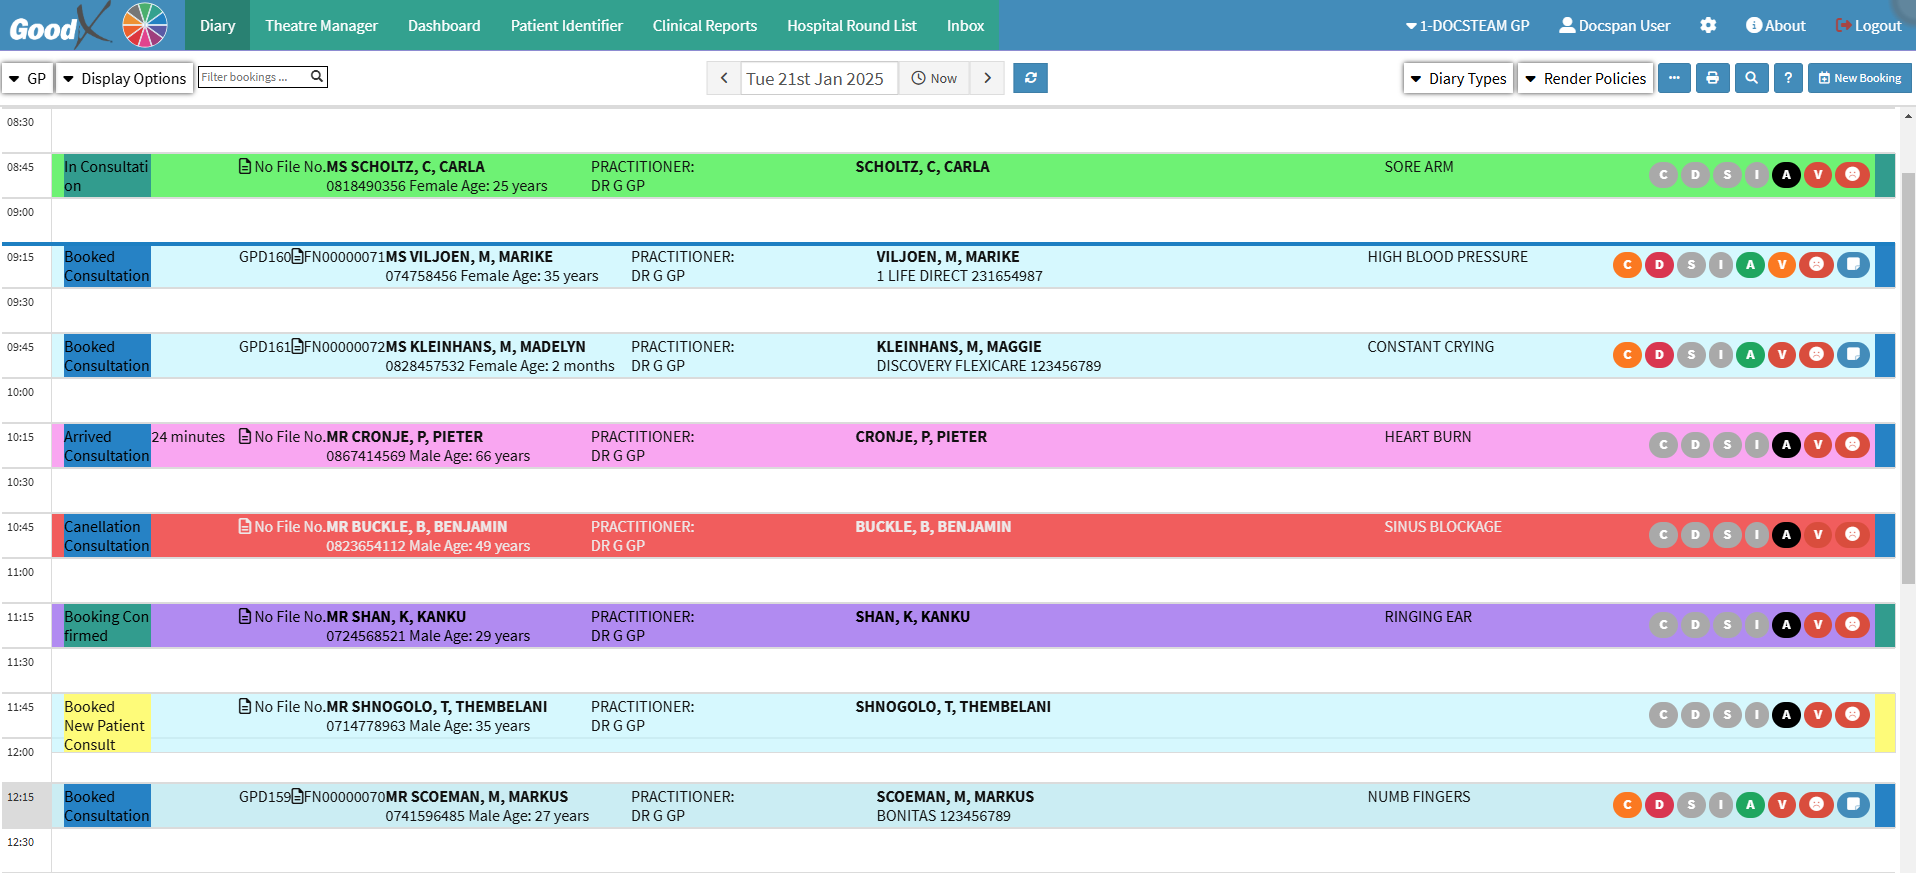
- Click on the Booking for the desired Patient.
![]()
- The Diary sidebar will open.
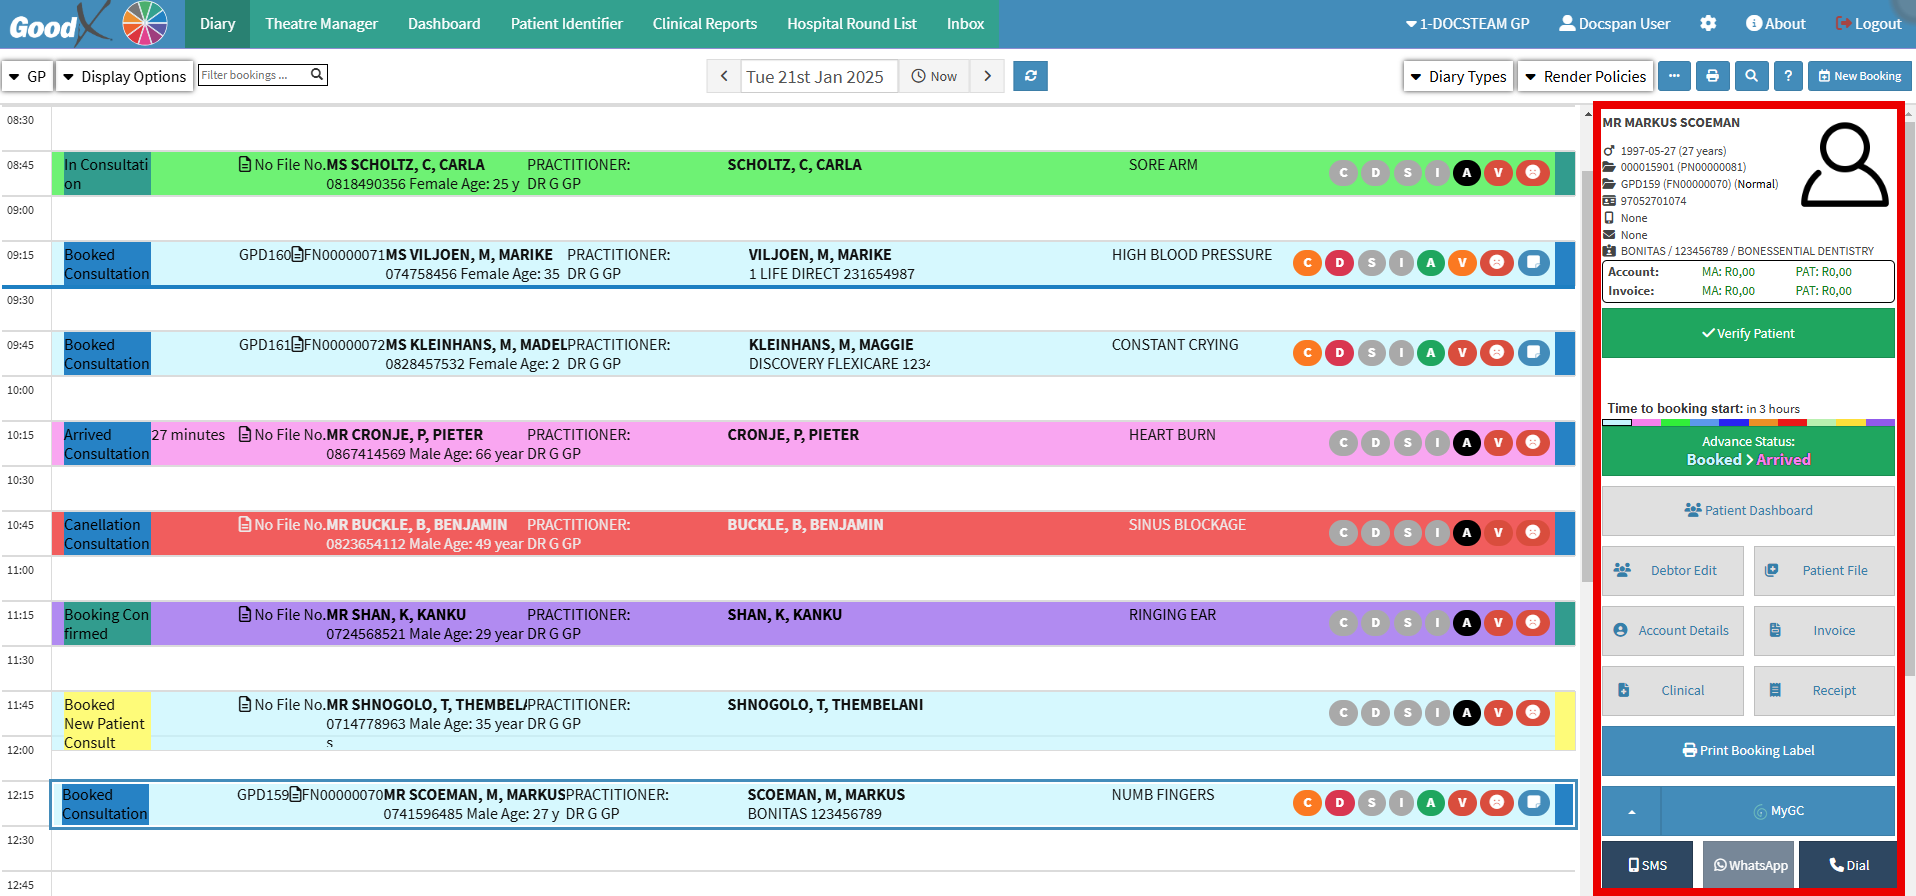
- Click on the Add Documents button when scrolling down on the Diary sidebar.

- The Uploaded Documents screen will open.
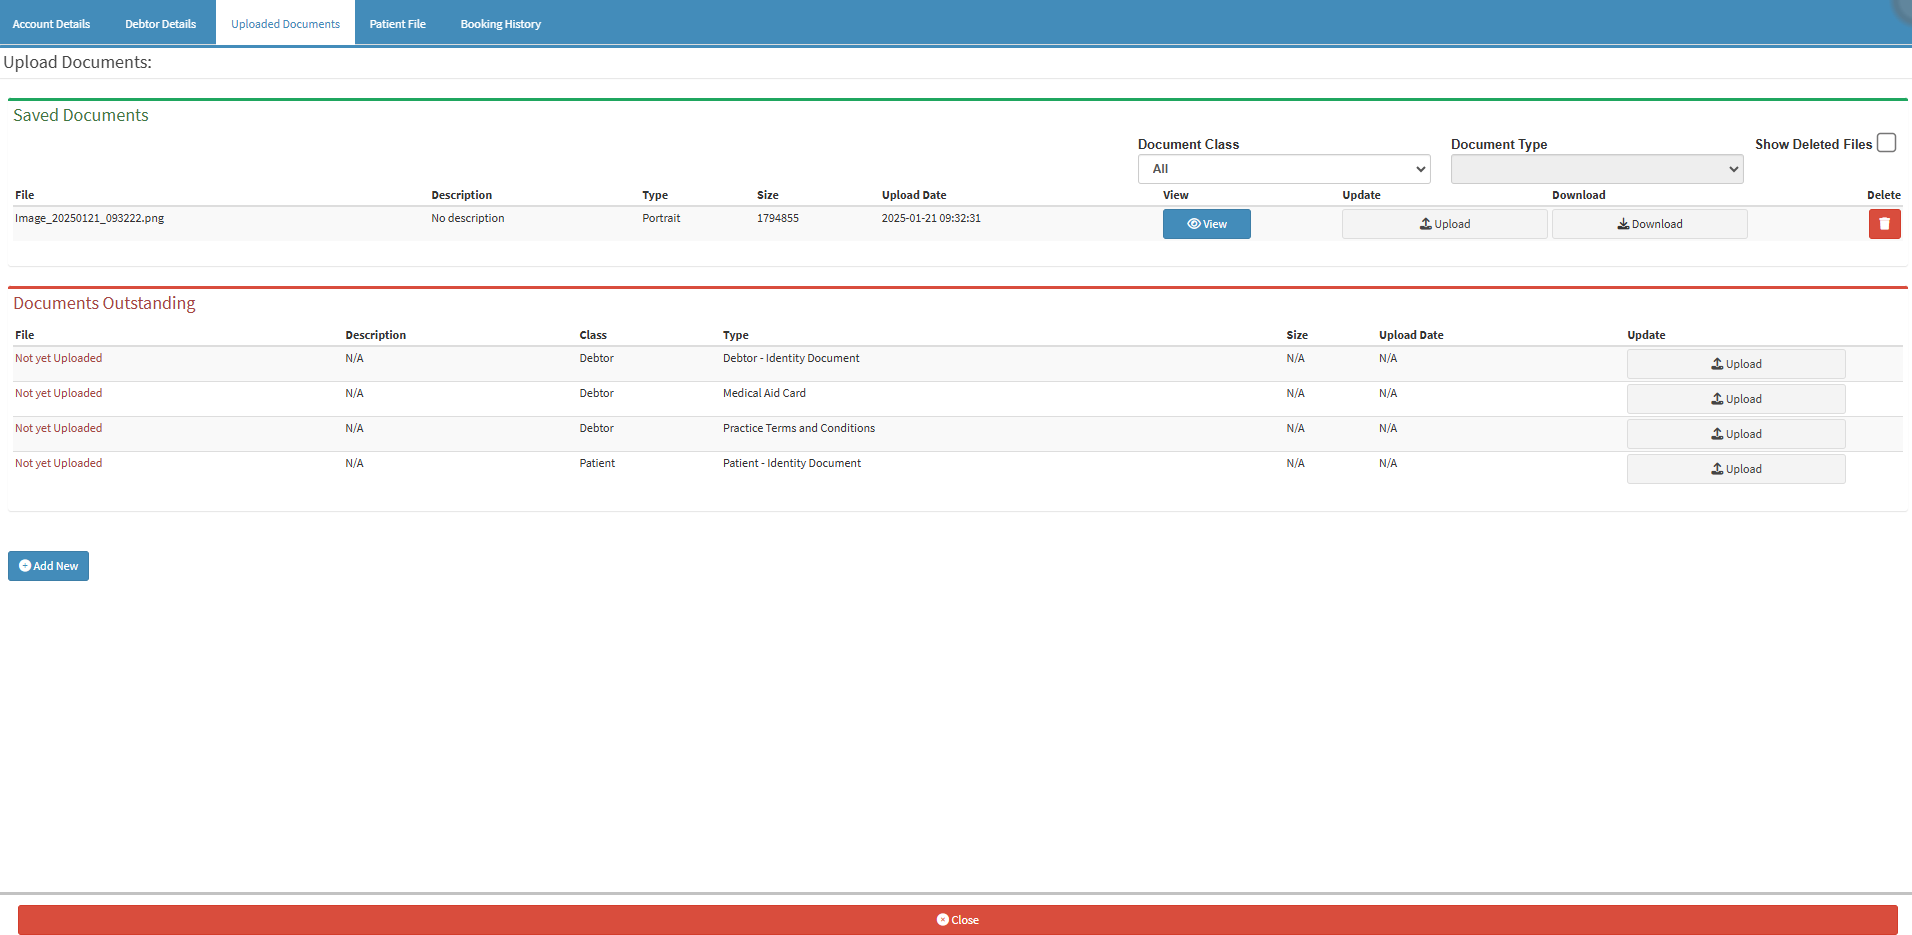
Saved Documents
Documents that have been saved and uploaded to the Debtor File.

- Click on the Document Class drop-down menu to select according to which class the Saved Documents will filter.
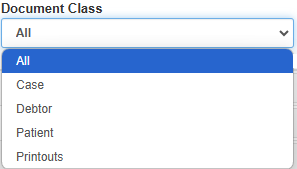
- All: All the documents that have been uploaded to the Debtor/Patient file.
- Case: Documents related to a specific Clinical case.
- Debtor: Documents that have been linked to the Debtor.
- Patient: Documents that have been linked to the Patient.
- Printouts: Estimates that have been created at the Practice are classified as Printouts. You can also use the Printouts class to re-upload signed documents that have been printed for the Patient.
💡Please Note: In order for Estimates to be automatically uploaded as Printouts, they will first need to be downloaded. For more information, please refer to the user manual: Account Details: Navigating the Estimate Invoices Tab.
- Click on the Document Type drop-down menu to select according to which Document Type the Saved Documents will filter.
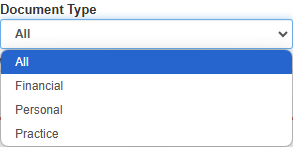
💡Please Note: The Document Types that are displayed here are dependent on the set-up that was done. For more information regarding the setup, please refer to the user manual: Document Settings.
- Tick the Show Deleted Files checkbox to display all documents that were previously deleted.
![]()
💡Please Note: If any files were deleted previously, their entries will appear under the Saved Documents section. Deleted Files can be restored if the need arises.
Columns
The information regarding each document entry will be divided into columns in the Saved Documents section.
- File: The name of the File that was uploaded.
- Description: Any additional information regarding the file.
- Type: The kind of document that was uploaded.
- Size: How big the file is.
- Upload Date: The Date that the specific file was Uploaded.
- View: Allows you to open the file, to View it.
- Click on the View button.
![]()
- The Viewing screen will open, where you are able to view the uploaded document.

- Click on the Ok button to close the screen.
![]()
- Click on the Upload button to update the specific document with a new version.
![]()
- The Document Upload screen will open.

- For more information regarding how to Upload a new document, please refer to the user manual: How to Add/Upload Debtor Documents.
- Click on the Download button to start downloading the document.
![]()
- Click on the Delete button to remove the document from the list of Saved Documents.
![]()
- The Delete button will change to a Restore button, allowing the document to be retrieved and made visible under the Saved Documents section.
![]()
Documents Outstanding
These are the Outstanding Documents that the Practice requires for all Debtors/Patients, which still need to be uploaded to their files.

Columns
The information regarding each Outstanding Document still needs to be uploaded.
- File: Indicates that the File has a status of Not yet Uploaded.
- Description: Will display N/A as there is no File uploaded as yet.
- Class: Specifies who the documents need to be uploaded for.
- Type: The document required to be uploaded.
- Size: Will display N/A as there is no File uploaded as yet.
- Upload Date: Will display N/A as there is no File uploaded as yet.
- Update: Allows you to Upload the required document.
- Click on the Upload button.
![]()
- The Document Upload screen will open.

- For more information regarding how to Upload a new document, please refer to the user manual: How to Add/Upload Debtor Documents.
Add New
Allows you to Upload more documents to the Debtor/Patient file.
- Click on the Add New button.
![]()
- The Document Upload screen will open.

- For more information regarding how to Upload a new document, please refer to the user manual: How to Add/Upload Debtor Documents.