Diary Settings allow each Practitioner’s Diary to be customised to their specific needs within the Practice. This ensures accurate bookings, efficient workflows, and consistent Invoicing. Settings like Default Practitioner, Service Centre, and appointment type help streamline daily operations and improve the Patient experience. Each Diary should be set up individually to reflect the preferences and requirements of the Practitioner using it.
💡Please Note: Diary Settings can be overwritten per User on User Entity Settings. For more information on the User Entity Settings screen, please refer to the user manual: User Entity Settings: Navigation and Use.
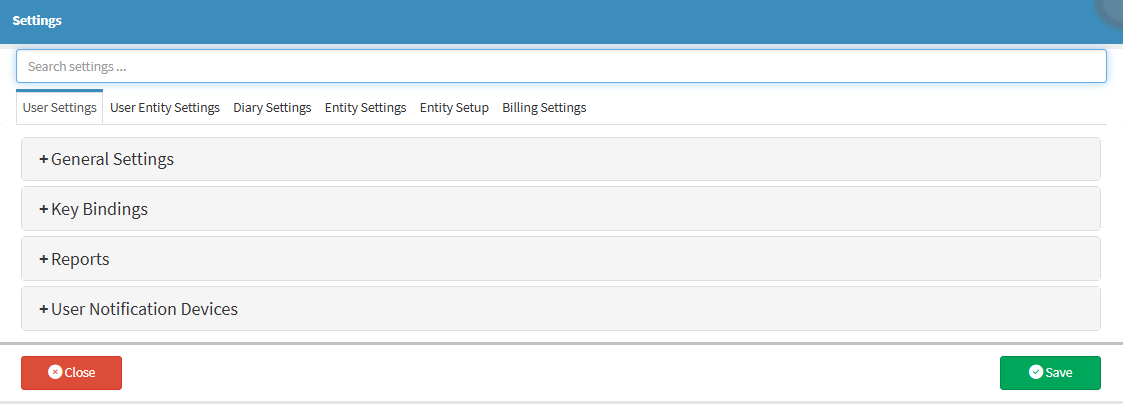
The Contents of This User Manual:
Dairy Settings Panel
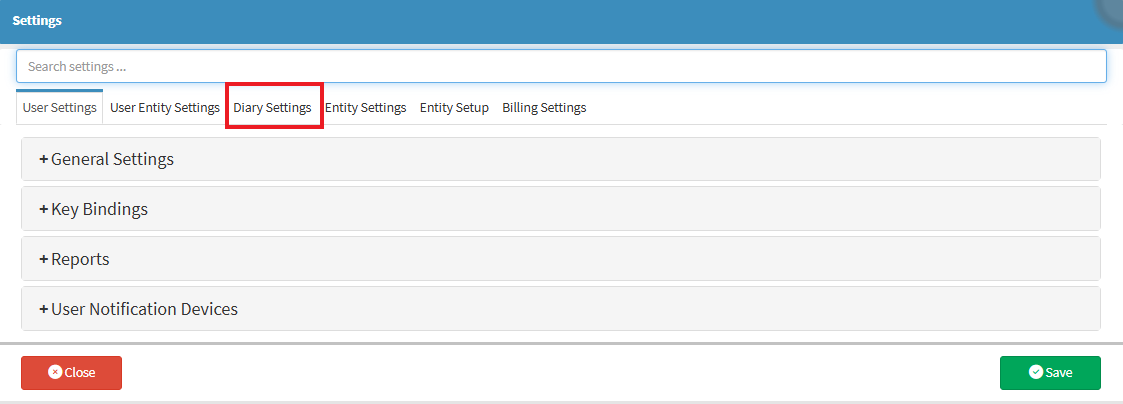
This user manual will start on the Settings Screen.
An explanation of the Dairy Settings panel will be given:
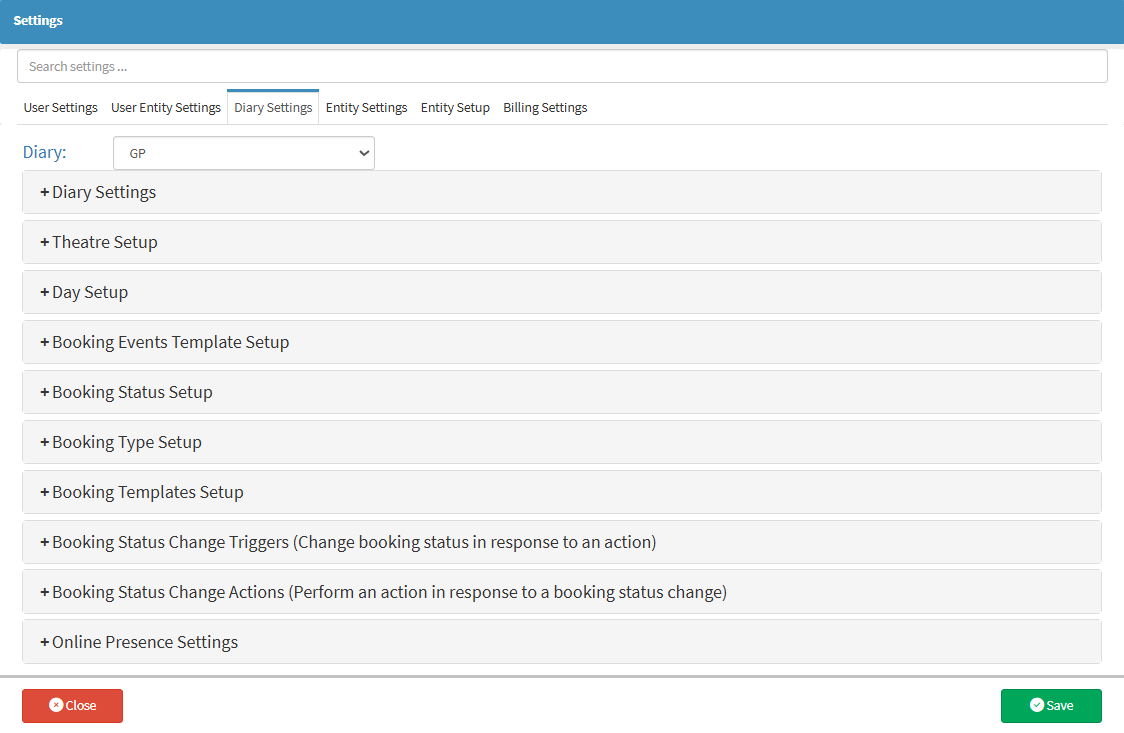
Dairy Settings Panel
The Diary Settings Panel allows you to customise the configuration and appearance of the appointment Diary. This includes defining scheduling rules, appointment durations, time slot intervals, working hours, Practitioner availability, and colour coding for appointment types. These settings ensure the Diary reflects the specific operational needs of the Practice and supports efficient appointment management.
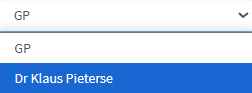
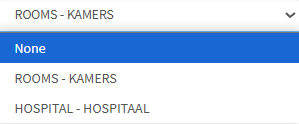
Click on the Dairy drop-down menu.
The Dairy drop-down menu will open for you to select the desired Practitioner.
💡Please Note: A Practice can have multiple Diaries. Make sure the correct one is selected.
Click on the Name field and enter the Dairy name.
Click on the Default Treating Practitioner field and enter the Default Treating Practitioner.
Click on the Default Service Centre drop-down menu.
Select the Default Service Centre from the drop-down menu.
Click on the Default Dairy Type drop-down menu.
An explanation will be given of the different Default Dairy Types:
None: No default diary view is set.
Timeslot (Overlap): Bookings scheduled at the same time appear side by side within the same time slot.
Timeslot (Stacked): Bookings scheduled at the same time are stacked vertically, with the time slot repeated for each booking.
Stacked by Time: Bookings are stacked in order of their scheduled time, with no visible time slots.
Stacked by Type: Bookings are stacked by appointment type, with no visible time slots.
Stacked by Status: Bookings are stacked by appointment status, with no visible time slots.
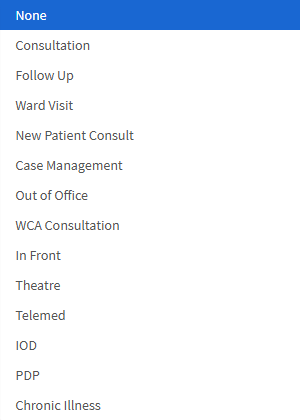
Click on the Default Booking Type drop-down menu.
The Default Booking Type drop-down menu will open.
Select the Default Booking Type that will be used most frequently for Patient appointments.
💡Please Note: The options available in the drop-down menu are determined by your Practice settings and how Booking Types have been configured. For more information on setting up Booking Types, please refer to the user manual: Booking Type Setup.
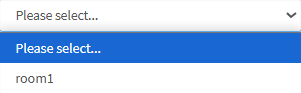
Clickon the Default Locationdrop-down menu.
The Default Location drop-down menu will open.
Select the Default Location from the drop-down, which will be the most frequently used Booking Location where the Practitioner will consult with their Patients.
💡Please Note: The options from the drop-down will depend on what you have set up for your Practice and the Booking Location setup panel under the Entity Settings tab.
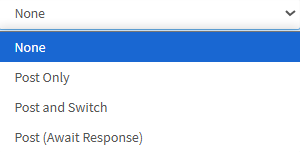
Click on the Default Post Invoice Action Override drop-down menu.
The Default Post Invoice Action Override drop-down menu will open.
Select the Default Post InvoiceActionOverride from the drop-down, which will be the most frequently used Invoice action when posting a Patient's Invoice.
An explanation will now be given of the Post Invoice Actions:
None: No default post-invoice action is set.
Post Only: Posts the invoice without switching it to the Patient’s medical aid, typically used for private Patients.
Post and Switch: Posts the invoice and immediately switches it to the Patient’s medical aid without waiting for an EDI response.
Post (Await Response): Posts the invoice, switches it to the Patient’s medical aid, and waits for an EDI response before proceeding.
💡Please Note: An immediate EDI response will only show if the Medical Aid has real-time switching.
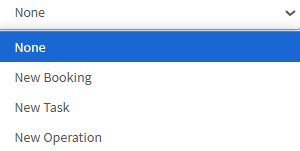
Click on the Default Create Action drop-down menu.
The Default Create Action drop-down menu will open.
An explanation will now be given of the Default Create Action drop-down menu:
None: The None option will select the default entity action button, which is the New Booking button.
New Booking: The New Booking option will display the New Booking button and enable a user to quickly create a booking.
New Task: The New Task option will display the New Task button and enable the user to quickly create a task.
New Operation: The New Operation option will display the New Operation button and enable the user to quickly create a theatre booking.
Tick the Repeat Booking checkbox to enable repeat bookings on your Add/Edit Booking screen.
Tick the Type Colour Show On 'Type-Status' Column On Booking checkbox to swap the colours used for the booking type and booking status in the Diary.
Tick the Use CRM checkbox to add a drop-down list on the Booking screen to choose where the Patient heard about the Practice.
💡Please Note: The Practice will be able to draw statistics from this data for marketing purposes. For more information on CRM, please refer to the user manual: CRM Settings.
Tickthe Use Case Managementcheckbox to enable structured tracking of the Patient's cases, including assessments, care plans, notes, and related appointments.
Tick the New Appointments on Historic Bookings Clinical/Invoicing checkbox to enable you to create follow-up appointments that are linked to a previous booking.
Click on the Booking Type drop-down menu.
Select a Booking Type for these appointments, and select the desired option.
Tick the Create/View Pop-up on Viewing of Posted Invoices checkbox to enable a pop-up screen to ask if you want to view the Invoice that was already posted on that specific day or to create a new Invoice.
Select a Booking Type for these appointments, and select the desired option.
Tick the Wait Time Calculation Ignore Early Arrival Time checkbox to ignore the arrived status of a booking and calculate the time from the booking's start time.
The Sync This Diary with Other Calendars setting will enable other applications to import bookings from this Diary using the URL in the field.