Text size
Line height
Text spacing
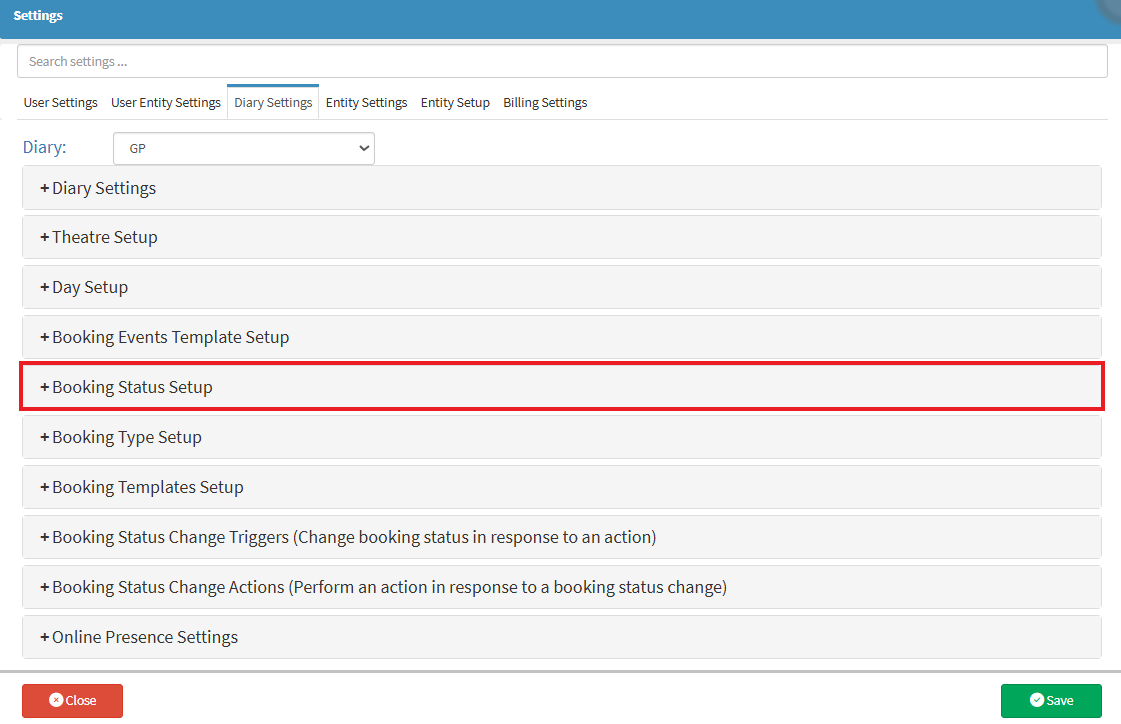
The Booking Status Setup function allows you to create and manage a tailored list of booking statuses that appear when scheduling appointments in the Diary. Clearly defined statuses help keep your appointment workflow organised, consistent, and easy to follow. This not only keeps your team aligned on each booking's status but also improves communication, minimises confusion and creates a smoother experience for both staff and Patients.


💡Please Note: Diary settings are configured per diary to customise the program according to the specific needs of each Practice. For more information on Dairy Settings, please refer to the user manual: Dairy Settings (General).
This feature allows Practices to refine and manage the various booking statuses used within the Diary. It enables them to track Patient appointment progress, customise status labels and colours, control visibility, and configure the sequence of Patient flow for efficient scheduling and wait time tracking.
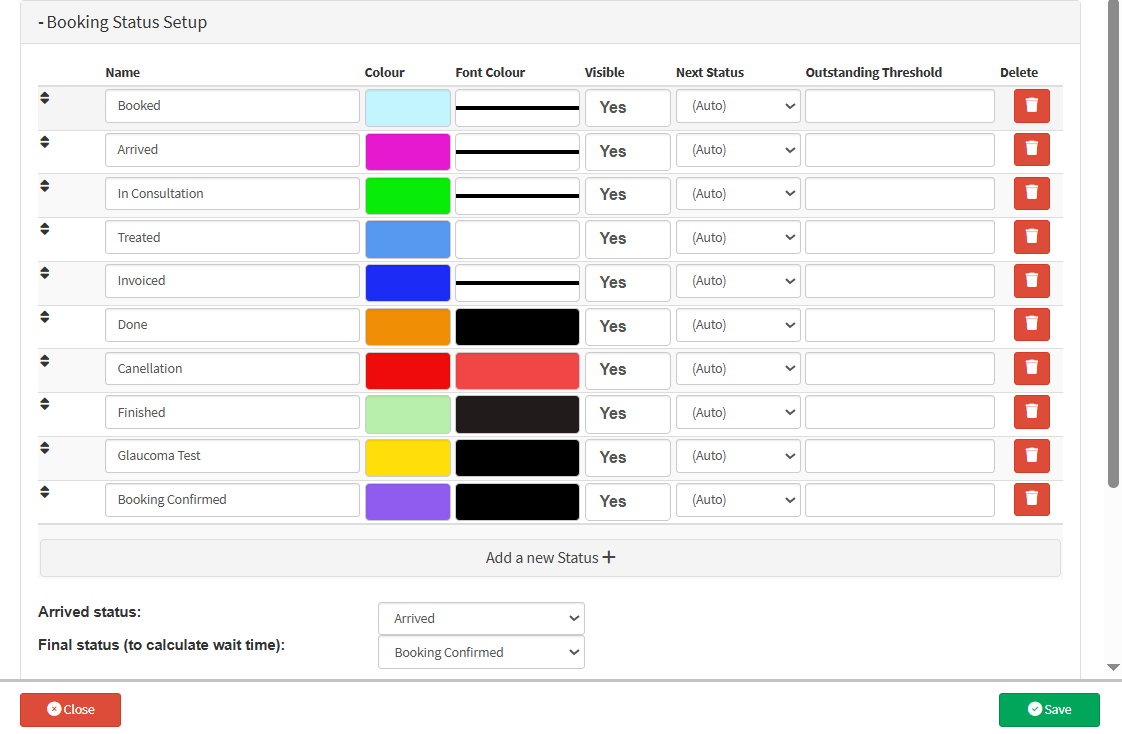
💡Please Note: Default Booking Statuses are pre-loaded, but you can customise them by adding or removing Booking Statuses specific to your Practice.
To add a new booking status that more accurately represents a specific stage in the appointment process. This new status will support clearer scheduling, reduce ambiguity for staff, and improve the overall efficiency and accuracy of appointment tracking and reporting. By default, there will be pre-loaded booking statuses; however, you can add or remove statuses that are customised for your Practice.
![]()

![]()
![]()

![]()
![]()
![]()
![]()
![]()
💡Please Note: The Bookings Status will not be permanently deleted, but rather disabled. To Re-enable the booking status, simply Click on the Re-enable button ![]()
The Calculate Wait Time function is used to determine the duration between a Patient’s scheduled appointment time and the actual time they are seen by a Practitioner. This helps evaluate operational efficiency, identify delays, and improve the Patient experience by monitoring and minimising wait times.


![]()