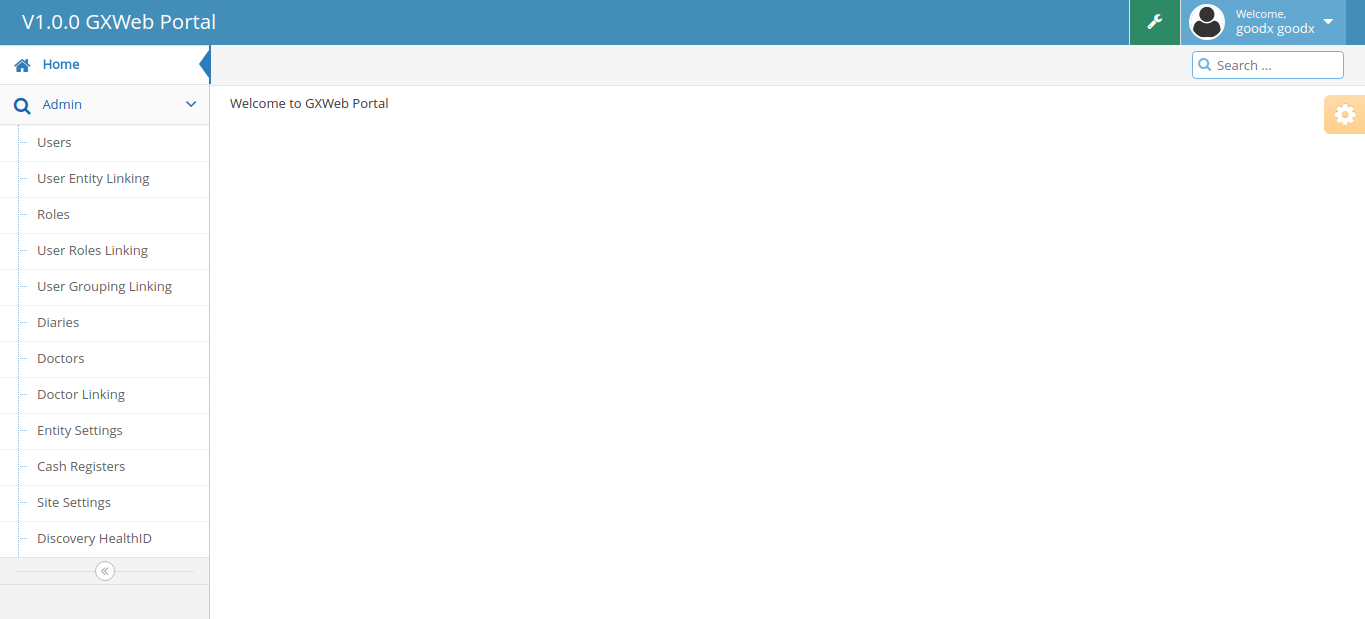
The GoodX Web Portal is used to change the Settings for the GoodX Web namely:
- Create Users.
- Link Users to Entities.
- Create Roles with their user access groups (actions that are permitted in the software eg invoicing).
- Link Users to Roles. (A user can be linked to one or more roles.)
- Toolbar:
- The following toolbar will appear on each screen:

- Definitions of each Icon:
 Add
Add  Edit (Change or Amend)
 View Record
 Delete
 Search
 Refresh
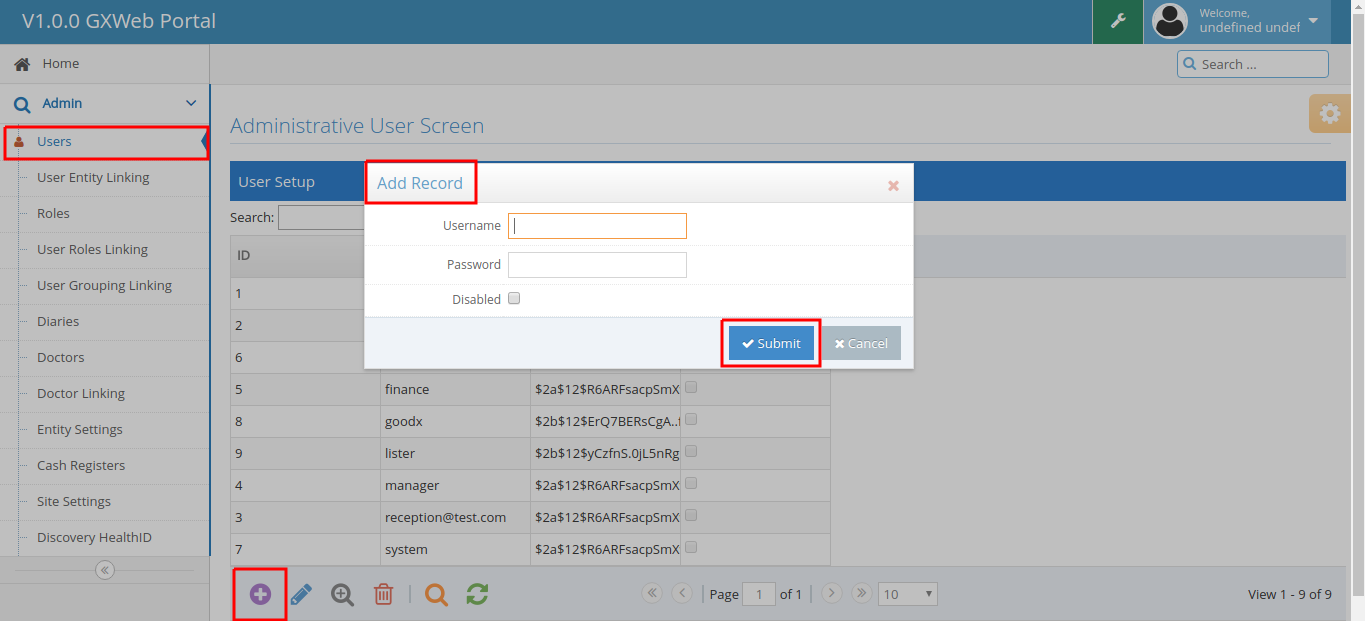
- Add Users:
- Click on Users.
- Click on the Add button.
- Type the Username and Password (the password must be 6+ characters)
- Click on Submit to Save the User.
- Use the other Functions in the Toolbar as explained above.
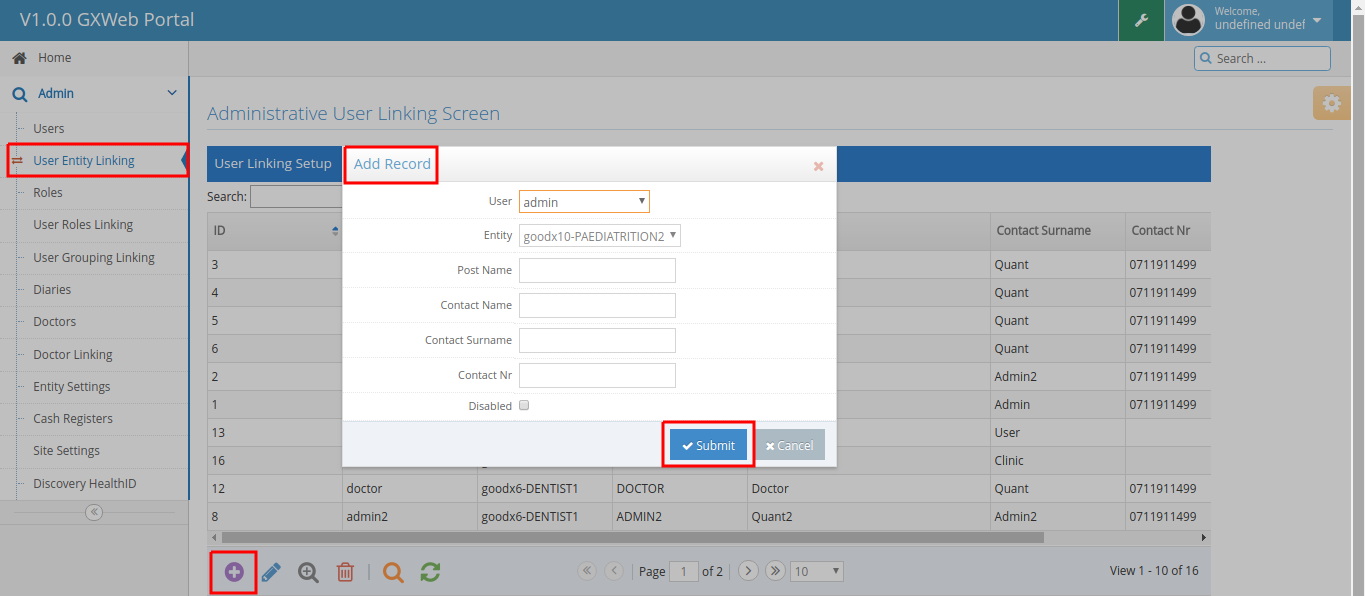
- User Entity Linking:
- Click on User Entity Linking.
- Select the Entity which you would like to link the user to.
- Complete Post Name (small letters), Contact Name (capital or small letters), Contact Surname (type in 'user' or 'user surname'), Contact Nr.
- Click on Submit to Save.
- Roles and Groups (User Access):
There are 9 default Roles in the GoodX Web App, namely:
- Administrator - has full access to all functions
- Practitioner
- Practice Manager
- Receptionist
- Billing Expert
- Cashier
- Credit Controller
- Stock Controller
- Bookkeeper
Every default Role has default access that allows the role to perform certain actions in the Web App. These actions are called Groups. Every default Role has a predefined group array that defines the access that the Role has on the Web App.
Every User can be linked to one or more Roles. If more than one Role is linked to the User, the User can perform all actions of all the Roles to which it is linked.
See the User Manual on the Default Role Groups.
TAKE NOTE: All Roles can be customised per Entity.
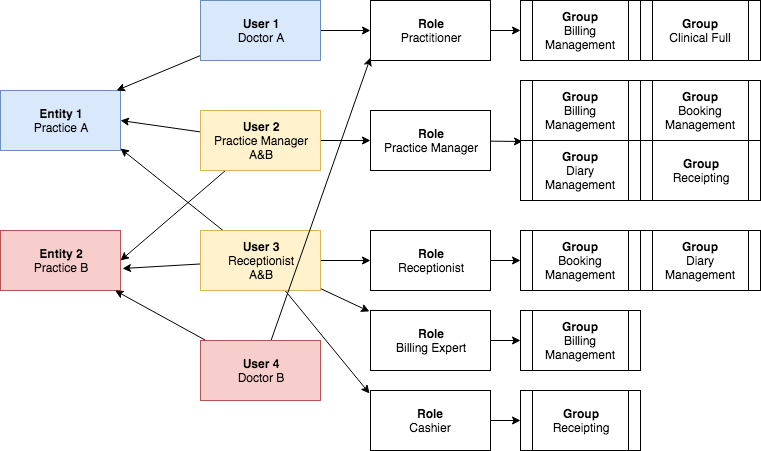
Here is an example of how Entities, Users, Roles, and Groups are linked together:
- Doctor A and Doctor B share a Group Practice. They each work in their own Entities for their own benefit, but they share the infrastructure, Receptionist and Practice Manager. This shows:
- How Users can be linked to one or more Entities;
- How Users can be linked to one or more Roles;
- How one or more Groups can be added to Roles to complete the user access of each Role.
- This is how the Groups look in the Portal:

- Groups provide the following access:
- Administrator Invoice Post: In a bureau set up where the administrator is responsible to post the invoice.
- Base User: Allow this setting for All users.
- Bed Management: This setting is only applicable to hospitals.
- Billing Management: This will allow the user to do billing and post Invoices.
- Booking Management: Allows the user to make bookings in the diary.
- Case Management: To Manage General Cases.
- Cash Register Admin: Gives access for the user to administrate and manage the cash registers.
- Clinical: Allows access to own events created.
- Clinical Assistant: Allows the user to create events and save but some sections will not be viewable or editable.
- Clinical Full: No Restrictions, the user will be able to access and edit all clinical events created by any user.
- Credit Note: Allows the user to do credit notes.
- Debtor Patient Management: Allows the user to manage debtor and patient details.
- Diary Management: Allows the user to manage the diary.
- Documents: Allows the user to add and remove debtor/patient documents.
- Download Document Files: Allows Users to download PDF documents from the system.
- Edit ERA Header and Payments: Allows the user to manage and administrate ERA's as well as change the header of the ERA.
- EMR Stages: Will allow users to use the different stages of the EMR event.
- Entity Management: Allows the user to access the entity management settings.
- Force Switch: Will allow the user to force the switching of an account to the medical aid.
- Invoicing: Allows Users to bill invoices on the system.
- Journal: Allows the user to do journals on the system.
- Nurse Invoice: Client Specific - Allows the billing of invoices for nurses.
- Receipting: Allows the user to capture receipts on the system.
- Reporting: Allows the user to access reports on the system.
- Reverse Receipts: Allows the user to remove/reverse receipts on the system.
- Save Bookings: Allows the user to Save Bookings on the system.
- Save Cash Register: Allow the user to save cash register sessions.
- Site Admin:
- Supervisor Functions: Not Currently Linked - Super Administrator (Developer) rights.
- System: Internal System Group, not allocated to any users.
- System Admin: Elevated System Privileges - No user should have this setting.
- Task Assignment: Will allow the user to assign tasks to other users.
- User Entity Link Management: Allows the user to link users to certain entities in the GoodX Portal.
- User Entity Settings: User Specific Settings per Entity.
- View Clinical Case: Allows the user to view clinical cases but not edit.
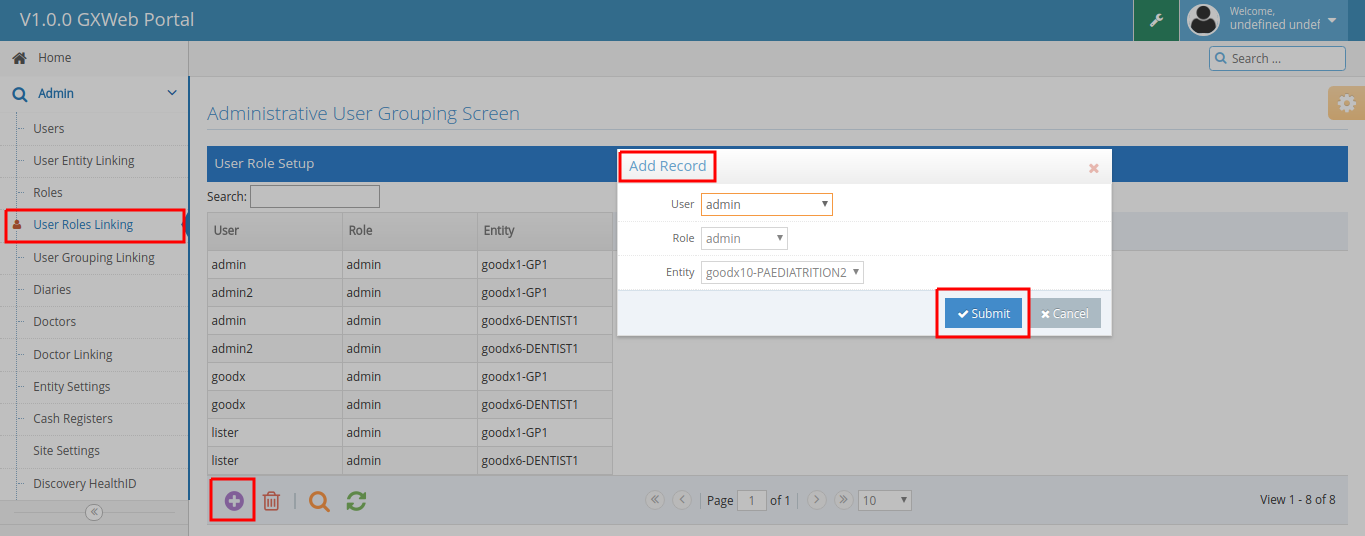
- User Roles Linking:
- Link Users to the roles that you have created.
- Click on Add Record
- Select the User and link a certain Role to that User
- Select the Entity that you want to link the User to
- Click on Submit
TAKE NOTE: You can link a User to multiple Roles. For example, Karlien can be Karlien1 - Receptionist and Karlien1 - Bookkeeper.
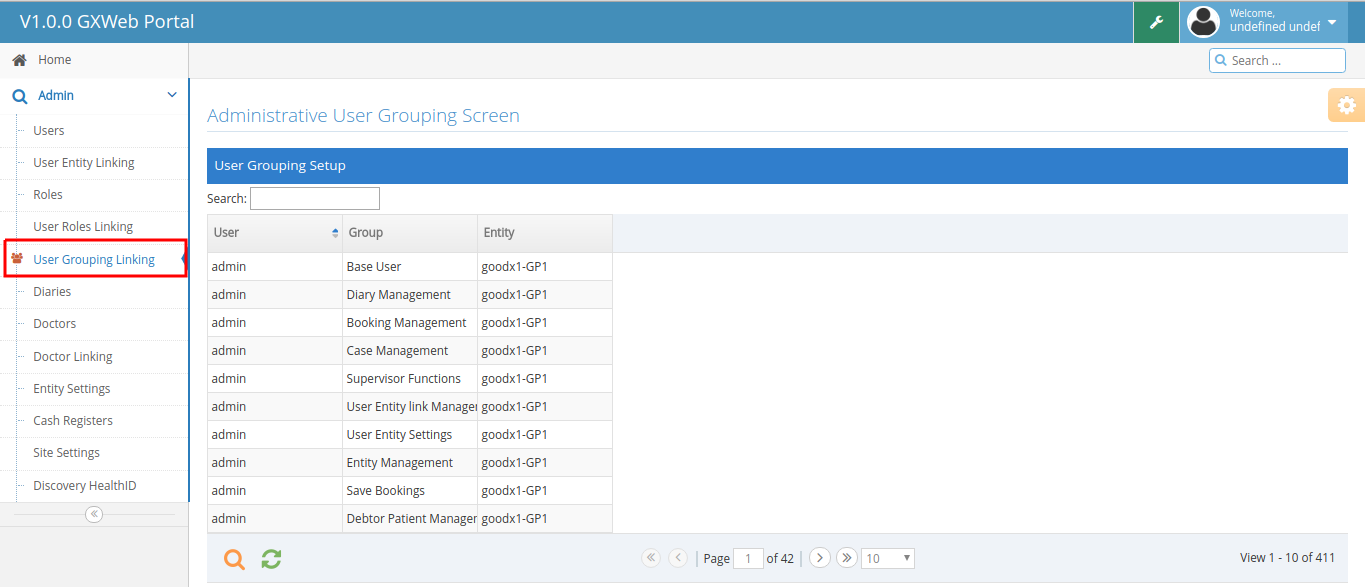
- User Grouping Linking:
- After creating the Users and linking them to a specific Role, you can also link that user to extra groups for extra access that is not linked to their specific role.

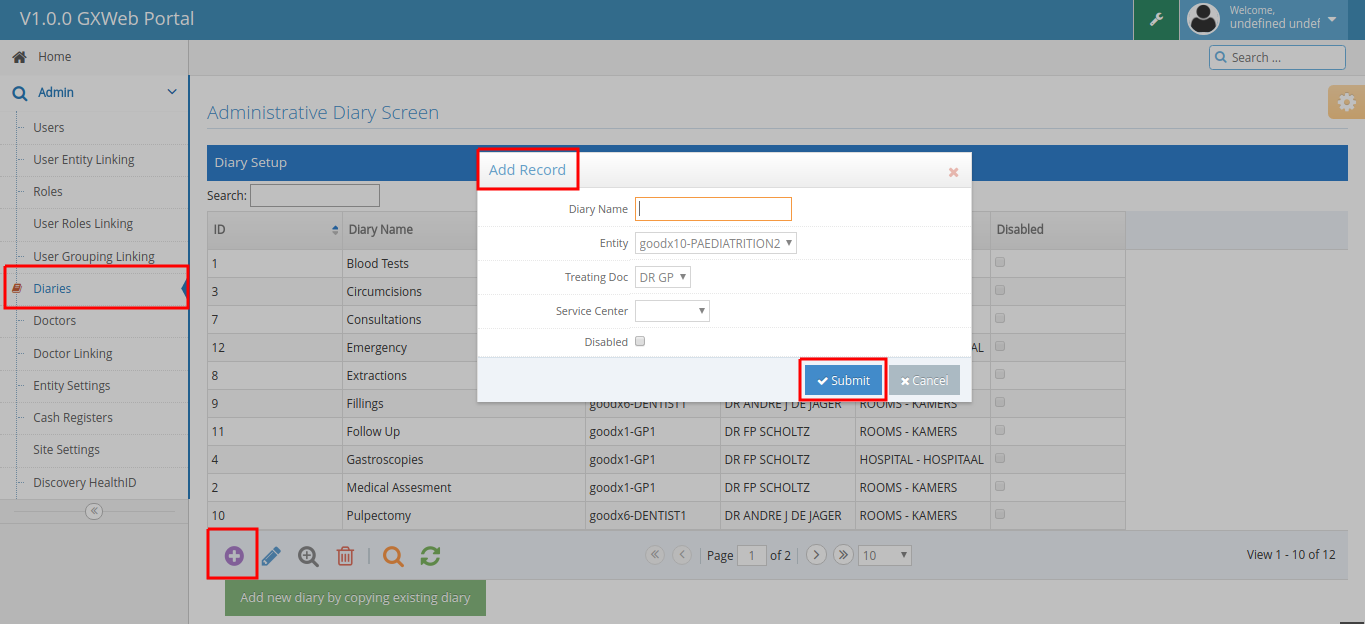
- Diary Name: This is the name that will display for the specific diary.
- Entity: The entity that the diary should be linked to.
- Treating Doctor: The default treating doctor for the specific diary. There must be a Treating Doctor linked to a Diary in order for the 'Reports' to work in the Web App.
- Service Centre: The default service center for the specific diary.
- Disabled: If this is ticked the specific diary will be disabled.
- Doctors:
- Name: This is the name of the treating doctor to be added.
- Initials: The initials of the treating doctor to be added.
- Practice Nr: This is the practice number of the treating doctor to be added.
- SAMDC Nr: Council number of the treating doctor.
- Specialization: The field that the practitioner specialized in. The Speciality code.

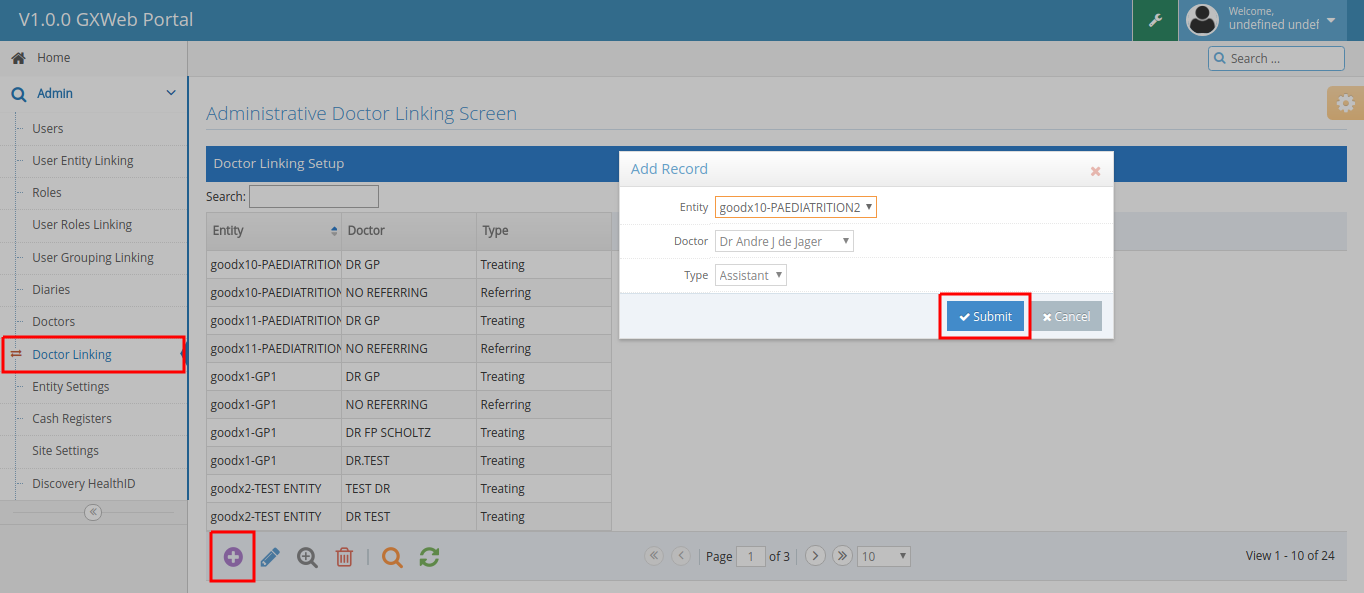
- Doctor Linking:
- Entity: Link the treating doctor to a specific entity.
- Doctor: Choose the doctor that should be linked.
- Type: This is the type of doctor (treating, assistant, referring).
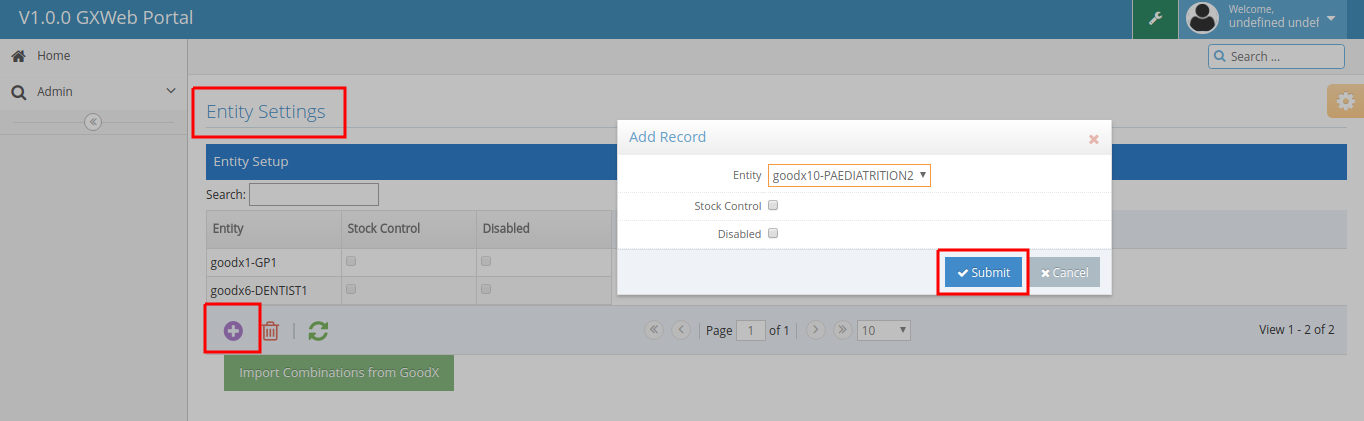
- Entity Settings:
- Entity: Choose the entity that you would like to activate/disable.
- Stock Control: Enable/Disable stock control.
- Disabled: If this setting is ticked, the entity will be disabled.
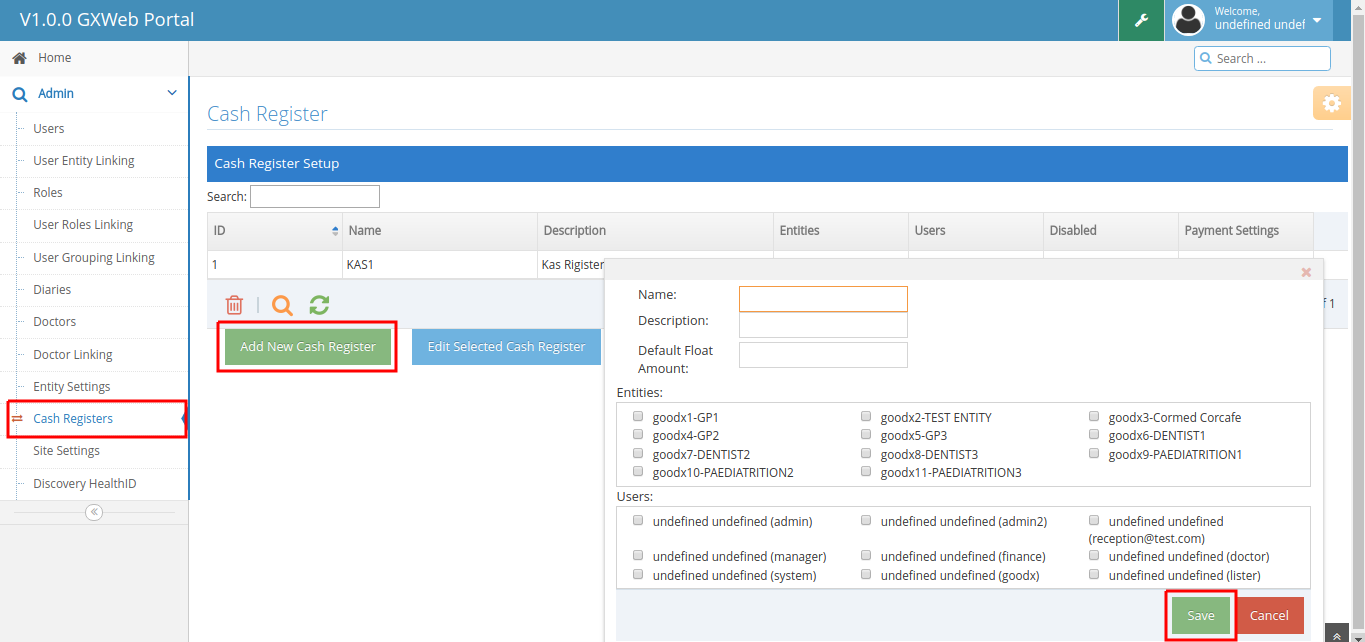
- Cash Registers:
- Name: Choose a name for the cash register being added.
- Description: Give a description of the cash register eg. Reception Cash Register.
- Entities: Choose the entity that you would like to link the cash register too.
- Users: Choose the users that should be linked to the cash register.
- Disabled: If this setting is ticked, the cash register will be disabled.
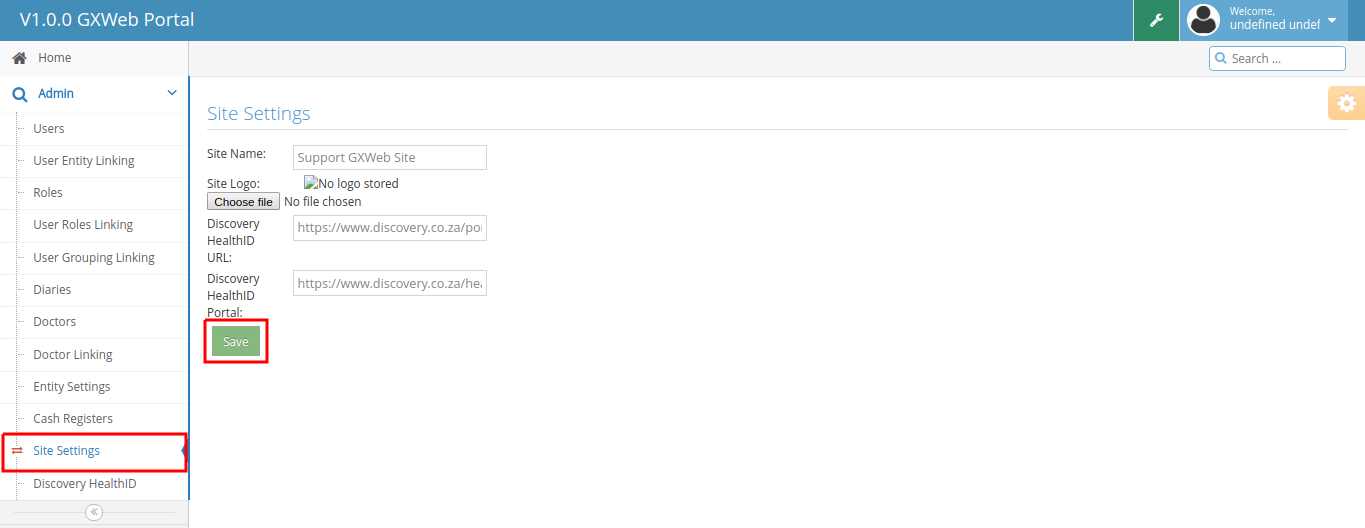
- Site Settings:
- Site Name: Enter the Site Name that will display on the Login Page of the site, in the top left corner.
- Site Logo: Upload the logo that will display on the Login Page of the site above the username and password field.
- Discovery Health ID URL and Portrait: This will be auto-completed.
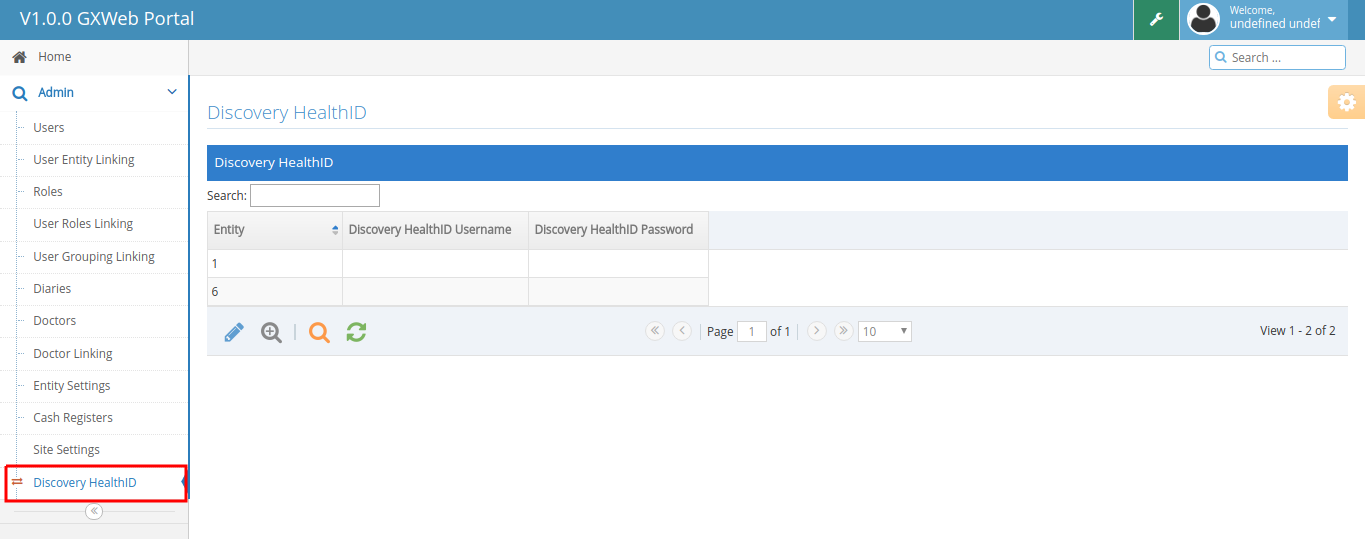
- Discovery HealthID:
- Discovery HealthID User: Add the username for the Discovery Health ID site.
- Discovery HealthID Password: Add the password for the Discovery Health ID site.