The screen provides all essential details needed to create and manage an Invoice, including Invoice Number, Service Centre, Treating and Referring Practitioners, Authorisation Numbers, Billing Groups, Price Lists, and Procedures. It ensures accurate billing, supports Temporary and Estimate Invoices, and allows access to Credit Control history, helping the Practice maintain proper documentation, authorisation compliance, and financial tracking.
The Contents of This User Manual:
Invoice Number
View CCA Logs
Invoice Details
Add Procedure
This user manual will start on the Invoice Details screen.
The unique system-generated number which identifies the Invoice.
💡Please Note: A Temporary Invoice is created automatically when a booking is made in the Diary. This Invoice remains temporary until it is posted to the Debtor’s account.
View CCA Logs
View the Credit Control history and actions for the specific Invoice you are working on.
Click the View CCA Logs button to view the Credit Control Assistant history for the specific Invoice being created.
💡Please Note: To manage Credit Control, Practices need to set up the Credit Control Assistant first. For more information regarding setting up the Credit Control Assistant, please refer to the user manual: Credit Control Management (Automated Credit Control) Setup.
Invoice Details
Shows key information about the Invoice, like the date, Treating Practitioner, and any Referring Practitioner or Authorisation codes. These details make up the total amount billed.
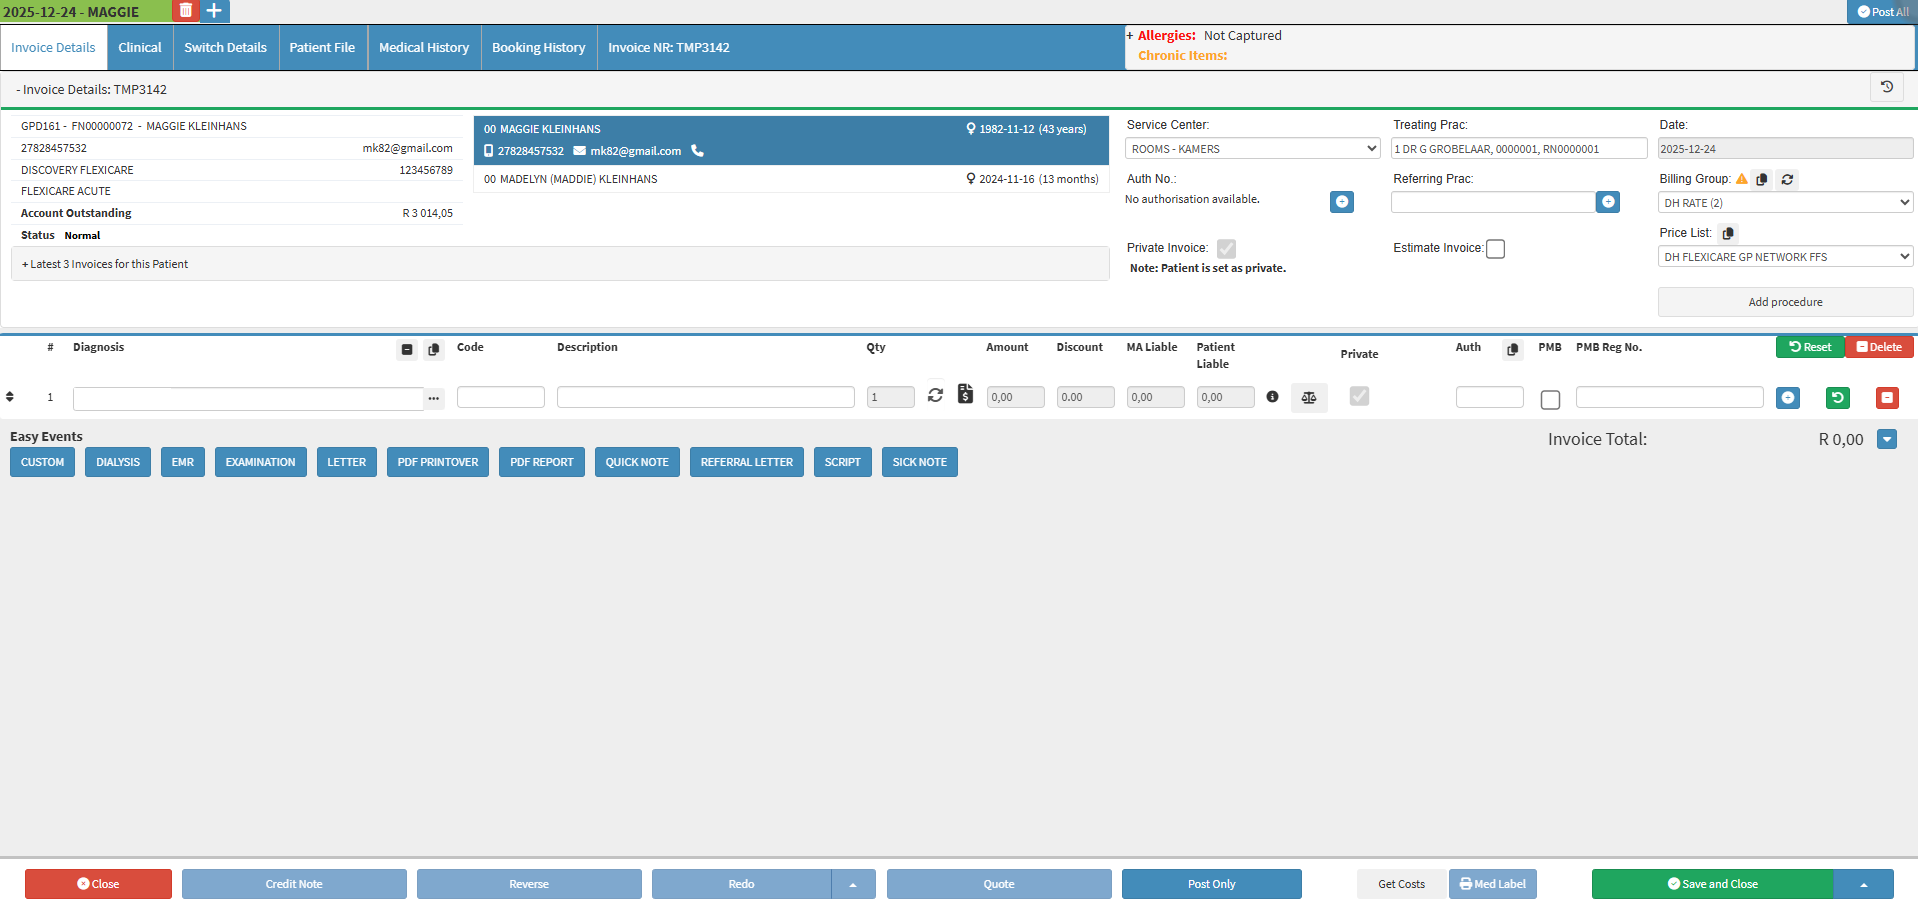
Click on the Service Centre drop-down menu to select an appropriate Service Centre option.
💡Please Note: The options on the list will display all Service Centres which have been set up at the Practice. For more information regarding how to set up Service Centres, please refer to the user manual: Add Place of Service (New Service Centre).
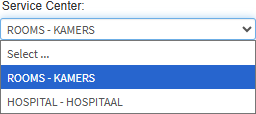
Click on the Treating Prac field to enter the Practitioner who treated the Patient from the list that becomes available.
Click on the Date field to view the year, month, and day (yyyy-mm-dd) when the booking was created and the service date; if the Invoice is created directly from the Debtors screen without a booking, the current date will be used by default, and the field cannot be edited.
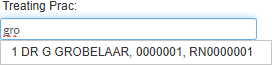
Click on the Auth No. field to view the Authorisation Number, which serves as proof of pre-approval for a specific item, procedure, or amount covered for the Patient by the Medical Aid/Insurance.
Auth Nr.: Authorisation Number - proof of pre-approval for a specific item, procedure, or amount the Patient is covered for by the Medical Aid/Insurance.
Click on the Addbutton to add an Authorisation Number.
The Clinical Information screen will open.
For more information regarding how to set up and add Authorisation Numbers, please refer to the user manual: Authorisation Setup.
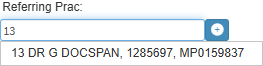
Click on the Referring Prac field and start typing the name of the desired Practitioner, then select the Practitioner from the drop-down menu that becomes available.
Click on the + button to add a new Practitioner to the list.
For more information regarding adding a new Referring Practitioner, please refer to the user manual: Add a Referring Practitioner.
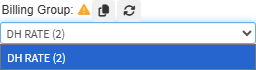
Click on the Billing Group drop-down menu to select the preset billing rate that will be used for this Invoice.
💡Please Note: The Billing Groups that appear on the list are determined by the Billing Groups that are available for the specific Medical Aid.
Click on the Copy Billing Group to all Lines button to apply the same Billing Group to the entire Invoice.
Click on the Reset Default Tariffs button to reset the Tariffs on the Invoice back to the default prices set up in the system or according to billing rules
Tick the Private Invoice checkbox to make the Patient liable for payment of the entire Invoice. This is used when the Patient’s Medical Aid funds are depleted or when the Medical Aid does not cover certain procedures.
Tick the Estimate Invoice checkbox to change the Invoice to a quotation. This provides the Patient with an estimate of the cost of procedures or treatments before they are performed, replacing the Temporary Invoice with an Estimate Invoice.
For more information regarding how to create an Estimate Invoice, please refer to the user manual: How to Create an Estimate Invoice.
Click on the Price List drop-down menu to select the tariff codes and corresponding prices that will be used to bill the Patient, based on their Medical Aid option.
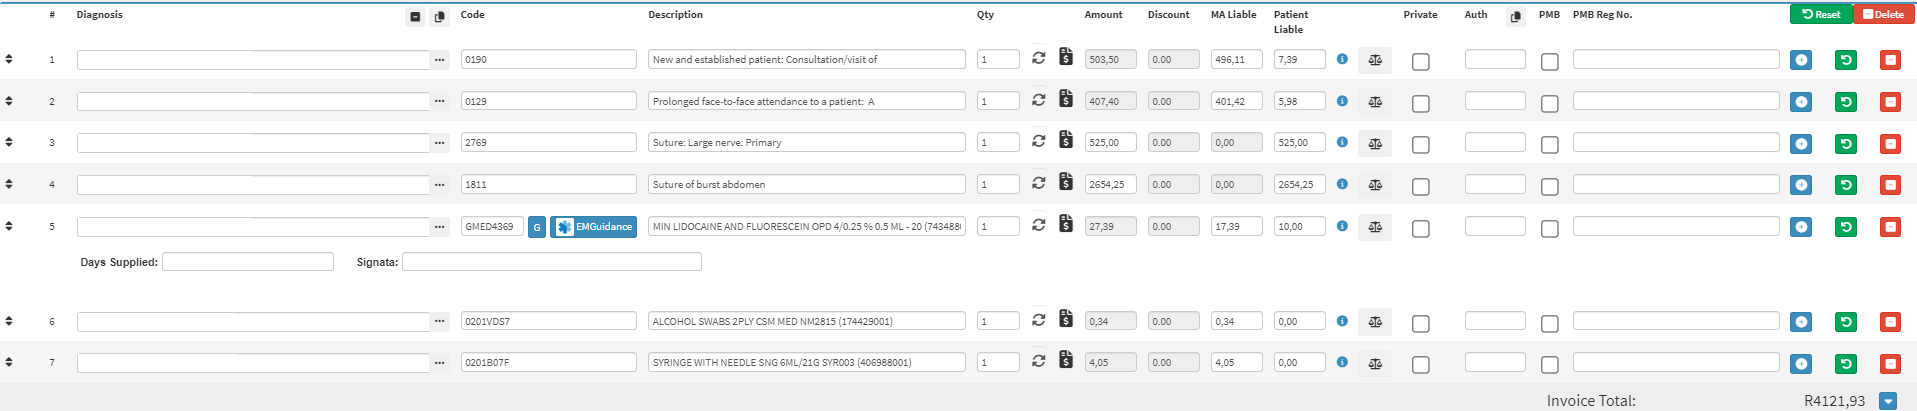
Add Procedure
Add Procedures to the Invoice by searching for and selecting items in the Billing Item Search screen.
Clickon theAdd Procedurebutton.
The Billing Item Searchscreen will open.
Click on the Search field and enter the name of the Procedure you want to add to the Invoice. The list will filter automatically as you type.
💡Please Note: Procedures can be searched for by using the Code or Name of the Procedure.
Click on the desired Codes/Items which you would like to bill, to move them over to the Added Codes side.
💡Please Note: More than one item can be selected from the list, including Medicines and Materials.
Click on the Delete button to remove an item.
Click on the Save button to add the selected items to the Invoice.