Add New Batch (Multi Invoice) Screen: Navigating and Use
Why Use This Function
The Multi Invoice screen allows you to create and manage batches that contain multiple Invoices. These batches may include Invoices for the same Debtor across different dates or for multiple Debtors within a single batch. This functionality is especially useful for Bureaus and Practices that process high volumes of billing, as it streamlines the invoicing process and reduces manual effort.
By grouping Invoices into batches, the Multi Invoice screen improves efficiency, ensures consistency in billing, and simplifies reconciliation and reporting. It helps maintain accurate financial records and supports faster claim submission, resulting in a smoother, more controlled billing workflow within the Practice.
The Contents of This User Manual
Load Batch
Invoice History, Post, Open Account, Repeat and Delete Invoice from Batch
Add Invoice
This user manual will start on the Debtors screen.
Click on the Multi Invoice button at the top right-hand side of the screen.
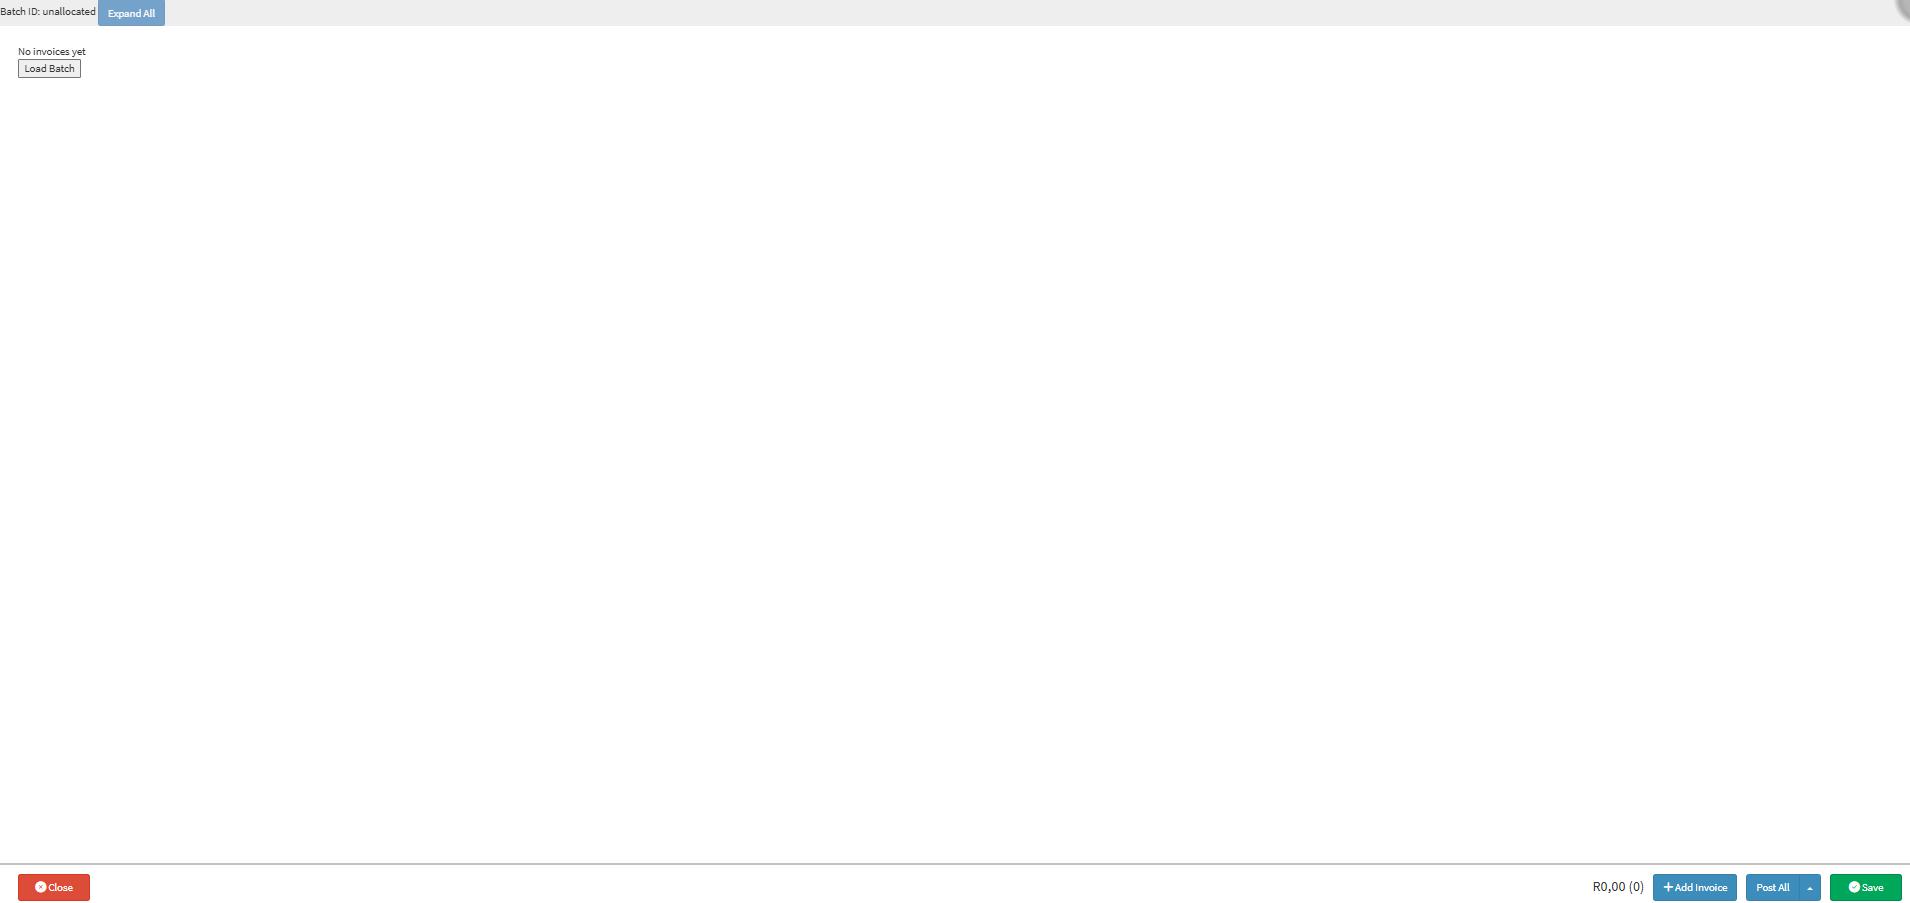
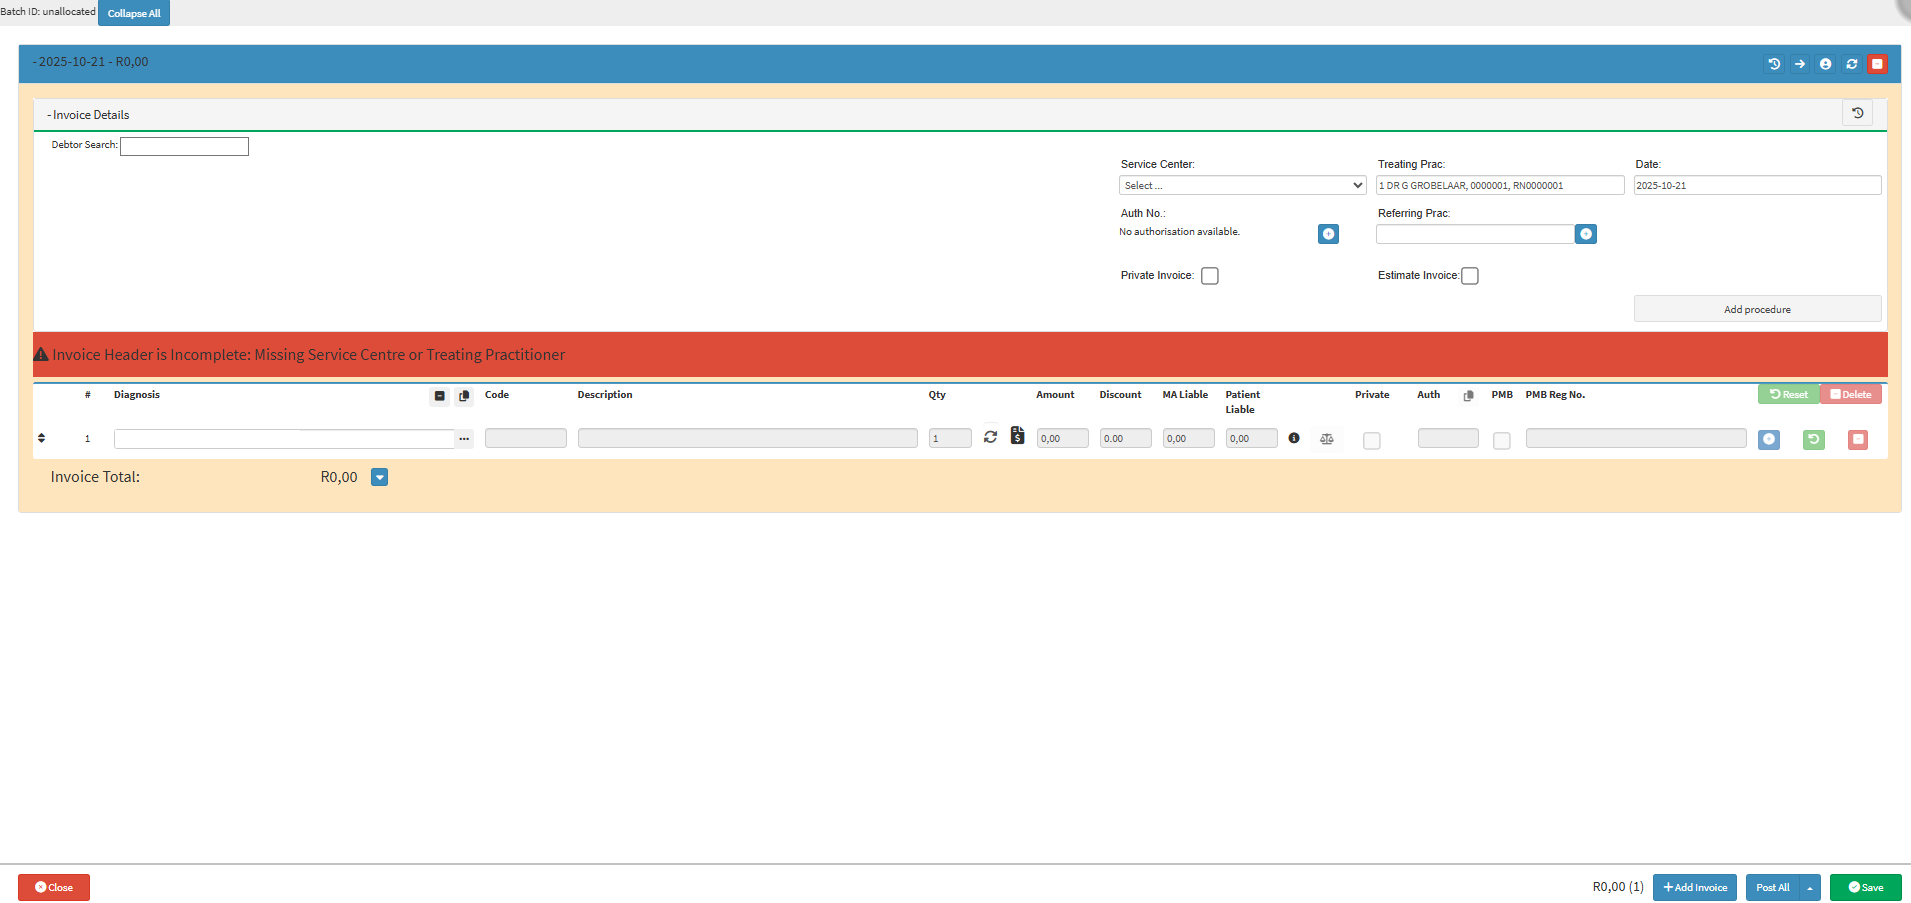
The Multi Invoice screen will open.
?Please Note: The Multi Invoice screen will be blank until you add an Invoice.
Load Batch
Allows you to load a batch that has only been saved and that has not been posted to the system.
Click on the Load Batch button to load batches that have not been posted yet.
The Batch will open and display all the Invoices associated with the specific batch that was chosen.
Click on the Expand All button to expand all the Invoices in the selected batch.
All the Invoices will expand, and you will be able to continue working.
Click on the Save button to save the batch after completion. The screen will close and revert to the main Debtors screen.
Invoice History, Post, Open Account, Repeat and Delete Invoice from Batch
Allows you to view the Invoice History, Post the current Invoice, open the Account Details screen of the selected Debtor, Repeat the current Invoice for several days and Delete Invoices that you no longer wish to post.
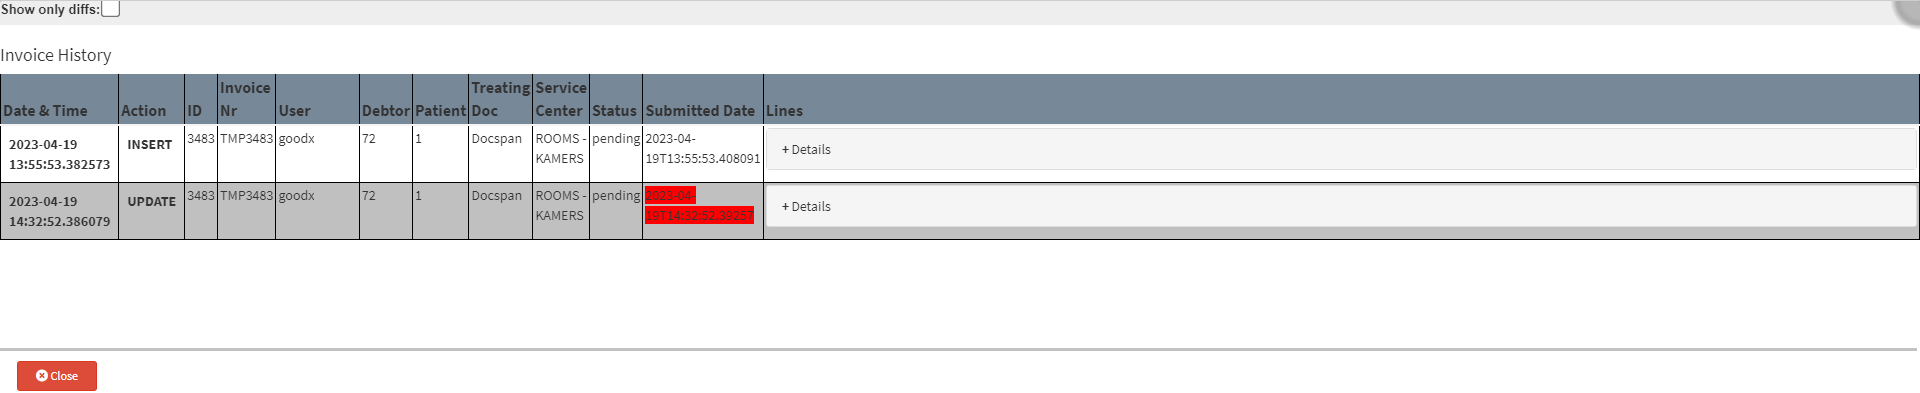
Click on the View Invoice History button on the Invoice panel of the desired Invoice to open the Invoice History screen.
The Invoice History screen will open.
For more information regarding the Invoice History screen and to view all the changes made on the Invoice, please refer to the user manual: Multi Invoice Change Log.
Click on the Post button on the Invoice panel of the desired Invoice to post the Invoice, whichwill only post the current Invoice and not any other Invoices in the batch.
When Posted Successfully, the Invoice will be highlighted in green.
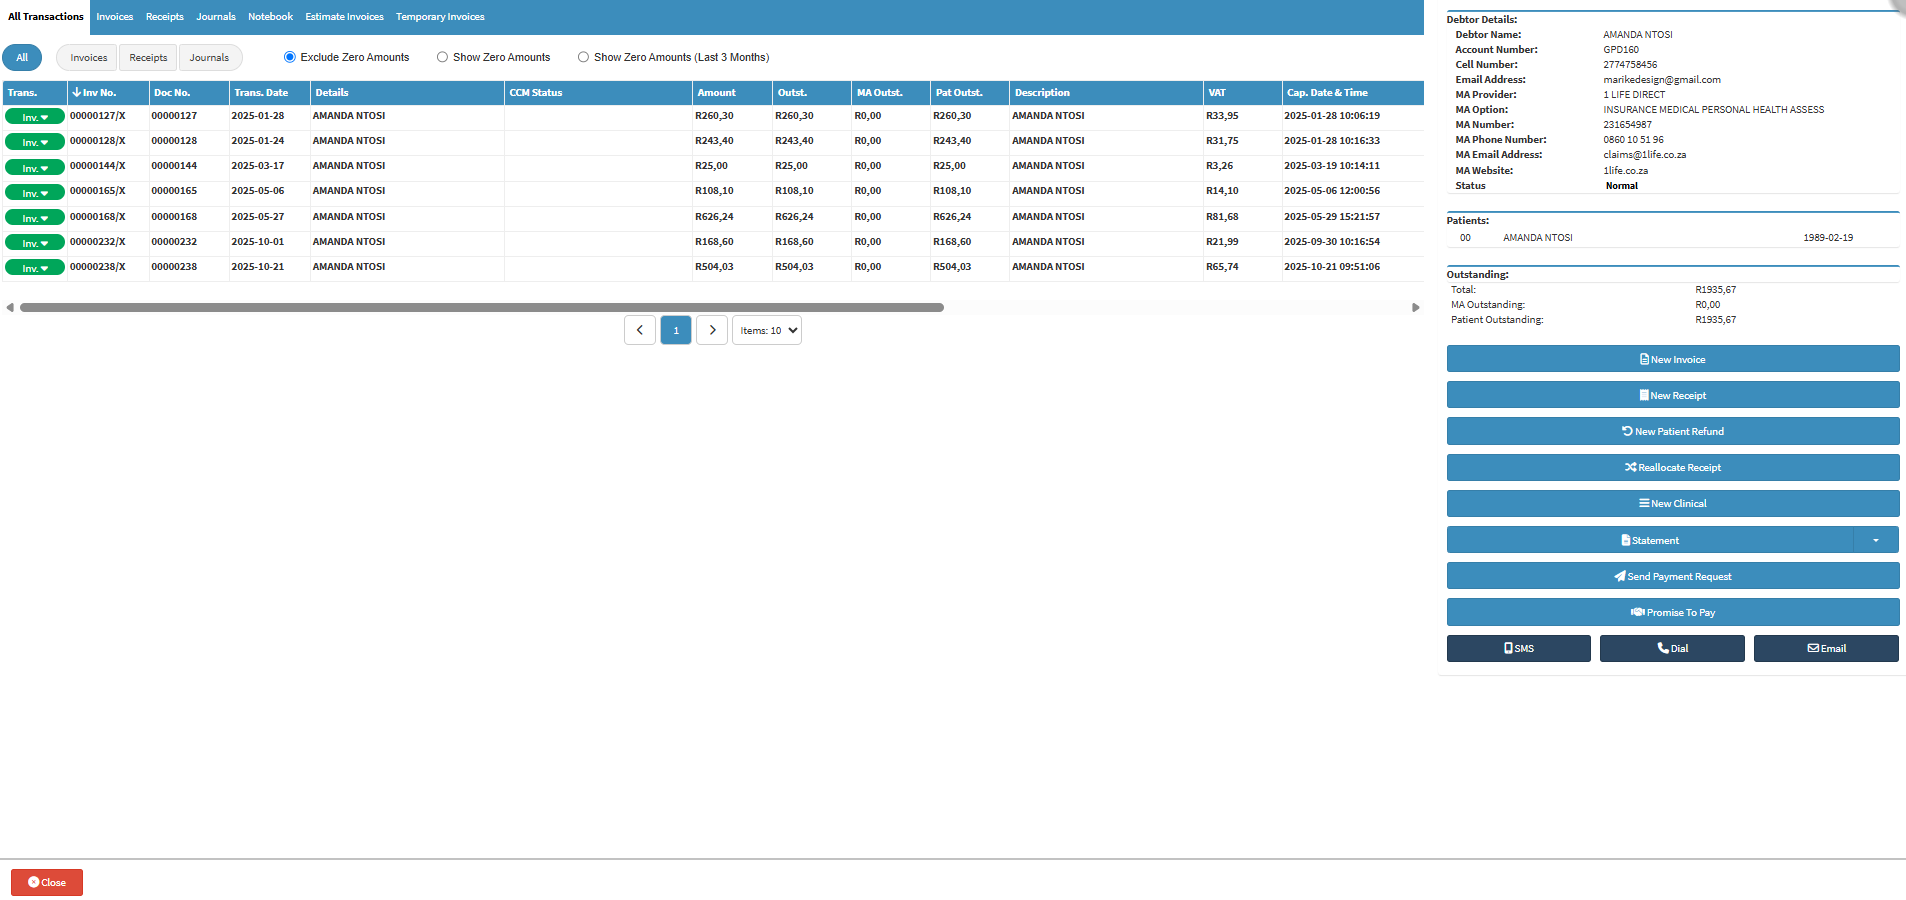
Clickon the Open Account button in the top right-hand corner of the desired Invoice panel to open the Debtors Account screen.
You will have access to the full Account History screen.
Click on the Repeat Items in Single Line button to repeat the invoice line multiple times.
Repeat Items in a Single Line: This allows you to repeat the invoice line multiple times.
?Please Note: For the Repeat Items in Single Line button to work, the Quantityvalue should be greater than 1.
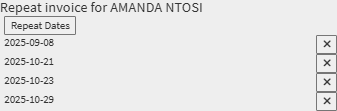
Clickthe Repeat button on the desired Invoice panel to createa new Invoice that is an exact duplicate of the current one.
The Repeat Invoice screen will open.
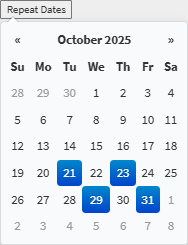
Click on the Repeat Dates button.
The Date Picker will open, where you can select the dates to repeat the same Invoice on the current Debtor.
The selected Dates will be listed in the Repeat Invoice screen.
Click on the Remove button to remove the corresponding date from the Repeat Dates list.
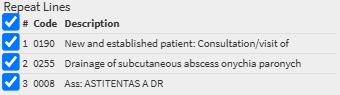
Click on the Item Line checkboxes to add or remove the Item Lines from the Repeat Lines list.
?Please Note: If the Item Line checkbox is not blue, the item line will not repeat for the selected repeat Dates.
Click on the Ok button when done with the selection. New Invoices will be created in the same batch.
Invoices for the selected dates will be created.
Click on the Post All button to post all the Invoices that have been created in the batch.
Click on the Post All drop-up menu button to access the option to Post and Switch All, which will post all the Invoices and switch them to the Medical Aid.
Click on the Save button to save the batch after completion. The Multi Invoice screen will close and return to the Debtors screen.
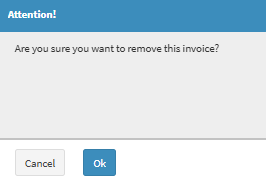
Clickon theDeletebutton to remove the Invoice from the batch.
An Attention pop-up will appear to ask you whether you are sure that you would like to permanently delete the Invoice from the batch.
Clickon theOK button to delete the selected Invoice from the batch.
Add Invoice
Allows you to create and add a new Invoice to the batch.
Clickon the Add Invoicebutton in the bottom right-hand corner of the screen.
The Invoice section will expand.
?Please Note: ARedWarning message will always appear by default when a new Invoice is added to advise you that the Invoice header is incomplete. The error will disappear once a Debtor has been added to the Invoice, or once the Service Centre and Treating Doctor have been added.
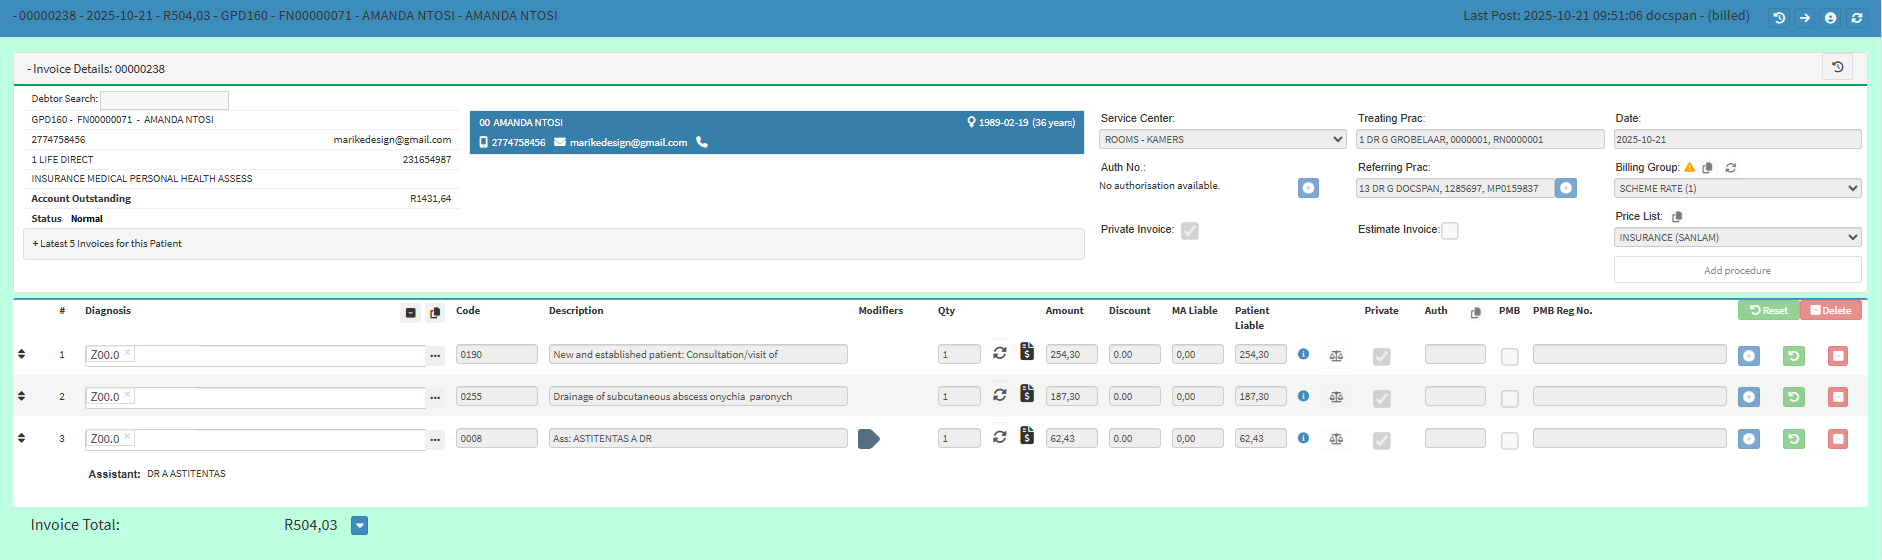
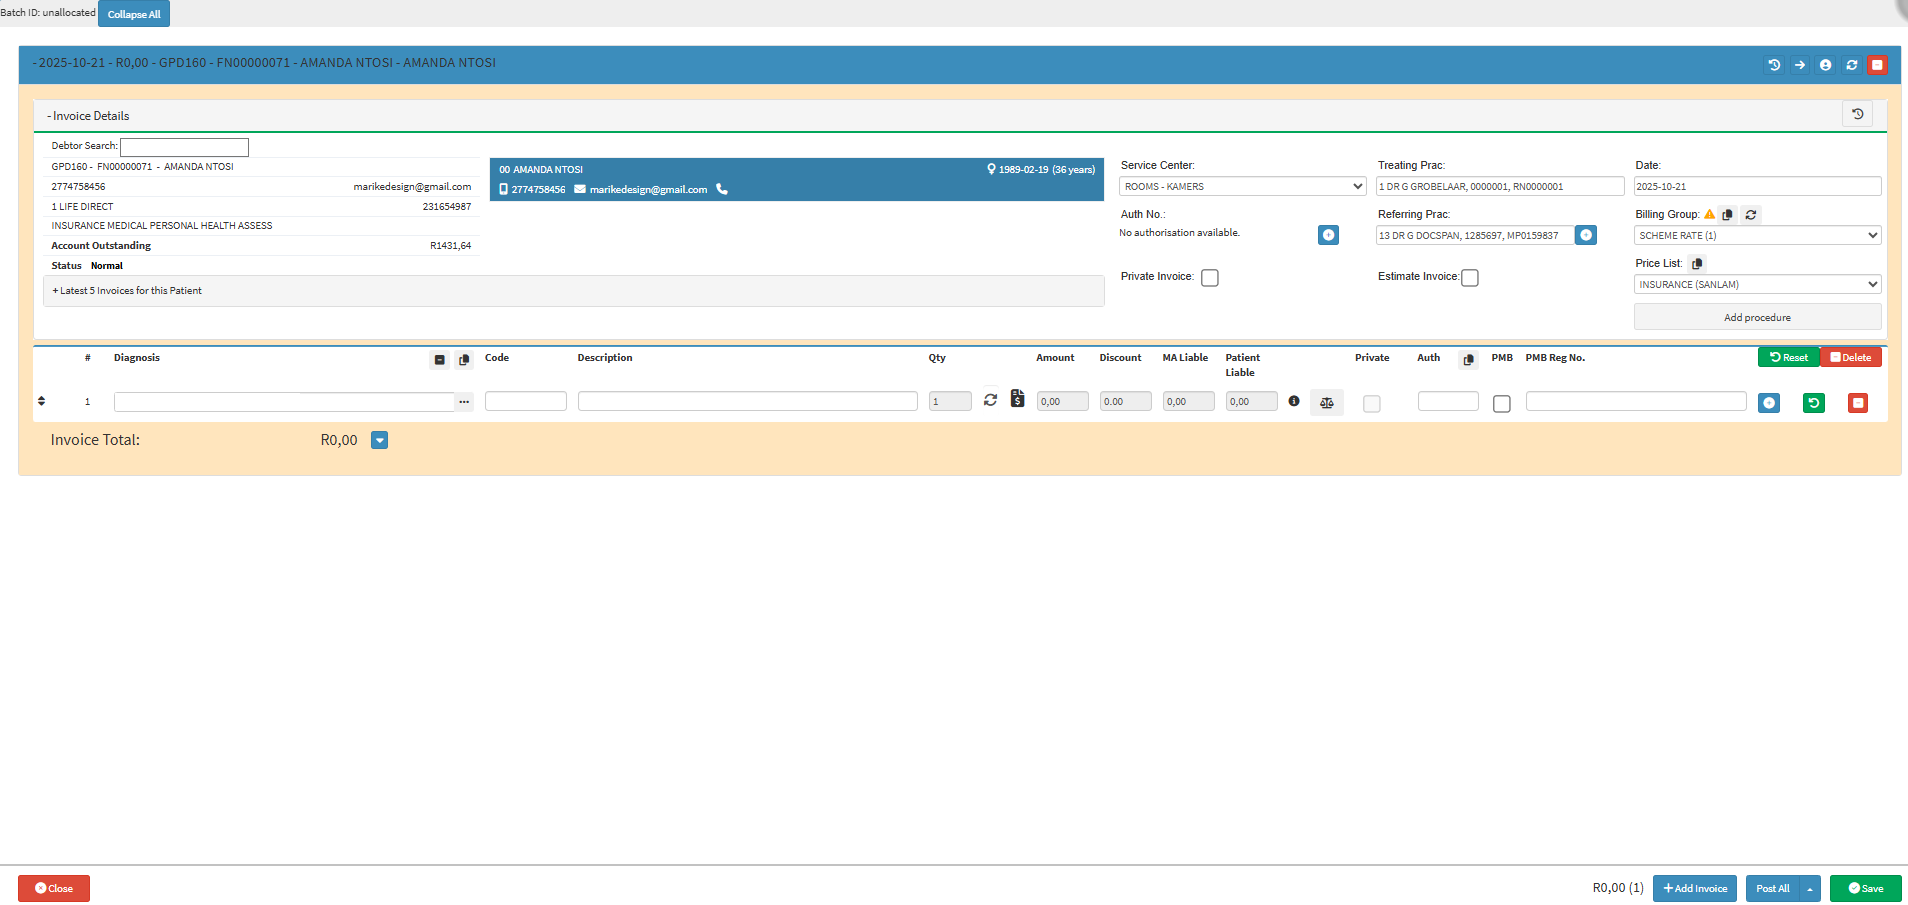
Add the Debtor by typing in the Debtor Search field.
Click on the desired Debtor to make a selection.
The selected Debtors' information will be populated onto the Multi Invoice.
?Please Note: A warning message will appear if an Invoice has already been posted on the same day for the same Patient.
The following personal details will appear on the top left side of the Invoice screen:
Debtor Number: The Account Number that will be linked to the person who is responsible for the account.
File Number: The Number that is associated with the account holder/patient's hard copy File.
Debtor Name and Surname: The full name of the person who is responsible for the payment of the account.
Contact Information and Email Address: The Cellphone Number and email address of the person who is responsible for the account.
Medical Aid Details and Medical Aid Number: The Name and Plan number of the Medical Aid the Debtor/Patient belongs to.
Medical Aid Plan: The Plan of the Medical Aid to which the Debtor/Patient belongs.
Account Outstanding: Outstanding Balance of the Debtor.
Click on the Add Procedure button toadd procedure items tothe Invoice lines.