Text size
Line height
Text spacing
A CCA/CCM Status indicates the current stage of an unpaid Patient or Debtor account within the Credit Control process. As part of the Credit Control Assistant (CCA)/Credit Control Management (CCM) workflow, each status reflects exactly where the account is in the debt-collection cycle, allowing the Practice to track progress, prioritise follow-up actions, and ensure that outstanding amounts are managed efficiently.
Statuses provide real-time visibility into the financial state of an account, helping the Practice monitor unpaid balances, streamline communication, and ultimately support the successful recovery of funds.
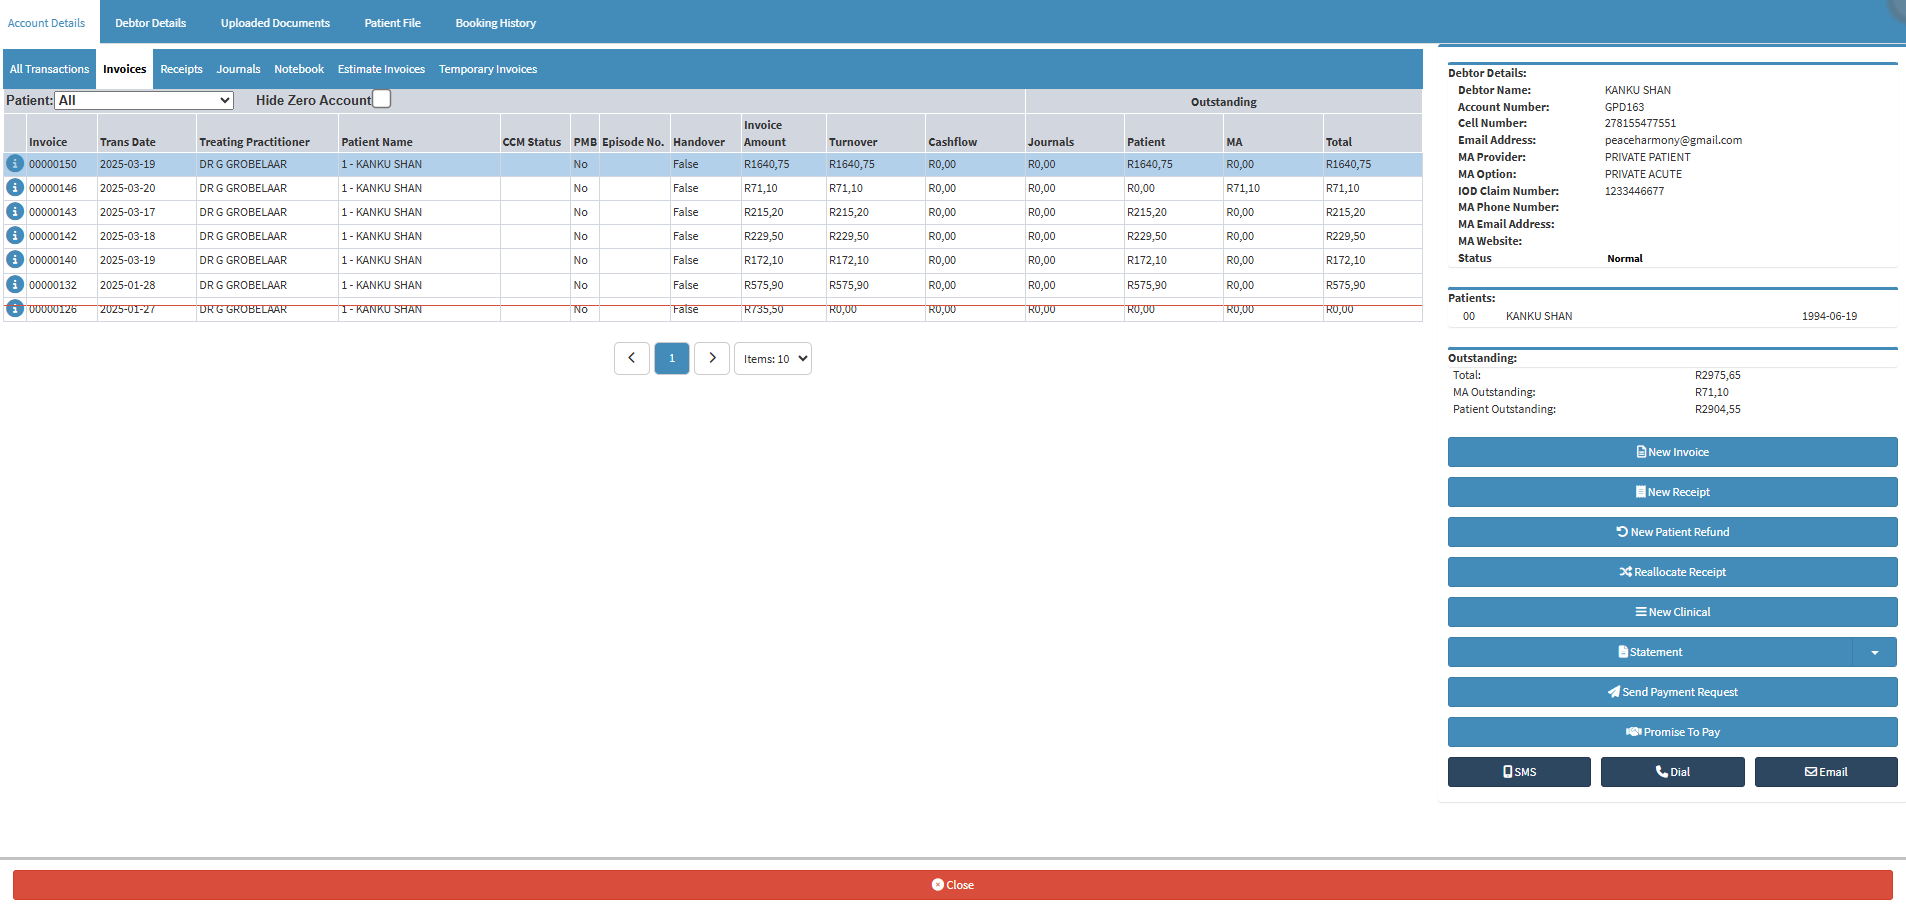
![]()

![]()
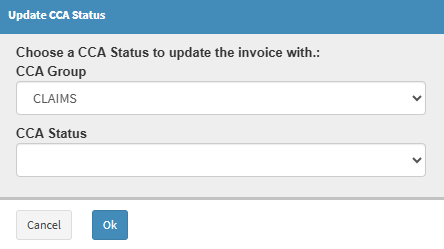
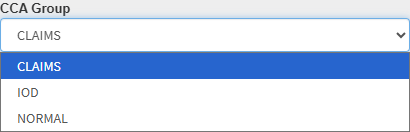
?Please Note: The options available depend on the CCA settings setup for your Practice.

![]()
