Text size
Line height
Text spacing
When a Patient is examined or treated by a Practitioner, the Practitioner will bill the Patient for services rendered. The Practitioner will use an Invoice to bill the Patient accordingly. The Invoice will be made out to the main member or the person who is responsible for the account payment, the Patient's details will also appear on the Invoice. An Invoice will be generated for each visit, detailing all consultations, procedures, medications, and consumables provided to the Patient. An Invoice will have an amount per line and a total for all the line items. An Invoice can be used for tax purposes. The Invoice can also be used to show the Patient how much they need to pay for the visit. An Invoice is also known as a Tax Invoice, which will indicate the VAT rate and the VAT amount.
The Contents of This User Manual:
![]()
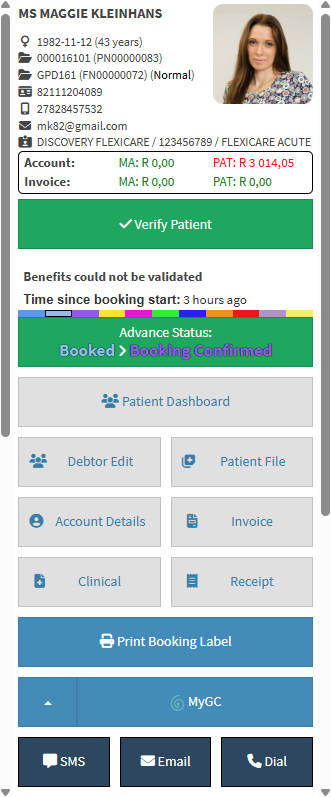
The Patient and Debtor Information panel provides a clear overview of the details linked to the current Invoice. Displaying demographic information, Medical Aid details, account balances, and Invoice history in one area supports correct Patient selection, reduces billing errors, and assists with consistent and efficient Invoice capture.

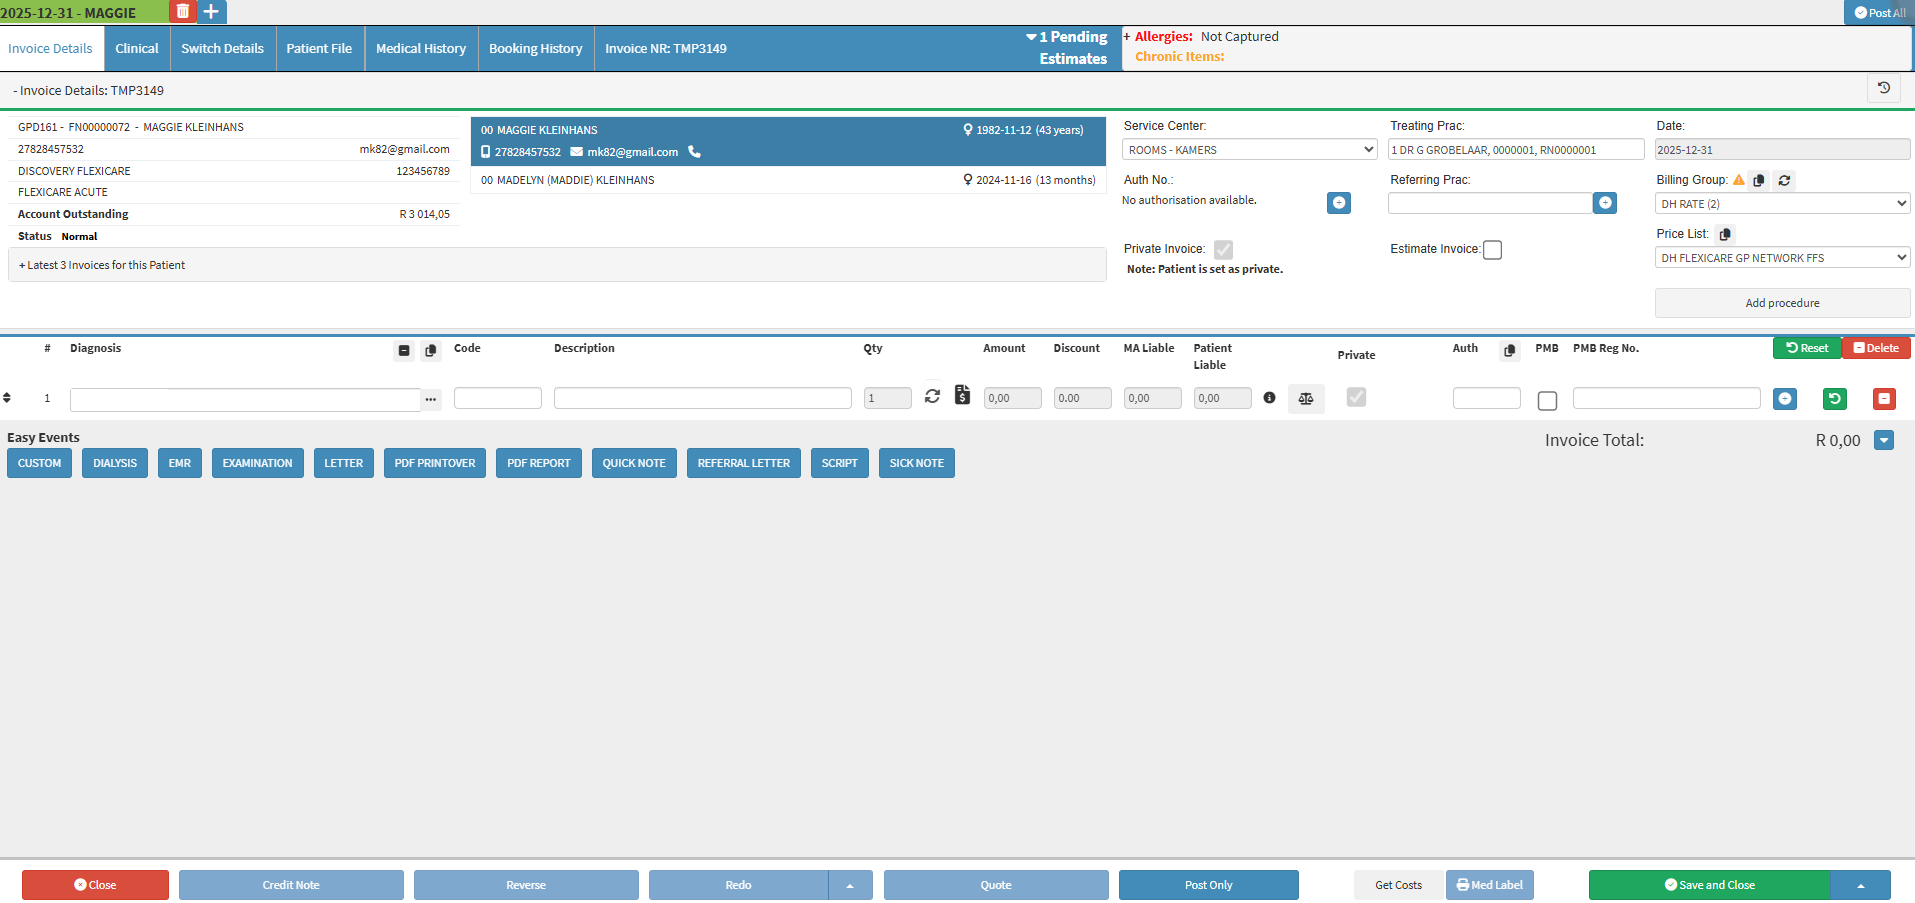
The Billing Information section displays the key details needed to create and manage an Invoice, supporting accurate billing, authorisation compliance, and effective financial tracking.
The Invoice Line Details section explains how billed services and items are captured and managed on an Invoice, supporting clear, accurate, and transparent billing for Patients and Medical Aids.

Prescription Line Items help you add Medicine Items to an Invoice accurately, including directions for use and supply days, while guiding you to select generics, access EMGuidance for safe prescribing, and record all details clearly and efficiently.

Invoice Actions let you manage, post, and save Invoices accurately while allowing corrections and authorisation checks.
![]()