Generate an Advanced Booking Reminder Report
Advanced Booking Reminder Reports aim to reduce missed appointments, enhance Patient compliance, and improve operational efficiency by sending timely reminders through Patients' preferred communication methods.
- The contents of this user manual will consist of the following information:
- Generate Advanced Booking Reminder
- Column Options
- Columns
- Booking Reminder Report Sidebar
- Bulk Actions
- Patient Information
- Page Options
- Export
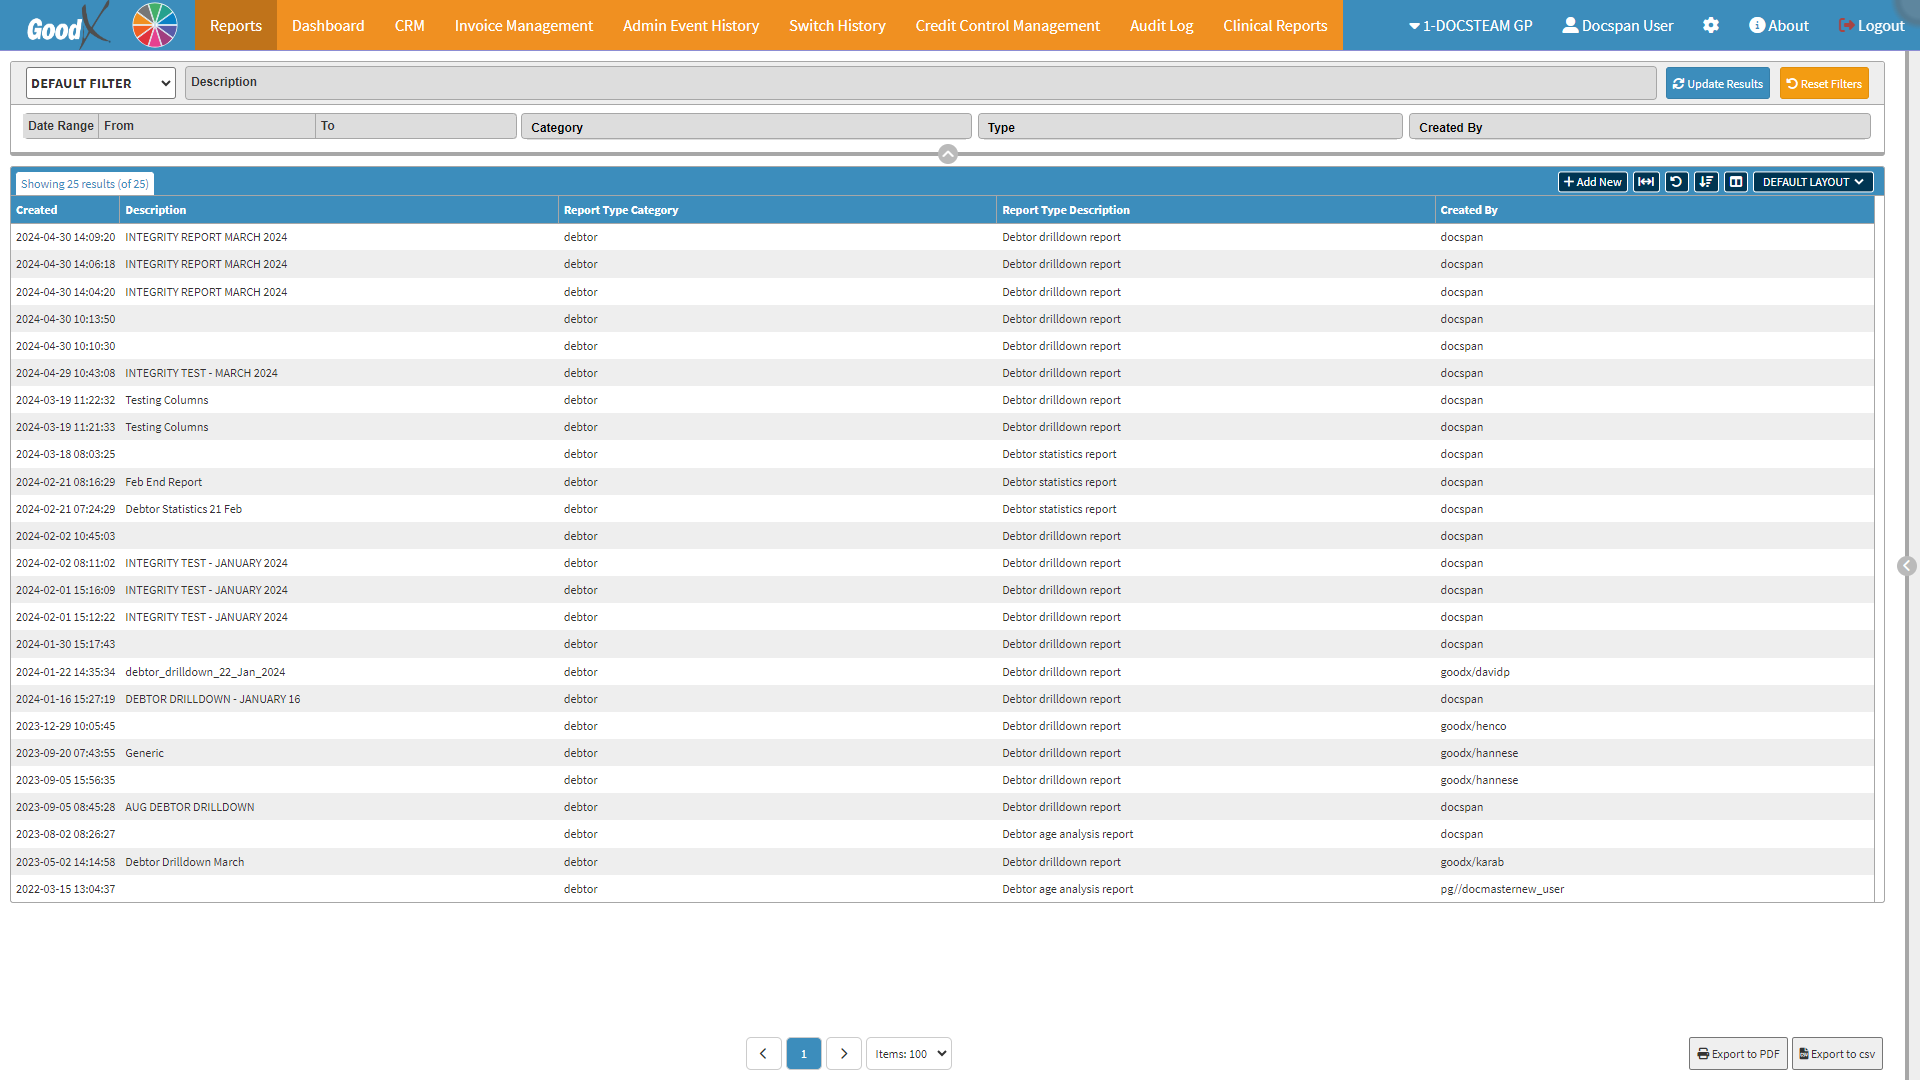
- This user manual will start on the Reports screen.

- Click on the CRM tab.

- The Build SMS/Email screen will open.

- Click on Booking Reminder tab.
![]()
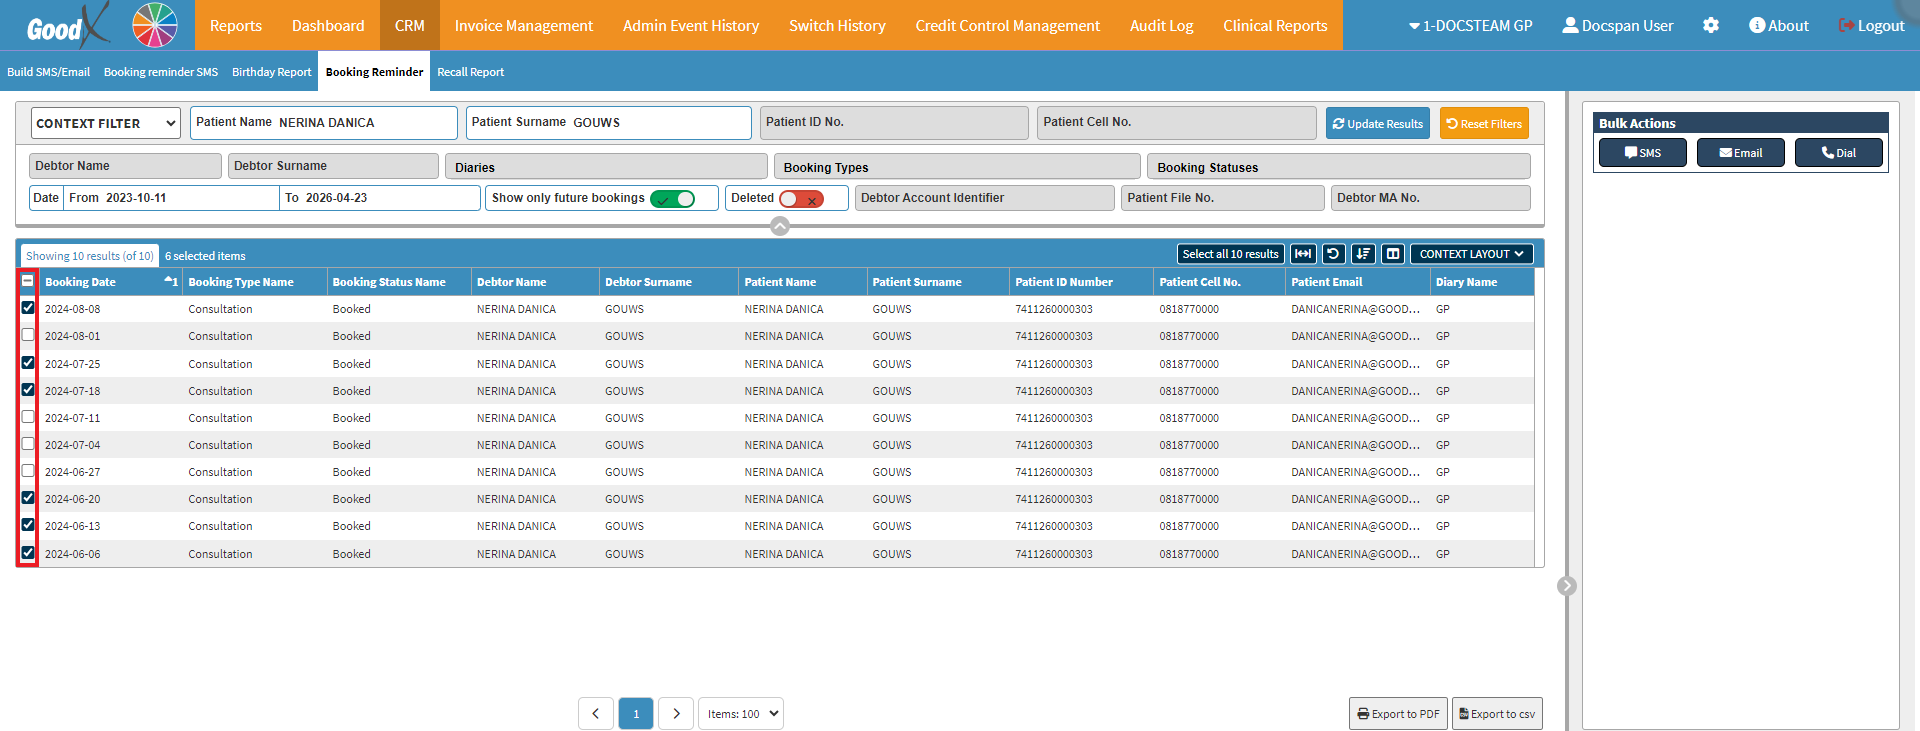
- The Booking Reminder screen will open.

- For more information regarding the Booking Reminder Report screen, please refer to the user manual: Booking Reminder Report Screen.
Generate Advanced Booking Reminder
Generating Advanced Booking Reminders allows the Practitioner to view a specific Patient's upcoming appointments and keep them up to date.

- Search for the desired Patient to whom the Reminder should be sent by using the Filter Bar.

- For more information on how to use the Filter Bar, please refer to the user manual: Booking Reminder Report Screen.
- Click on the Update Results button after all the filters have been set.
- The Booking Reminder Report screen will display with all the chosen filters applied.

Column Options
Several additional Options are available for the Columns. These additional Options are to help the User adjust the Report, refine the Search and give more specific results.
![]()
- Click on the Select All Results button to Select All Results on the filtered list.
![]()
- Click on the Expand Widths button to auto-fit the Column Width to the information within all columns.
![]()
- Click on the Reset Widths button to restore the original Widths after any modifications were made.
![]()
- Click on the Sort Columns button to sort the Columns in the order that you desire.
![]()
- For more information regarding how the Sort Columns feature works, please refer to the user manual: How to Sort Columns on Reports and List Screens.
- Click on the Choose Columns button to select the columns that will be displayed on the List.
![]()
- For more information regarding how the Choose Columns feature works, please refer to the user manual: How to Choose Columns on Reports and List Screens.
- Click on the Context Layout drop-down menu to select the type of layout that will be used for the screen.
![]()
Columns
All the information on the Booking Reminder Report screen is divided into Columns to logically group related information together.

- An explanation will be given for each of the Columns:
- Booking Date: The Date on which the Booking is scheduled.
- Booking Type Name: The Type of Booking that was scheduled.
- Booking Status Name: The Status of the Scheduled Booking.
- Debtor Name: The Name of the Debtor.
- Debtor Surname: The Surname of the Debtor.
- Patient Name: The Name of the Patient.
- Patient Surname: The Surname of the Patient.
- Patient ID Number: The ID Number that belongs to the Patient for whom the Booking was created.
- Patient Cell No.: A Mobile Number where the Patient can be reached by telephone.
- Patient Email: An Email Address where the Patient can receive Emails.
- Diary Name: Name of the Diary where the booking is scheduled.
Booking Reminder Report Sidebar
The Booking Reminder Sidebar allows you to view the Patient's demographic and Medical Aid information. You are also able to send bulk SMSes and Emails to the Patient, as well as make necessary calls from the sidebar.

Bulk Actions
You are able to send multiple SMSes and Emails to the same Patient on the Booking Reminder Report sidebar.

- Tick the corresponding Checkbox to select the desired Patient's booking dates on the booking reminder Report List, for whom you would like to send the booking reminder.

- Click on the SMS button to send the Booking Dates via Text Message to the selected Patient.
- For more information regarding how to SMS Patients, please refer to the user manual: Send an SMS.
- Click on the Email button to send the Booking Dates via Email to the selected Patient.
- For more information regarding how to Email Patients, please refer to the user manual: Send an Email.
- Click on the Dial button to create a Call Event for the desired Patient.
![]()
- For more information on how to make a call to a Patient, please refer to the user manual: Making a VoIP Call.
Patient Information
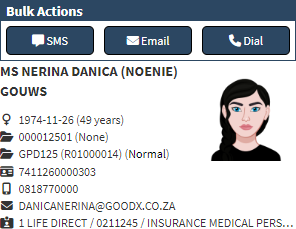
When Clicking on a result, the Demographic and Medical Aid Information of the selected Patient will be displayed.
- The fields will be explained below:
- Patient's Details (MS NERINA DANICA (NOENIE) GOUWS): The Patient's Title, Name, Nickname and Surname.
- Gender, Date of Birth, Age ( ♀️ 1974-11-26 (49 years)): Patient's Gender, Date of birth and their Age.
- Account Number and Patient's File Number (000012501 (None)): The Main Debtor's Account Number and the Patient's individual File Number.
- Debtor Number (GPD125): A Debtor Number is autogenerated by the system and assigned per Patient.
- File Number (R01000014): The File Number which is created by the system automatically when the system's file was created.
- ID Number (7411260000303): ID Number of the Patient.
- Cellphone Number (0818770000): Cellphone Number of the Patient.
- Email Address (DANICANERINA@GOODX.CO.ZA): Email Address of the Patient.
- Medical Aid Provider, Option and Number (1 LIFE DIRECT / 0211245 / INSURANCE MEDICAL PERSONAL HEALTH ASSESS): The name of the Patient's Medical Aid, Plan and Plan Number.
Page Options
All the additional options that are available for the page.
![]()
- Click on the Previous button to Navigate to the Previous Page.
![]()
- Click on the Page Number button to Navigate to the desired Page.
![]()
- Click on the Next button to Navigate to the Next Page.
![]()
- Click on the Items drop-down menu to select the Number of items that will be displayed on the screen.

Export
The Booking Reminder Report can be exported to a PDF or CSV file should you wish to Print or Save to your computer or open the form in an Excel or PDF format.
- Once the desired bookings have been Selected, Click on the Export to PDF button to save the filtered results as a PDF file.
![]()
Please Note: In order to Export to PDF, a file should be selected.
- Once the desired bookings have been Selected, Click on the Export to CSV button to save the Report in a CSV format.
![]()