The Account Details sidebar brings essential information together in one place, making it easy to access all relevant Debtor and Medical Aid details at a glance. It provides a quick view of contact details, Patient links, outstanding balances, and access to key action and communication buttons. This centralised layout supports efficient financial processing, faster follow-ups, and smoother communication, helping you manage each account with accuracy and ease.
The Contents of This User Manual:
Demographic Details
Debtor Details
Patient Details
Account Details
Action Buttons
Communication Buttons
This user manual will start on the Account Details screen.
The Account Details sidebar allows you to access different account-related functions.
Demographic Details
Demographic Details refers to all of the Debtors/Patients' Personal Information, such as Name, Surname, Medical Aid Information, etc.
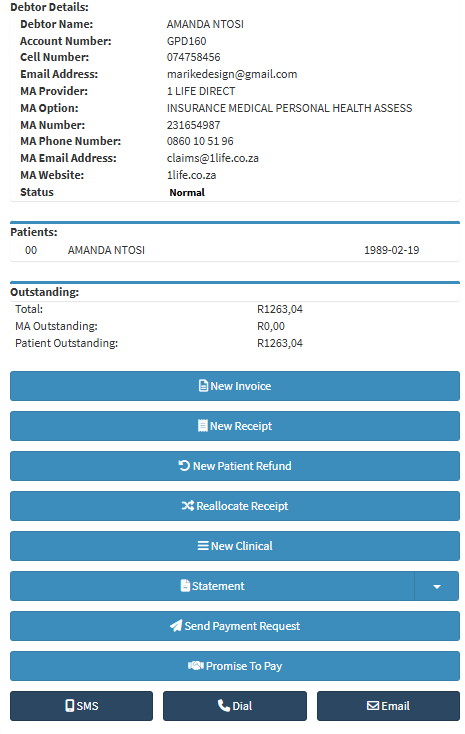
Debtor Details
Debtor Name: The First and Last Nameof the person who is responsible for the payment of the Account as stated on their official identification documents.
Account Number: The Debtor Numberthat will be linked to the person who is responsible for the Account.
Cell Number: The Mobile Numberof the person who is responsible for the Account.
Email Address: An Electronic Mailing Addressof the person who is responsible for the Account.
MA Provider: The name of the company with which the person responsible for the Account has Medical Insuranceor Medical Aid.
MA Option:The Name of the Medical Aid Plan corresponding to the Medical Aidof the person who is responsible for the Account.
MA Number: The Medical Aid Membership Number associated with the Account of the Main Member.
MA Phone Number: The Telephone Numberthat can be used to contact the Medical Aidthat covers the Debtor.
MA Email Address: The Electronic Mailing Addressthat can be used to contact the Debtor'sMedical Aidprovider.
MA Website: The URL to the Website of the Medical Aid provider.
Status: A Debtor Status indicates the current situation at a particular time during the Practice flow process, and allows you to add a status to the Debtor.
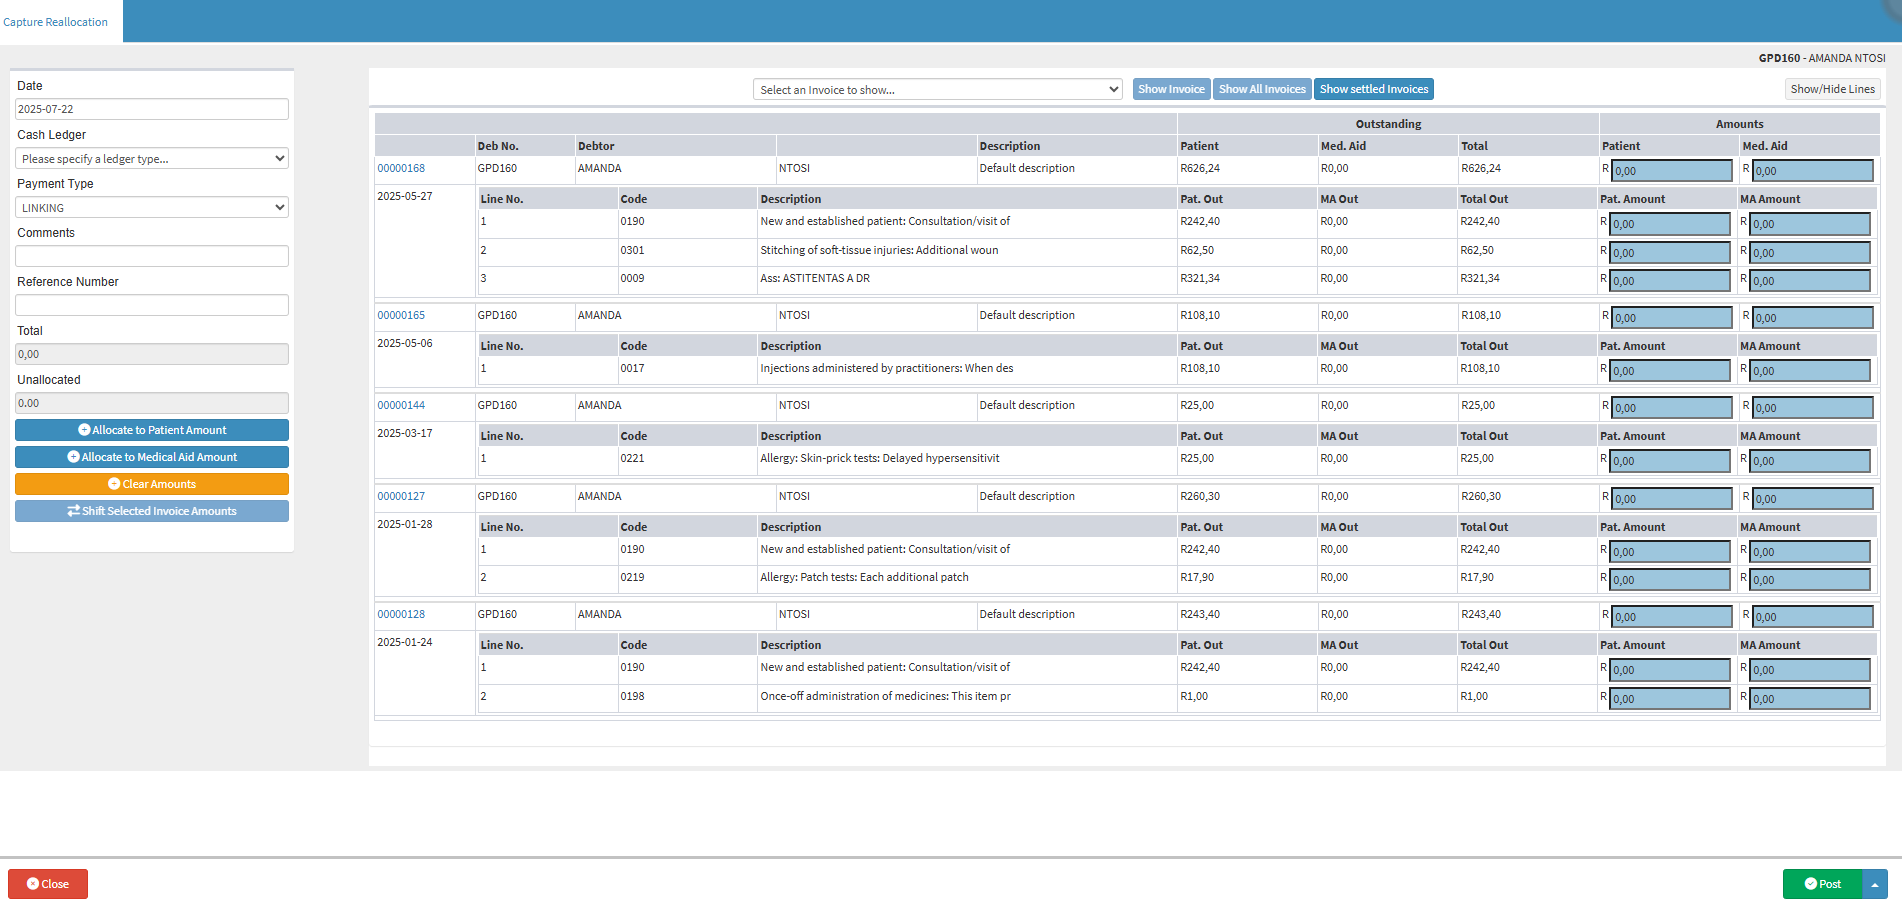
The information displayed in the Outstanding section includes all amounts that are due on the Debtor's Account.
Total: The entire amount of funds outstandingfrom the Debtor's Account.
MA Outstanding: The total amount of funds that the Medical Aidis still liable for.
Patient Outstanding: The total amount of funds the Debtor/Patientis still liable for.
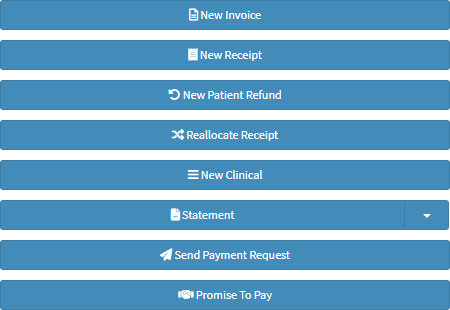
Action Buttons
The Action buttons offer quick access to essential financial and clinical tasks linked to the Patient’s account. These buttons help streamline daily operations by allowing you to easily create Invoices, issue Receipts, record Refunds, and manage payment-related actions directly from one central area.
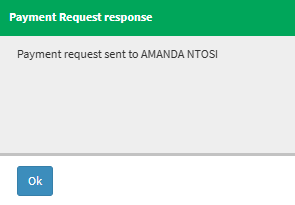
Click on the Send Payment Request button to send out a payment link to the Debtor.
The Payment Request Response pop-up will appear, stating a payment linkwas sent to the Debtor.
Click on the Ok button.
For more information regarding what a Payment Link is, please refer to the user manual: Send Payment Request WebApp.
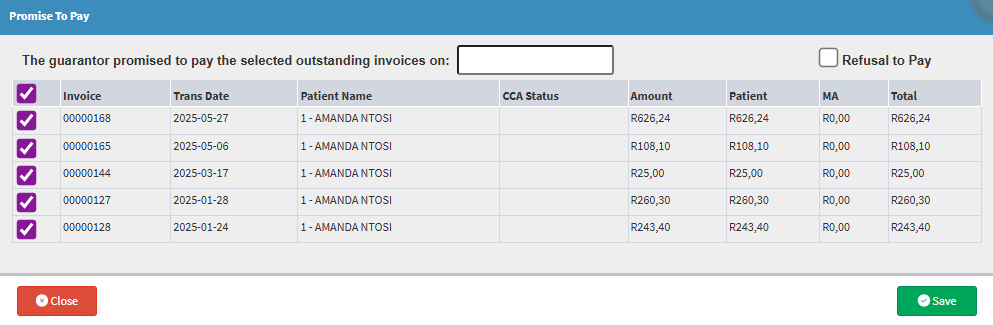
Click on the Promise to Pay button if the Debtor has made a payment arrangement with the Practice that will be paid by a specific date.
The Promise To Pay screen will open.
For more information regarding how the Promise To Pay screen works, please refer to the user manual: Promise to Pay.
Communication Buttons
The Communication buttons allow for fast and direct contact with the Patient via SMS, phone call, or email. This ensures effective communication, helping you follow up, send reminders, or share important information with ease.
Click on the SMS button to send a custom SMS to the Debtor.
For more information on how to send an SMS, please refer to the user manual: Send an SMS.
Click on the Dial button to access the Call Event - Workflow Event screen.
For more information regarding VoIP Calls, please refer to the following user manual: Making a VoIP Call.
Click on the Email button to send a custom email to the Debtor.
For more information on how to Send an Email, please refer to the user manual: Send an Email.