The Quote button on the Invoice screen allows Practitioners to submit a virtual claim directly to the Medical Aid. The system communicates instantly with the Medical Aid and returns a real-time response, showing what the scheme will pay, what the Patient must pay, and any claimable amounts or benefit usage. This process supports the authorisation process by giving a clear indication of whether the Medical Aid is likely to approve the claim.
This does not update the Patient’s benefits but provides immediate cost transparency and helps Patients plan financially, avoid unexpected costs, and make informed decisions before treatment. This ensures fewer disputes after billing, improved efficiency in financial discussions, and smoother pre-authorisation processes.
💡Please Note: Currently, the Quote feature is only available for Discovery, Medscheme, and MHG Patients.
The Contents of This User Manual:
Debtor Details
Quote Claim
Invoice Lines
Buttons
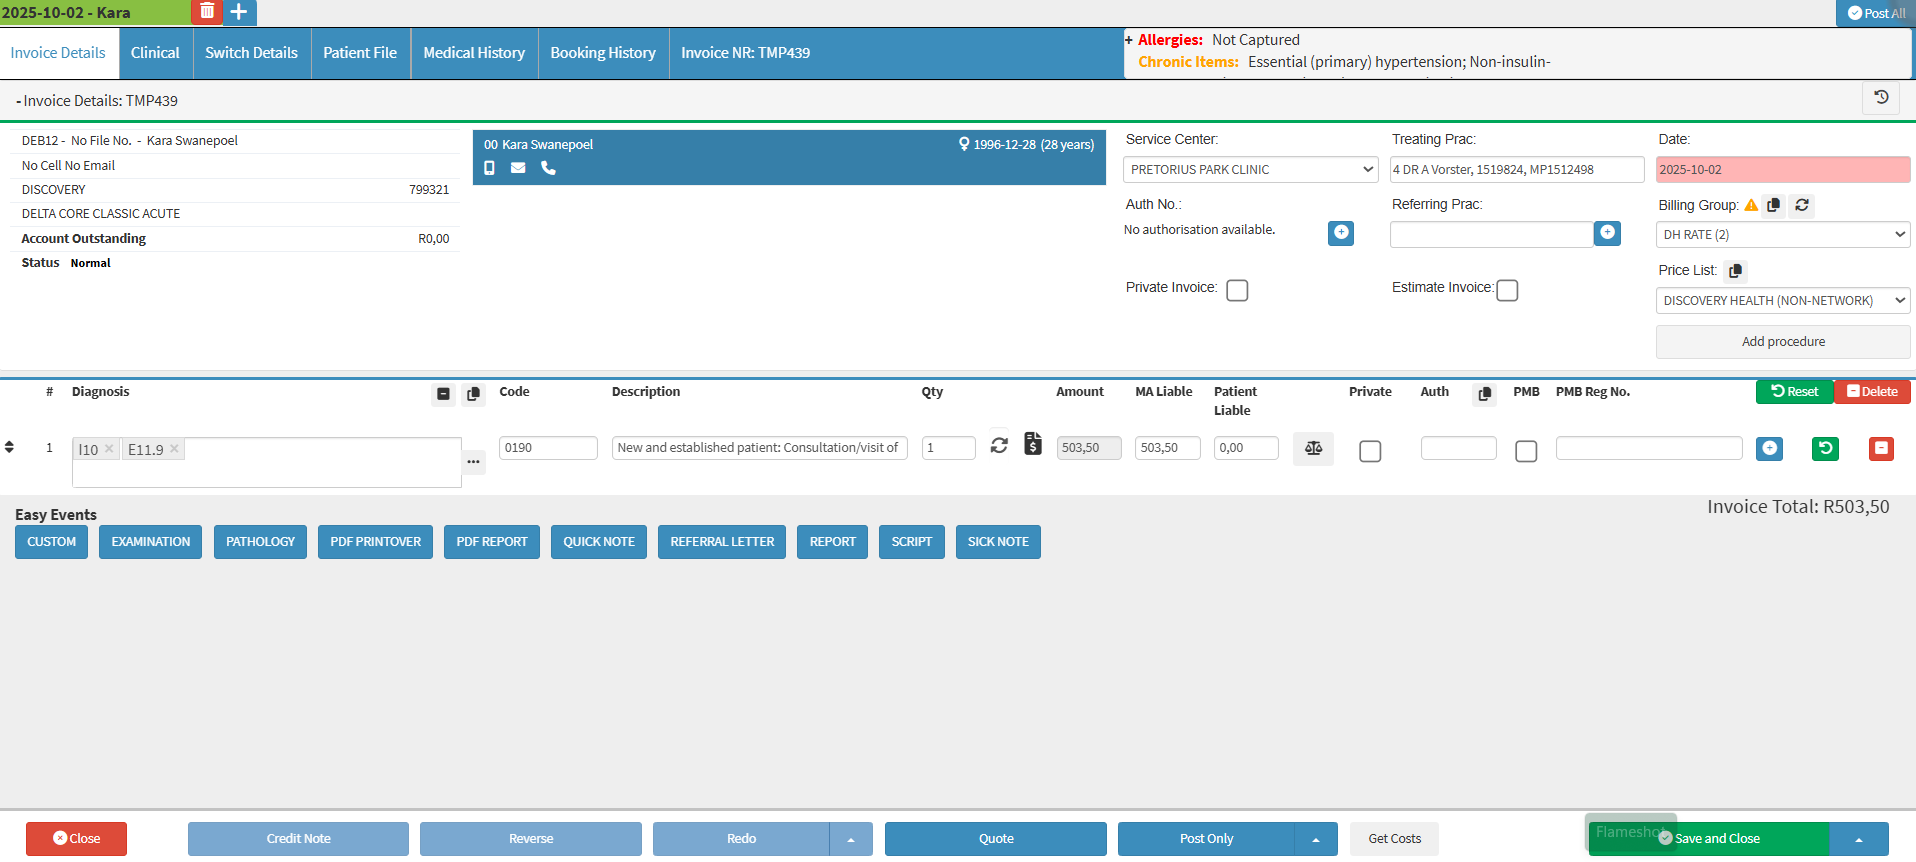
This user manual will start on the Invoice Details screen.
Debtor Details provide key information about the account holder responsible for payments, including contact details, Medical Aid information, and linked Patients. Having accurate Debtor Details ensures smooth communication, correct billing, and proper linkage between Debtors and Patients, supporting efficient financial and administrative management in the Practice.
DEB12 – XANTE AMELIA RUTH SIEBRITS: The Debtor code and name identifying the account holder responsible for payments.
Cellphone Number: The contact number recorded for the Debtor.
Medical Aid Details: Information about the Debtor’s Medical Aid, including scheme and plan, if applicable.
Email: The email address linked to the Debtor for communication.
Patients: The list of Patients linked to the Debtor’s account.
Quote Claim
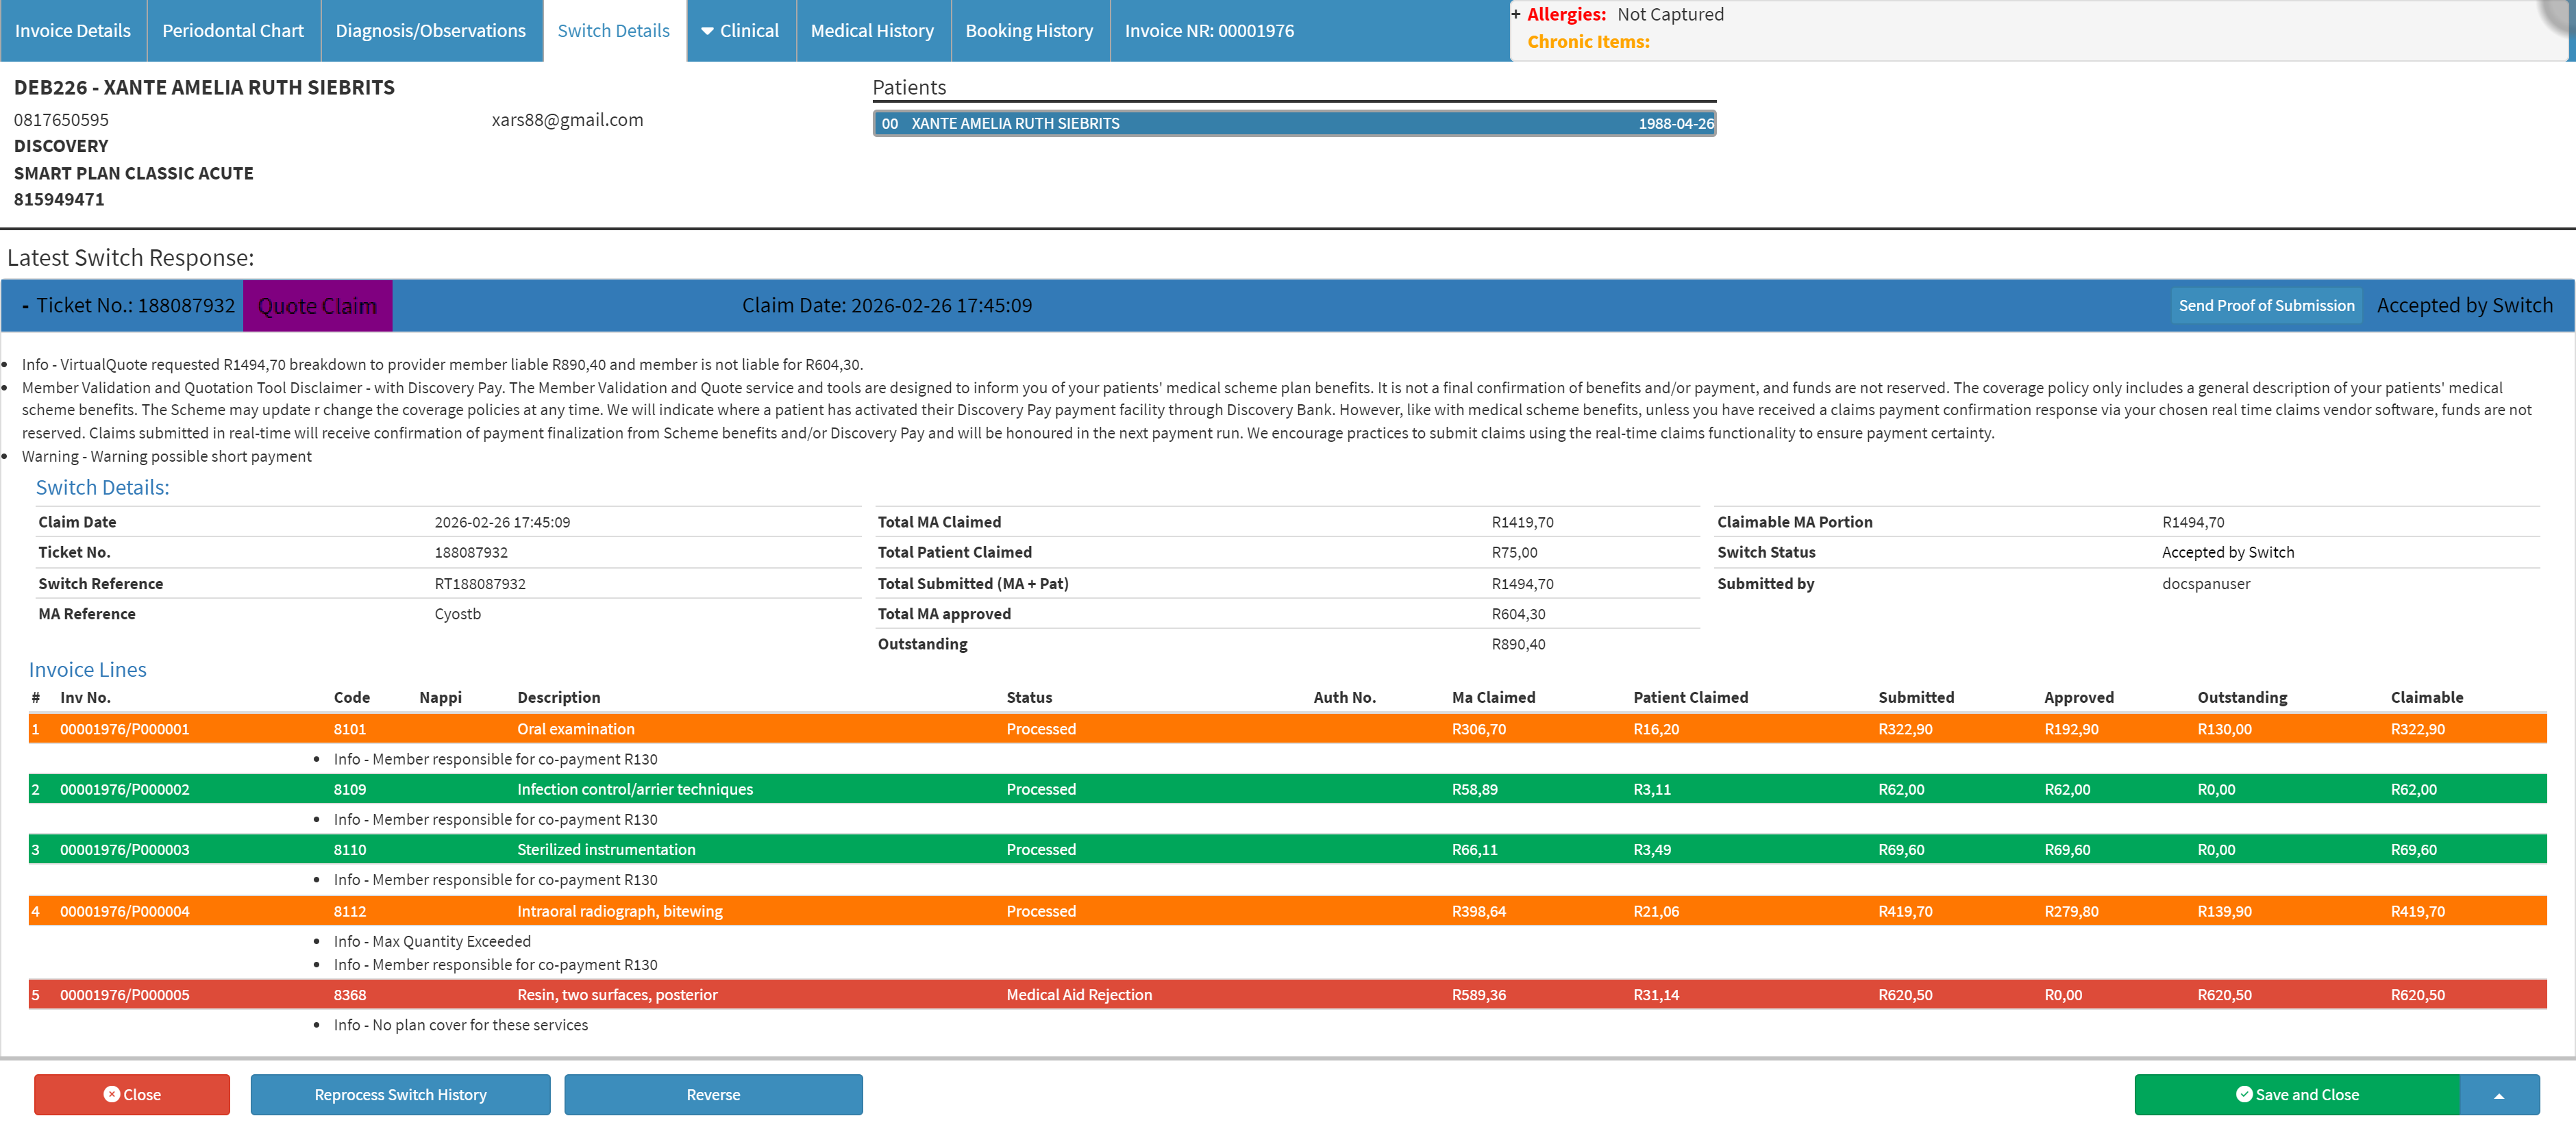
The Quote Claim provides a detailed overview of a claim submission, including claim amounts, Medical Aid portions, Patient portions, and claim status. By consolidating financial and submission details in one place, it helps Practices track claim progress, identify outstanding amounts, and ensure accurate communication with Medical Aids for smoother claim processing.
Claim Date: Displays the exact date and time when the claim was created or submitted through the system.
Ticket No.: A unique reference number automatically assigned to track the claim submission.
Switch Reference: The identifier used by the switching system to reference the specific claim.
MA Reference: The Medical Aid reference number associated with the claim, if provided by the Medical Aid.
Total MA Claimed: The total amount that has been claimed from the Medical Aid.
Total Patient Claimed: The total amount that has been claimed directly from the Patient.
Total Submitted (MA + Pat): The combined value of both the Medical Aid and Patient claim amounts that were submitted.
Total MA Approved: The amount from the Medical Aid portion of the claim that has been approved.
Outstanding: The portion of the claim that remains unpaid or unresolved.
Claimable MA Portion: The amount that is potentially claimable from the Medical Aid for the specific claim.
Switch Status: Shows the current status of the claim within the switch process, such as accepted, rejected, or pending.
Submitted By: Identifies the user or system that submitted the claim.
Click on the Send Proof of Submission button.
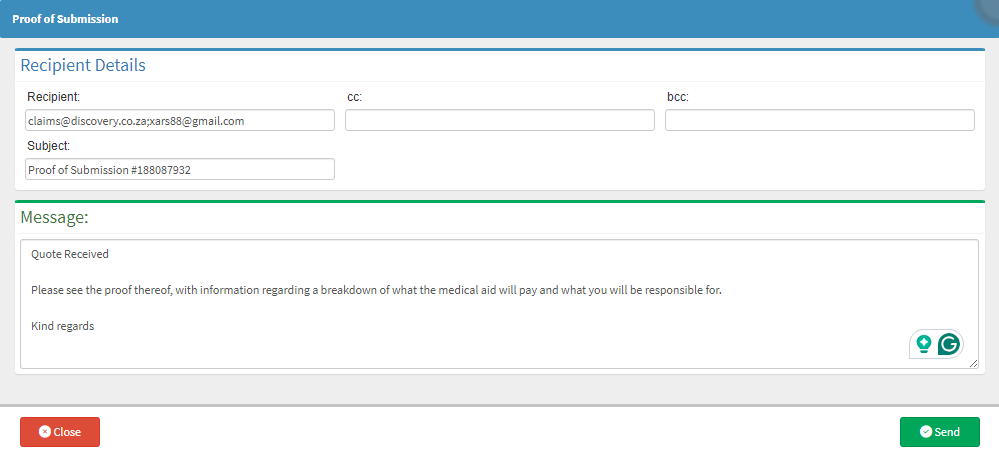
The Proof of Submission screen will open.
Recipient: The main person to whom the email is addressed and who will be receiving the email.
CC: Carbon Copy - An exact copy of the email will be sent to the mailing address that is provided.
BCC: Blind Carbon Copy - An exact copy of the email will be sent to the mailing address that is provided. For privacy and security purposes, the email addresses that the email has been sent to will not be visible to the other recipients.
Subject: A description to advise the recipient of what the email is regarding.
Message: All the information that you would like to send to the recipient. The Message field is a free-text field with no character limit.
💡Please Note: The Medical Aid and Debtor's email will be filled in automatically when the Proof Of Submission screen opens.
Click on the Send button to send the email and return to the Switch Details Screen.
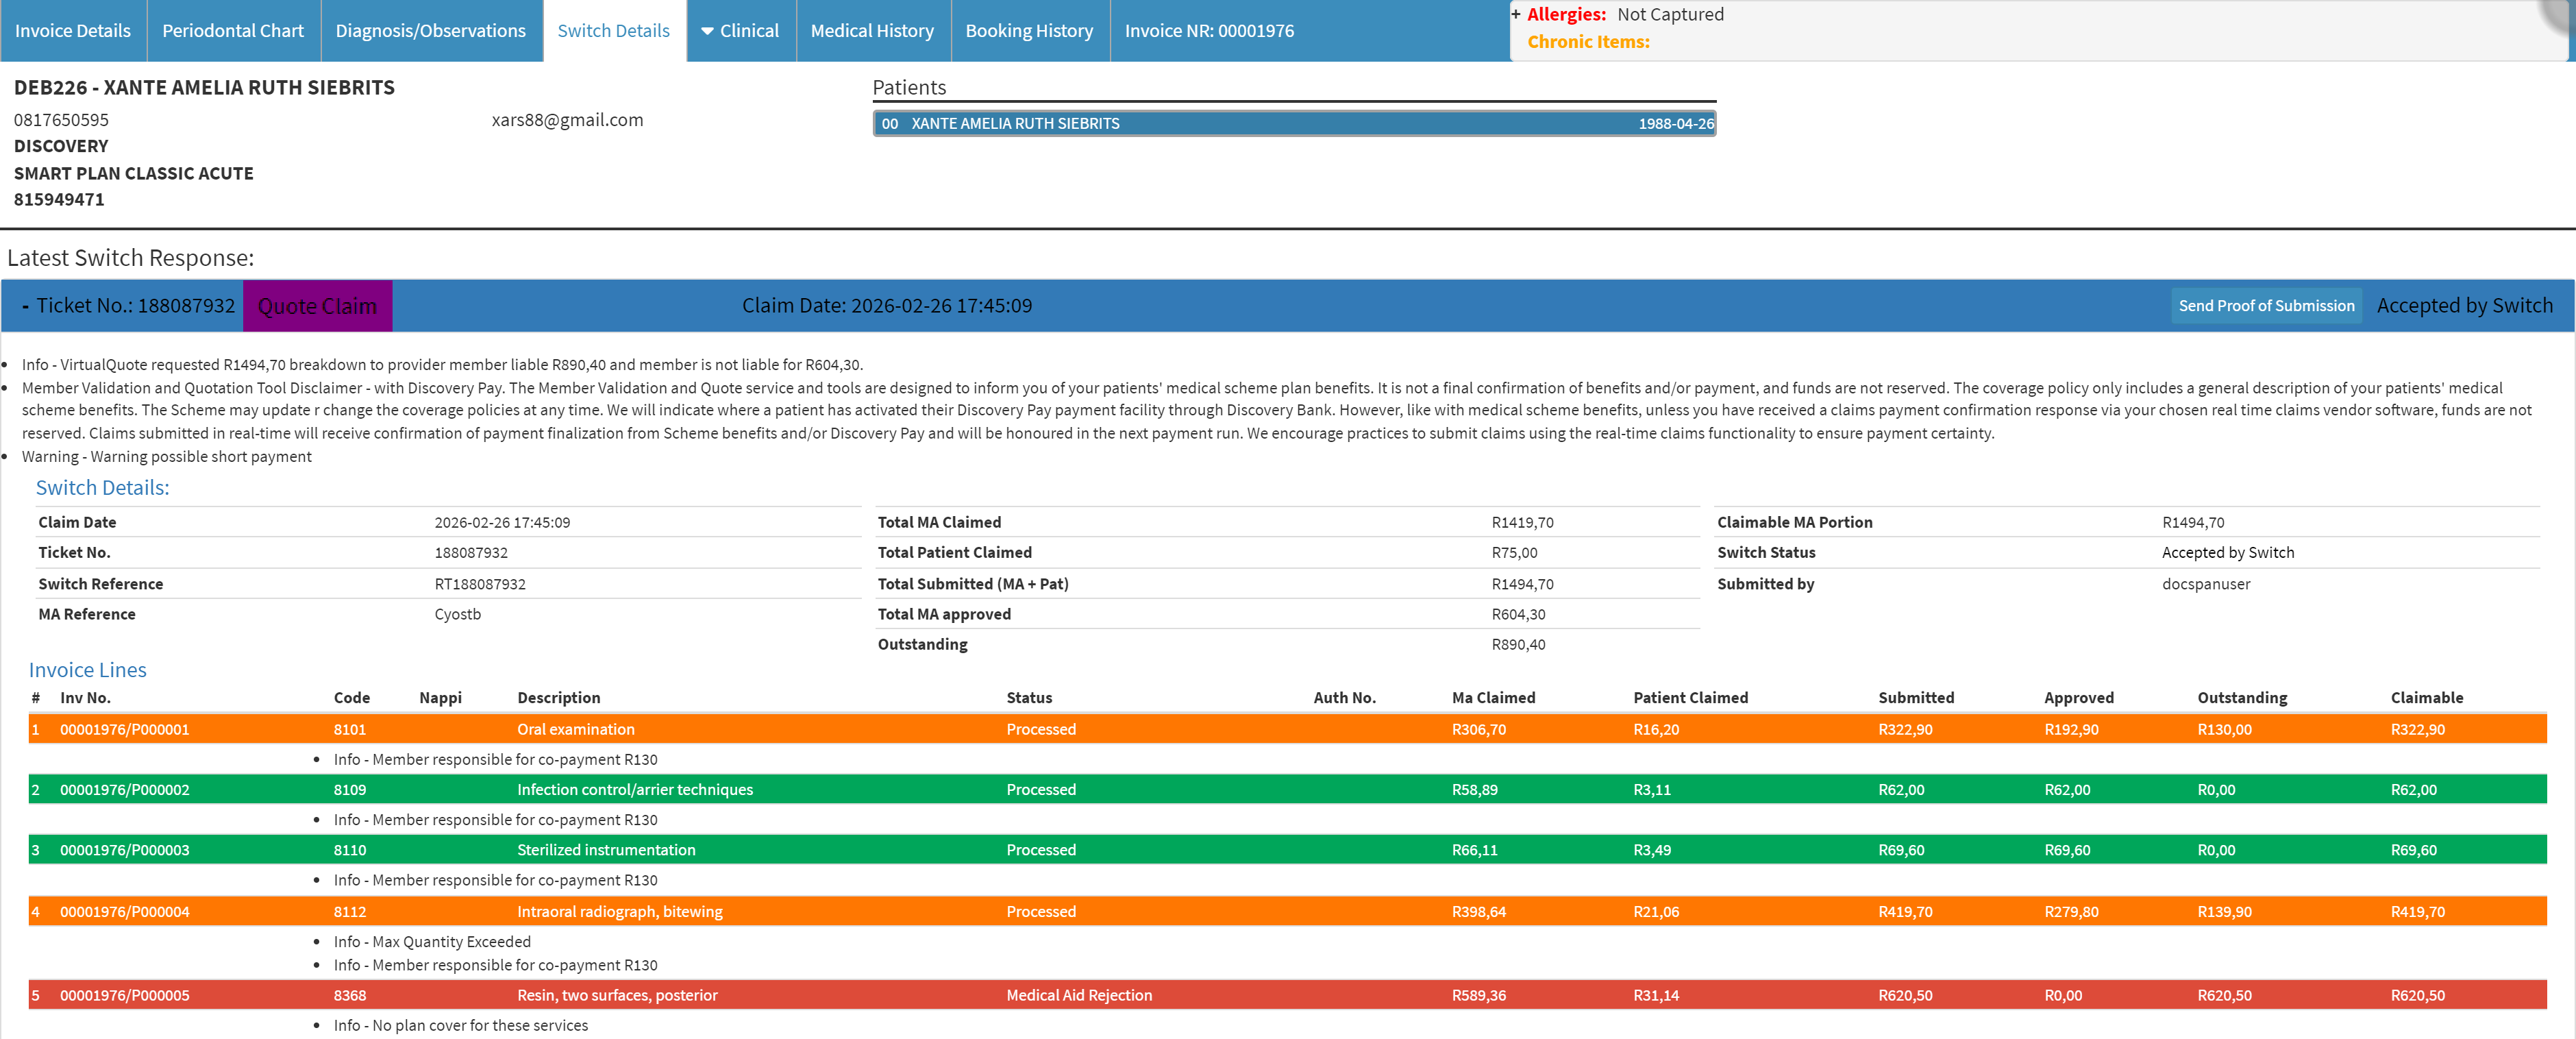
Invoice Lines
Understanding each field in the claim line allows you to track and manage billing accurately. It shows the details of the service or item provided, the amounts claimed from the Medical Aid and Patient, and what remains outstanding or claimable. Having this information clearly displayed helps ensure transparency, proper reconciliation, and timely follow-up on any pending or unpaid amounts.
Inv No.: The invoice number linked to the claim line.
Code: The system-generated code used for identifying the service or item.
Nappi: The NAPPI (National Pharmaceutical Product Index) code that uniquely identifies medicine or medical items.
Description: A short explanation of the service or item being billed.
Status: The current state of the claim line, such as pending, approved, or rejected.
Auth No.: The authorisation number provided by the Medical Aid, if applicable, for approval of the service or item.
MA Claimed: The amount claimed from the Medical Aid for this specific line.
Patient Claimed: The amount claimed directly from the Patient for this specific line.
Submitted: The total amount submitted (Medical Aid and/or Patient) for this line item.
Approved: The portion of the submitted amount that has been approved.
Outstanding: The portion of the amount that remains unpaid or unresolved.
Claimable: The amount that can still be claimed from the Medical Aid for this line item
Buttons
These controls enable you to manage and update information efficiently, perform necessary corrections, track changes over time, and ensure that records remain accurate and up-to-date. They help streamline workflows and maintain proper account management.
Click on the Close button to close the quote.
Click on the Reprocess Switch History button to reprocess the switch history.
Click on the Reverse button to reverse the switch.
Click on the Save and Close drop-up menu button for more saving options.
Save: You are able to save the changes made to the form without closing the form.
Save Lines To New Macro: Allows you to create a new macro.