Stock Adjustment Tab: Navigation and Use
Why Use This Function:
Stock Adjustments are used to add or reduce the quantity of a specific stock item in the system, ensuring that recorded stock levels accurately reflect what is physically available.
Adjustments are typically made for three main reasons:
- Lost Stock: Items that have gone missing.
- Broken Stock: Broken items or items whose packaging is badly damaged so that they can no longer be used.
- Expired Stock: Items that have passed the use-by date.
Once a Stock Adjustment is recorded, the updated amount is reflected in the system, and the adjusted items will no longer appear as stock on hand. By managing stock in this way, you maintain accurate inventory, reduce errors, and support both operational and financial efficiency in the Practice.
The Contents of This User Manual:
- Filters
- Screen Columns Action Button
- Columns
- Page Options
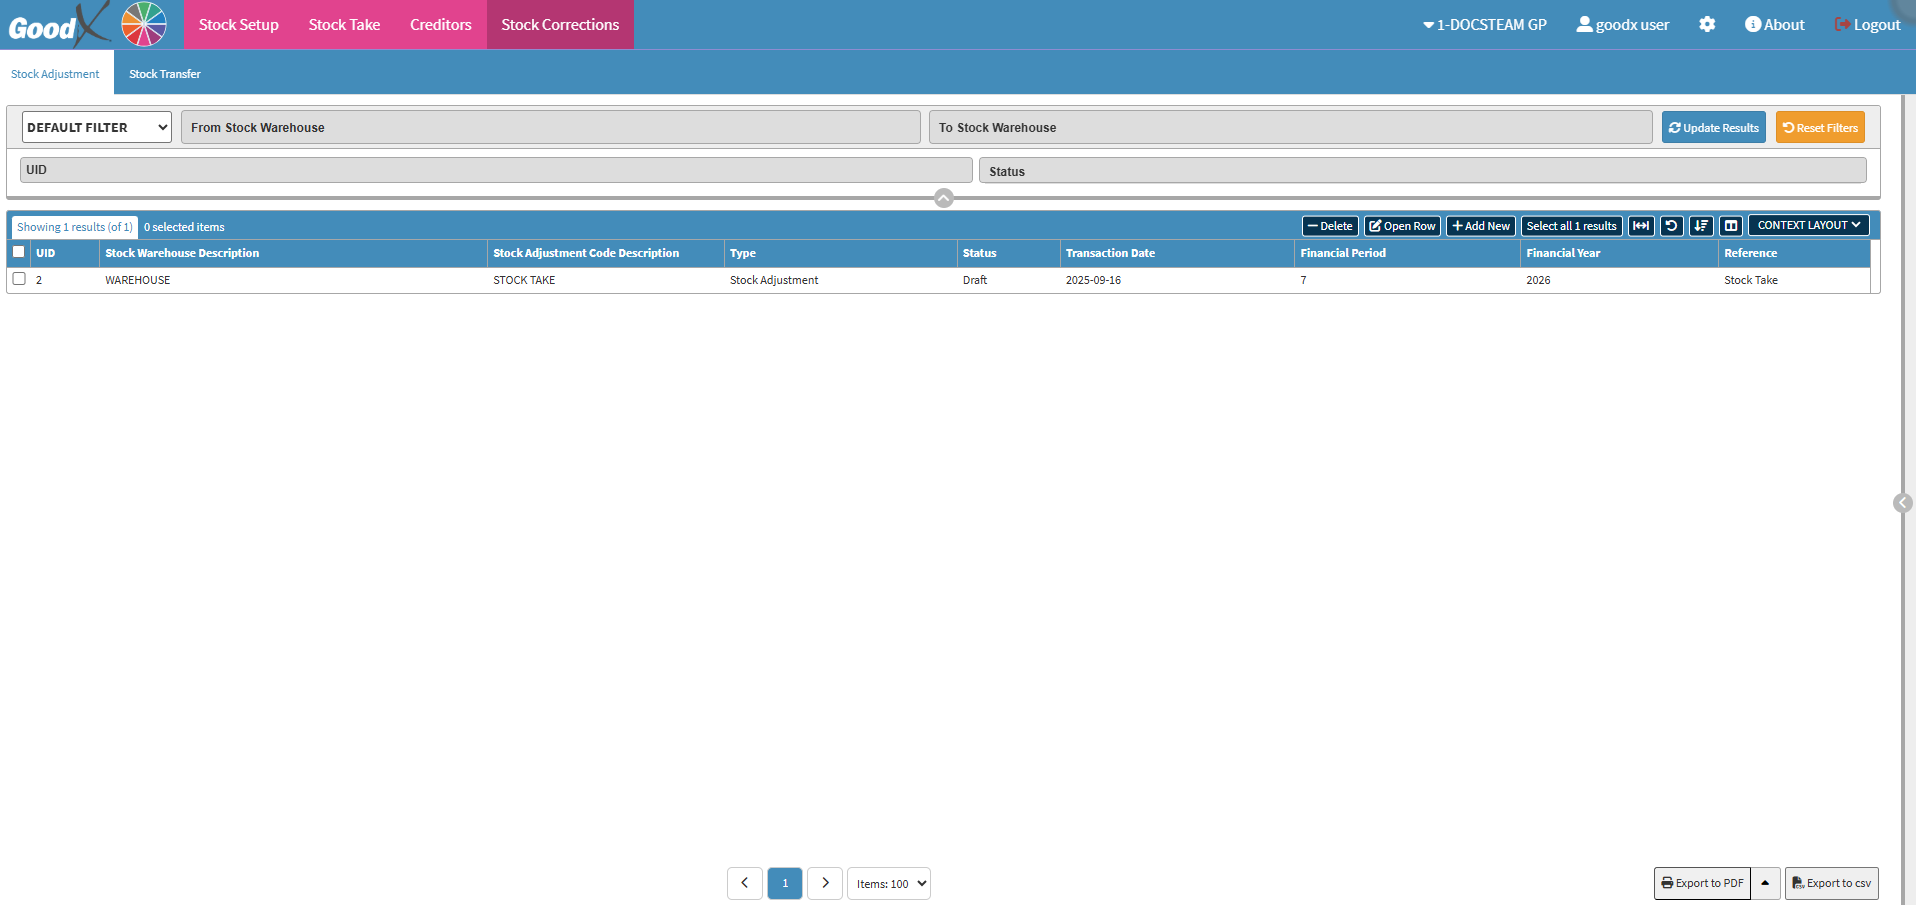
- This user manual will start on the Stock Correction, Stock Adjustment sub-tab screen.

- For more information on how to navigate to the Stock Adjustment sub-tab, please refer to the user manual: Stock Segment.
Filters
Allows you to narrow down or refine the results displayed on the Stock Adjustment tab.- Click on the Default Filter drop-down menu to select the filter style you wish to use.

- Click on the From Stock Warehouse drop-down field to Tick the stock warehouse you want to filter from.

- Click on the To Stock Warehouse drop-down field to Tick the stock warehouse you want to filter from.

- Click on the UID (Unique Device Identifier) field to input the UID number to filter on.
![]()
- Click on the Status drop-down field to Tick the status you want to filter to.

- Click on the Update Results button to update your results based on your filters.
![]()
- Click on the Reset Filter button to clear all your filters.
![]()
Screen Column Action Buttons
Several additional Options are available for the Columns. These additional Options are to help the User adjust the List, refine the Search and give more specific results.![]()
- Click on the Delete button to delete the selected stock transfer.
![]()
- Click on the Open Row button to view the Stock Transfer selected.
![]()
- The Stock Adjustment screen will open on the selected stock transfer to edit and update.

- For more info on how to edit a Stock Adjustment, please refer to the user manual: Add/Edit a Stock Transfer.
- Click on the Add New button to add a new Stock Adjustment.
![]()
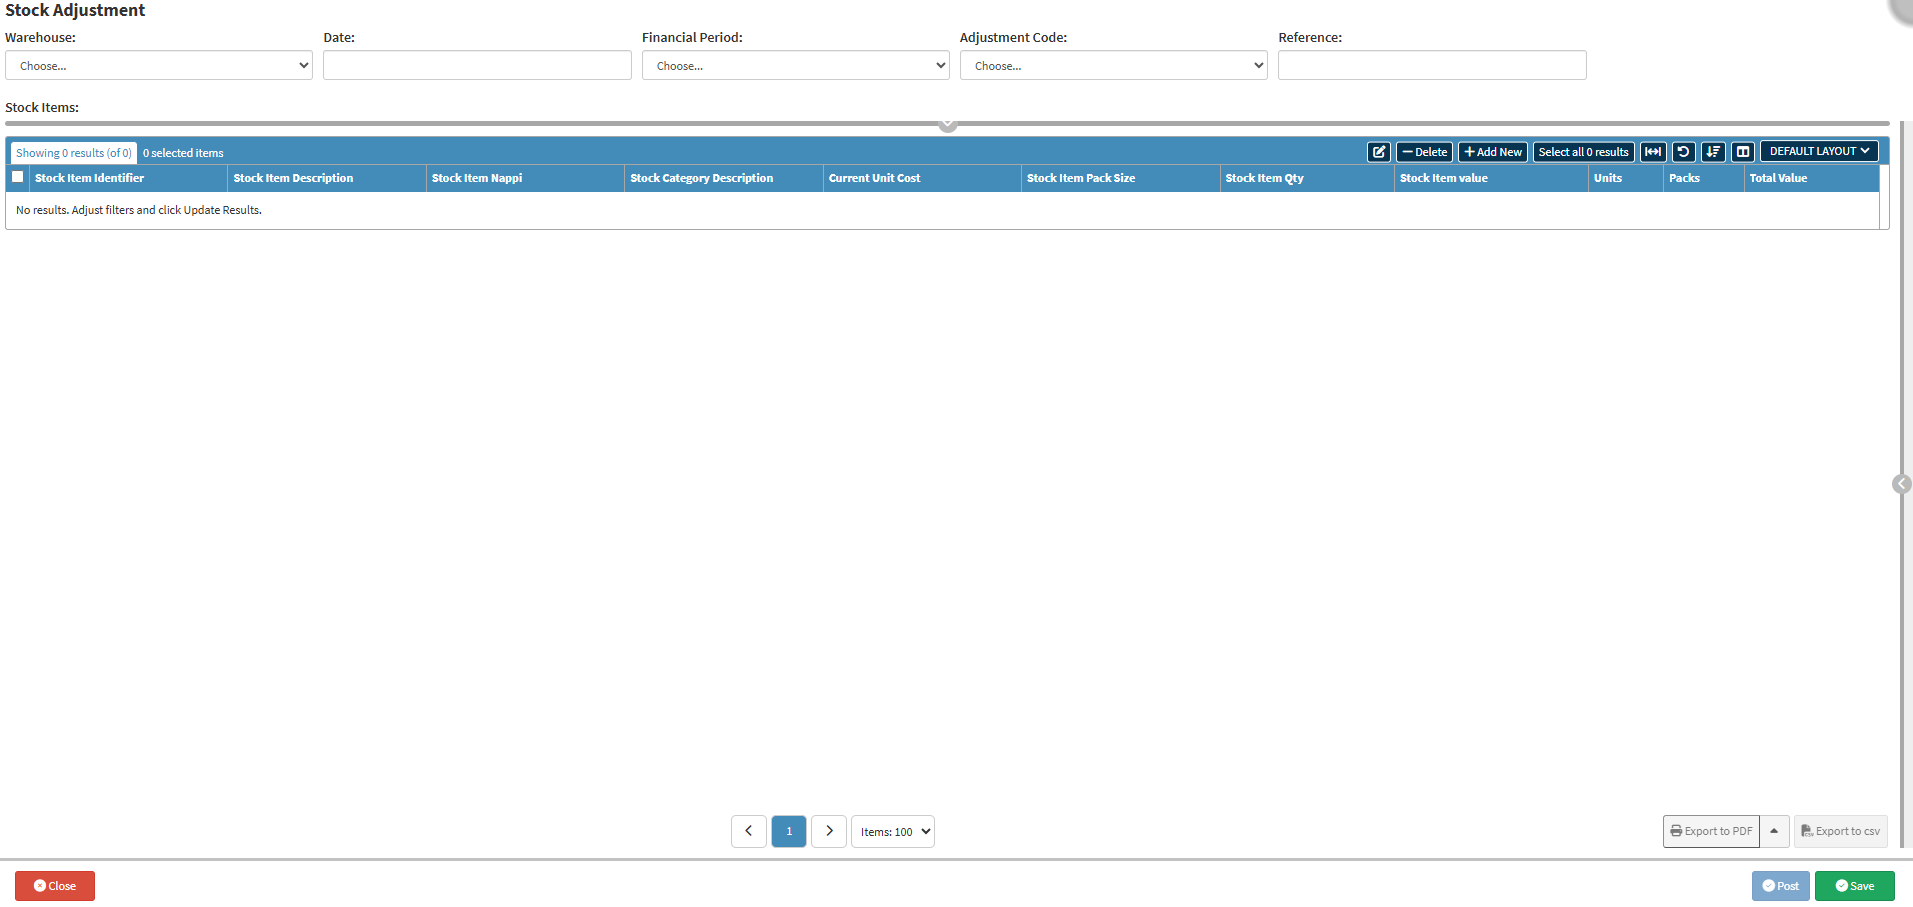
- The Stock Adjustment screen will open to add a new Stock Adjustment item.

- For more info on how to add a Stock Adjustment, please refer to the user manual: Add/Edit a Stock Transfer.
- Click on the Select All Results button to select every line in the column.
![]()
- Click on the Expand Widths button to auto-fit the column width to the information within all columns.
![]()
- Click on the Reset Widths button to restore the original widths after any modifications were made.
![]()
- Click on the Sort Columns button to sort the Columns in the order that you desire.
![]()
- For more information regarding how the Sort Columns feature works, please refer to the user manual: How to Sort Columns on Reports and List Screens.
- Click on the Choose Columns button to select the columns that will be displayed on the list.
![]()
- For more information regarding how the Choose Columns feature works, please refer to the user manual: How to Choose Columns on Reports and List Screens.
- Click on the Default Layout drop-down menu to select the type of layout that will be used for the screen.
![]()
Columns
All the information on the Stock Adjustment screen is divided into Columns to logically group related information together.
- UID: A unique number automatically given to the stock adjustment.
- Stock Warehouse Description: The warehouse where the stock adjustment took place.
- Stock Adjustment Code Description: The reason for the adjustment, such as stock take.
- Type: The type of adjustment, for example, stock adjustment or transfer.
- Status: The progress of the adjustment, such as draft or completed.
- Transaction Date: The date the stock adjustment was created.
- Financial Period: The accounting period (month) linked to the transaction.
- Financial Year: The accounting year of the transaction.
- Reference: A note or label attached to describe the adjustment.
Page Options
All the additional options that are available for the page.![]()
- Click on the Previous button to navigate to the previous page.
![]()
- Click on the Page Number button to navigate to the desired page.
![]()
- Click on the Next button to navigate to the next page.
![]()
- Click on the Items drop-down menu to select the number of items that will be displayed on the screen.

- Click on the Export to PDF button to save a PDF file of all the data as a comprehensive report.
![]()
- Click on the Export to PDF drop-up menu to access the Export Consolidated PDF option that allows you to generate a single document that combines all the data from multiple sources to provide an overview.

- Click on the Export to CSV button to save the Report in a CSV format.
![]()
Last modified: Tuesday, 30 September 2025, 7:16 AM