Text size
Line height
Text spacing
Printing and understanding the Variance report
Stock Take
Step 5: Printing Variance report and understanding the adjustments
Open the Stock module
Click on Corrections
Click on Stock Take

Right click on the correct Snapshot
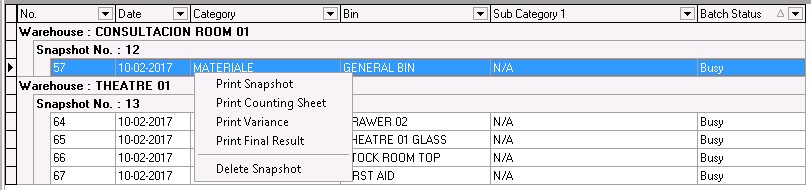
Choose Print Variance
On the top of the report, it will show the Category, Warehouse and Counting location or General Bin or Normal Bin - depends on your setup.
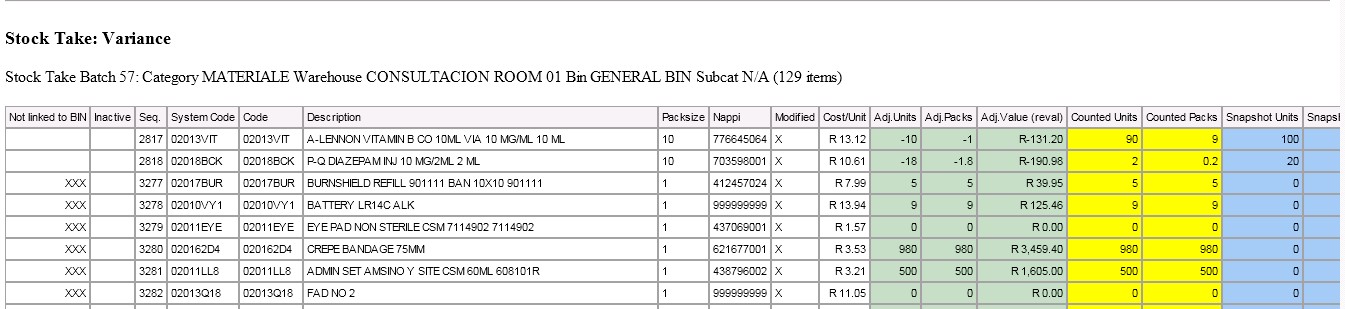
Descriptions and explanations of the Variance Report:
![]()
Not Linked to bin: This means the item is not linked to a Counting location or Bin and that this item did have a quantity at the time when the snapshot was taken. This entry will be items that are not on your counting sheets. You must link these items after your stock take to make sure that these items will be on the counting sheets with the following stock take.
Inactive: This means the items were inactive when the snapshot was taken but there was a quantity on hand.
Sequence: This is the Item linking sequence inside the counting location - the spot where the item is on the shelf, for example.
System Code: This is the Medprax or Iqest Code
Code: Your own code, otherwise this will be the same as the System code
Description: This is the stock item's description
Pack size: Please click here for the explanation
Nappi: Please click here for the explanation
Modified: This means that the item was counted and there was a quantity filled in as counted units. The item will be modified.
Cost/Unit: Please click here for the explanation
For the following Descriptions' explanations please click on the link underneath.
![]()
Adj. Units (Green first column): Please click here for the explanation
Adj. Packs (Green second column): Please click here for the explanation
Adj. Value (Green third column): Please click here for the explanation
Counted units (Yellow first column): Please click here for the explanation
Counted Packs (Yellow second column): Please click here for the explanation
Snapshot Units (Blue first column): Please click here for the explanation
Snapshot Packs (Blue second column): Please click here for the explanation
Snapshot Value (Blue third column): Please click here for the explanation
The Value of the Snapshot (under the last Blue column) and the Value of the Variance (under the last Green column) is on the bottom of the Variance report in Rand value.
![]()
When you can explain the variance on the report and the practice is satisfied with the variance, please move to the next step (Posting the stock take) of the Stock Take or Click here for Step 6 instructions - Post Stock-take
To edit the counted units please click here for instructions. Only the counted units and counted packs are changeable. The snapshot values are not changeable.