Stock Level List Screen: Navigation and Use
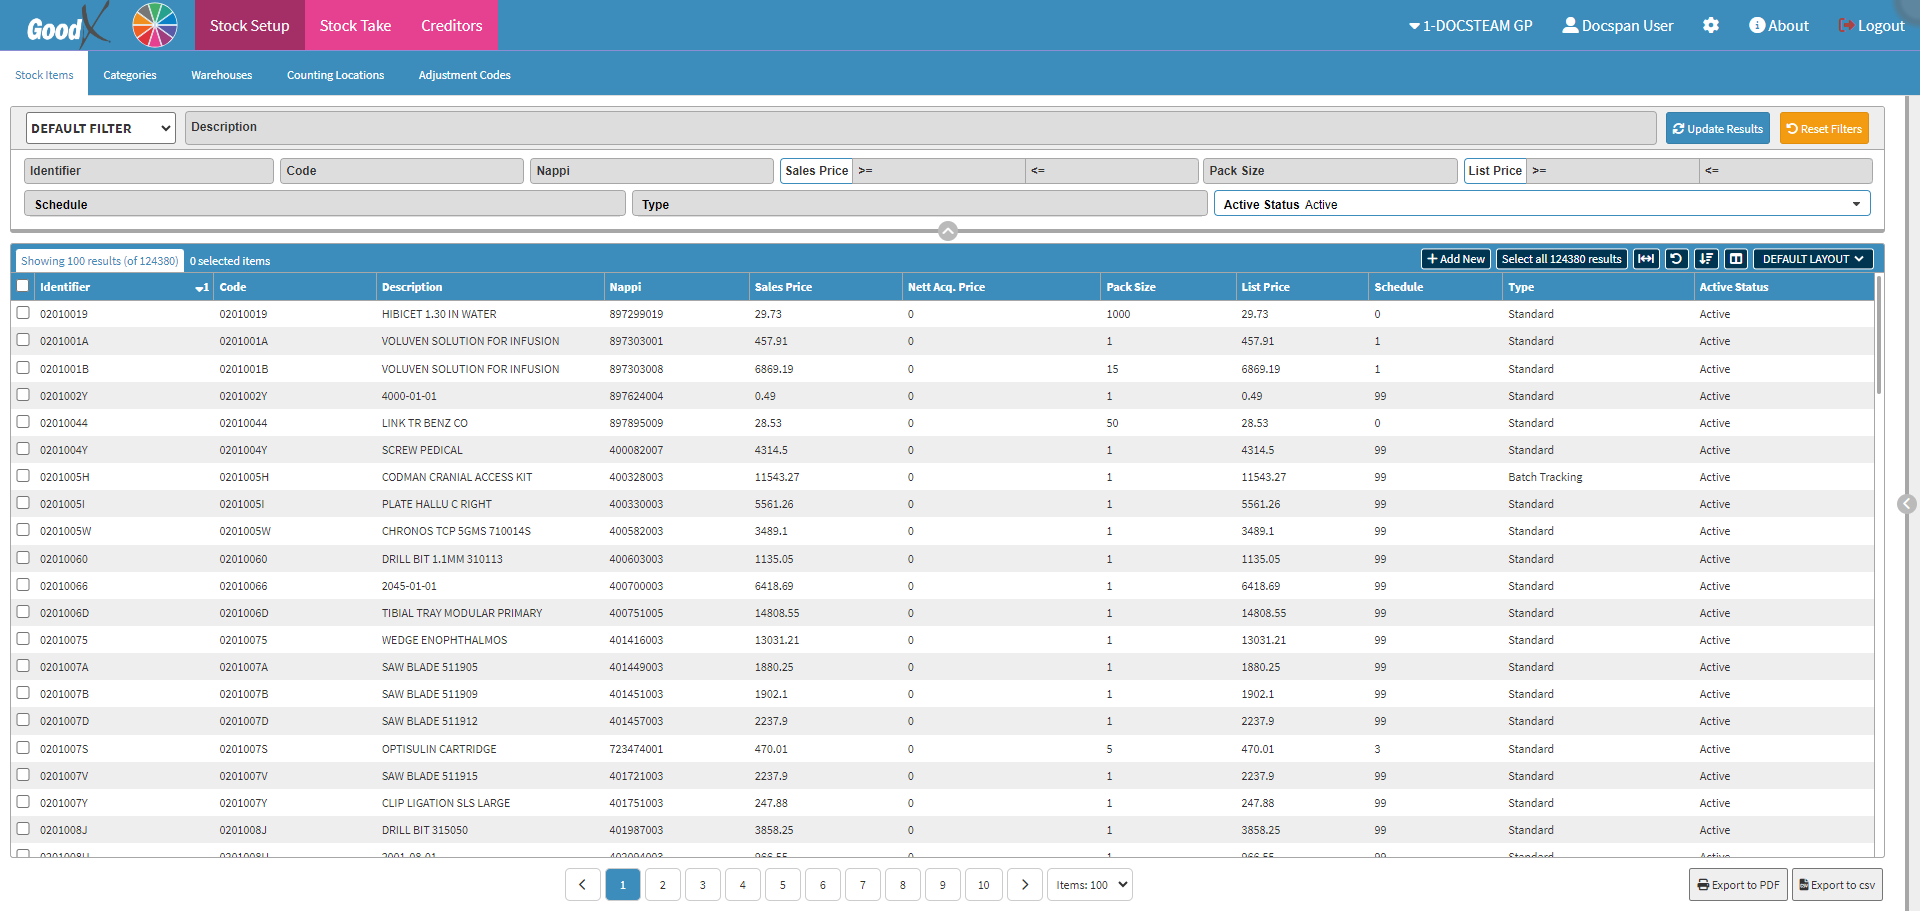
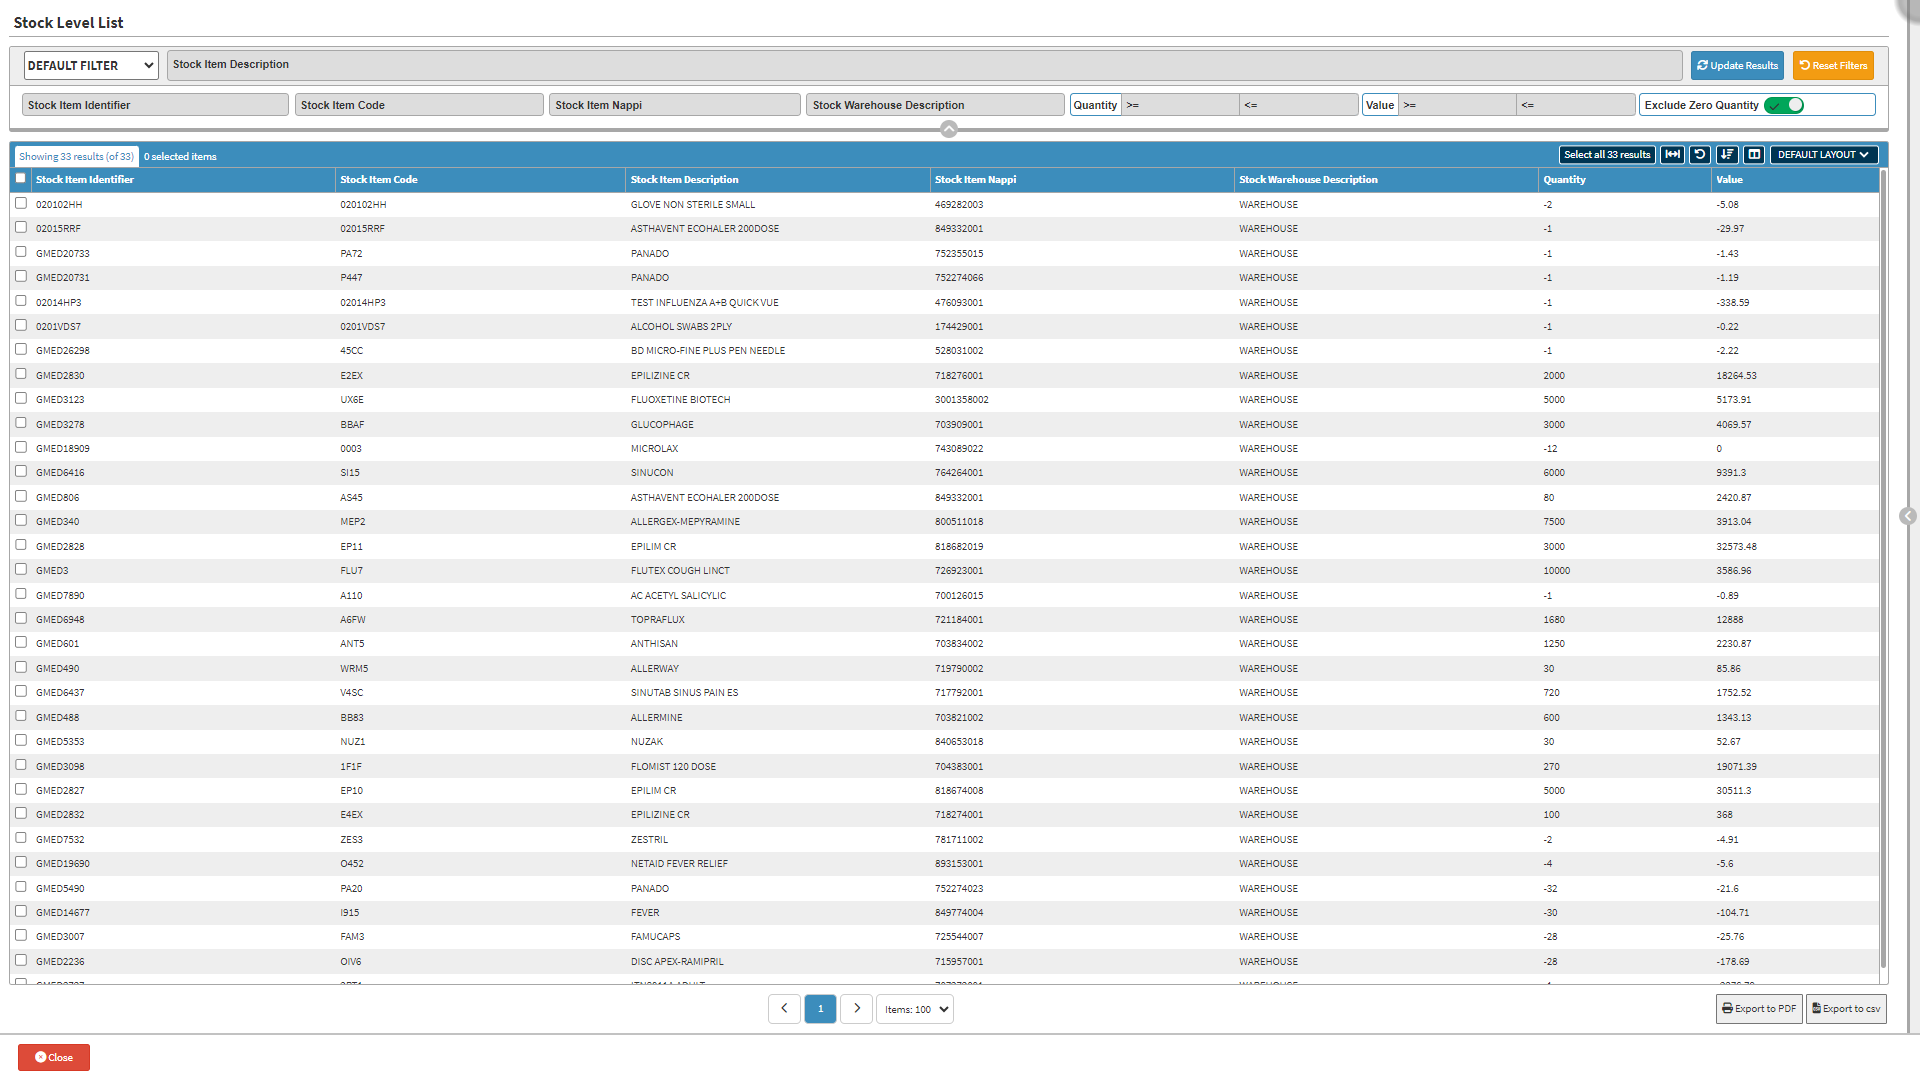
The Stock Level List screen plays a crucial role in enabling the Practice to maintain real-time awareness and comprehensive oversight of the stock levels across each warehouse, ensuring optimal inventory management and operational efficiency.
- The contents of this user manual will consist of the following information:
- Filters
- Column Options
- Columns
- Page Options
- Export
- This user manual will start on the Stock Setup screen.
- For more information regarding the Stock Setup screen, please refer to the user manual: Stock Setup Screen: Navigation and Use.
- Click on the desired Stock Item.
- Click on the Sidebar Expander button.
- The Stock Items sidebar will open.
- Click on the Levels Breakdown button.
- The Stock Level List screen will open.
Filters
Filters are tools or functionalities that allow you to narrow down or refine the results displayed on the Stock Level List screen.
- Click on the Description field to enter the details of the stock item you are searching for.
- Click on the Stock Identifier field to enter the identification number of the product or item.
- Click on the Stock Item Code field to enter the stock item code of the product or item.
Please Note: The Identifier and Code fields will contain the same information, as this is the number used when stock take was done and loaded onto the system.
- Click on the Stock Item Nappi field to enter the Naopi code of the product or item.
- Click on the Stock Warehouse Description field to enter the desired information.
- Enter the quantity information in the Quantity Less Than or Equal To field.

- Enter the value information in the Value Less Than or Equal To field.
- Click on the Exclude Zero Quantity slider to show all zero quantity stock items.
- Click on the Exclude Zero Quantity slider a second time to exclude all zero quantity stick items.
- Click on the Update Results button after all the filters have been set.

- Click on the Reset Filters button to empty all filter columns.
Column Options
Several additional Options are available for the Columns. These additional Options are to help the User adjust the Report, refine the Search and give more specific results.
- Click on the Select All Results button to Select All Results on the filtered list
- Click on the Expand Widths button to auto-fit the Column Width to the information within all columns.
- Click on the Reset Widths button to restore the original Widths after any modifications were made.
- Click on the Sort Columns button to sort the Columns in the order that you desire.
- For more information regarding how the Sort Columns feature works, please refer to the user manual: How to Sort Columns on Reports and List Screens.
- Click on the Choose Columns button to select the columns that will be displayed on the List.
- For more information regarding how the Choose Columns feature works, please refer to the user manual: How to Choose Columns on Reports and List Screens.
- Click on the Default Layout drop-down menu to select the type of layout that will be used for the screen.
Columns
All the information on the Stock Level List screen is divided into Columns to logically group related information together.
- An explanation will be given for each of the Columns:
- Stock Item Identifier: The Code entered when the stock item was received into the system.
- Stock Item Code: The Stock Item Code as supplied by MedPrax and IQest.
- Stock Item Description: The Name of the stock item.
- Stock Item Nappi: The Nappi Code of the stock item.
- Stock Warehouse Description: The Name of the Warehouse where the stock item is located.
- Quantity: The Quantity of the stock item
- Value: The Value of the stock item.
Page Options
All the additional options that are available for the page.
- Click on the Previous button to navigate to the Previous Page.
- Click on the Page Number button to navigate to the desired page.
- Click on the Next button to navigate to the Next Page.
- Click on the Items drop-up menu to select the Number of items that will be displayed on the screen.
Export
The Stock List Level can be exported to a PDF or CSV file.
- Once the desired stock items have been Selected, Click on the Export to PDF button to save the filtered results as a PDF file.
- Once the desired stock items have been Selected, Click on the Export to CSV button to save the filtered results in a CSV format.