How to Discharge a Patient
A Discharge Form is a document that advises, that the Patient is ready to be released from a Hospital, Sub Acute, or Rehab facility and is able to go home or be transferred to a suitable facility for further treatment, or if the Patient has passed away, a Discharge Form will be issued to release the Patient. The form gives information on when and if the Patient should follow up regarding the procedure or treatment progress and a brief description of when and why the Patient was admitted to the facility. Discharge forms are used to keep track of where Patients are, and give an indication of the average time spent at the facility. For a Patient to be released the Treating Practitioner must sign the Discharge Form.
- Log in to the GoodX Web App with your GoodX username and password.
- The Diary screen will open.

- Click on the Navigation Wheel button.

- The Navigation Wheel will open.
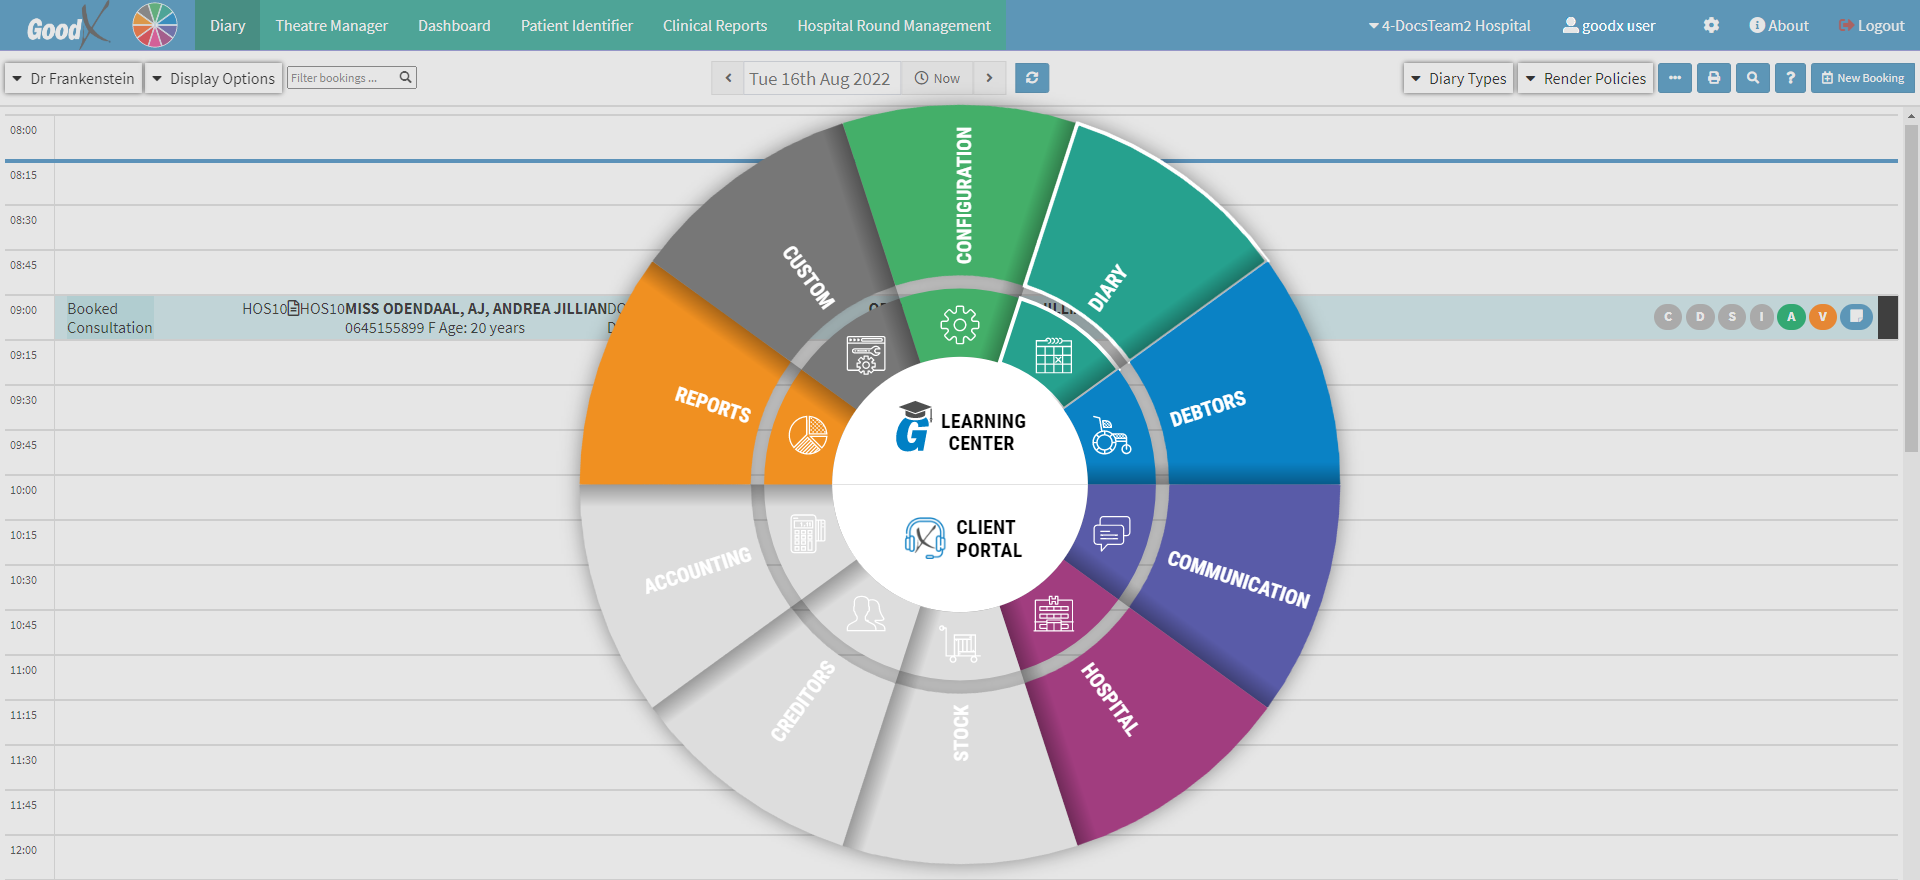
- Click on the Hospital segment to open the Hospital Diary screen.

- The Hospital Diary screen will open.

- Click on the Case Management tab on the Navigation Bar.
![]()
- The Case Management screen will open.

- For more information regarding the Case Management screen and how the screen works, please refer to the user manual: WA: Case Management Screen Overview.
- Click on the case of the Patient whom the user would like to discharge.

- The Case Management Sidebar will open.
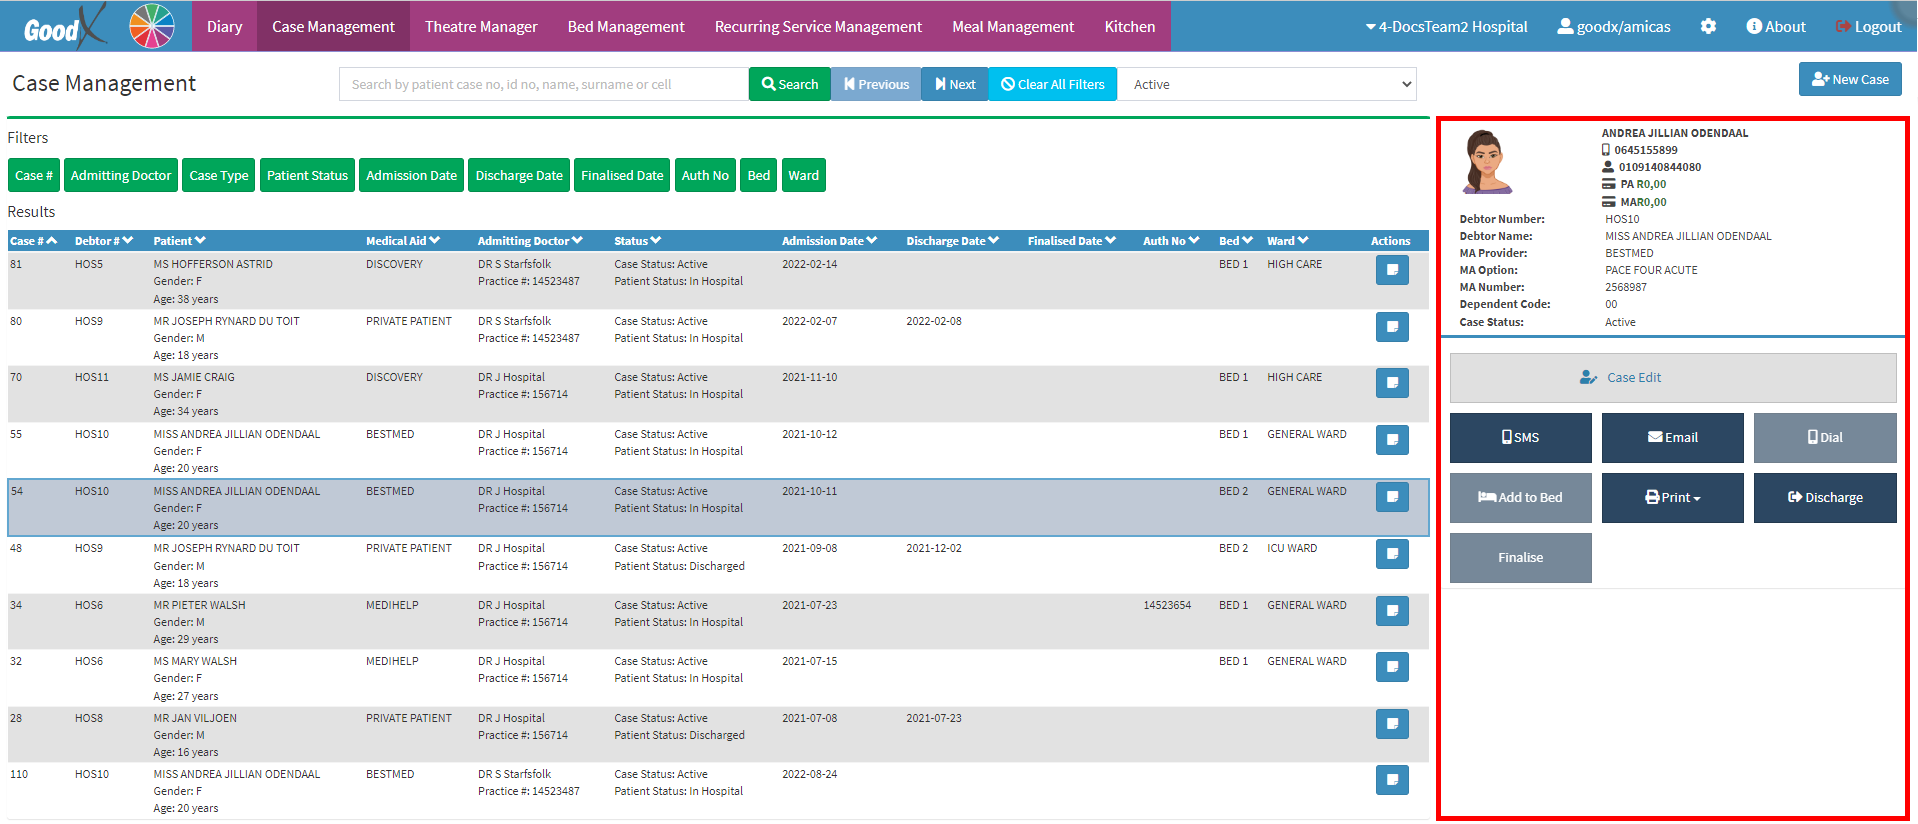
- Click on the Discharge button.

- The Discharge Form - Workflow Event screen will open.
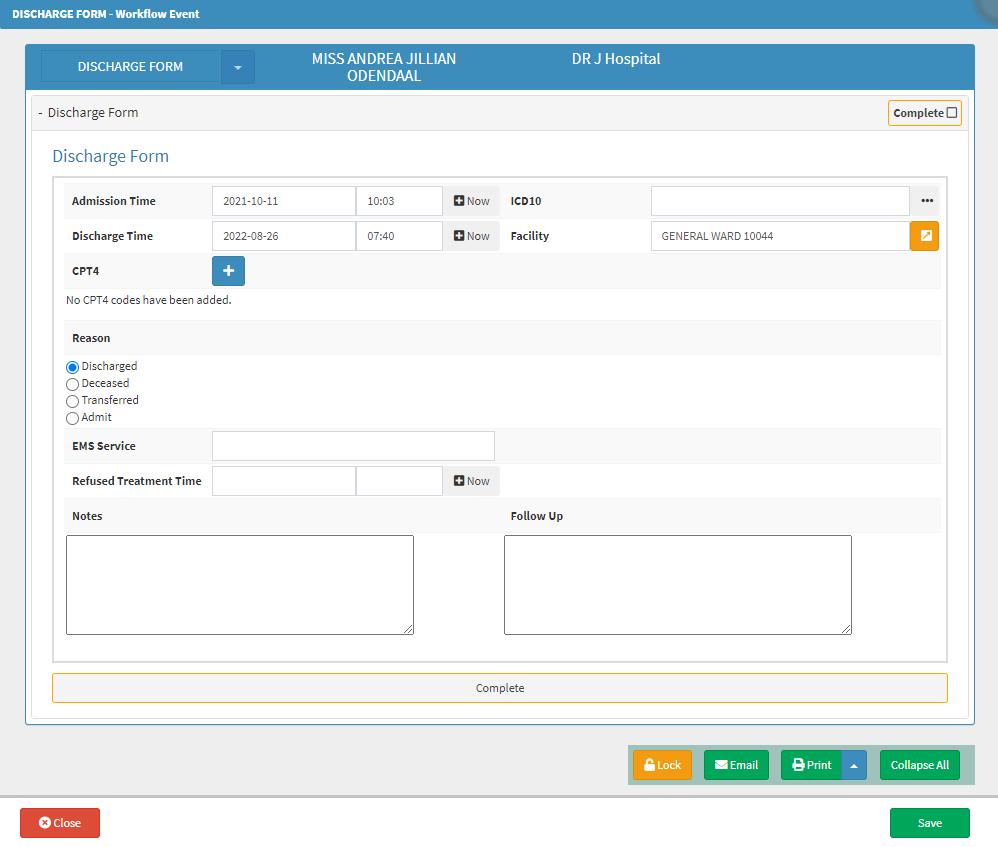
- An explanation will be given for each field and option on the Discharge Form - Event Template screen:
![]()
- Admission Time: The date (yyyy-mm-dd) and time (hh:mm) at which the Patient was taken up in Hospital.
- Click on the first Admission Time field to open the date picker.
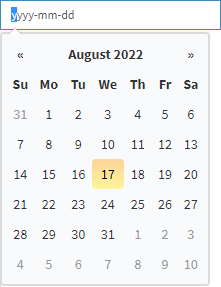
- Click on the desired date to make a selection.
- Click on the second Admission Time field to open the time picker.
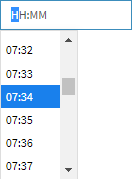
- Click on the desired time to make a selection.
- Click on the Now button to select the current date and time as set up on the user's device.
![]()
- The current date and time will automatically be pulled into the Admission Time date and time fields.
![]()
Please Note: The admission date will need to be filled in to indicate when the Patient was admitted to the hospital.
![]()
- Discharge Time: The date (yyyy-mm-dd) and time (hh:mm) at which the Patient will be released from Hospital.
- Click on the first Discharge Time field to open the date picker.
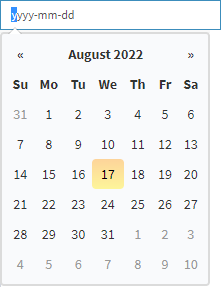
- Click on the desired date to make a selection.
- Click on the second Discharge Time field to open the time picker.

- Click on the desired time to make a selection.
- Click on the Now button to select the current date and time as set up on the user's device.
![]()
- The current date and time will automatically be pulled into the Discharge Time date and time fields.
![]()
Please Note: The date and time can be entered manually, the user does not need to use the date and time picker.
![]()
- ICD10: The diagnosis of the patient's illness or medical condition as classified by the International Classification of Diseases version 10.
- Click on the ICD10 field to enter a known diagnosis code. Only character is required before a list of diagnosis codes becomes available.

- Click on the desired ICD10 code on the list that has become available to make a selection.
- Alternatively, Click on the ... (ellipse) button to search for the diagnosis code.
![]()
- The ICD10 Builder screen will open.
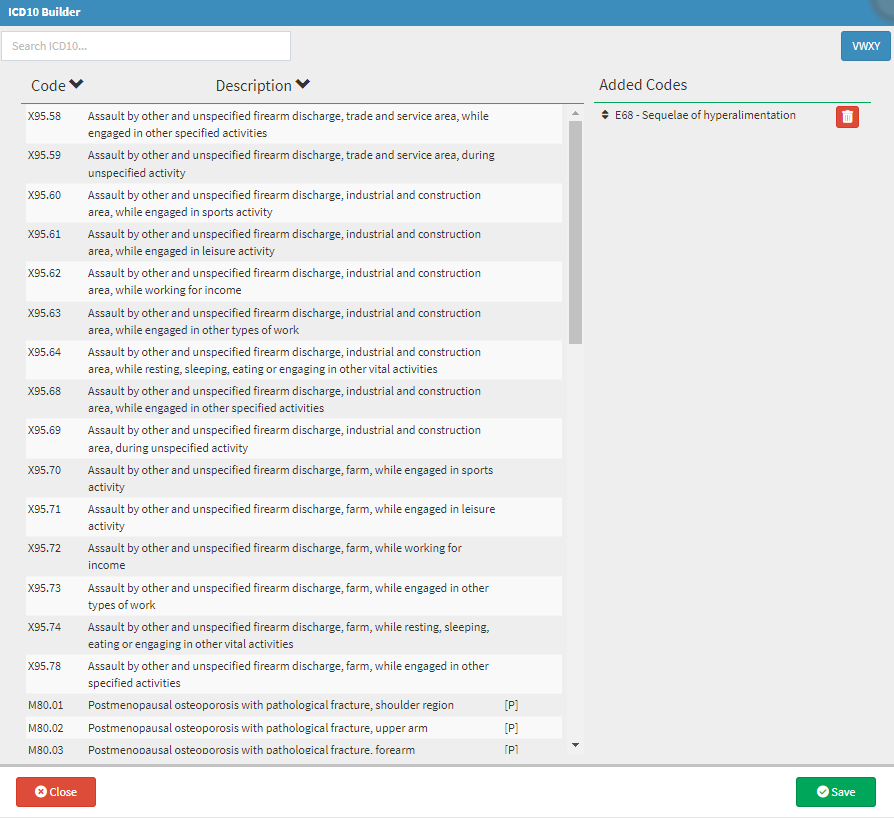
- Click on the Search ICD10... field and start typing the name or code of the desired diagnosis code. The list will shorten according to the information that has been entered.
![]()
- Click on the desired ICD10 code.
![]()
- The ICD10 code will be added to the Added Code list section of the ICD10 Builder screen.


- Click on the Remove button to remove the ICD10 code from the list.
![]()
- The ICD10 code will be removed from the list.
- Click on the Close button to close the ICD10 Builder screen and return to the Discharge Form screen, without applying any changes.
![]()
- An Attention! pop-up will appear to advise the user that they might have unsaved changes and if they would like to exit anyway.

- Click on the Cancel button to ignore the request to close without saving changes and return to the ICD10 Builder screen.
![]()
- Click on the Ok button to exit the screen without saving. The changes that were made will be lost.
![]()
- The Attention! pop-up will close and return to the ICD10 Builder screen.
- Click on the Save button to keep and add the selected ICD10 codes to the Discharge Form.
![]()
- The selected ICD10 codes will be filled into the ICD10 field automatically.
![]()
- Facility: The place where the Patient is being treated, for example, the name of the Hospital/rehab.
- Click on the Facility field to enter the name of the place, where the Patient is being discharged from.
![]()
- CPT4: The procedure codes that identify what procedure the Patient was admitted to the Hospital for
- Click on the + button to add a procedure code.
![]()
- The CPT4 Builder screen will open.
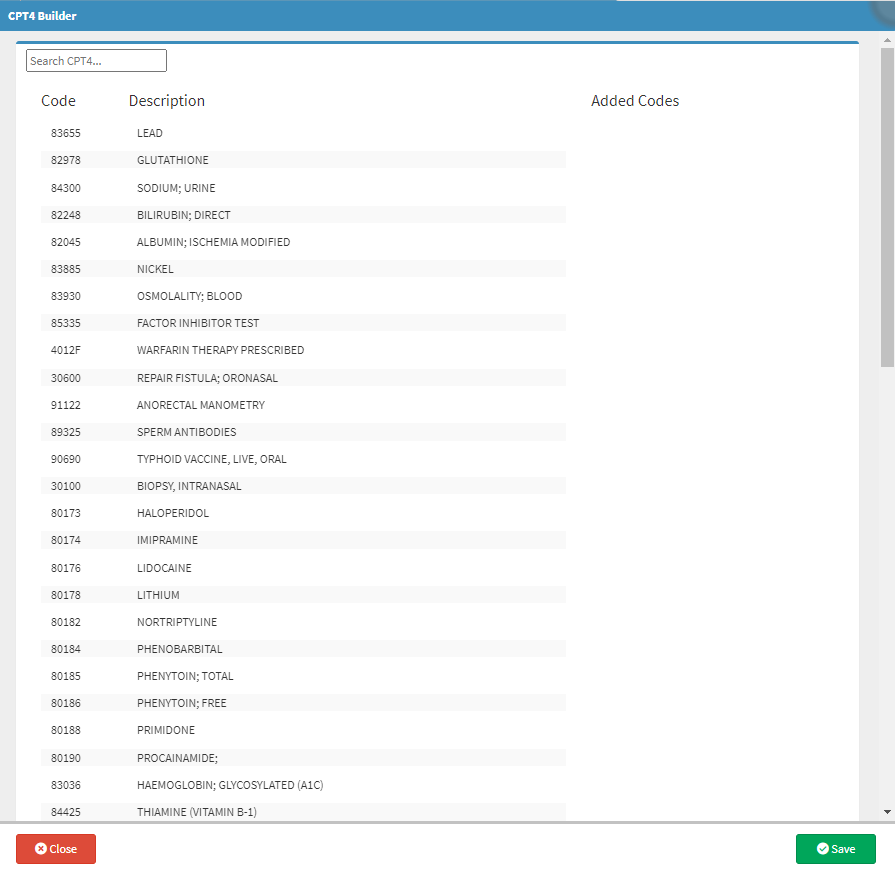
- Click on the Search CPT4... field to search for the desired procedure code/s. The list will shorten according to the information that has been entered.
![]()
- Click on the desired CPT4 code.
![]()
- The CPT4 code will be added to the Added Code list section of the CPT4 Builder screen.
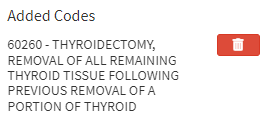
Please Note: More than one CPT4 code can be added to the list.

- Click on the Remove button to remove the CPT4 code from the list.
![]()
- The CPT4 code will be removed from the list.
- Click on the Close button to close the CPT4 Builder screen and return to the Discharge Form screen, without applying any changes.
![]()
- An Attention! pop-up will appear to advise the user that they might have unsaved changes and if they would like to exit anyway.
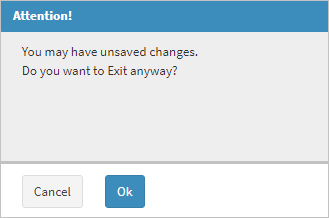
- Click on the Cancel button to ignore the request to close without saving changes and return to the CPT4 Builder screen.
![]()
- Click on the Ok button to exit the screen without saving. The changes that were made will be lost.
![]()
- The Attention! pop-up will close and return to the CPT4 Builder screen.
- Click on the Save button to keep and add the selected CPT4 codes to the Discharge Form.
![]()
- The selected CPT4 codes will be filled into the CPT4 field automatically.

- Reason: An explanation as to why the Patient is being released from the Hospital.
- Click on the relevant radio button to select the desired option:
- Discharged: The Patient has fully recovered and is healthy enough to be sent home.
- Deceased: The Patient has passed away.
- Transferred: The Patient will be moved to a different facility that will better suit their recovery needs.
- Admit: The Patient will need to be admitted to the Hospital. For example, the Patient was treated by the Emergency Department and needs to be admitted to the Hospital.
![]()
- EMS Service: Emergency Medical Service. The service which provided post-hospital transportation to the Patient. For example, the ambulance service that was used to transport the Patient from the Hospital to a recovery facility.
- Click on the EMS Service field to enter the details of the service, if applicable. The field is a free text field.
![]()
- Refused Treatment Time: The date (yyyy-mm-dd) and time (hh:mm) at which the Patient advised that they are refusing treatment from Hospital.
Please Note: When a Patient refuses treatment, they are going against the medical advice of the treating Practitioner and would like to be discharged from, the admitting facility.
- Click on the first Refused Treatment Time field to open the date picker.
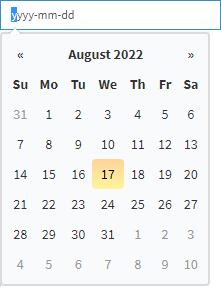
- Click on the desired date to make a selection.
- Click on the second Refused Treatment Time field to open the time picker.

- Click on the desired time to make a selection.
- Click on the Now button to select the current date and time as set up on the user's device.
![]()
- The current date and time will automatically be pulled into the Refused Treatment Time date and time fields.
![]()
Please Note: The date and time can be entered manually, the user does not need to use the date and time picker.

- Notes: Any additional information that is relevant to the discharge of the Patient and aftercare instructions that the treating Practitioner would like to advise the Patient of.
- Click on the Notes field to enter information relevant to the Patients' discharge. The field is a text area that has no character limit.

- Follow Up: Information regarding when the Patient should return for a check-up relating to why the Patient was initially admitted to the Hospital.
- Click on the Follow Up field to enter information relevant to the Patients' discharge. The field is a text area that has no character limit.
- Click on the Email button to send the details of the Discharge Form to an email recipient of the users' choice.
![]()
- Click on the Print button to print a hard copy of the Discharge Form.
![]()
- The Print screen will open. The Discharge Form will display on the screen.
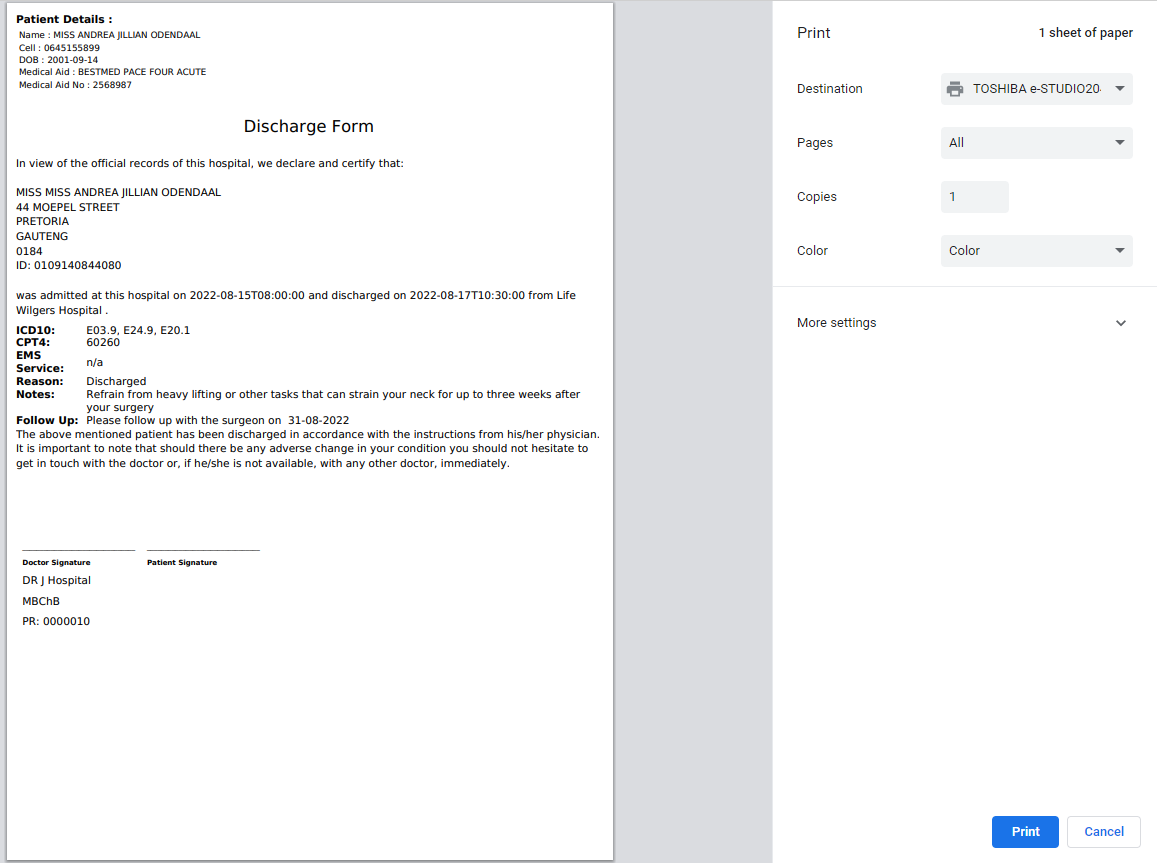
Please Note: There are fields on the printout that allows the Practioner and Patient to sign the form.
- Click on the Cancel button to cancel the printing of the Discharge Form.
![]()
- Click on the Print button to print the Discharge Form.
![]()
- Click on the Print drop-up menu to open print options.

- Click on the Download button to save the Discharge Form in PDF format to the users' computer.
![]()
- Click on the Close button to close the Discharge Form details and return to the Diary screen without saving.
![]()
- Click on the Save button to save all the details of the Discharge Form.
![]()