How to Create a New Hospital Case
A Case is where a patient is admitted to the Hospital / Day clinic / Rehab for a certain medical condition, treatment or to undergo a certain procedure. The Hospital Case screen can, therefore, be used to Create a New Case. All the information regarding the Case will be completed in the Hospital Case screen.
- The contents of this User Manual will consist of the following information:
- Hospital Case details
- Staff List
- ICD10
- CPT4
- Authorisation
- Bed Movement
- Notebook
- Case Screen buttons
- Log in to the GoodX Web App with your GoodX username and password.
- The Diary screen will open.

- Click on the desired Patient, for whom a new Hospital Case has to be created.
![]()
- The Diary Sidebar will open.

- Click on the New Hospital Case button.

- The Hospital Case screen will open.
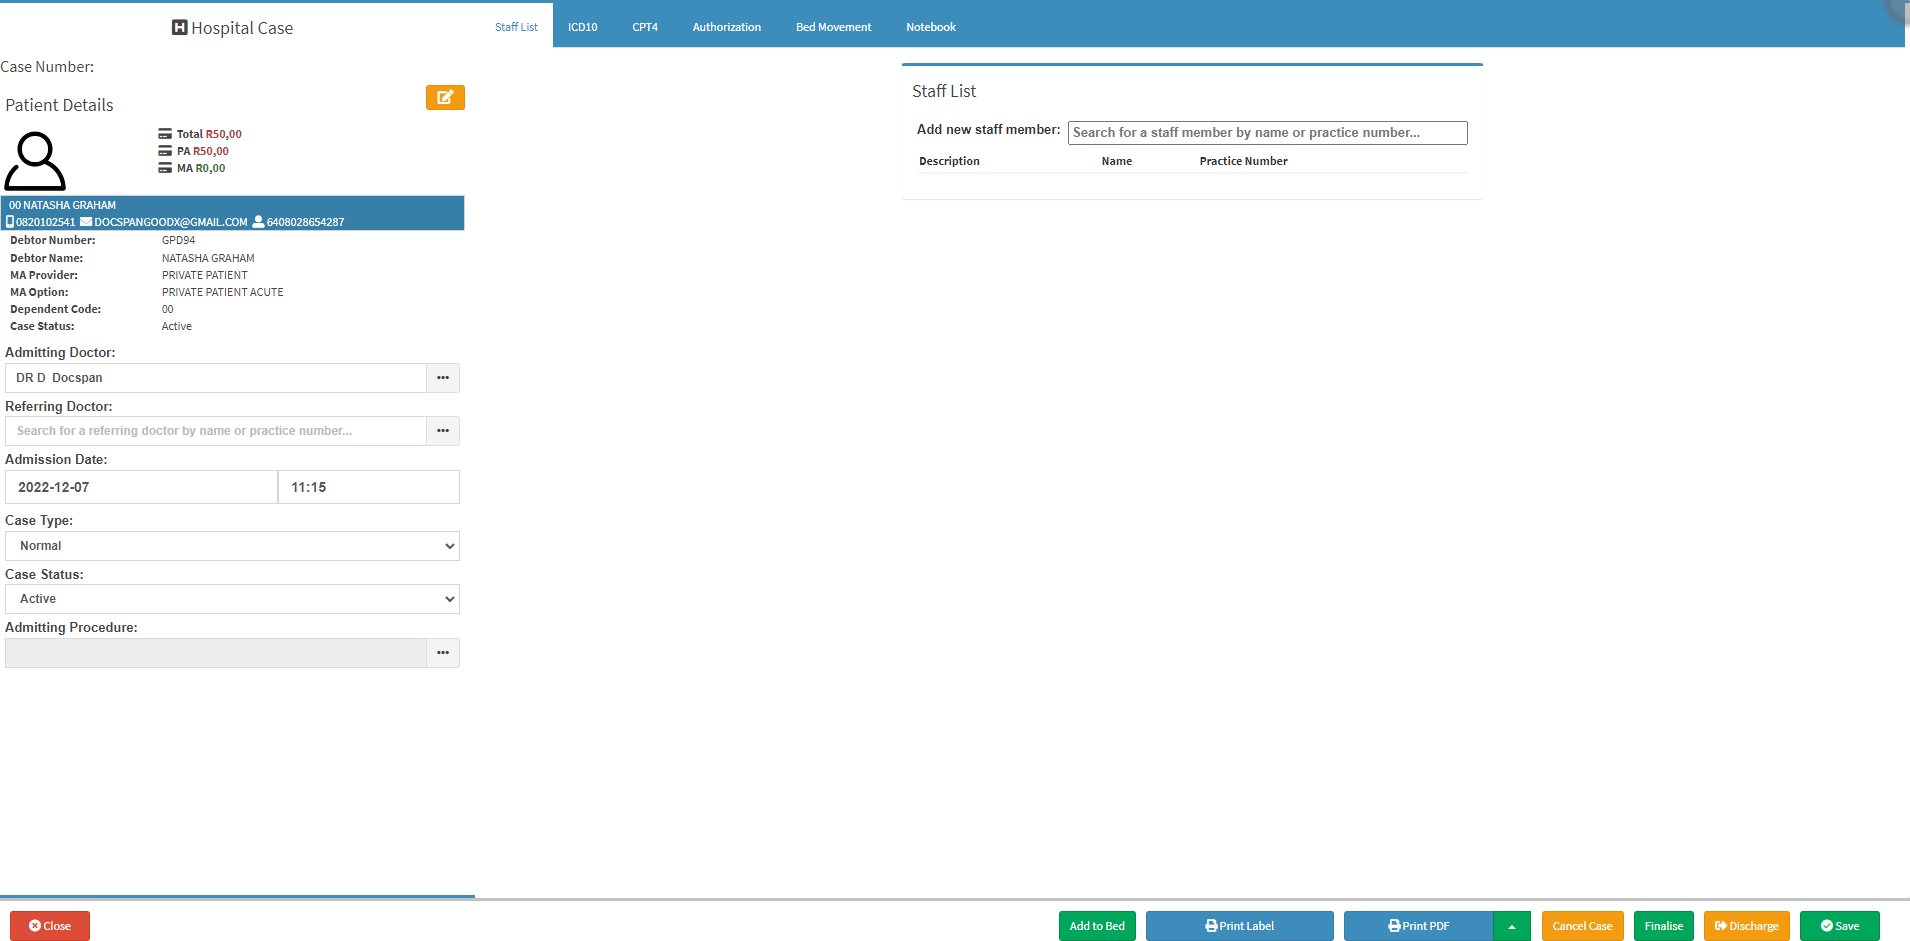
Please Note: A New Case can also be created from the Case Management screen. For more information regarding the Case Management screen, please refer to the user manual: WA: Case Management Screen Overview.
Hospital Case Details
The following details will be pulled through from the Debtor Details screen as completed when the Debtor was created on the system: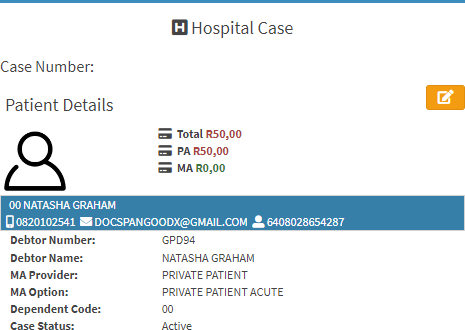
- Case Number: The Case number will be allocated automatically by the system after the New Case has been saved. It will allocate the number according to the last Case number for example if the previous Case was 34, the new Case number will be 35.
- Patient Details: The Patient details will pull through from the Debtor demographic data when the Debtor was created and from the Patient Booking on the Diary screen. The Debtor/Patient that is linked to the booking on the Diary screen will display the Patient details as well.
- For more information regarding the details of the Debtor/Patient, please refer to the user manual: Create New Debtor.
- Click on the orange Edit button to open the Debtor Details screen.
![]()
- The Debtor Details screen will open. The user can Edit/Update any demographic information for the Debtor/Patient on the Debtor Details screen.
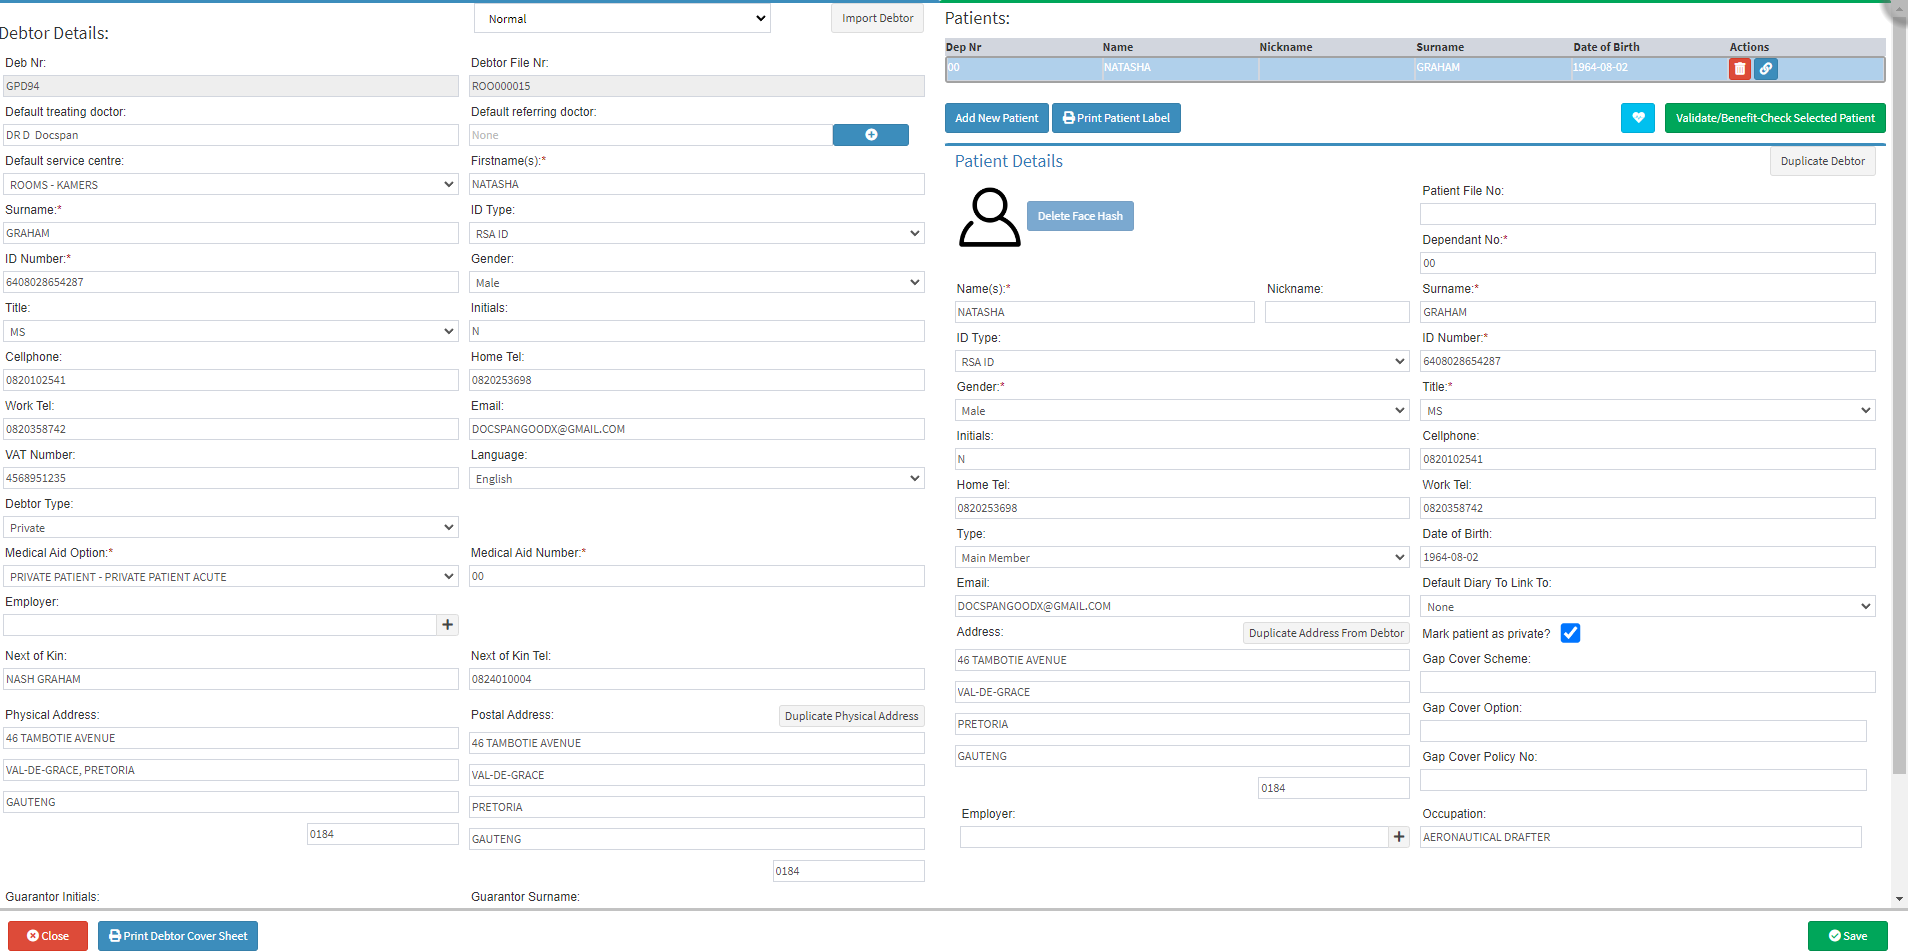
- For more information regarding Editing/Updating of Debtor/Patient details, please refer to the user manual: View or Update Debtor and Patient Information.
- Click on the Close button to return to the Hospital Case screen without saving any changes made.
![]()
- Click on the Save button to return to the Hospital Case screen and save the changes that were made on the Debtor Details screen.
![]()
- Click in the Admitting Doctor field to search for the Admitting Practitioner.
![]()
- Type the Admitting Doctors Name, Surname or Practice Number, a list will appear and get shorter as the user types.

- Select the Admitting Doctor from the list that becomes available.
- Click in the Referring Doctor field to search for a Referring Practitioner.
![]()
- Type the Referring Practitioner's Name, Surname or Practice Number, and a list will appear that will become shorter as the user types.

- Select the Referring Doctor from the drop-down menu.
- The Referring Doctor will now display in the applicable field.
![]()
- Click in the Admission Date field to manually change the Admission Date.

- The date picker will open.
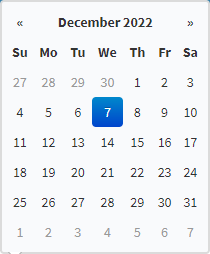
- Select the desired date from the date picker.
- Click in the Time field to manually change the Admission Time from the drop-down timeslots.
![]()
- The Time drop-down will open.

- Click on the desired time.
- Click in the Case Type field.
![]()
- The Case Type drop-down menu will open.

- Normal: When a patient is being admitted to Hospital, the case type will be normal.
- Out-patient: The outpatient is a patient who attends the hospital for treatment without staying overnight. The Patient will then be allowed to go home after the treatment or procedure was done from the Hospital.
- Click in the Case Status field.
- The Case Status drop-down menu will open.

- Active: The Active option means that the Patient is admitted to the hospital. The Hospital Case is Active.
- Pre-admitted: The Pre-admitted option means that the Patient Case is pre-admitted to the Hospital, but not yet admitted into the Hospital. The case file is electronically being open with all the patient information and a booking is made. When the patient arrives, all the paperwork will be ready and the patient can be admitted.
- To be Finalised: The To be Finalised option means that the Patients Case is ready to be finalised from the Hospitals side.
- Click on the ellipse (...) button in the Admitting Procedure field. The user can add the Procedure here for what the Patient is being admitted for in Hospital.
![]()
- The Admitting Procedure screen will open.

- Select one of the options that become available or Click on the blue (+) button to add a New Procedure.
![]()
- The Add admitting procedure screen will open. Complete the English and Afrikaans description for the Procedure the Patient is going for.
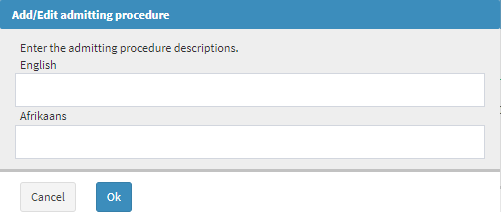
- Click on the Cancel button to cancel adding the admitting Procedure.
![]()
- Click on the Ok button to proceed and add the admitting Procedure.
![]()
- Click on Close to exit the Admitting Procedure screen without saving the Procedure. The Admitting Procedure will not be added.
![]()
- Click on Save to add and save the Admitting procedure and proceed back to the Hospital Case screen.
![]()
- The selected Procedure will display in the Admitting Procedure field.
![]()
Staff List
The Staff List displays a list of the facility staff involved with the Patient's treatment.
- The Staff List tab will be open by default.

- An explanation of the Staff List section will be given:
![]()
- Add New Staff member: Allows the user to link a Hospital employee to the Hospital Round Case by adding them to the Staff List. Staff members on the Hospital Round Cases are all employees who are involved in the treatment or care of the Patient.
- Click on the Search for a Staff Member by Name or Practice Number... field to add the details of the staff member that the user would like to add to the Staff List. Only 2 characters are required for the list to appear.

- Select the desired option from the list that has become available.
Please Note: The options available on the list will depend on the staff that has been set up at the Practice.
- The selected staff member will be added to the Staff List section.

- The Staff List is divided into columns.

- An Explanation of the Staff List columns will be given:

- Description: The role that the staff member has been assigned with regard to the treatment of the Patient.
- Click on the Choose a Role... drop-down menu to select the desired role.
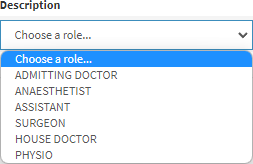
- Select an option from the list that has become available:
- Admitting Doctor: The Practitioner that admitted the Patient to the Hospital.
- Anaesthetist: A medical professional responsible for administering anaesthesia to the Patient.
- Assistant: An Assistant Practitioner assists the Treating Practitioner in certain procedures in the Practice or in the theatre. The Assistant Practitioner conducts physical exams, diagnoses and treats illnesses, orders and interprets tests, counsels on preventive health care, assists in surgery, and can also write prescriptions.
- Surgeon: A Surgeon is a Practitioner who specialises in a certain Medical field and treats conditions that may require Surgery. The Surgeon is the Practitioner who will perform the Surgery on the Patient.
- House Doctor: The primary healthcare provider of the Patient. The Practitioner with whom the Patient has a history and with whom the Patient has a longstanding medical relationship.
- Physio: A Physiotherapist assists Patients to recover by means of movement and exercise and manual therapy such as massage to manage pain and prevent any further deterioration. Physiotherapists encourage development and facilitate recovery for Patients who have injuries, illnesses, or disabilities.
- Name: The last name of the staff member.
- Practice Number: The Practice Number of the staff member as registered with the BHF (Board of Healthcare Funders).
- Click on the Remove button to delete the staff member from the Staff List.
![]()
- The staff member will be removed from the Staff List.
ICD10 Codes
Practitioners and other healthcare professionals identify and label all diagnoses, symptoms, and procedures using the ICD10 (International Classification of Diseases) codes. These codes can be added via the ICD10 Code tab, which will be added to an invoice when the Patient's treatment is complete at the Service Center.
- Click on the ICD10 tab on the Navigation Bar.
![]()
- The ICD10 screen will open.
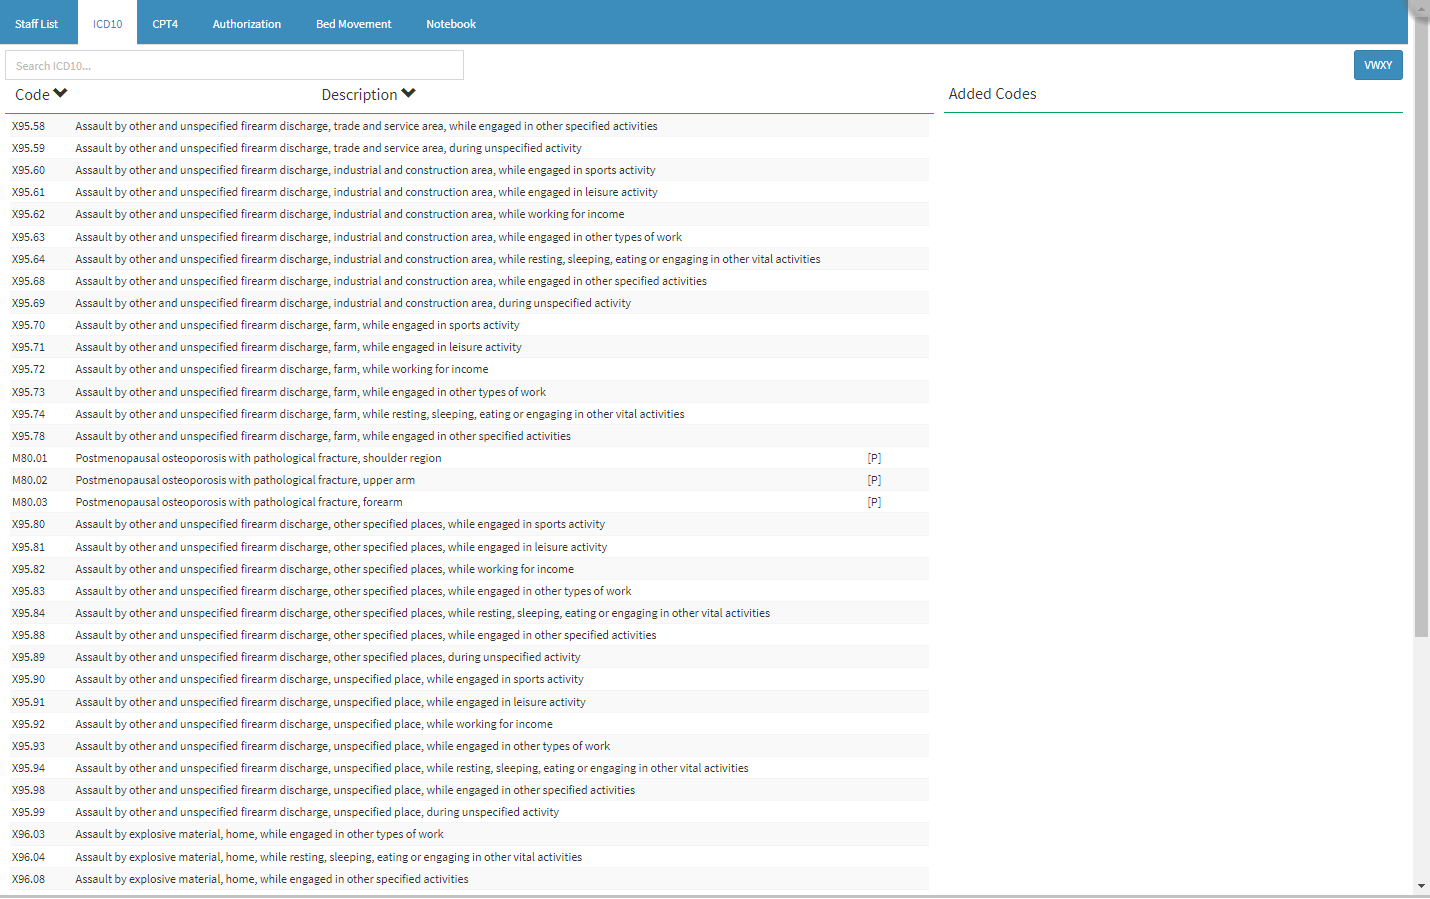
- Click on the Search ICD10 field and start typing the name or code of the desired Diagnosis Code. One character is required before the list becomes available.
![]()
- Click on the desired ICD10 Code.
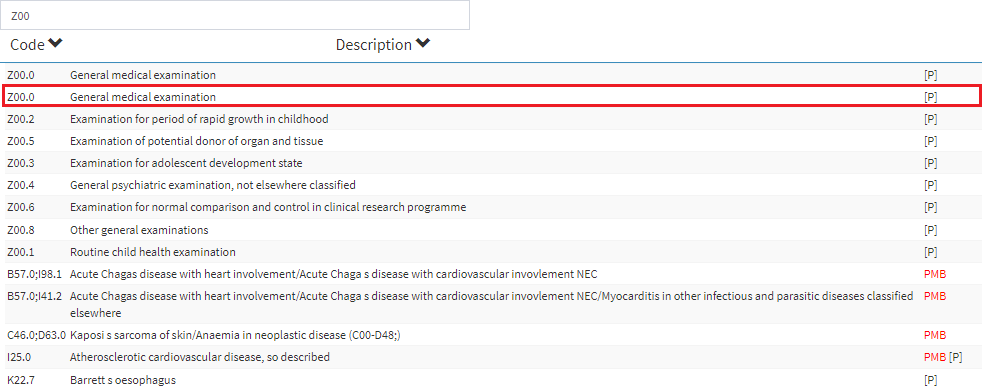
- The ICD10 Code will be added to the Added Codes list, the selected ICD10 Code will be linked to the case.
![]()

- Click on the Remove button to remove the ICD10 Code from the Added Codes list.
![]()
- The ICD10 Code will be removed from the Added Codes list
CPT4
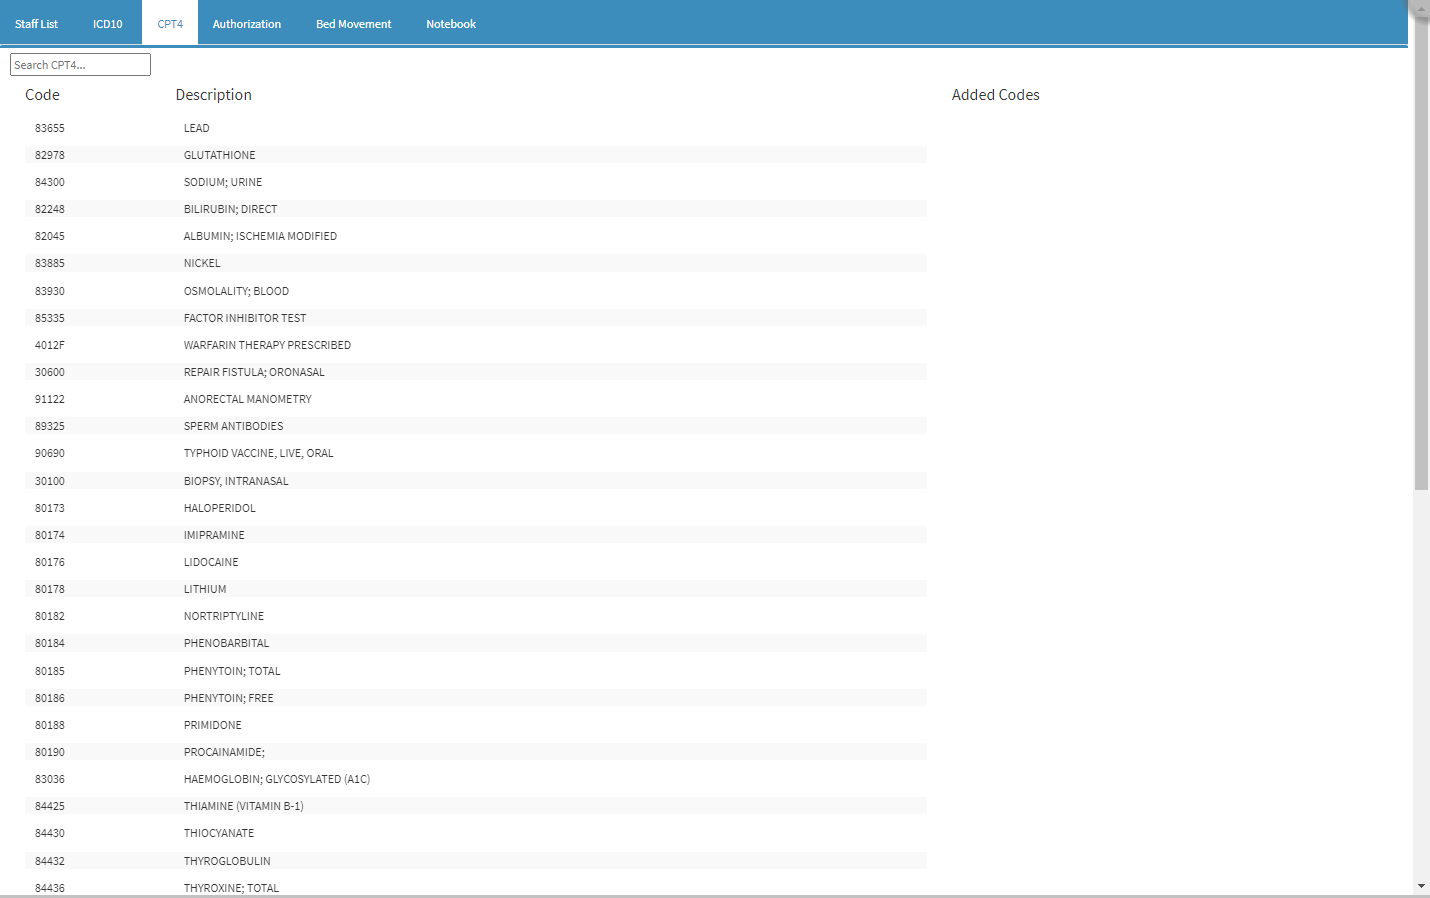
The List of CPT4 (Current Procedural Terminology) Codes are procedure codes that are already listed on the system. These codes tell the Medical Aids which procedure has been done on the patient. Without these codes, Medical Aids will not pay out the claims. CPT4 Codes will be applicable for Hospitals and certain Specialities.
- Click on the CPT4 tab on the Navigation Bar.
![]()
- The CPT4 screen will open.
- For more information regarding CPT4 Codes, please refer to the user manual: WA: Case Screen - CPT4.
- Click on the Search CPT4 field and start typing the name or code of the desired Procedure Code. One character is required before the list becomes available.
![]()
Please Note: The List becomes shorter as users type. The ICD10 Code List will search according to the Code or the Description.
- Click on the desired CPT4 Code.

- The CPT4 Code will be added to the Added Codes list, the selected CPT4 Code will be linked to the case.

Please Note: More than one CPT4 Code can be added to the list.

- Click on the Remove button to remove the CPT4 Code from the Added Codes list.
![]()
- The CPT4 Code will be removed from the Added Codes list
Authorisation
Authorisation codes are given by the Medical Aid to approve the procedures, treatment, consumables and medicine items that are required whilst the Patient is admitted to the Hospital.
- Click on the Authorisation tab on the Navigation Bar.
![]()
- The Authorisation screen will open.

- Click in the Add New Authorisation field.
![]()
- Complete the Authorisation number and press the Enter key on the keyboard.
![]()
- A new Authorisation line will open.

- The user can Complete the Authorisation details here like received from the Medical Aid:
- Auth Code: The Authorisation number will pull through into this field from the Add New Authorisation field.
- Start Date: The Start Date is the date the Authorisation will start for the Hospital Admission.
- End date: The End Date is the date the Authorisation will end for the Hospital Admission.
- Days: The Days will be calculated automatically by the system from the Start and End Date for the Authorisation.
- Amount: The Amount is the Amount approved by the Medical Aid on the Authorisation for the Procedure.
- Contact Person: The Contact Person is the Contact Person at the Medical Aid that can help with any queries where applicable regarding the Authorisation.
- Approval date: The Approval Date is the date the Medical Aid approved the Authorisation for the Hospital Case.
- Click on the red (-) delete button to remove and delete the Authorisation line that was added.
![]()
Bed Movement
Bed Movement assists the Hospital in managing the total number of patients the Hospital can assist, where the patients are in the hospital, and how many beds are occupied or unoccupied. Depending on the need the Bed Movement can be used to assist in the organising of the Hospital. Patients can be moved to different beds, rooms, and wards.
- Click on the Bed Movement tab.
![]()
- The Bed Movement screen will open.
Please Note: The Patient must be Added to a Bed first in order for the Bed Movement to display any information.

- Click on the Add to Bed button at the bottom of the Hospital Case screen to Admit the Patient to a Bed.
![]()
- The Transfer Case screen will open.

- Select the Ward and Bed the Patient will be admitted to.
Please Note: Refer to the Admit a Patient to a Bed link or related button to open the Manual for more information on How to admit a patient to a Bed.
- After the Patient was Added to a Bed, the Bed Movement screen will display the relevant information.

- The Bed and Ward the Patient was admitted to.
- The Date and Time the Patient was in the selected Bed and Ward.
Notebook
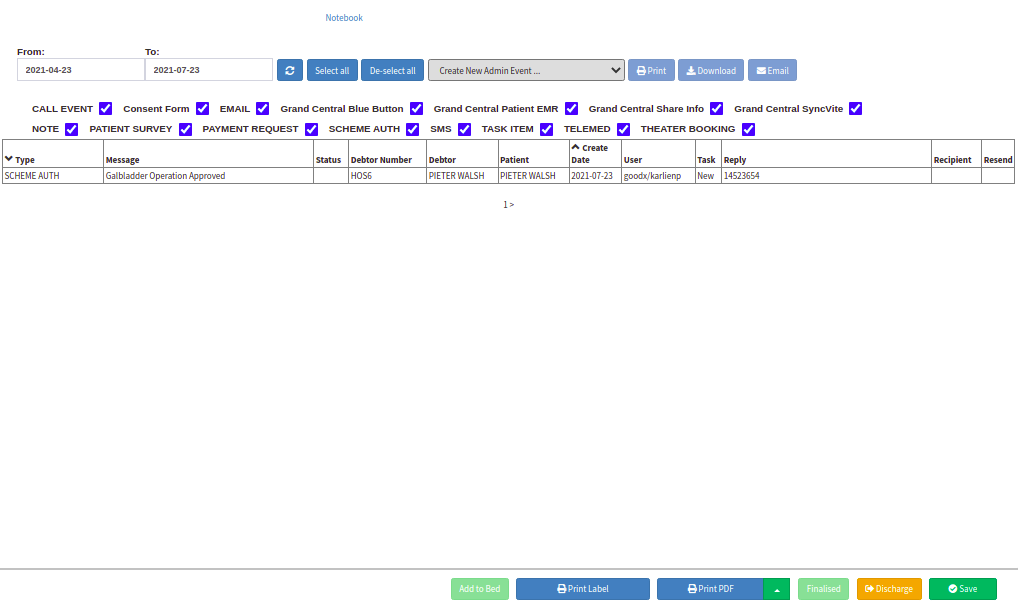
The Notebook is used internally to keep track of any account-related information or communication or any important information on the debtor's electronic file. SMS's and Emails sent to debtors will also be logged in the Notebook. The Notebook is an internal communication function and is only viewable for the staff members at the practice. The Notebook should not be used for any clinical notes or information.
- Click on the Notebook tab.
- The Notebook screen will open. The user can send any communication-related events from the Notebook screen and also see a summary of all the different Workflow Events that have been sent to this specific Patient.
Please Note: Refer to the Notebook link or related button to open the Manual for more information on How and What can be sent from the Notebook screen.
Case Screen buttons
- The Print Label button will allow the user to Print a Single Label for the Hospital Case file.
![]()
- Case Labels can be printed and put on the Patient's hard copy file, the theatre and billing charge sheet, also on clinical notes of the patient. Labels can be customised for each client.
Please Note: Refer to the Case Print / Email / Download and Label Printing link or related button to open the Manual for more information on How to Print the Case Admission Document.
- The Print PDF button will allow the user to print the Admission Document in *pdf format.
![]()
- The Admission Document will include all the Demographic data of the Patient and all the Case details. It is important that the Case is completed correctly. The Admission Document will be attached to the Patients Hospital File.
Please Note: Refer to the Case Print / Email / Download and Label Printing link or related button to open the Manual for more information on How to Print the Case Labels.
- The Finalised button will allow the user to Finalise the Hospital Case. The Case can only be Finalised after the Patient was Discharged from the Hospital. If the Patient is still admitted To Hospital, the Finalised button will be greyed out.
![]()
- The user can Finalise the Case when all billing, corrections and notes are done on the Case. The Case is ready to go through to the Accounts department so they can follow up on Payments.
- The Discharge button will allow the user to Discharge the Patient from Hospital.
![]()
- The Discharge Form Workflow Event Template screen will open. The user can complete the Discharge Form if the Patient is ready to go home, died while in Hospital or is transferred to another Facility.
- Click on the Close button to close the Hospital Case screen without saving the Case.
![]()
- Click on the Save button to save the New Hospital Case that was created.
![]()