The Bed Management assists the Hospital in managing the total patient the Hospital can assist, where the patients are in the hospital and how many beds are occupied or unoccupied. Depending on the need the Bed Management
can be used to assist in the organising of the Hospital.
Open the Hospital Patient Admin Module.
Click on the Beds button.
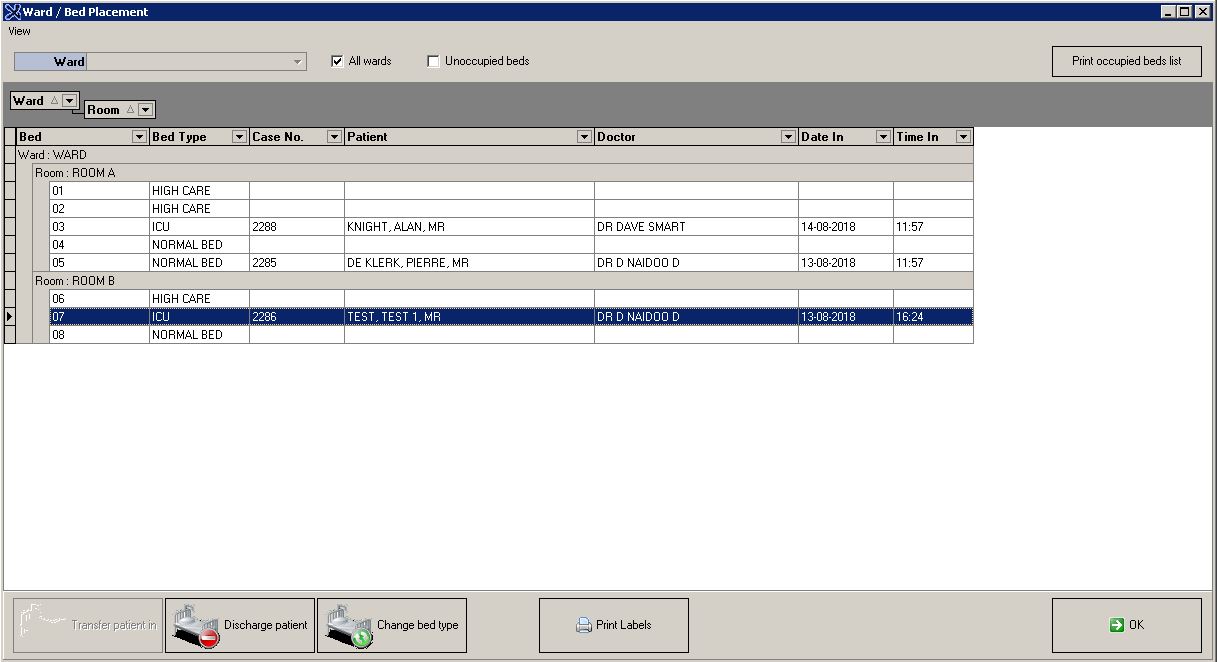
The Ward / Bed placement screen will open, with all the Patients that are in the Hospital and the open beds of the Hospital.
From this screen the following functions are available, click on the description to view the user manual on the function:
All the columns can be sorted alphabetic and can be filtered according to information needed by clicking on the arrows and using the custom filter option or by clicking on the information you need. The arrow will turn blue
when there is a filter applied to that column.
To remove the filter click on the cross on the bottom of the screen. All the filters will be removed and all the information will be displayed again.
Grouping:
The columns can be dragged up to the grouping section in the grey area, this will group certain information together.
The information will display according to the Ward first and the Room according to the grouping set.
Options:
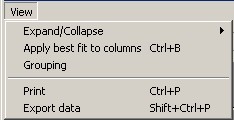
Under the View Menu bar there are the following functions:
Expand / Collapse - Will minimize and maximize the information according to the grouping.
Apply best fit to columns (Ctrl + B) - Will apply the best size for the columns according to the information inside the columns.
Grouping - Will allow the user to use grouping or to deactivate the grouping.
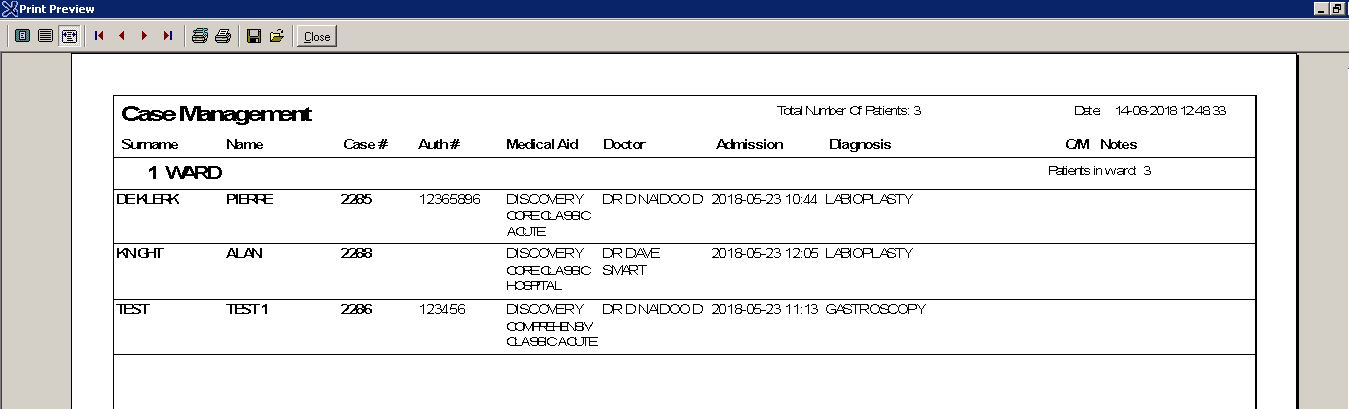
Print (Ctrl + P) - Will print all the information on the screen.
Export data (Shift+Ctrl+P) - The information on the screen can be exported to excel.
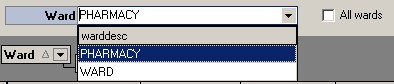
Ticks:
The following ticks are available on the Ward / Beds placement screen:
All wards - will display all the Wards. If the tick is off you will be able to select the Ward that must be displayed.
Unoccupied beds - will only show the empty beds. If the tick is off all the beds will be visible with the patient that is in the beds.
Last modified: Thursday, 2 November 2023, 10:05 AM