VAT Report: Settings and Parameters
A VAT report is a summary of all transactions that include VAT over a specific financial period. VAT needs to be paid bi-monthly to SARS. This report is used to be able to accurately complete the VAT payment. VAT - Value added tax, is levied at the standard rate of 15% on the supply of goods and services by registered vendors.


New Profile






- The contents of this User Manual will consist of the following information:
- New Profile
- Edit Profile
- Delete Profile
- Print Direct
- Print to Grid
- Set as Default
- Options
- Close
- Log in to the GoodX Desktop using your GoodX username and password.
- From the Navigator, Double Click on the Financial Reports Module.

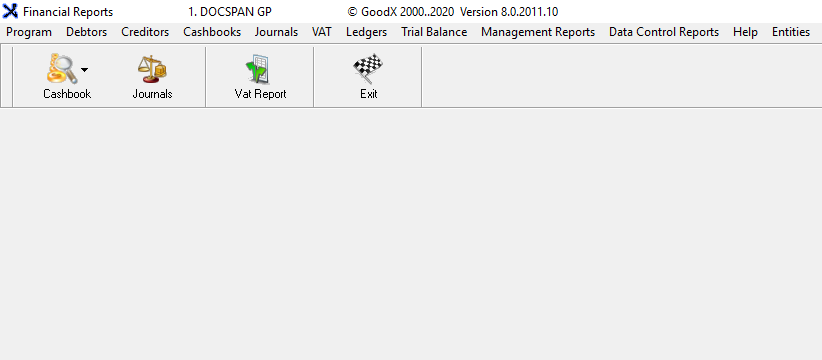
- The main Financial Reports screen will open.

- Click on the Vat Report button on the toolbar.

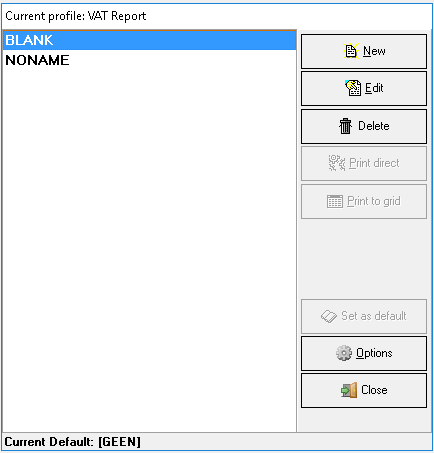
- The Current profile: VAT Report screen will open.
New Profile
Allows a user to create a new report profile with customised options to suit the needs of the practice.
- Click on the New button.

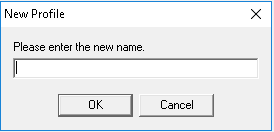
- A New profile pop-up will appear.

- Click on the Please enter the new name text field to input a new name for the profile.

- Click on the Cancel button to cancel the request, the pop-up will close and return to the Choose a Profile screen.

- Click on the OK button to save the new profile name.

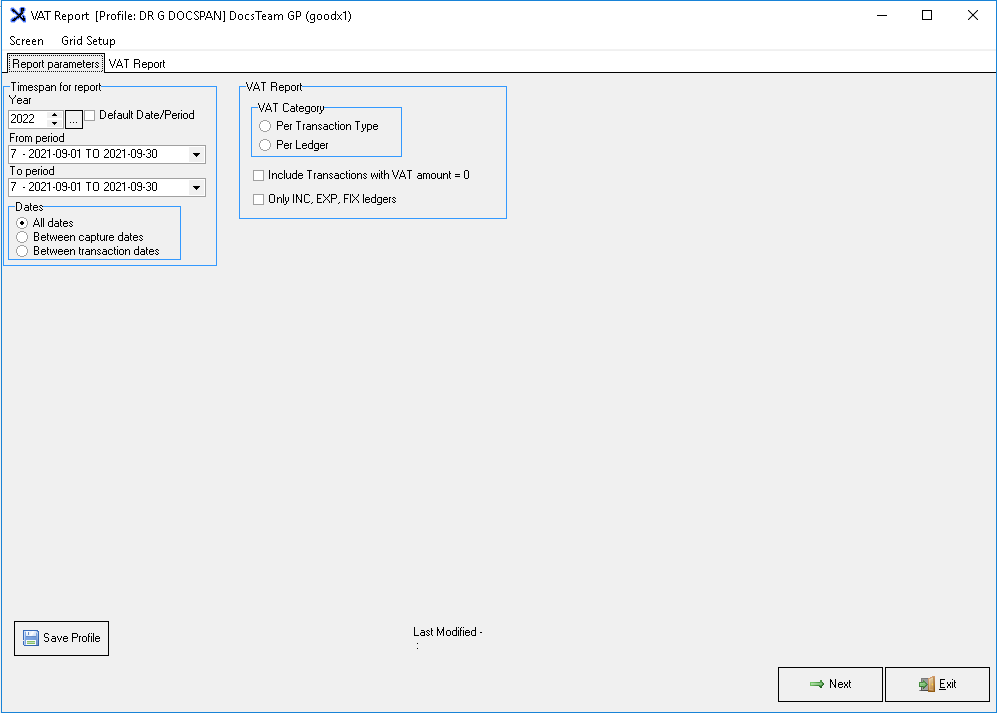
- The VAT Report, Report Parameters tab will open, in order to set up the new profile.

- An explanation for each field will be given:
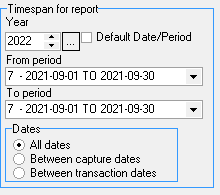
- Timespan for Report: The period of time that will be taken into consideration when the report is generated to determine what transaction data will be included in the report.

- Year: Financial year (Click on the ... ellipse to default the date to the current financial year, this will only happen if the Default Date/Period check box is ticked) For more information on the financial year, please refer to the glossary entry: Financial Period.
- Use the selector arrows to change the year.
- From Period: The financial period start date for the report, including the first day of the specified financial period.
- Click on the drop-down menu to select the desired option.
- To Period: The financial period end date of the report, including the last day of the specified financial period.
- Click on the drop-down menu to select the desired option.
- Dates: The dates that will be used to determine exactly what data will be displayed per transaction and date type when the report is generated.

- Select an option by clicking on the relevant radio button:
- All dates: All dates within the financial year and period that the user has selected.
- Between Capture Dates: The time period between two dates when the transaction was captured and posted to the system. A dates section will open where the user can select the dates.

- From Date: The capture date on which the report transactions will start.
- Click on the drop-down menu to select the desired start date.
- To Date: The capture date on which the report will end.
- Click on the drop-down menu to select the desired end date.
- Between Transaction Dates: The time period between two dates when the service was rendered to the patient. A dates section will open where the user can select the dates.

- From Date: The transaction date on which the report transactions will start.
- Click on the drop-down menu to select the desired start date.
- To Date: The transaction date on which the report will end.
- Click on the drop-down menu to select the desired end date.
- VAT Report: A summary of all transactions that include VAT over a specific time period.

- VAT Category: The collection of the specific VAT transaction types and how they will be grouped on the report.

- Select an option by clicking on the relevant radio button:
- Per Transaction Type: The report will be grouped according to transaction types, for example, Creditor Invoices, Debtor Invoices, Journals etc.
- Per Ledger: The report will be grouped according to the ledger account to which the transaction was posted, for example, Income and Expense accounts.

- Include Transactions with VAT amount = 0: Transactions that do not have VAT on them.
- Tick the checkbox to select the option.

- Only INC, EXP, FIX ledgers: Only transactions that include VAT from the Income (INC), Expenditure (EXP) and Fixed Assets (FIX) ledgers will be shown on the report.
- Tick the checkbox to select the option.
- Click on the Save Profile button once satisfied with the selection criteria that will be used to generate the report. This will be the criteria the specific report profile will use by default every time the report is printed in future unless changed.

- An Information pop-up will appear to ask whether the user would like to overwrite the current profile.

- Click on the No button to cancel the request the pop-up will close and no changes will be saved.

- Click on the Yes button to save the current selection that has been made. The pop-up will close.

- Click on the Next button to continue.

- The Timespan for the report screen will open to confirm the dates for the report.

Please Note: If the need arises, changes can be made. Please refer to the Timespan for report explanation in this user manual for more information.
- Click on the Next button to continue.

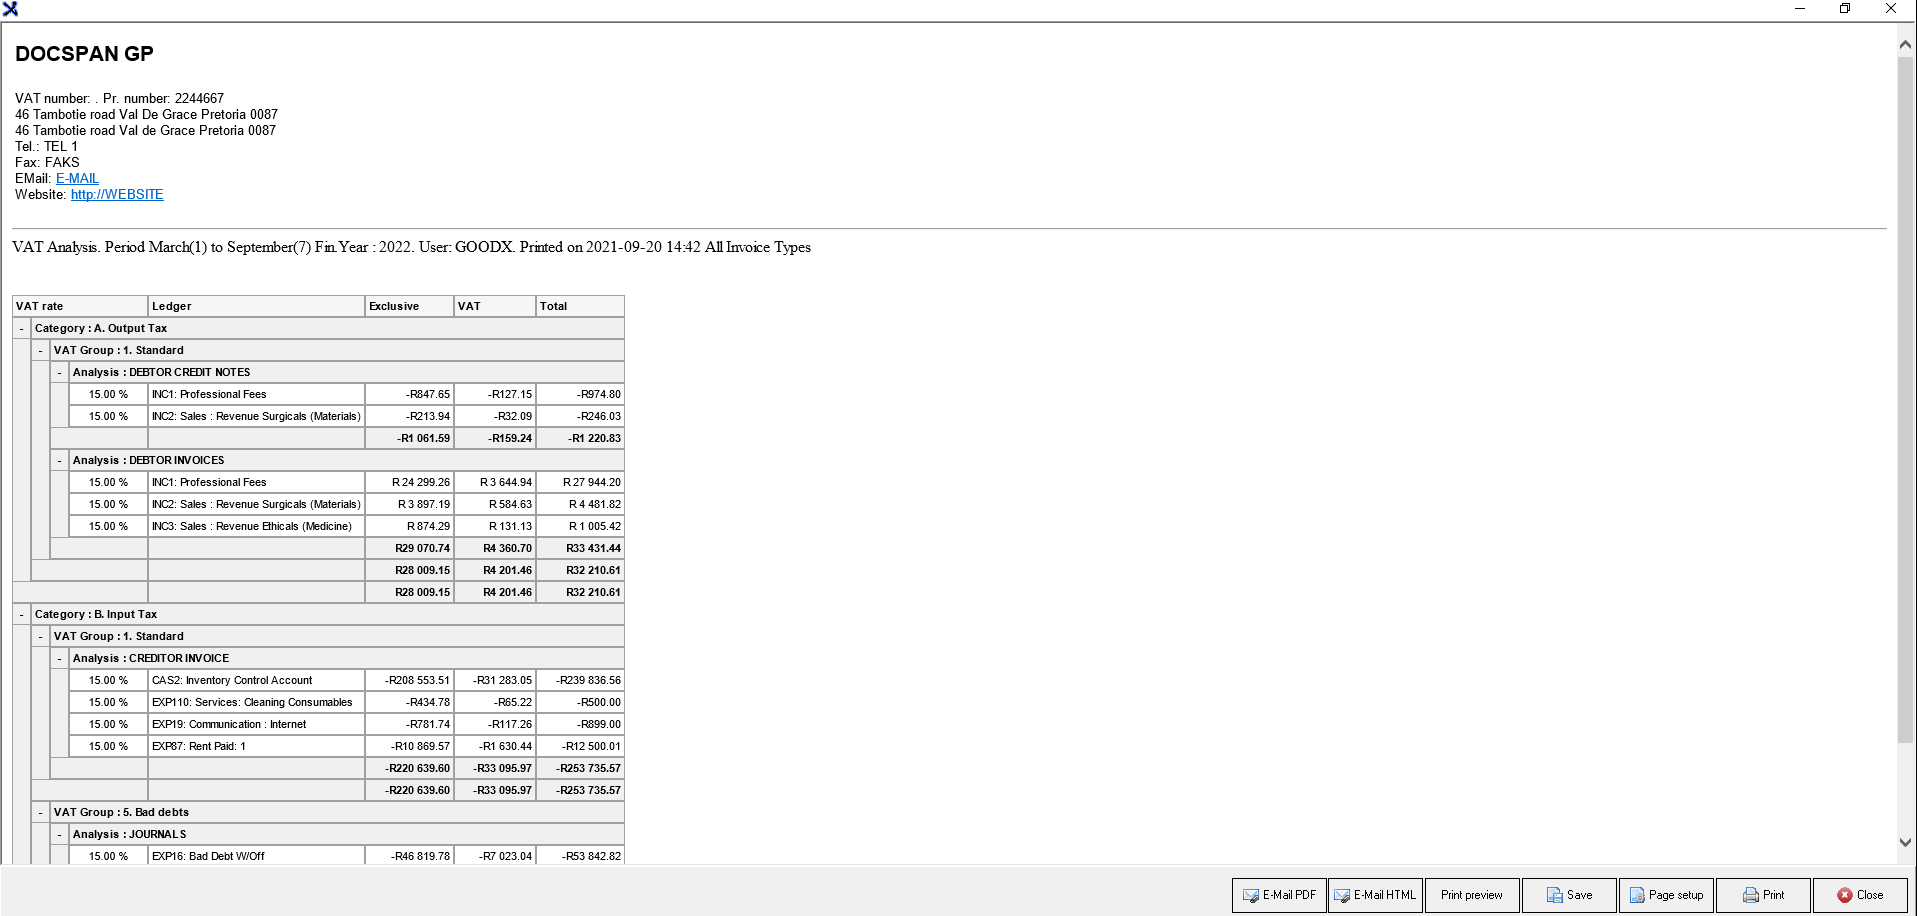
- The VAT Report will generate and will display on the screen.
- For an Explanation of the Email and Print options for the report please refer to the user manual: VAT Report (Overview).

- For an extensive explanation regarding the information that is displayed on the report please refer to the user manual: VAT Report: Report Filters.
- Click on the Exit button to close the report and return to the Current profile: VAT Report screen.

- Notice that the new profile that has been created has been added to the profile list.

Edit Profile
Allows a user to edit the Settings and Parameters of a specific preset up profile.
- Select the desired report profile by clicking on the profile to make a selection.

- Click on the Edit button.

- The VAT Report, Report Parameters tab will open.

- Make the necessary changes by changing the settings, using the parameter explanations as explained in the New Profile section of this user manual.
- Click on the Save Profile button to save the changes that have been made.
- An Information pop-up will appear: Overwrite Profile?

- Click on the No button to cancel the request the pop-up will close and no changes will be saved.

- Click on the Yes button to save the current selection that has been made. The pop-up will close.

- The Information pop-up will close.

- Last Modified: This will show the information when last changes were made to the specific profile and which user made the changes.
- Click on the Exit button to return to the Current Profile: VAT Report screen.

Delete Profile
Allows the user to remove an existing profile from the list.- Select the desired report profile by clicking on the profile to make a selection.

- Click on the Delete button.
- An Information pop-up will appear to ask the user: Delete Profile?

- Click the on No button to cancel the request, the pop up will close and return to the Current Profile: VAT Report screen.

- Click on the Yes button to delete the selected profile, the pop up will close and return to the Current Profile: VAT Report screen.

- The selected Profile will be removed from the list.
Print Direct
Allows the user to directly print the report to the screen. This will print as an HTML report.- Select the desired report profile by clicking on the profile to make a selection.

- Click on the Print Direct button.
- The Timespan for the report screen will open to confirm the dates for the report.

- Click on the Next button to continue.

- The VAT Report will display on the screen.

- Print and E-Mail options will be available for the printed report, for more information, please refer to the user manual: Options to Print.
Print to Grid
Allows the user to view the report on the screen and filter the report before printing the report.
- Select the desired report profile by clicking on the profile to make a selection.

- Click on the Print to Grid button.
- For more information on how to Print to Grid, please refer to the user manual: VAT Report (Overview).
Set as Default
Allows the user to mark a selected report as the default report. When a report is set up as the default report the user will not be able to delete the report.- Select the desired report profile by clicking on the profile to make a selection.

- Click on the Set as Default button.

- The selected option will be marked as default and this will be indicated on the bottom of the Current Profile: VAT Report screen.

Please Note: Once the desired report is set as the default report, the default report will remain the same and will be displayed as the Current Default until the user sets up a different report as the default.
Options
Extra options that are available for the VAT Report profiles, for example, renaming the profile, duplicating an existing profile with a new name and unsettling the current default profile.
- Select the desired report profile by clicking on the profile to make a selection.

- Click on the Options button to access the options menu.

- The Options menu will become available:
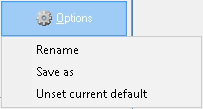
- Rename: Allows the user to give the profile a new name.
- Save As: Will save a duplicate copy of the selected profile with a new name.
- Unset Current default: Will remove the selected profile as the default profile.
Close
Allows the user to exit the Current profile screen.
- Click on the Close button to exit the Current Profile: VAT Report screen and return to the main Financial Reports screen.

Last modified: Thursday, 21 October 2021, 5:18 PM
