Posting the Imported Electronic Bank Statement
The main Bank Cashbook is used for the Reporting of all transactions that go through on a Bank Account. Because this Cashbook should be an exact duplicate of the applicable Bank Account, the best way to get these transactions into the GoodX System is to do an Electronic import. The Bank Statement needs to be imported as a CSV file.
The purpose of importing and posting the Bank Statements is for the Practices financial reporting. The Practice must be able to recon their Income and Expenditures.
The posting of the imported batches can be found under the Financial Module.
- Before the Bank Statements can be posted, there are a few things that you need to check to ensure a successful Electronic Bank Statement posting:
- Ensure that your downloaded Electronic Bank Statement is in a CSV format.
- For clarity, this is also known as your CSV file which contains all your transactions.
- Ensure that the CSV file hasn't changed and that its layout and format still correlates with its CSV profile.
- Ensure that you have no other existing batches and that the dates are correct.
- Ensure that the Opening Balance is the previous month's import Closing Balance.
- Ensure that you don't import duplicate transactions.
- Ensure that there are no outstanding transactions for the month/period.
For the purpose of this Manual, we are going to use the Bank Statement Credit. The Credit is for Credit Transactions only. The Debit option will work exactly the same. The Credit and Debit need to be done to allocate and post the Bank Statements.
- Log in to the GoodX Desktop using your GoodX username and password.
- From the Navigator, click on the Financial Module.

- The Financial Manager screen will open.

- On the Toolbar, click on the Cashbook button.

- The Cashbook menu screen will open.

- Select the Cashbook for the Bank Account that is set up. In this case, KAS6 - FNB Bank Account.
Please Note: The correct Cashbook must always be selected that is applicable in your case.

- Cashbook Code: Cashbooks is a Financial account that contains all the transactions for a specific type of Receipt and Payment. The Cashbook code will indicate on the accounts to which Cashbook the Receipt or Payment is posted. The entries will be posted to a general Ledger.
- Cashbook Name: This is the name of the type of Receipts or Payments on the system.
Posting the Imported Batches
- Click on the Cheques button to post the Credits and / or
![]()
- Click on the Deposit button to post the Debits.
![]()
- When you click on the Cheques or Deposit button, the Financial Period will open.
Please Note: For the purpose of this manual, the Cheques will be used to post the Credits.
- Select the Period. (The period is the financial period for which the bank statement is posted).
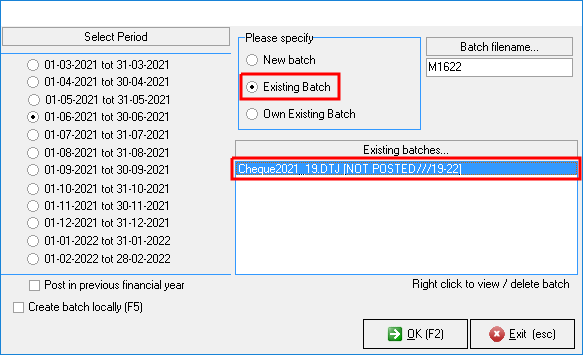
- Click on Existing Batch.
- Select the correct batch to Allocate and Post.
![]()
- Click on OK to continue to the Cheques screen.
- The KAS6 - FNB Bank Account - Cheques screen will open. The transactions displayed was imported from the Bank Statement.
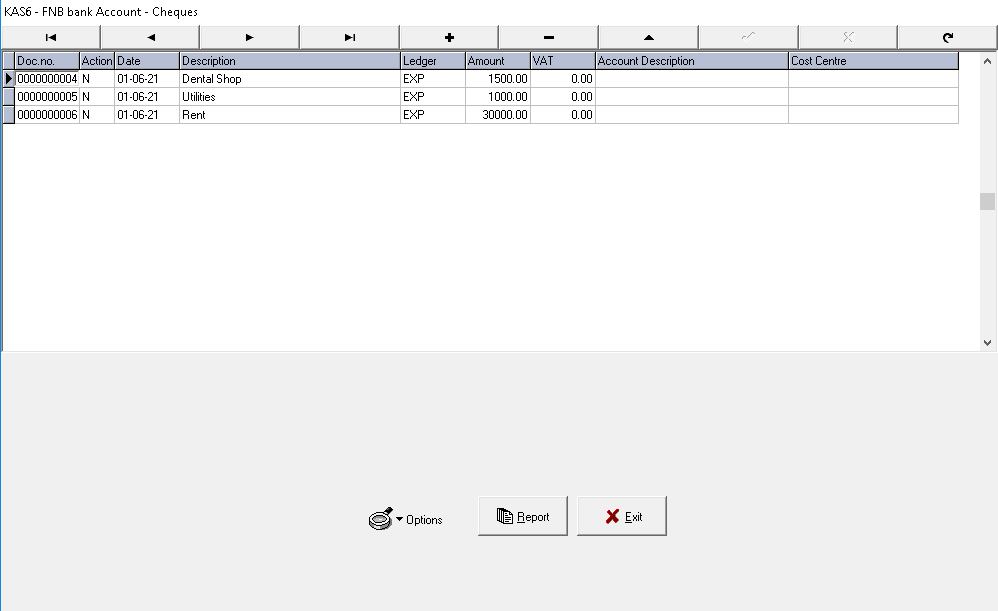
- Click in the Ledger field.
- In the Ledger field, press TAB to open the Expenditure Accounts. If you know the Expenditure Account, you can type the account in the Ledger field and also press TAB.
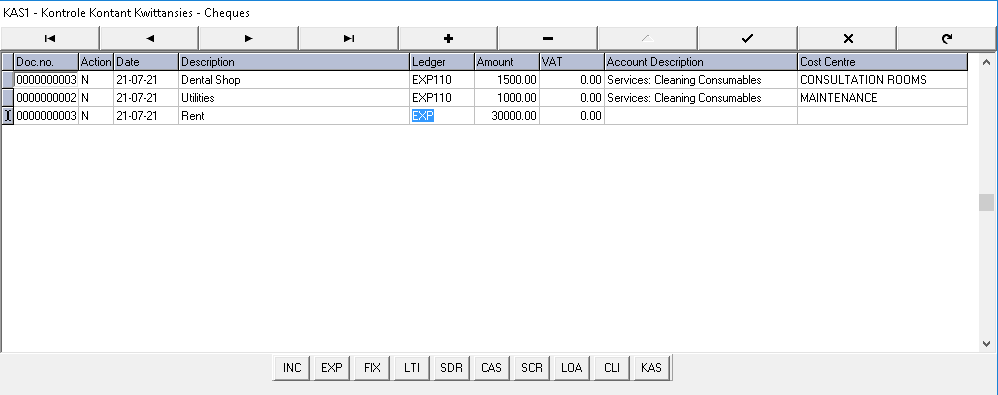
- The following Ledger buttons will appear on the screen when the user pressed the TAB button in the Ledger field.
![]()
Please Note: Click on the Grouping of Ledger Accounts link or the related button at the beginning of this manual to open the manual for more information on the different Grouping of the Ledger Accounts.
- Click on the EXP button (for the purpose of this manual).
![]()
- The Expenditure Accounts screen will open.

- Search the correct Expenditure Account in the Search field.
- Select the Expenditure Account.
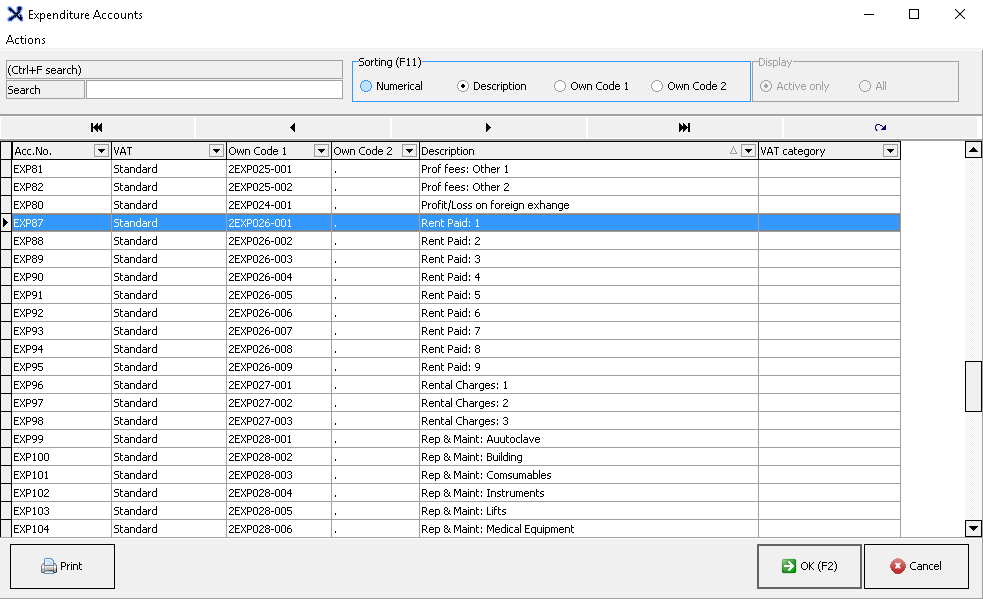
- Click on OK to continue.
![]()
- The 'Select a cost centre' screen will open when an Expenditure Account was selected.
Please Note: The Cost Centres must be set up. If the Cost Centres is not set up, the user won't be able to select a Cost Centre to link the Account to. Click on the Cost Centres link or the related button at the beginning of this manual to open the manual for more information on How to access and set up the Cost Centres.
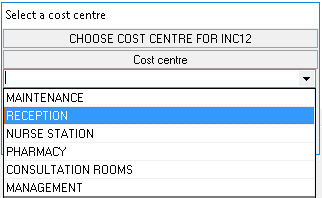
Please Note: A cost centre is an area within a business where costs can be allocated to. Cost Centres are a method to group certain income and expenditures in certain categories for reporting purposes. To assist in making decisions and knowing which departments or sections of the business/practice are making the biggest loss or the greatest profit.
- From the drop-down menu, select the Cost Centre for this Expenditure Account (EXP87).
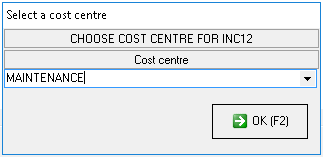
- Click on OK to continue to link the Expenditure Account and Cost Centre to the Credit.
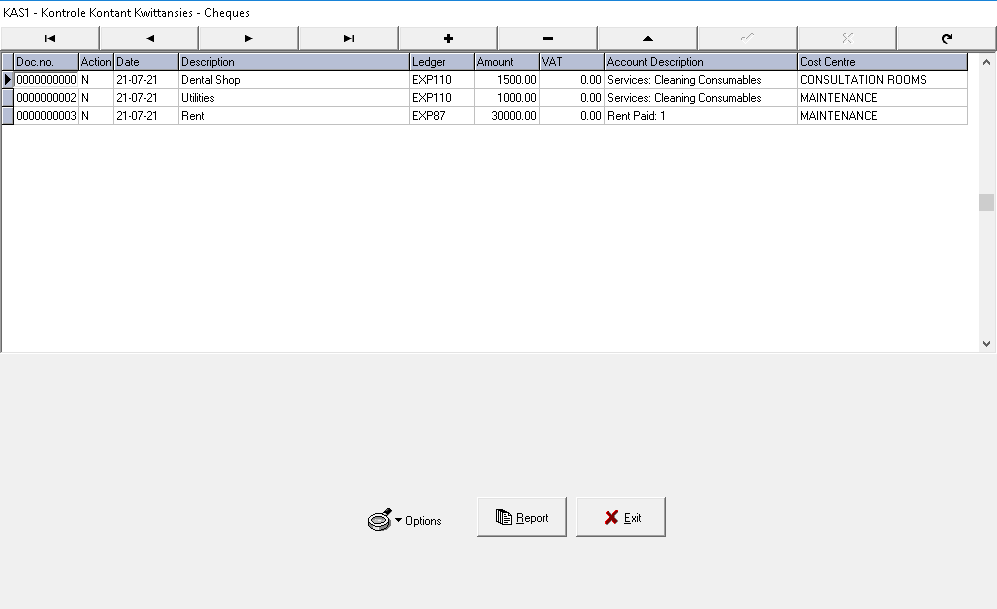
- Click on the Exit button to continue.
![]()
- The Batch screen will open.

Please Note: Click on the Batch Options link or the related button at the beginning of this manual to open the manual for more information on How the Batch Options work.
- Click on the Post (F2) button to post the batch.
![]()
- Click on the Exit and Save (F4) button to exit and save the batch but not post the batch.
![]()
- Click on the Exit and Cancel (Esc) button to exit and cancel the batch without saving or posting the batch.
![]()