Importing an Electronic Bank Statement in CSV format
Purpose:
The main Bank Cashbook is used for the reporting of all transactions that go through on a bank account. Because this Cashbook should be an exact duplicate of the applicable bank account, the best way to get these transactions into the GoodX system is to do an Electronic import.
The Bank Statement needs to be imported as a csv file from the particular BANK website.
STEP1 : Preparation for Import:
- Ensure that the csv file is saved in the following format under the KasProfile folder
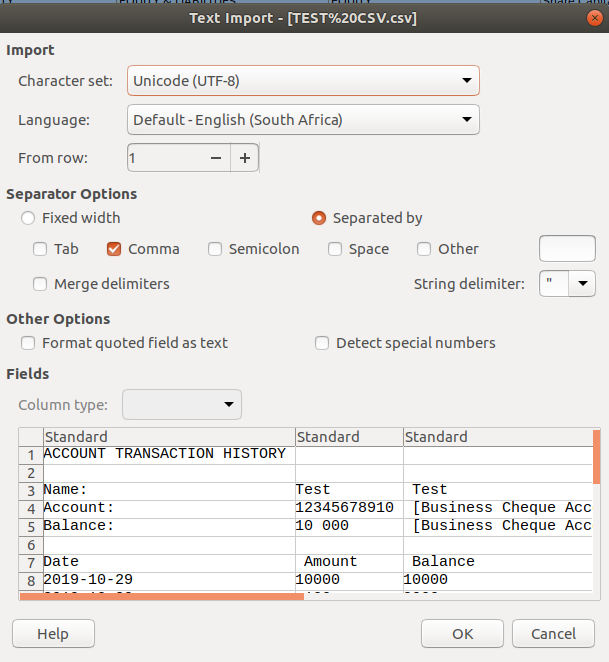

2. Make sure that the CSV file is saved in the correct folder on the GoodX System under the X: drive
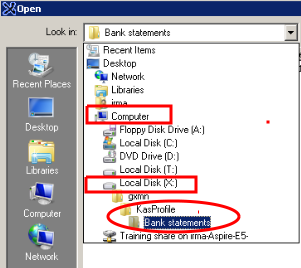
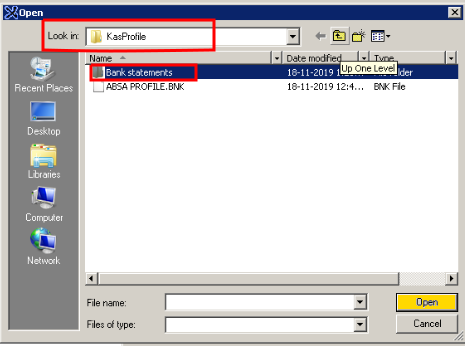
STEP 2: Roadmap : Financial >> Cashbooks >> Select applicable Bank Cashbook >> Cashbook >> Electronic Bank Statement
- On the Bank Statement Import screen, click on the ellipsis button next to the Batch to Import field
- The folder with the saved Bank Statement is displayed
- Select the bank statement and click on Open
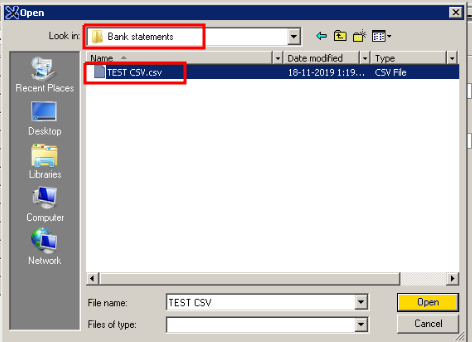
- In the Bank statement Import screen , the selected Bank statement file will appear in the Batch to Import field.
- Click on Import Batch button

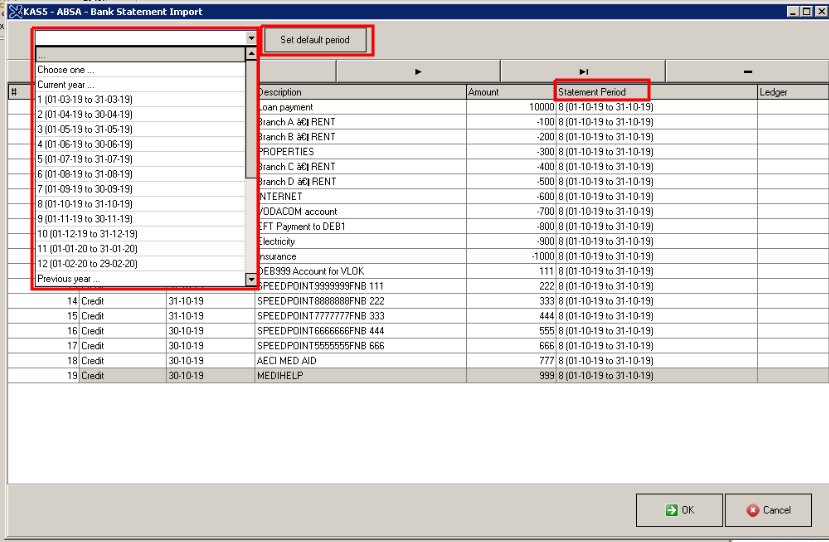
- The following screen will appear with all the data of the imported bank statement.
- The transaction type is now flagged as followed: Debit transactions are the Negative amounts and the Credit transactions are the Positive amounts.
- Before taking the next step, confirm that the transaction dates and the statement period, are correct, and then click on OK.

- If the transaction dates and the statement period, are NOT correct, because the statement date is not falling in the current financial periods, you can change the period as follow
- On the Drop-down arrow, Select the applicable period
- Click on Set default period
- The period in the Statement period column will now change accordingly.
- Click now on OK
- The following report will appear as a confirmation of the successful Import.
- Review and confirm if this is correct,
- If you prefer to keep an additional record of the imported batch, please use the Save or Print buttons

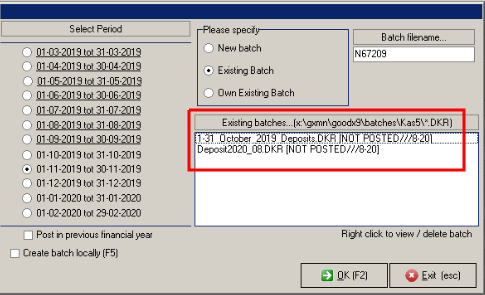
- The system will now Import this electronic bank statement in two different batches. One for the Deposits (debits) and one for the Cheques (credits). You will find these batched under Existing batches. (See Allocating of Bank statements.)
Troubleshooting:
- If you are receiving errors at the point of Import, first check the date format on the CSV as well as on the Bank Profile. The regional settings of the clients' computer, as well as the regional settings of the Cloud, can play a role.
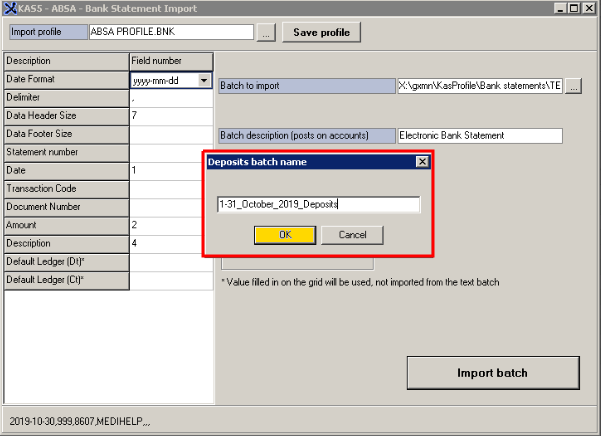
- If for some or other reason, the import is a duplication, the system will ask you to rename the batch. Take Note that there should not be any spaces in the file name . This will cause errors.
- Incorrect Filename: 1-31 October 2019 Deposits
- Correct Filename: 1-31_October_2019_Deposits

Last modified: Wednesday, 9 September 2020, 9:54 AM