Text size
Line height
Text spacing
It is vital for any Medical Practice that the Practice Manager ensures that the Critical Business processes are successfully completed. This will reduce the risk of all kinds of losses, eg Data loss and Financial losses.

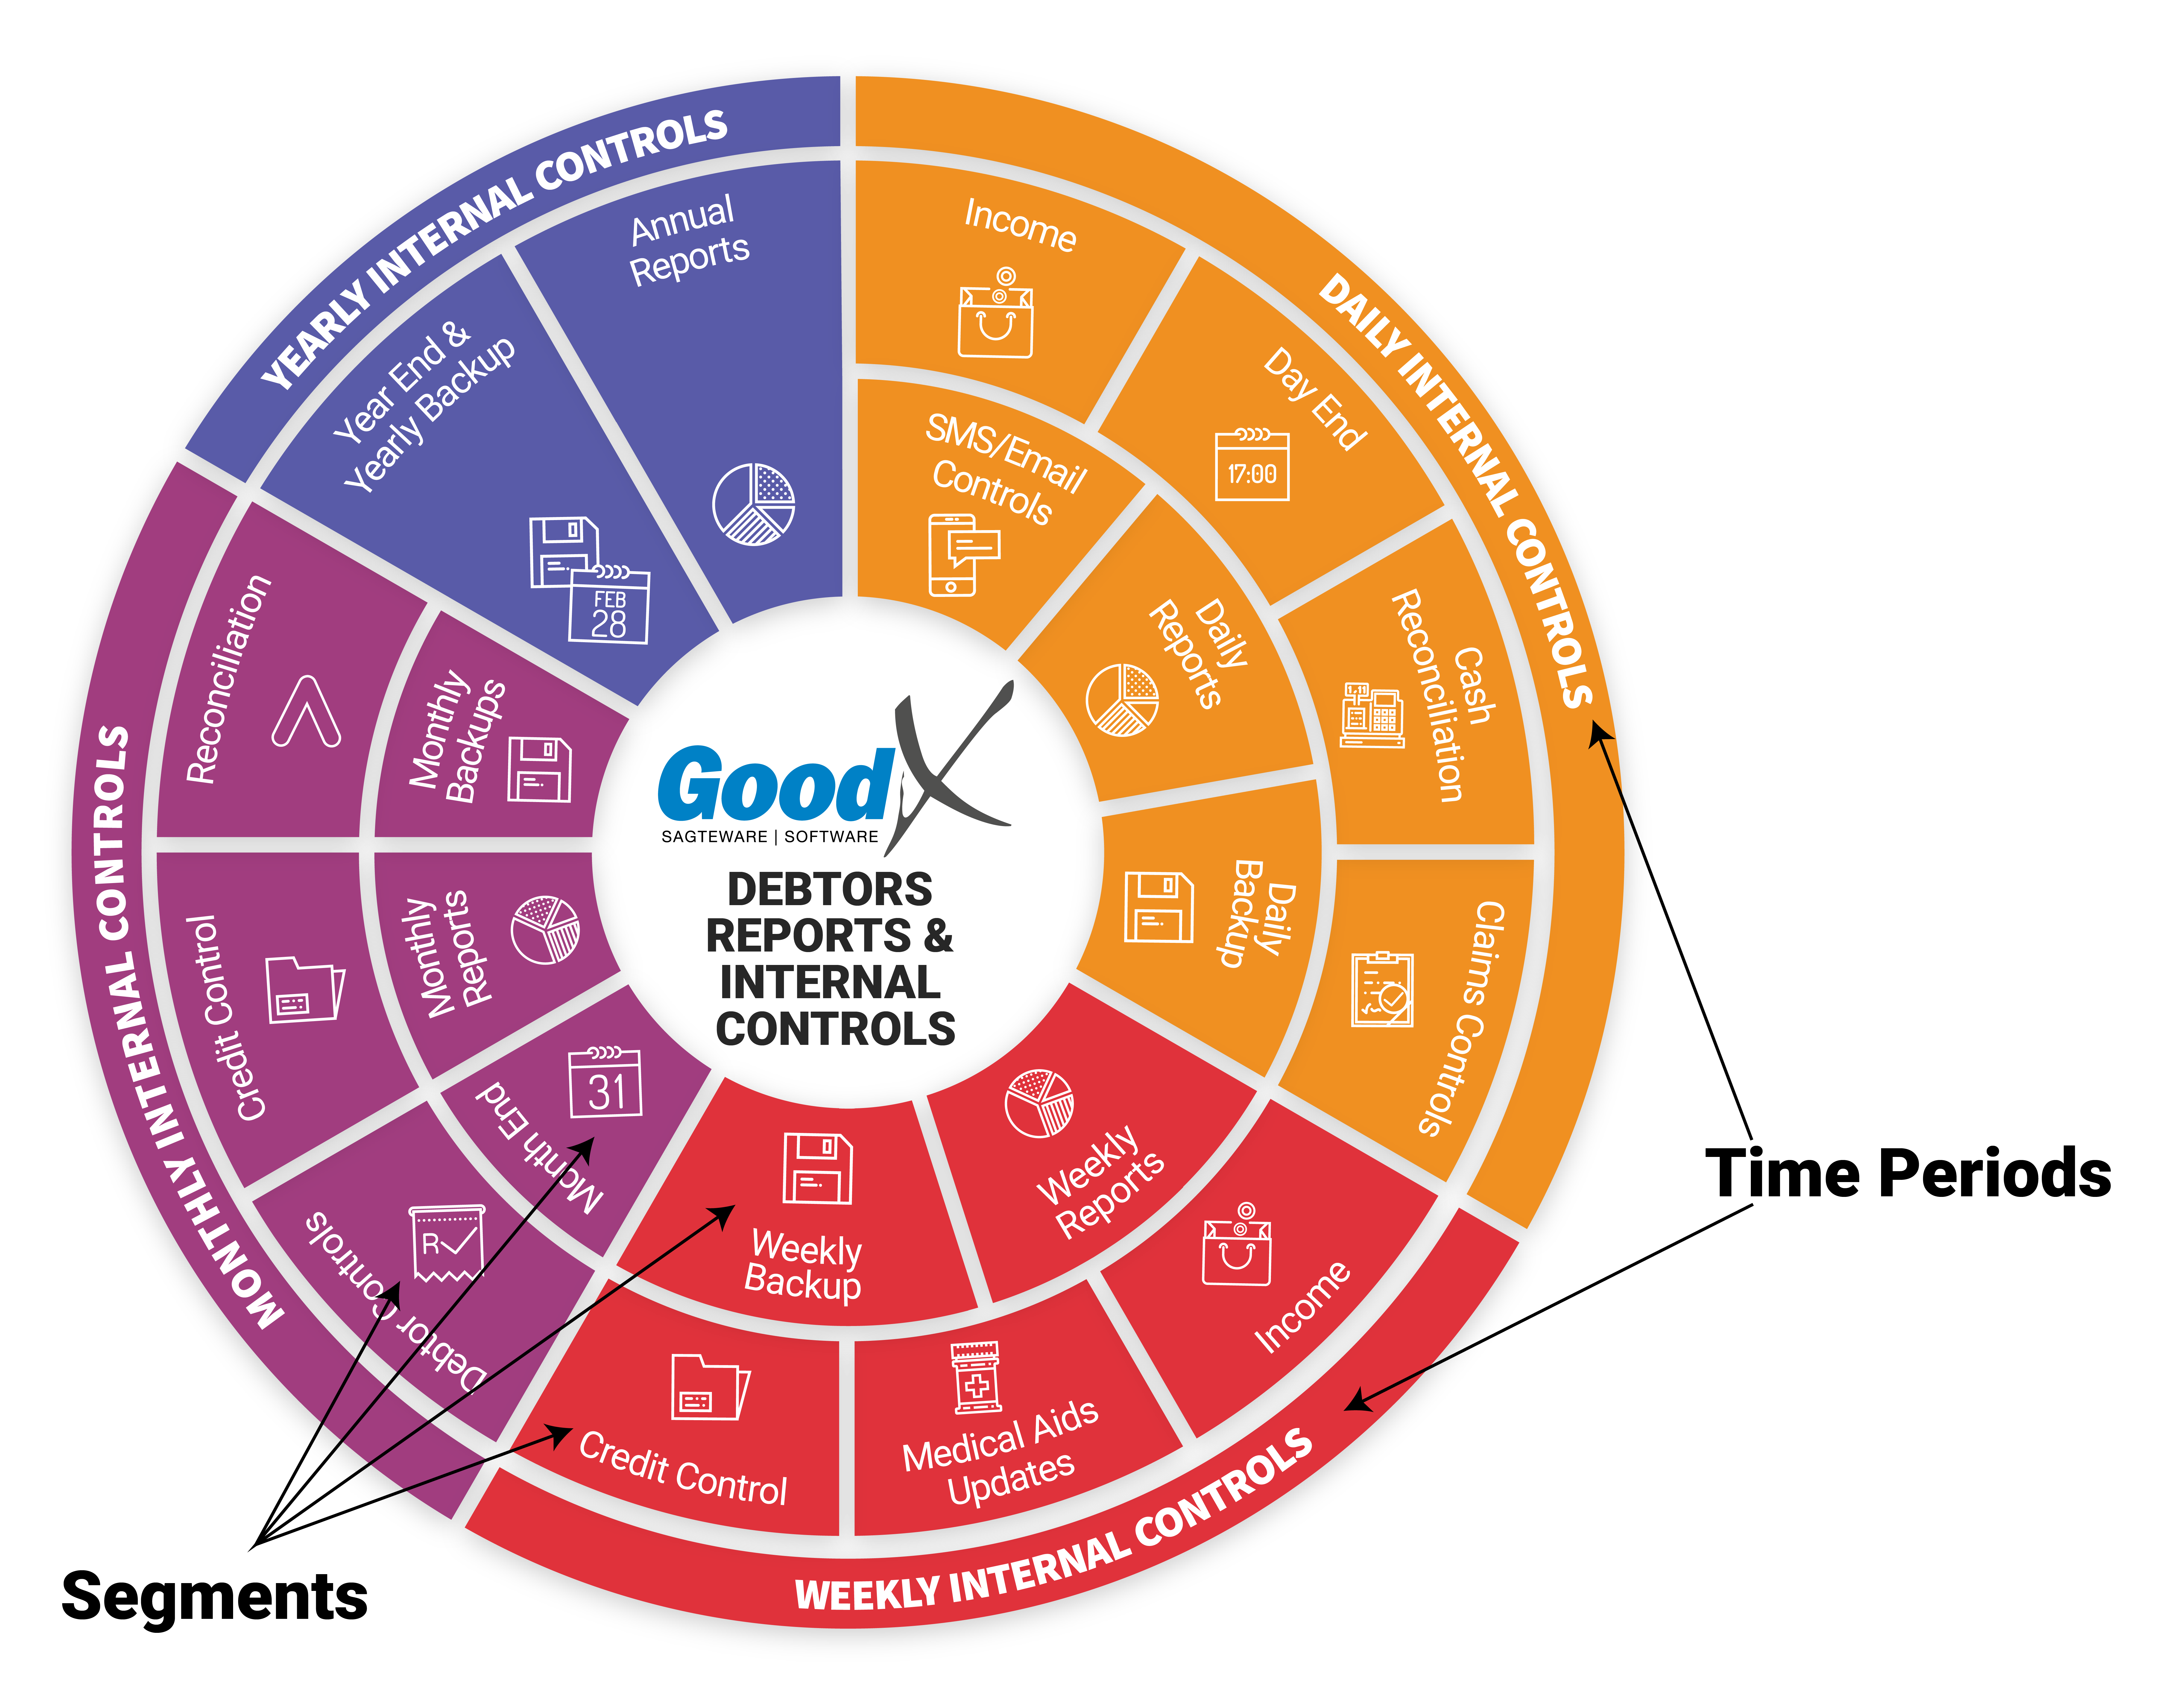
The following diagram gives an Overview of the Internal Controls that need to be performed on a regular basis. The Controls are performed by:
The Best Practice Guidelines Booklet can be found under Guidelines on the Home page.
The Internal Controls diagram is divided into six time periods (daily, weekly, monthly etc) during which the Internal Controls are to be performed.
Actions and Reports that share a common emphasis are grouped together into Segments, eg cash reconciliation includes petty cash and cash collected at the cash registers.
Segments are grouped together within the time periods so that the Practice Manager will be able to see at a quick glance which controls must be performed during which time period. As the financial year proceeds, following the Diagram's flow will assist the Practice Manager in completing all the necessary tasks and Reporting to complete the whole year's Internal Controls.
Take Note: