The Add/Edit Payment Plan screen enables a Practice to create, manage, and track Patient Payment Plans from the initial setup to completion. It streamlines billing by capturing all essential details for primary and Instalment payments, managing plan statuses with built-in rules, and recording Practitioner and Service Centre Information for clear accountability. Automated calculations, field validations, and confirmation dialogues help prevent errors and ensure the maintenance of accurate, auditable financial records. By using this screen, Practices can save time, ensure compliance, improve payment tracking, and deliver a smoother financial experience for Patients.
The Contents of This User Manual:
Patient Section
Details Section
Primary Billing Section
Status Rules
Instalment Billing Section
Additional Options
Saving a Payment Plan
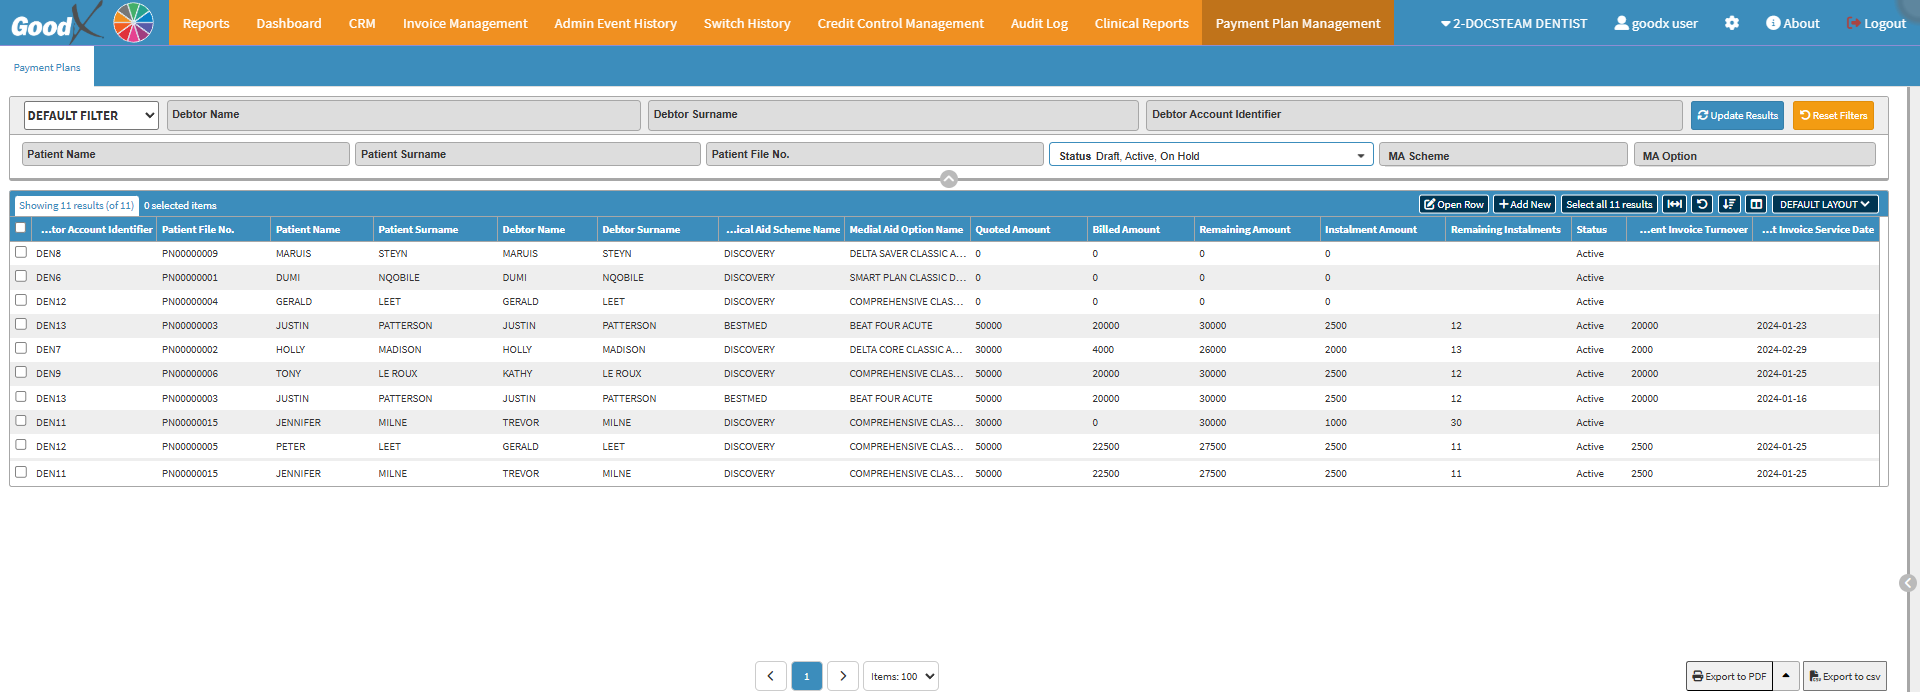
This user manual will start on the Payment Plans screen.
An explanation will be given of the Add/Edit Payment Plan screen:
Patient Section
The Patient section is a mandatory field that can be used to search for a Patient by typing at least three characters in the search field, triggering an auto-suggest drop-down with matching results. Alternatively, you can Click the ellipsis icon to open the Patient List screen to select a Patient.
Details Section
The Details section provides a comprehensive overview of the financial breakdown for a payment arrangement. It records the total quoted amount, the agreed Instalment amount, and the number of remaining instalments. It also displays the primary amount, the total billed to date, and the final Instalment amount, along with the remaining outstanding balance. This section enables you to track payment progress accurately, ensuring clear visibility of both billed and pending amounts throughout the payment cycle.
An explanation will be given of the Details section:
Quoted Amount: Required numeric input for the overall Quoted Amount.
Primary Amount: Optional numeric input for a once-off deposit. If omitted, Primary Billing is not required.
Billed Amount: Automatically populated with the Primary Amount after the Primary Invoice is posted.
Remaining Amount: Automatically calculated as the outstanding balance.
Remaining Instalments: Auto-calculated based on Quoted, Primary, and Instalment amounts.
Final Instalment Amount: Auto-calculated once all other values are filled in.
?Please Note: Any change to the Instalment Amount or the Remaining Instalments will auto-update all calculated fields.
Primary Billing Section
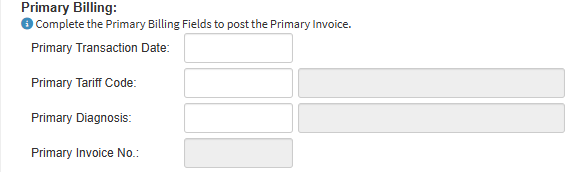
The Primary Billing section captures and records the essential details of a Patient’s initial Billing Transaction, including the Transaction Date, Tariff Code, Diagnosis, and Invoice Number, ensuring accurate, auditable, and streamlined financial processing.
An explanation will be given of the Primary Billing section:
Primary Transaction Date: Select the Date when the Billing Transaction took place using the Date Picker.
Primary Tariff Code: Begin typing at least three characters to search and select the special Code representing the service or Procedure being billed.
Primary Diagnosis: Start entering at least three characters to select the medical diagnosis code (ICD-10) for the Patient’s condition; only one Code can be used.
Primary Invoice No.: The unique number assigned to the Primary Invoice is generated by the system and cannot be edited.
Status Rules
The Status Section allows you to monitor and control the progress of Payment Plans, guiding them from draft creation to completion. It enforces rules for status changes, ensures accountability by requiring reasons for manual updates after Invoices are posted, and automates actions like posting the Primary Invoice when a plan is activated.
An explanation will be given of the Status Rules section:
Draft: The default status for a new Payment Plan, used during creation; it cannot be reverted to Draft once the Primary Invoice is posted.
Active: Indicates the plan is in progress; selecting Active after the Primary Invoice was posted will post the Invoice and requires saving.
On Hold: Marks the plan as temporarily paused; changing to On Hold after an Invoice is posted requires entering a reason, which is recorded in the Patient Notebook.
Completed: Indicates the plan is fully paid; this status becomes locked after the final Instalment Invoice is posted and cannot be changed.
Instalment Billing Section
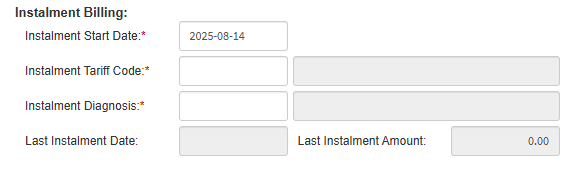
The Instalment Billing section tracks and manages recurring payments for a Patient’s plan. It ensures Instalments are scheduled, calculated, and billed accurately, providing a clear overview of the start date, amounts, and final Instalment details.
An explanation will be given of the Instalment Billing section:
Instalment Start Date: Select the Start Date for the Instalment plan using the Date Picker. This is a required field.
Instalment Tariff Code: Begin typing at least three characters to search and select the Service or Procedure Code for the Instalment. Macros are not allowed, and this is a required field.
Instalment Diagnosis: Start typing at least three characters to select the ICD-10 Diagnosis Code for the Instalment. Only one Code can be used, and this is a required field.
Last Instalment Date: The Date of the final Instalment is automatically generated from the Instalment Start Date and cannot be edited.
Last Instalment Amount: The Amount for the final Instalment is automatically calculated once the Details section is completed and cannot be edited.
Additional Options
The Additional Options section captures key administrative details for the payment plan. It allows you to select the Treating Practitioner, Referring Practitioner, and Service Centre to ensure accurate assignment and proper system tracking, while enforcing required fields with warning dialogues to maintain data integrity.
An explanation will be given of the Additional Options:
Treating Practitioner: Select the Practitioner responsible for the Patient’s care from the drop-down. This is a required field and will default to the Debtor Setup. A warning dialogue will appear if not completed.
Referring Practitioner: Select the Practitioner who referred the Patient from the drop-down. This field is optional and will default to the system setup if not selected.
Service Centre: Select the facility or location where services will be provided from the drop-down. This is a required field, and a warning dialogue will appear if it is not completed.
Close: Discard all changes. If any edits have been made, a confirmation pop-up will appear before closing.
Save: Save the current information and return to the list view.
Click on the Up Arrow next to the Save button to display the Save & Post Primary Invoice button.
Save & Post Primary Invoice: Save the new Payment Plan and post the Primary Invoice.
Saved Payment Plan
Once a Payment Plan is saved, all captured financial details are securely stored and displayed on the Payment Plan Management screen. This allows the Practice to retain an accurate record of the arrangement while providing flexibility to review, track, and update the plan as needed. By double-clicking on a saved payment plan, the Add/Edit Payment Plan screen will reopen, allowing you to make changes if required.
Double-Click on a Saved Payment Plan.
The Add/Edit Payment Planscreen will open.
Last modified: Thursday, 11 September 2025, 6:46 AM