Print Report to PDF
Once reports are generated, they can be converted into a PDF format for easy readability and accessibility through printing. Printing reports ensures that the Reports format stays consistent. In summary, printing a report to PDF ensures that the document is easily shareable, maintains its integrity across different platforms, and offers options for both digital and physical distribution while preserving the original formatting and security features.

Please Note: For the purpose of this user manual, we shall use the Debtor Age Analysis report.


- This user manual will start on the Reports screen.

Please Note: For the purpose of this user manual, we shall use the Debtor Age Analysis report.
- Click on the +Add New button to generate a new Report.
- The Report Profile screen will open.

- Select the category you wish to use from the Report Category: drop-down menu.

- Select the type of report you wish to generate from the Report Type: drop-down menu.

- Select Debtor Age Analyis Report from the menu.

- The Report Profile screen will open.

- Select all the different options you wish to be displayed on the report.
- For more information on the Settings and Parameters of the Reports, please refer to the user manual: Age Analyis Report: Settings and Parameters.
- Click on the Generate Report button to generate the Debtor Age Analysis Report.
Please Note: You are also able to just Save and Generate the report by Clicking on the Generate Report drop-up menu button.
- A Notification will pop up indicating that the report has been generated in the background.

- After the Report is generated a pop-up will appear indicating that the Report has been generated.

- The Report will display in the Reports List.

- Double-click on the Report (Debtor Age Analysis December 6 - 2023).

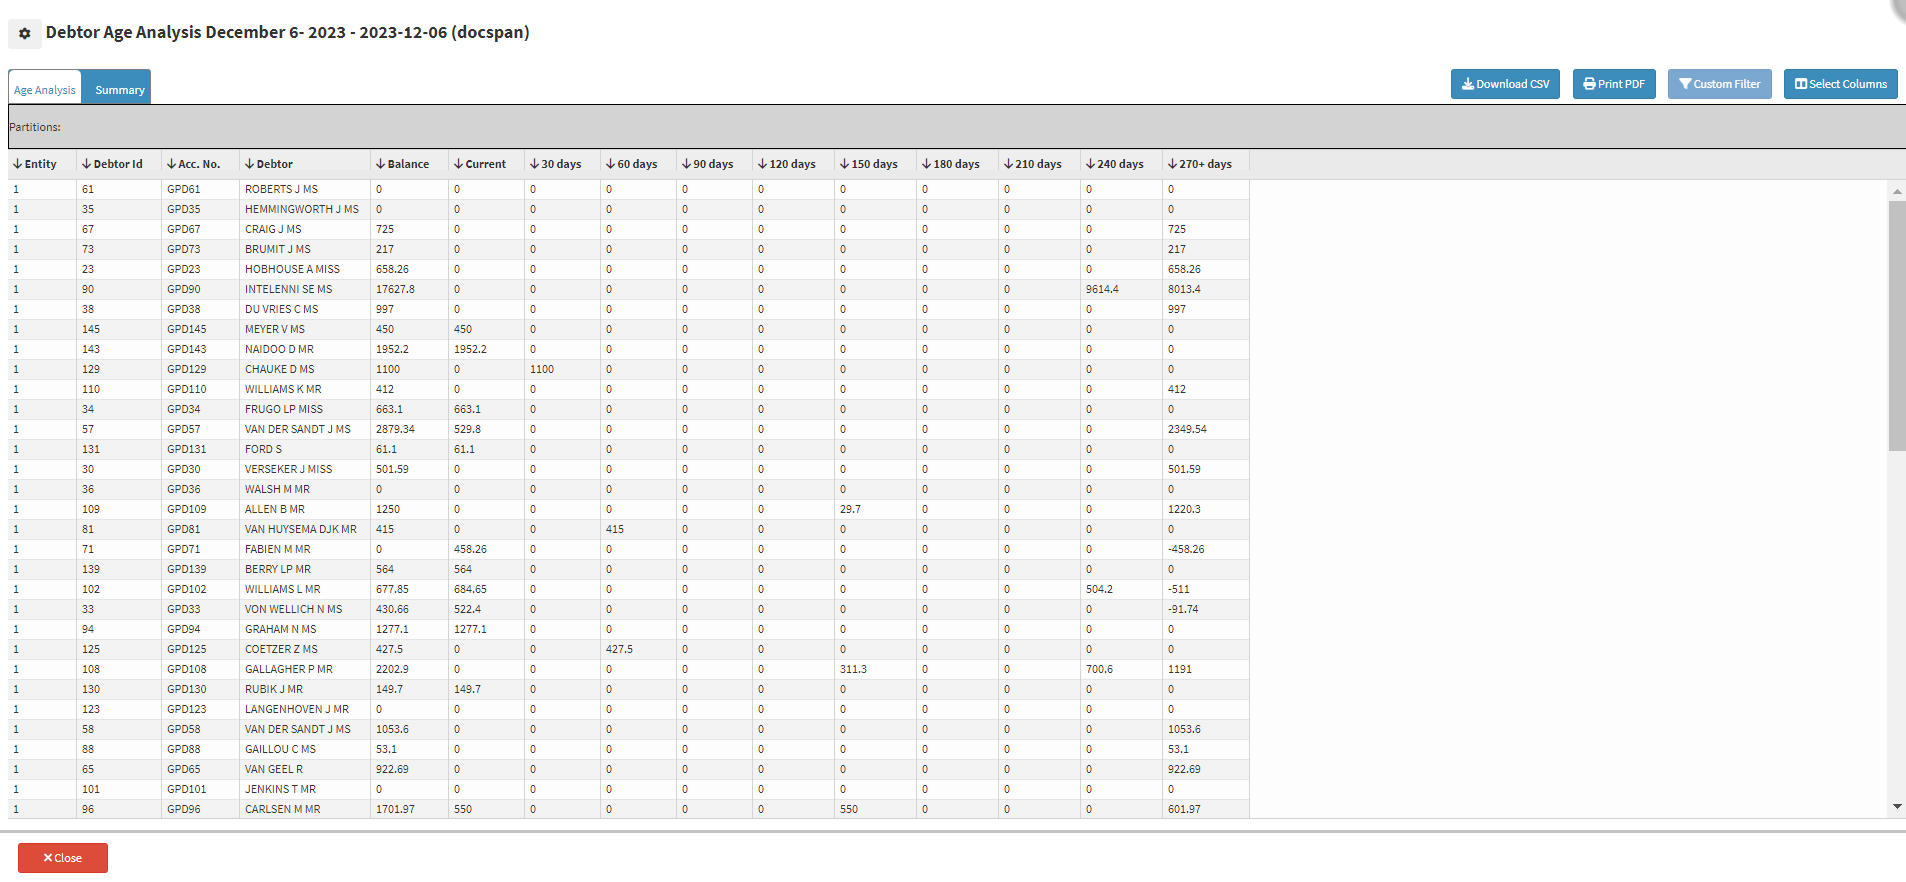
- The Debtor Age Analysis December 6 - 2023 - 2023-12-06 (docspan) screen will open.

- Click on the Print PDF button.

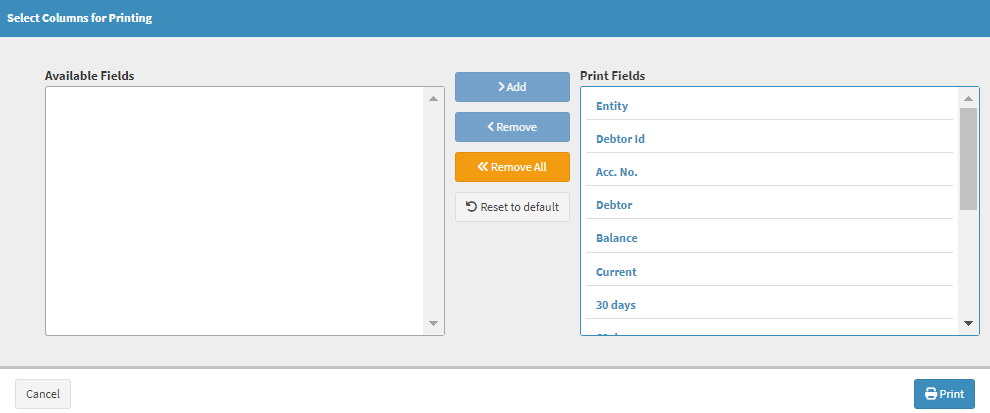
- The Select Columns for Printing screen will open.

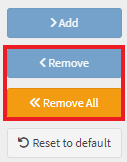
Please Note: All the columns will display on the report that has been generated, but you can choose if you wish to only print certain columns on the report by using the Remove and Remove All buttons.

- Click on the Print button.

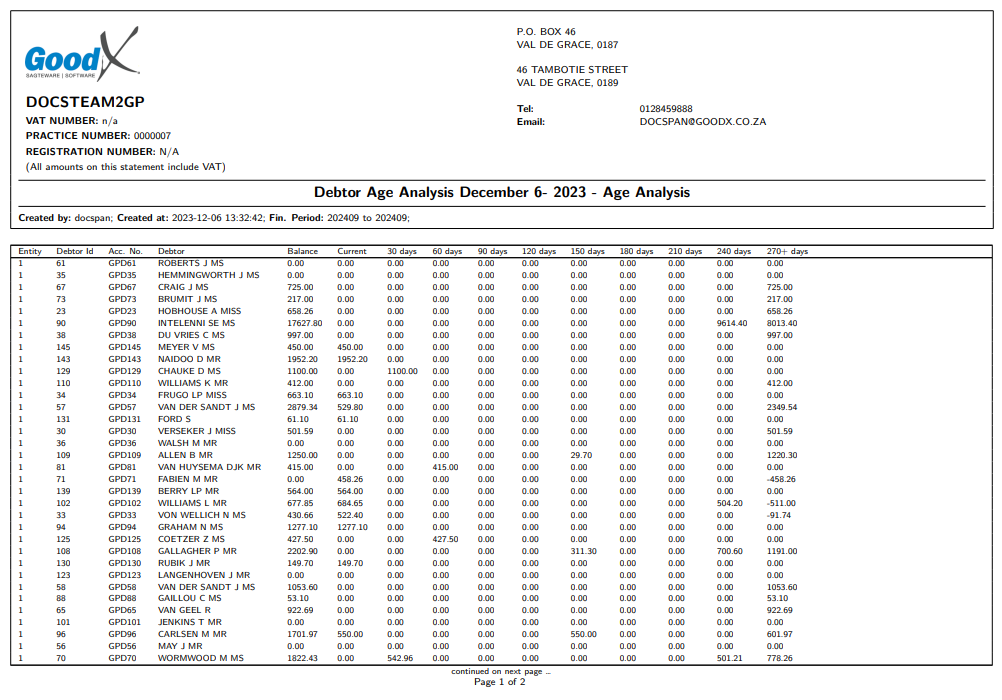
- The Debtor Age Analysis report will print with all columns fitted onto the page in PDF format.

- For more information on how to select the columns and which columns to choose, please refer to the user manual:
Print PDF: Select Columns for Printing
.
Last modified: Monday, 8 January 2024, 11:02 AM