EMR Form: Billing & Administration
The Billing and Administration section on the EMR form is used to select and bill the appropriate Consultation and Procedure codes for Emergency Room treatment provided to the Patient. Once the billing codes have been selected, the Practitioner can add all the codes to an Invoice. The selection of certain options and fields will trigger the automatic selection of certain billing codes, which helps save the Practitioner time when billing for the Patient's treatment.
- The contents of this user manual will consist of the following information:
- Consultations
- Billing Codes
- No Charge
- Procedures
- General Billing Items
- General Billing Codes
- Invoice
- This user manual will start on the EMR form.

- For more information on where to access the EMR form, please refer to the user manual: EMR Form Overview.
- Click on the Billing and Administration panel.
![]()
- The Billing and Administration panel will expand.
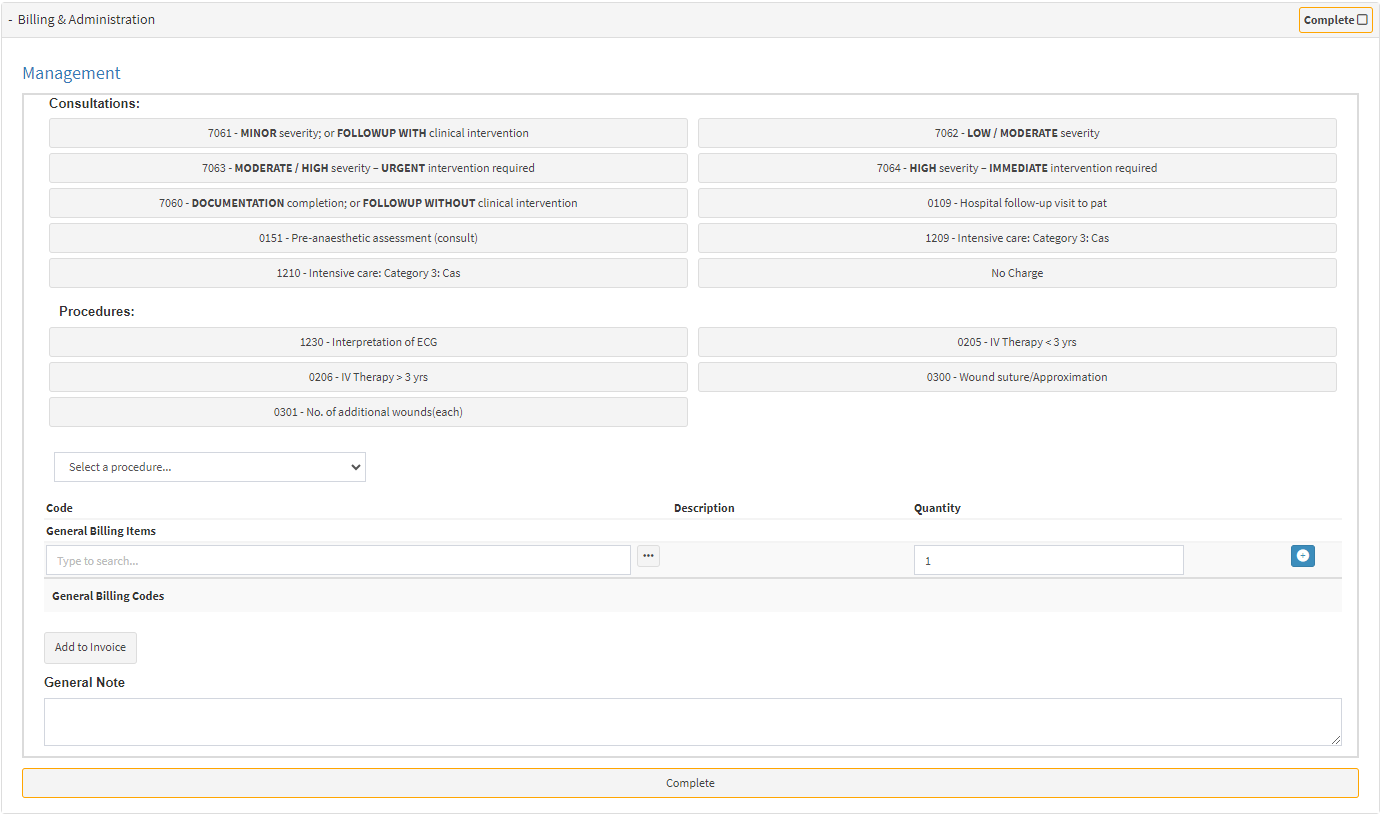
Consultations
Billing Codes are directly associated with the interaction between the Patient and Practitioner during the Emergency Room Visit.

Please Note: The Consultation codes listed are the most commonly used billing codes in an Emergency Room and cannot be changed manually. The codes are pre-setup and programmed into the EMR form.
Billing Codes
- Click on the button of the desired code to add the code to the General Billing Codes section. As an example, 7061 - Minor Severity; or Follow Up with Clinical Intervention, will be used.
![]()
- Once a Consultation code has been selected the button of the code will be highlighted in blue.
![]()
- The selected Consultation code will also be added to the General Billing Codes section.

- Click on a selected Consultation Code button for a second time to deselect the code and remove the code from the General Billing Codes section.
Please Note: The No Charge option works differently than all the other billing codes in the Consultations section.
No Charge
- Click on the No Charge button to indicate a particular service or item is being provided at no cost to the Patient. This could include free samples of medication, waived fees for certain medical tests or procedures, or complimentary services.
![]()
- The Quick Note screen will open.

- For a full explanation of the features of the Quick Note, please refer to the user manual: Quick Note.
- Click on the Free Text field to enter a reason why the No Charge billing code is being used.

- Tick the Complete checkbox to mark the Quick Note as finalised.
![]()
- The Complete checkbox will be ticked, changed to Completed and turn green.
![]()
- Click on the Close button to cancel the request to add the No Change billing item. The Quick Note screen will close.
![]()
Please Note: You will not be able to use the No Charge billing item if a reason has not been entered.
- Click on the Save button to save all the changes which have been made to the Quick Note.
![]()
- The Quick Note will be added to the Clinical sidebar under the Active Forms section.

Please Note: The No Charge billing code will be added to the General Billing Codes section.

- Click on EMR under the Active Forms section to return to the EMR form.
![]()
Procedures
Billing Codes associated directly with the treatment which the Patient received in the Emergency Room.

Please Note: The Procedure codes listed are the most commonly used codes in an Emergency Room and cannot be changed manually. The codes are pre-setup and programmed into the EMR form.
- Click on the button of the desired Procedure code to add the code to the General Billing Codes section. As an example, 1230 - Interpretation of EGC, will be used.
![]()
- Once a Procedure code has been selected the button of the code will be highlighted in blue.
![]()
- The selected Procedure code will also be added to the General Billing Codes section.

- Click on a selected Procedure code button for a second time to deselect the code and remove the code from the General Billing Codes section.
- Click on the Select a Procedure... drop-down menu to select and add the appropriate billing codes of a pre-setup list of Procedures.
![]()
- Select a Billing Code from the list which has become available.

Please Note: Each item which is selected will be added to the General Billing Codes section. Multiple items can be selected, as the need arises.

- If billing codes 0205/0206 have been selected.

- An Attention! pop-up will appear where you need to indicate that you confirm that you have inserted a cannula for the Patient.
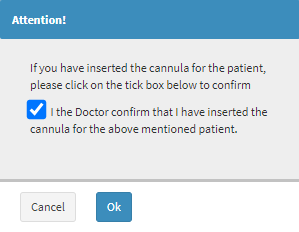
- Click on the Ok button to confirm.
![]()
General Billing Items
Allows the Practitioner to add other Procedure Codes which were performed and not part of the pre-setup Procedure List and buttons available on the form in the Procedures section.

- The information of the General Billing Codes will be divided into columns:
![]()
- An explanation will be given for each column:
- Code: A unique identifier for the Procedure.
- Description: A short explanation of the Procedure to which the billing code is linked.
- Quantity: The number of Procedures which will be billed to the Patient.
- Click on the Type to Search... field to type a Consultation Code which the Practitioner would like to search for. Only one character is required before the list of Procedure Codes becomes available.
![]()
- Select the desired Consultation Code on the drop-down menu which will become available whilst typing.
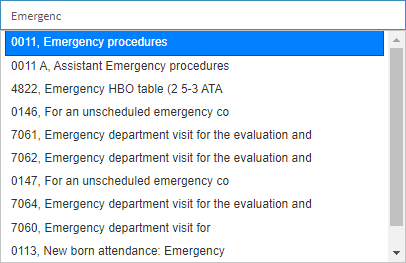
- Once the desired code has been selected, the Description of the code will automatically be filled in.
- Click on the ... (ellipse) button to search for a Procedure code, if the code is not known.
![]()
- The Search Procedures screen will open.

- For an explanation of how the Search Procedures screen works, please refer to the user manual: Procedure/Material/Medicine/Macro/ICD-10 Search Code Lookup.
- Click on the Quantity field to change the number of Consultations which have occurred.
![]()
- Click on the Add button to add the selected Procedure to the General Billing Codes section.
![]()

- Follow all the steps in the General Billing Items section to add more items.
General Billing Codes
All billing codes which have been added to the form will accumulate in the General Billing Codes section in order for the Practitioner to be able to bill all the codes which have been added to the different panels of the EMR form.
- Each item in the General Billing Codes section will be assigned an identifier which will give an indication of how the item was added.
![]()
- An explanation will be given for each identifier:
- A: The item added to the General Billing Codes section was added automatically when a specific test was requested in the Doctor Triage and History and Special Investigation section of the EMR form. For more information on how to use the Doctor Triage and History section as well as the Special Investigations section of the EMR form, please refer to the user manuals: EMR Form: Doctor Triage and History and EMR Form: Special Investigations.
- M: The item was added by manually entering the information in the Billing & Administration section of the form as explained in this user manual.
- Click on the Delete button to remove an item from the list in the General Billing Codes section.
- Click on the General Note text box to add any relevant notes relating to the Billing & Administration of the EMR form.

- Click on the Add to Invoice button to add all the items which have been added to the General Billing Codes section to an invoice.
![]()
- An Attention! pop-up will appear to ask whether you would like to add items to the Invoice and to warn you that no other additions can be made to the Invoice from the EMR screen.
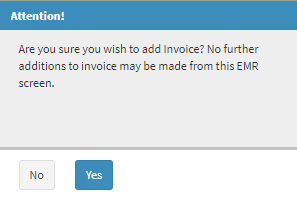
- Click on the No button to cancel the request to add the selected items to the Invoice, and to return to the EMR form to make changes. The pop-up will close.
![]()
- Click on the Yes button to create an Invoice with the selected codes. The pop-up will close and the items will be added to an Invoice.
![]()
- Once the items have been added to the Invoice the Billing & Administration panel will automatically be marked as completed and the panel will collapse.
![]()
- The Add to Invoice button will change to Added to indicate that the billing codes were successfully added to the Invoice.
![]()
Invoice
Allows you to finalise an Invoice with the lines billed in the General Billing Codes section of the EMR form.
- Click on the Invoice Details tab on the Navigation Bar to access the Invoice on which the General Billing Codes have been added.
![]()
- The Invoice screen will open.
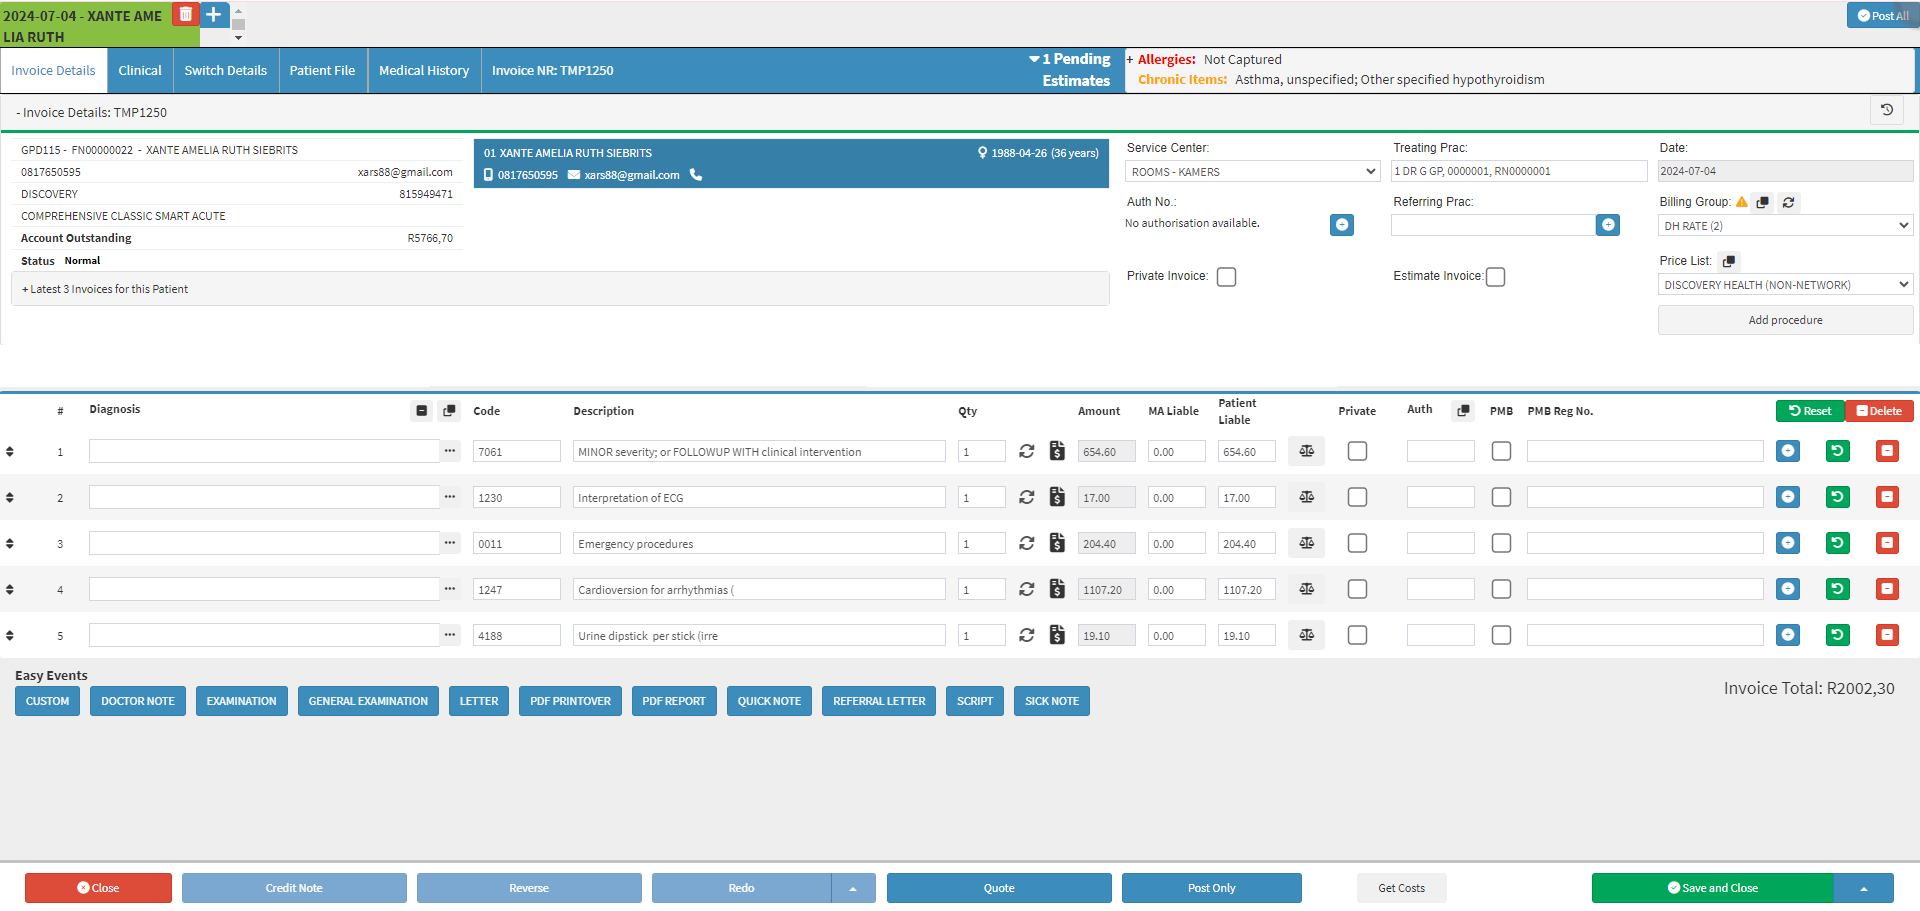
- For more information on how to Save and Post the Invoice, please refer to the user manual: The Invoice Screen.