A Triage form is a clinical document used by ER Nurses to assess a Patient's vital signs and overall physical condition. This form automatically assigns a colour based on the level of significance of the data added by the Nurse. The Triage Form serves as a tool for categorising Patients in the Emergency Room based on the urgency of their medical condition.
The contents of this user manual will consist of the following information:
Make an Emergency Case Booking
Create Debtor/Patient file
Open Triage Form
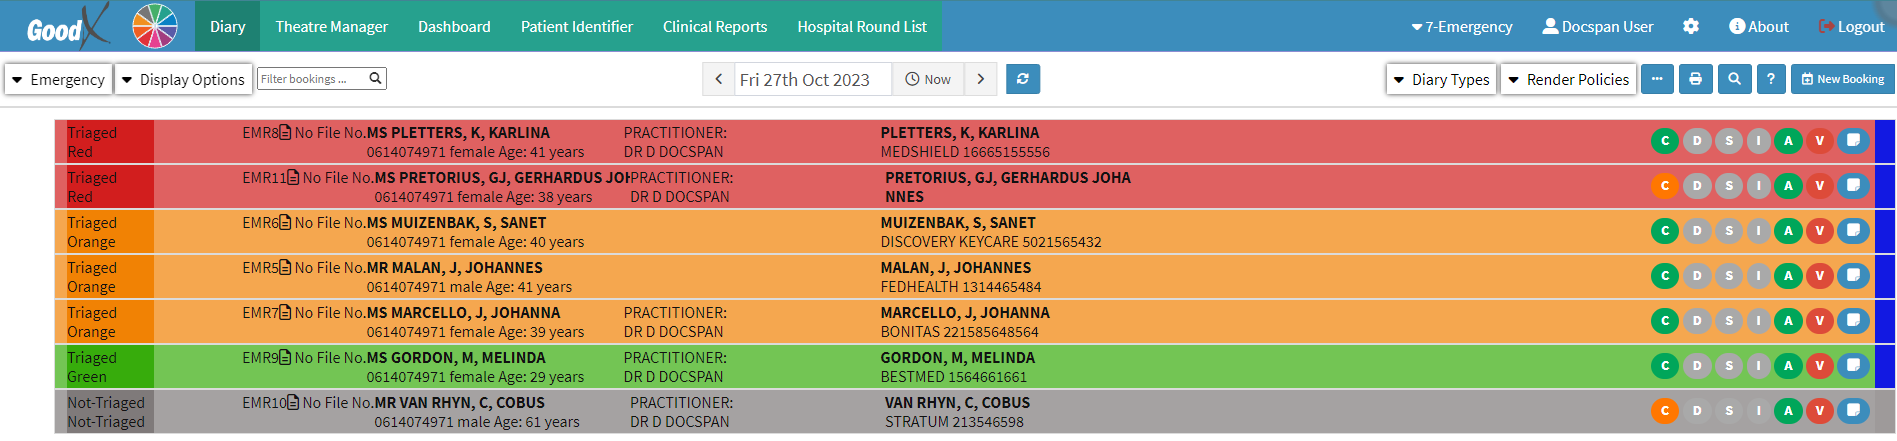
This user manual will start on the Diary screen in stacked by type view which is specifically set up for the Emergency Room.
The Stacked by Type view of the diary assists the Emergency Room staff in prioritising cases, allowing them to address Red Triage cases first, before attending to other cases.
Please Note: When outpatients go to the Emergency Room, it is likely that the Patient does not have an active file for the Emergency Room, therefore the debtor needs to be added first.
Make an Emergency Case Booking
With each new Emergency Case, a new Booking needs to be made.
Click on the New Booking button to open a new case for the Emergency Case.
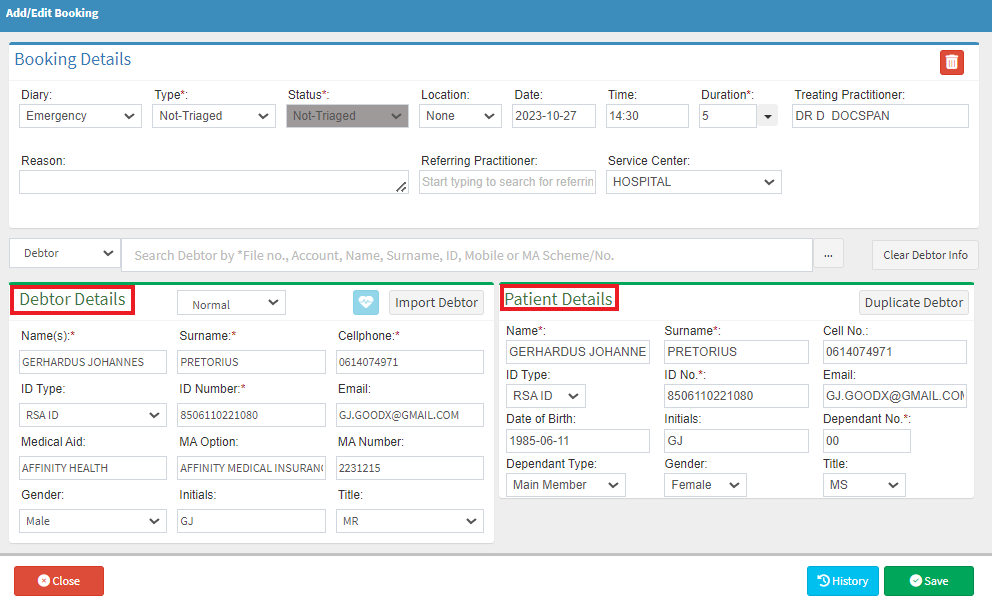
The Add/Edit Booking screen will open.
Please Note: The only information that is important in the Booking Details section is the Type of booking, Status, Date, Treating Practitioner and Service Center.
Complete the Debtor and Patient Details to capture information on the Patient being treated.
Click on the Save button to Save the booking.
Please Note: After a booking has been made the booking will appear in a non-triaged colour, as setup. For more information about how to setup booking types and statuses, please refer to the user manual: Booking Type Setup and Booking Status Setup.
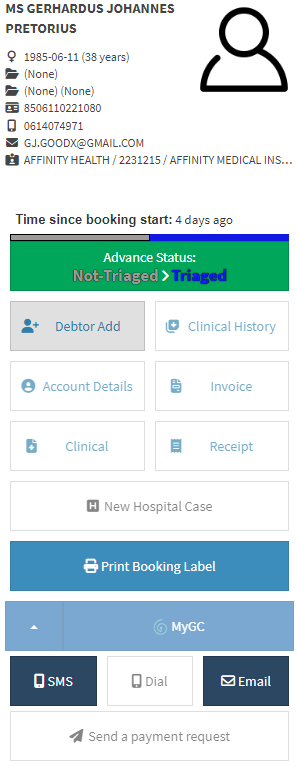
Click on the Debtor's booking to open the Debtor's sidebar.
The Diary sidebar will open.
The Debtor/Patient is currently not added to the system and Debtor's list, therefore the Debtor/Patient needs to be added first.
Please Note: The buttons on the Diary Sidebar is currently not accessible and greyed out, these buttons will only be available after the Debtor has been added.
Create Debtor/Patient File
Click on the Add a Debtor button, to add the Debtor.
Complete all the necessary information that has not been completed when the file was initially loaded onto the system.
For more information on how to add a Debtor, please refer to the user manual: How to Create a New Debtor.
Open Triage Form
Click on the Clinical button, from the Debtor's sidebar.
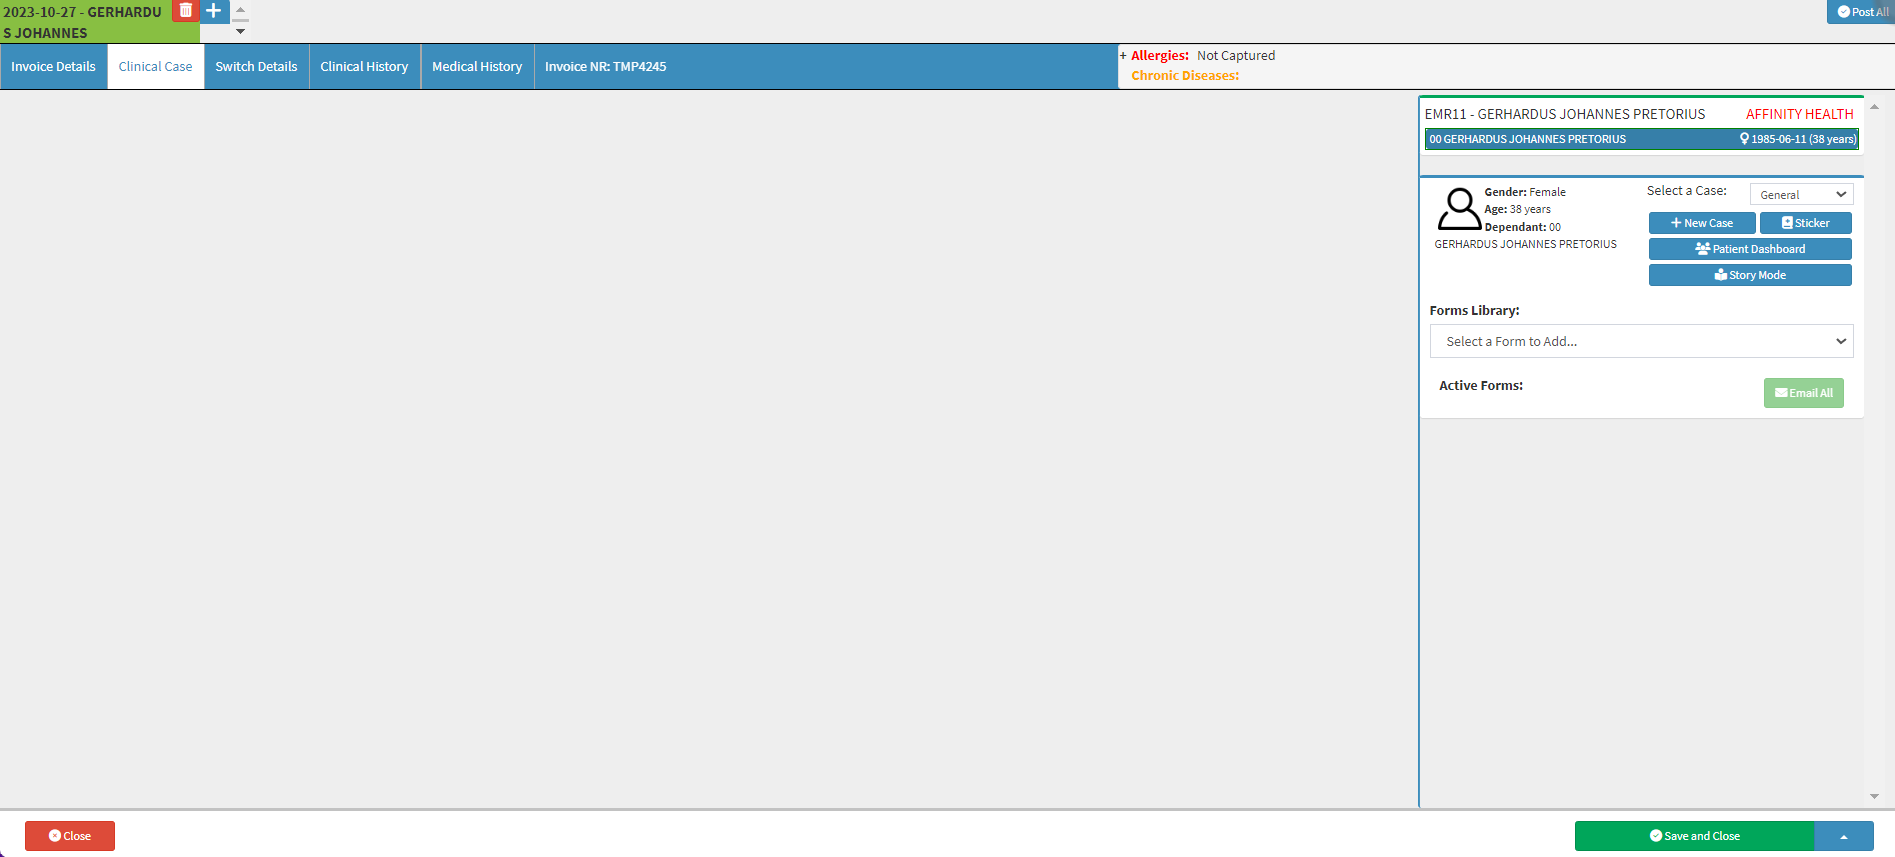
The Clinical Case Screen will open.
Click on the Forms Library and select the Triage form.
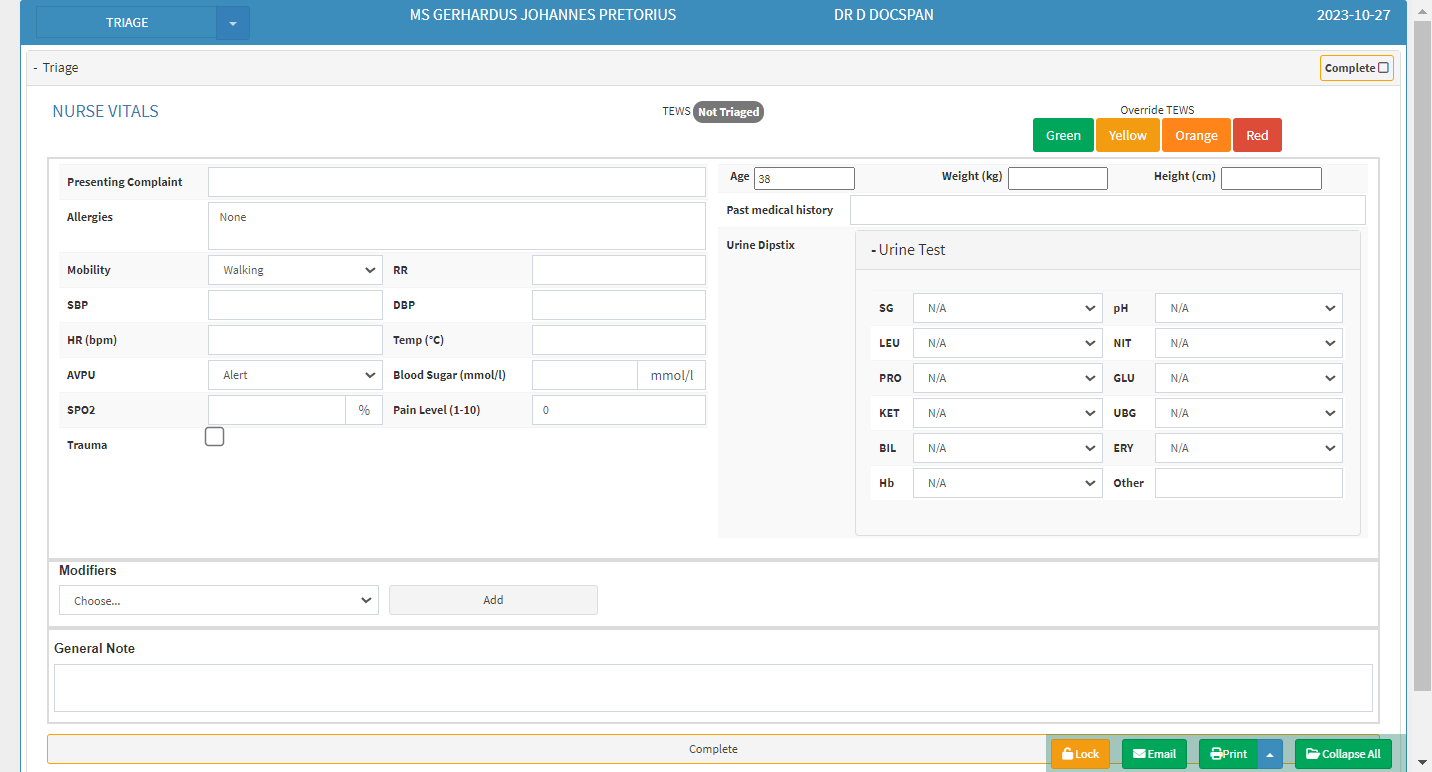
The Triage form will open.
The Nurse will complete all the information relevant to the Patient's vitals and assign a colour according to their immediate medical needs in order to categorise and prioritise the Patients in the ER based on the severity of their condition.
Please Note: The TEWS (Triage Early Warning Score) at the top of the form will be grey and will indicate Not Triaged, as the Patient has not been triaged yet.
Modifiers: The modifiers allows the Nurse to pre-select the Patient's current medical state, which is allocated by different colours according to their severity.
The modifiers are default on the Triage form, according to the most regular cases in Emergency Rooms.
Click on the Modifier drop-down to select a pre-set condition, for example: Seizure-current.
Click on the Add button to add the current medical condition to the Patient.
The Triage Status of the Patient will automatically change to Red, indicating a high emergency medical condition
Please Note: Should one or more pre-setup conditions be chosen in different severity categories, then the highest condition indicator will be used.
As soon as the Nurse completed the form, the Patient will be triaged according to their vitals and current medical condition.
Please Note: The TEWS (Triage Early Warning Score) at the top of the form will be grey and will indicate Not Triaged, as the Patient has not been triaged yet.
General Note: A General Note can be made in regard to the Patient to inform the next person dealing with the Patient of certain information.
Click on the Save and Close button to Save all the information entered into the form.
The Triage colour of the Patient has been changed to Red, and will appear on the Emergency Room's screen, indicating that the Patient is important and needs to be attended to immediately.