How to Edit an ERA
Why Use This Function:
Editing an Electronic Remittance Advice (ERA) is important for maintaining accurate financial records within the Practice. When discrepancies or errors are identified in the ERA, making the necessary corrections ensures that all Debtor accounts reflect the correct payment information. This process helps in proper account management and reduces billing discrepancies, ensuring that the Practice's financial data remains reliable and up-to-date.
The Contents of This User Manual:
- Editable Fields
- Filters
- Buttons
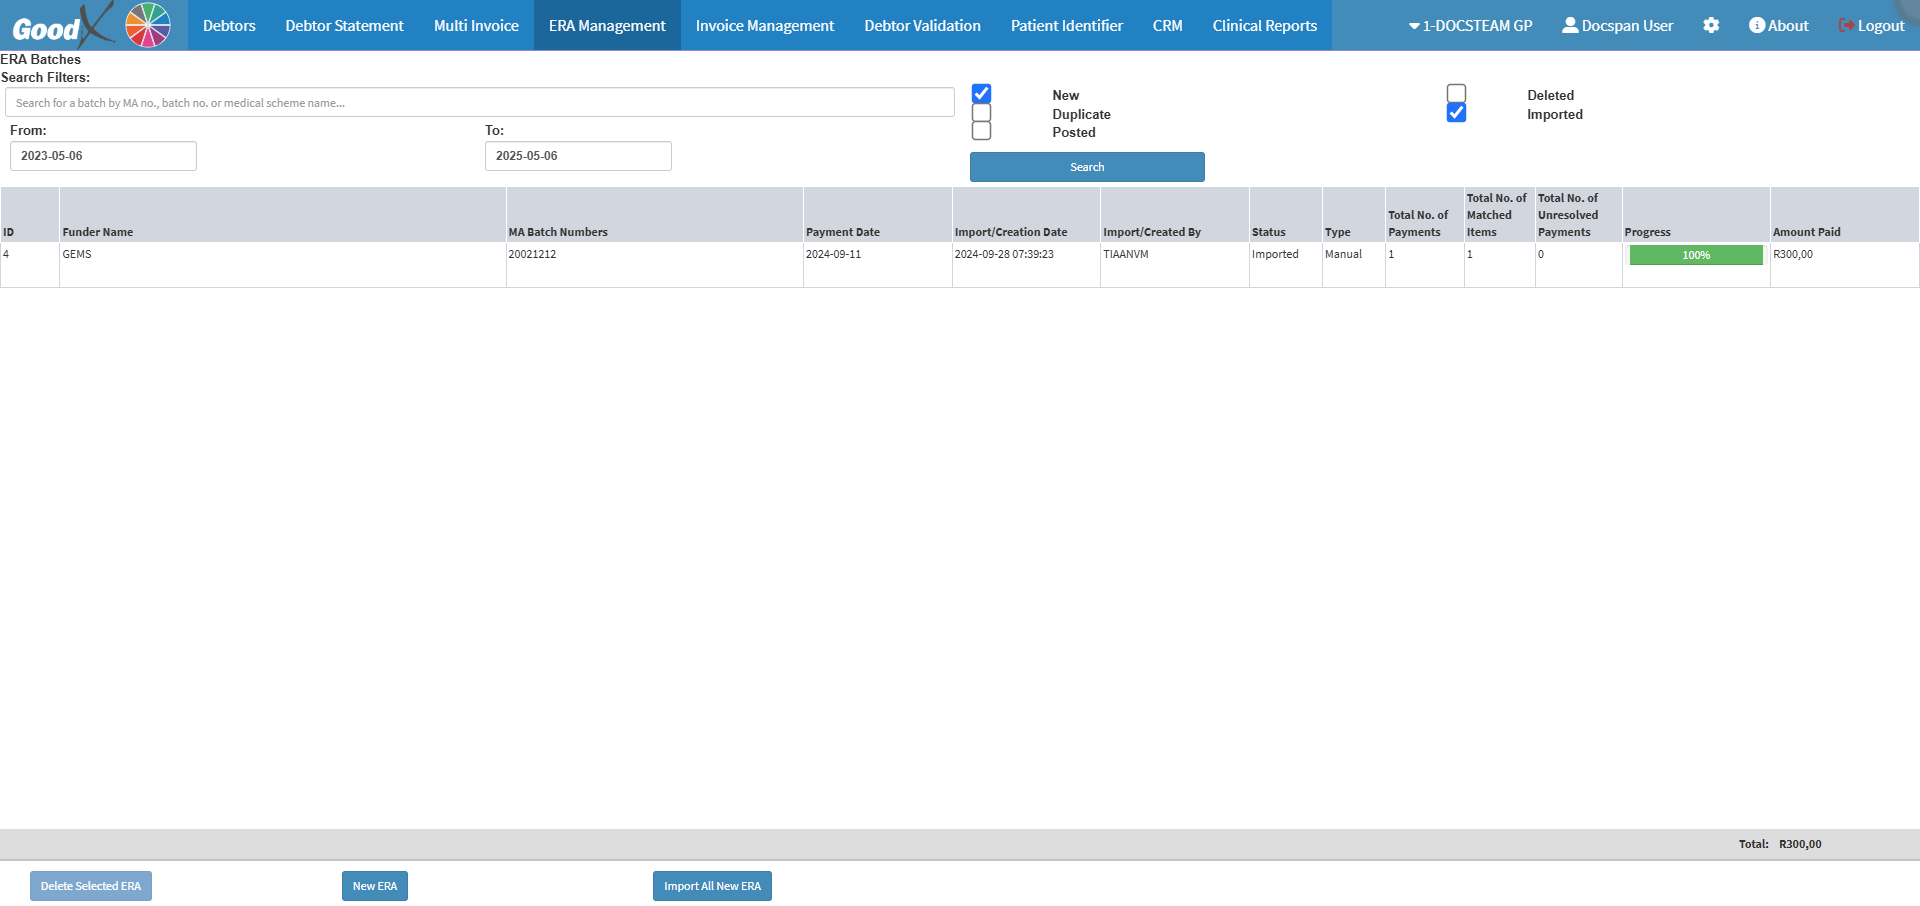
- This user manual will start on the ERA Management screen.

- For more information on how to navigate to ERA Management screen, please refer to the user manual: Debtor Segment.
- Click on the desired ERA you wish to edit.
![]()
- Click on the Edit Selected ERA button to make changes to the ERA that was uploaded if necessary.
![]()
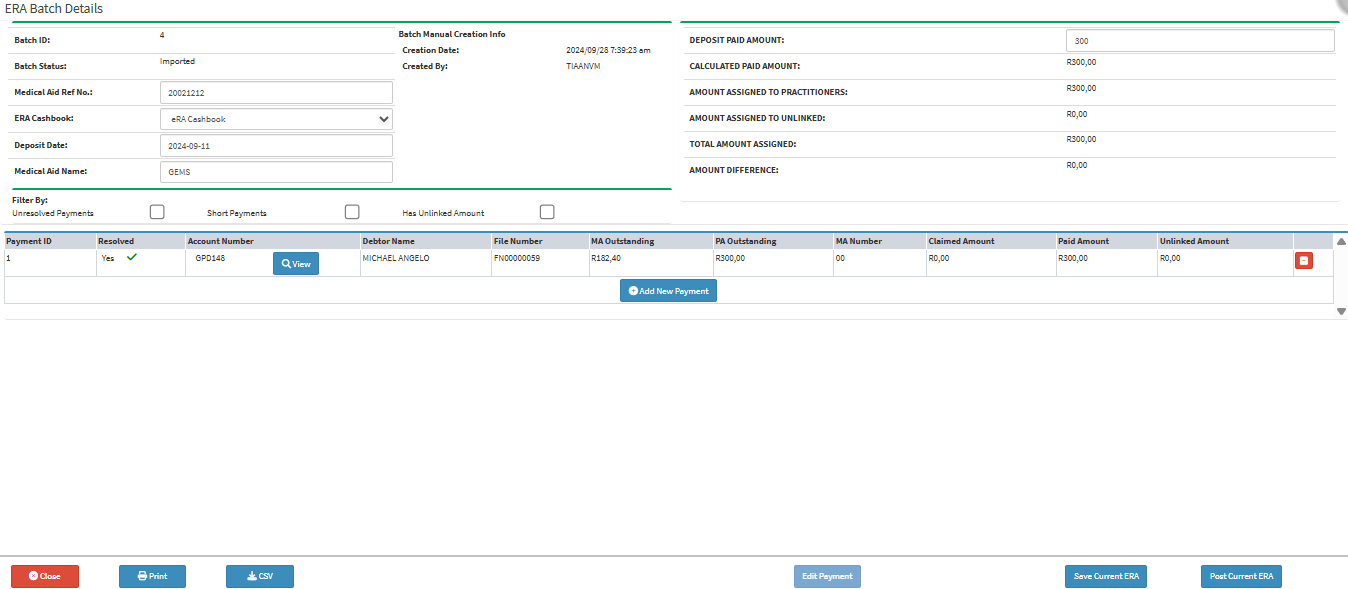
- The ERA Batch Details screen will open.

Editable Fields
When editing an ERA, you will only be able to edit certain fields.
- Medical Aid Ref No.: The reference number the Practice can refer to for the specific ERA.
- ERA Cashbook: The type of payment.
- Deposit Date: The date the payment was made.
- Medical Aid Number: The Patients' Medical Aid number.
- Deposit Paid Amount: The amount that was paid to the Practice.
Filters
Allows you to narrow down or refine the results displayed on the ERA Batch.![]()
- Tick the Unresolved Payments checkbox to filter on the unresolved payments.
![]()
- Tick the Short Payments checkbox to filter on all payments that have an amount outstanding.
![]()
- Tick the Has Unlinked Amount checkbox to filter the accounts that are not linked.
![]()
Buttons
The actions that can be taken on the specific ERA to view the ERA or add new Payments.- Click on the View button to view the ERA.
![]()
- Click on the Add New Payment button to add a new payment to the ERA.
![]()
- Click on the Print button to print the ERA to a PDF.
![]()
- Click on the CSV button to download the ERA to a CSV.
![]()
- Click on the Save Current ERA.
![]()
- Click on the Post Current ERA button to post the edited ERA.
![]()
Last modified: Wednesday, 14 May 2025, 9:18 AM