DA Create New Debtors and Dependants - Using the Import Data function
- When using the GoodX Switch, some Medical Aids allow you to import the Main Member and Dependant information directly from the database of the Medical Aid to create a new Debtor.
- From the Diary or Meddebs screen,>> click on Admittance >> click on the + as normal to create a new Debtor

- Using the Import Data function when adding a new Debtor, click on the + sign to create a new Debtor.
- Choose Import Data and Click on OK.

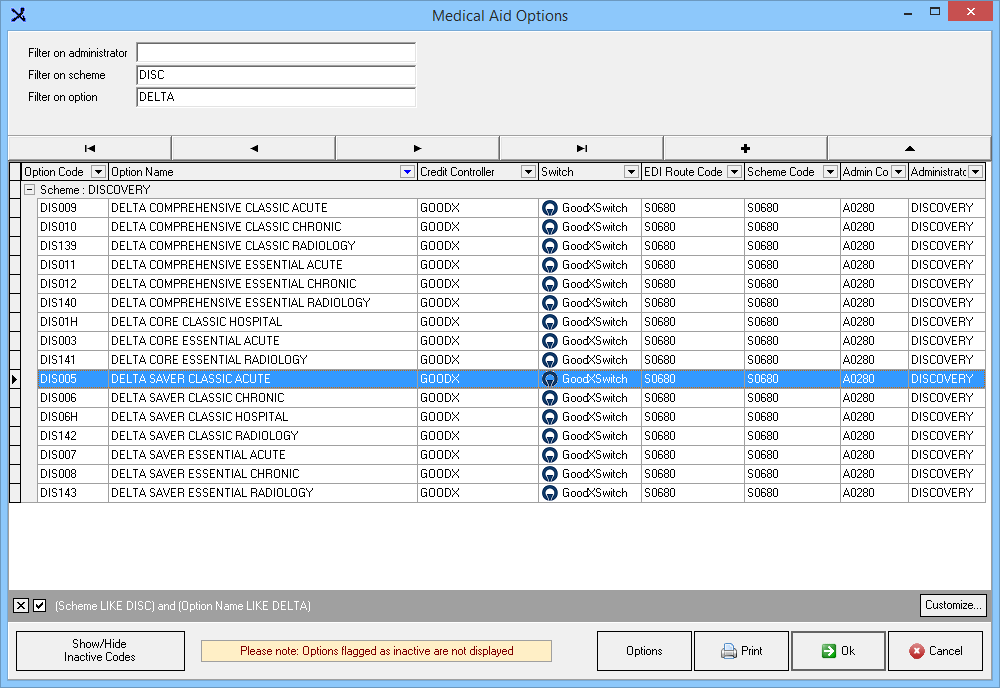
- Type in the Medical Aid and click on the ellipsis
 to search for the plan.

- Type in the plan and click on OK.

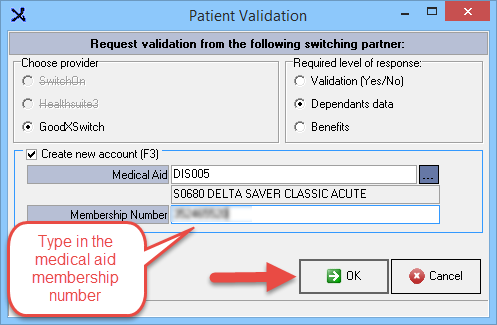
- Type in the Medical Aid membership number and click on OK.

- You will receive confirmation if it is a Valid Patient/Member, and you will also see all the Members on that Medical aid.
- Click on Continue

- Tick all the Members that you wish to import and click on the Import button to import the selected members.

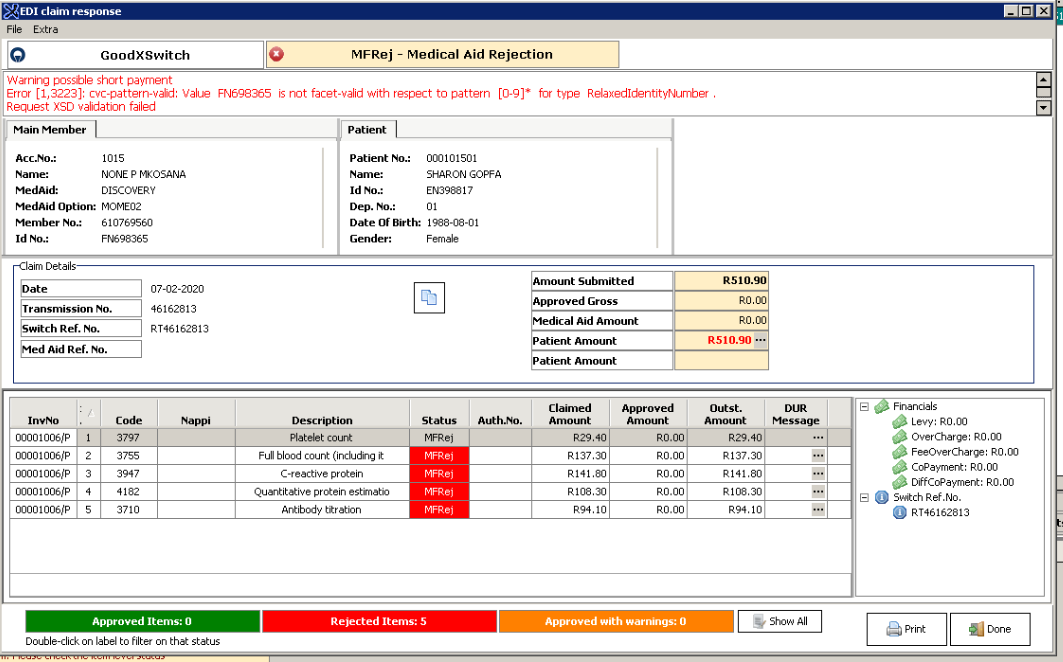
TAKE NOTE: When doing an Import from the Medical Aid and the member has PASSPORTS numbers, you need to manually change the passport numbers and REMOVE the 'FN' letters in front of the number. This will prevent all claims from being rejected as the switch doesn't recognise the FN in front of the passport number.

- If you get the following rejection message when sending a claim - you need to remove the letters in front of the passport number.

- Complete the rest of the Debtor's information by completing the Contact Details and Group options.

- Click on Save and go to the Patient if you wish to add the patient contact details as well.
New Function in version 8.0 ONLY:
- Insert Multiple E-mail addresses on a Single debtor.
- Med debs >> Admittance >> Debtor Input >> Add the following in the E-mail field:
"anthonymmarcucci@teleworm.us;laurarbryant@rhyta.com;anthonyrpickrell@teleworm.us" >> After filling the rest of the debtors information >> SAVE.
Last modified: Wednesday, 6 May 2020, 9:18 AM