Debtor Statistics: Settings and Parameters
A Debtor Statistics Report allows a user to set up and print a report with certain information regarding specific statistics of the debtor, such as summarised transactions per turnover, cash flow and journals. This report can be customised to suit the needs of the practice.
The Settings and Parameters for the Debtor Statistics Report will be explained to enable users to build custom reports to suit the needs of the practice.
- The contents of this User Manual will consist of the following information:
- New Profile
- Edit Profile
- Delete Profile
- Print Direct
- Print to Grid
- Set as Default
- Options
- Close
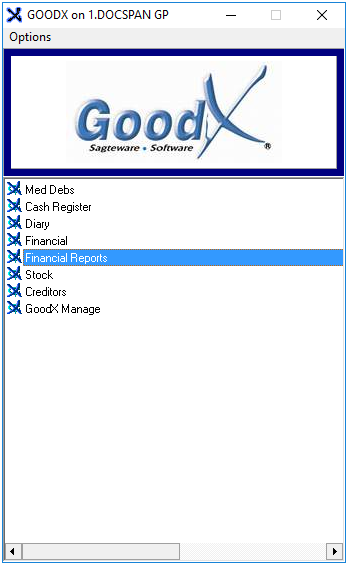
- Log in to the GoodX Desktop using your GoodX username and password.
- From the Navigator, Double Click on the Financial Reports Module.
- The main Financial Reports Screen will open.
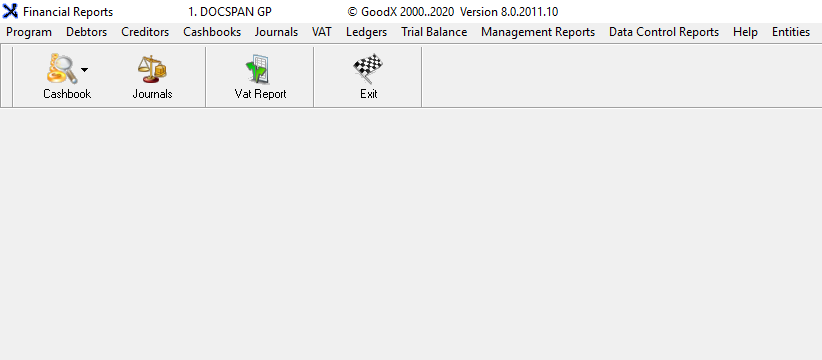
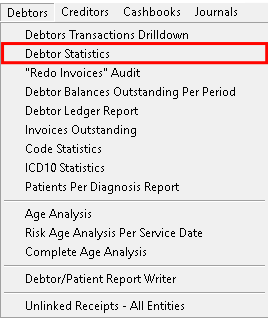
- Click on Debtors on the menubar.

- Click on Debtors Statistics on the sub-menu.
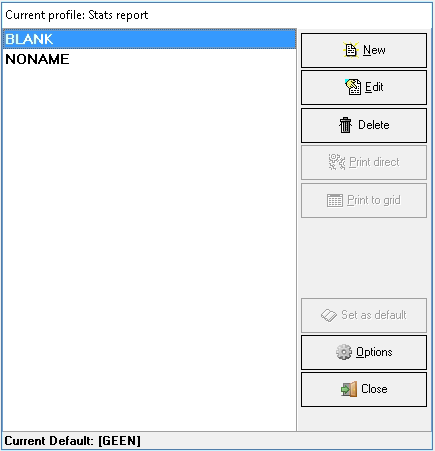
- The Current Profile: Stats Report screen will open.
New Profile
Allows the user to create a New Profile for a report. Users will create profiles for every type of report that they wish to generate, which will allow the user to print the report without having to change and set up the parameters for the report every time they wish to print the same report, and save the user time.- Click on New to add a New Profile.
- The New Profile pop up will appear.
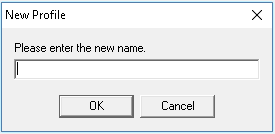
- Click on the Please enter the new name field and input a name for the New Profile.

- Click on Cancel to close the pop-up without creating a New Profile.

- Click on OK to create the New Profile.

- The Statistics report screen, Report Parameters Tab will open.

- An explanation of each section will be given:
- Report Grouping: The criteria that will be used to group the information that will appear on the report.

- Grouping 1: The main grouping that is used to sort the report information into a specific chosen category.
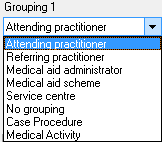
- Click on the drop-down menu to select an appropriate option.
- Attending practitioner: The practitioner who is treating the patient and attending to their medical needs.
- Referring practitioner: The Referring Doctor is the doctor who has referred the patient to the Treating Doctor.
- Medical Aid administrator: The name of the company that does the administration of the medical aid.
- Medical Aid scheme: The name of the company with whom the medical aid cover is.
- Service Centre: Where the treatment or consultation took place, e.g. in Rooms or in Hospital.
- No Grouping: No Grouping will be applied. Only a total of all posted transactions will be displayed.
- Case Procedure: The report is categorised by case type according to the procedure that the patient came in for. (Hospital Entity)
- Medical Activity: Per Medical Activity/Discipline code if it is a multi-discipline practice.
- Grouping 2: The subgrouping that is used to further sort the information on the report after a main group (group 1) was selected.
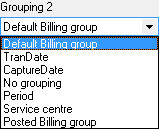
- Click on the drop-down menu to select an appropriate option.
- Default Billing Group: The billing group that was used by default when the transaction was posted. A billing group indicates what calculations were used when the tariff codes were billed.
- TranDate: Transaction date; the date that the transaction took place.
- CaptureDate: The date the transaction was captured onto the system.
- No Grouping: No Grouping will be applied. Only the totals of the selected main group will be displayed.
- Period: The financial period is a period of 30/31 days, Normally a Calender month. This is a period that shows the information inside a certain date span.
- Sevice Centre: Where the booking took place, e.g. in Rooms or in Hospital.
- Posted Billing Group: The billing group to which the transaction was posted.
- Amounts: How VAT will display on all the amounts.

- Select an option by clicking on the relevant radio button:
- VAT Inclusive: All amounts displayed will include Value Added Tax.
- VAT Exclusive: All amounts displayed will exclude Value Added Tax.
- Timespan for Report: The period of time that will be taken into consideration when the report is generated to determine what transaction data will be included in the report.
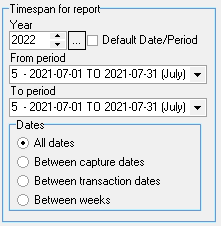
- Year: Financial year (Click on the ... ellipse to default the date to the current financial year, this will only happen if the Default Date/Period check box is ticked)
- Use the selector arrows to change the year.
- From Period: The financial period start date for the report, including the first day of the specified financial period.
- Click on the drop-down menu to select the desired option.
- To Period: The financial period end date of the report, including the last day of the specified financial period.
- Click on the drop-down menu to select the desired option.
- Dates: Which financial period date filters will be taken into consideration when generating the report.

- Select an option by clicking on the relevant radio button:
- All dates: All dates within the financial year and period that the user has selected.
- Between Capture Dates: Between two capture dates. A dates section will open where the user can select the dates.
- Between Transaction Dates: Between two transaction dates. A dates section will open where the user can select the dates.
- Between Weeks: Between Certain Week periods.
- Only when selecting Between Weeks, the From period To period will change to From Week To Week.
- Dates: When the options Between Capture Dates and Between Transaction Dates is selected the Dates section will appear where specific to and from dates can be selected.
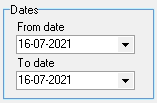
- Click on the relevant date drop-down to select a date from the calendar.
- From date: The specific date that the user would like to use to start the report.
- To date: The specific date that the user would like to use to end the report.
- Weeks: A time period of 7 days from Monday to Sunday. The options that will be available for the time period when Between weeks is selected.
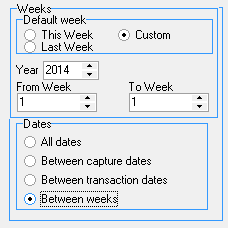
- Default week: Which week is used by default.
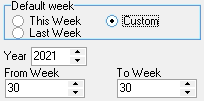
- Select an option by clicking on the relevant radio button:
- This week: Current Week.
- Last Week: Previous Week.
- Custom: Allows the user to select a specific week.
- Year: The Financial Year within which the week that is selected falls.
- Use the selector arrows to change to the desired option.
- From week: Start week number.
- To Week: End Week number.
- Invoice Types to print: The kind of invoices that will print on the report, if selected.
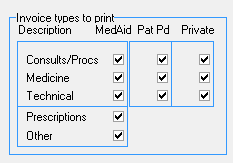
- Tick the checkbox of the relevant option to print it onto the report.
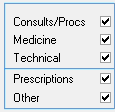
- Consults/Procs: Consultations and procedures.
- Medicine: Invoices where medication was dispensed and billed as part of the invoice.
- Technical: Invoices where the use of equipment was billed (Oncology)
- Perscriptions: Invoices where prescriptions were given to patients.
- Other: Any other invoices which don't have a specific selection option.

- Description: The type of invoice that will print according to the corresponding option that is selected.
- MedAid: The invoices that have been posted to the Medical Aid.
- Pat PD: Medical Aid invoices where the patient made the payment.
- Private: Invoices that have been billed privately.
- Click on Set As Default for Diary Stats Report to set the options that have been set up on the Debtors Statistics report as the default on the Diary Stats Report.

- An Information pop-up will appear: Overwrite Profile?
- Click on No to close the pop-up without making changes.

- Click on Yes to overwrite and save the New default.

- The Information pop-up will close.

- Number of Visits/Cases: Ticking/Unticking the tick box shows or hides the Number of Patient visits or Hospital cases on the report.

- Anaesthetics Statistics: When Anaesthetics were used during a procedure it will be possible to include the statistics thereof. Ticking/Unticking the checkbox shows or hides the Anaesthetics Statistics on the report.

- Episode Statistics: If the practice is set up for using Episodes it is possible to include the episode information in the report. Ticking/Unticking the checkbox box shows or hides the Episode Statistics on the report.

- Outstanding Debtors: Debtors who have outstanding accounts can be included in the report. Ticking/Unticking the checkbox box shows or hides the Outstanding Debtors.

- Print Cost of Sales: This will print the cost of all stock items that have been billed. Ticking the checkbox will print the Cost of Sales on the report, this option will only become available when the Turnover Print total is selected.
- Turn Over: The total amount that a practice has billed in a certain time period.
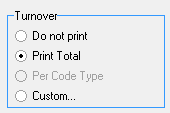
- Select an option by clicking on the relevant radio button:
- Do not Print: Will not print the turnover.
- Print Total: Prints the total turnover. When this option is selected the Print Cost of Sales option will become available.
- Per Code Type: Prints the turnover per code type.
- Custom...: This allows a custom profile to be set up, select a custom profile from the drop-down list.
- For an extensive explanation on how to set up a custom profile, please refer to the user manual: Debtor Statistics: Custom Profile Setup.
- Cashflow: The total amount of money that the practice has received during the selected time period.
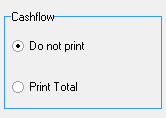
- Select an option by clicking on the relevant radio button:
- Do not Print: Will not print anything regarding the cash flow.
- Print Total: Prints the Cashflow Total.
- Journals: If journals were posted within the selected time period, it is possible to select how they will be printed in the report.

- Select an option by clicking on the relevant radio button:
- Do not Print: Will not print anything regarding Journals.
- Print Total: Prints Journal Total to the report.
- Journal actions: Prints Journal Actions to the report and groups the journal action types together in their own columns.
- Journal ledgers: Prints the Journal Ledgers to the report and each ledger will be grouped into its own column.
- Per type of account: Prints Journals per type of account to the report and each account will be grouped into its own column.
- Click on Save Profile after making changes in order to remember the setup, This will make printing the report in future faster as the setup has already been done.

-
Click Next, when satisfied with the selections that have been made.

- Confirm or change the dates on the screen that will appear.
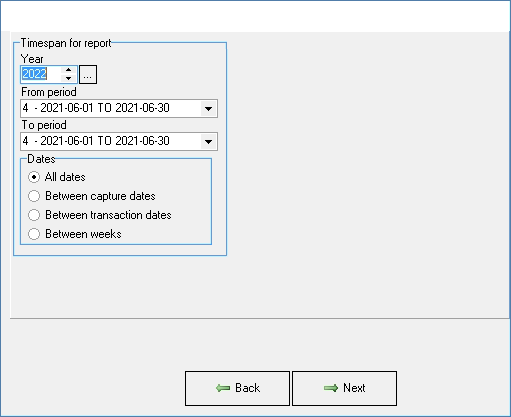
- Click on Next to generate the report.

-
The Statistics Report will be generated.

- For information on the content of the report and the columns that the information will be divided up into, please refer to the user manual: Debtor Statistics: Report Filters.
- Click on Exit to close the report and return to the Current Profile: Stats Report screen.

- The New Report will be added to the list on the Current Profile: Stats Report screen.
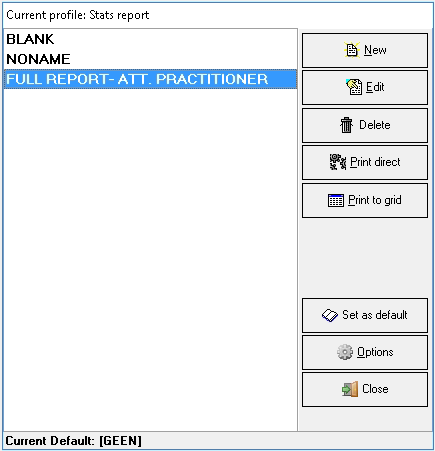
Edit Profile
Allows a user to edit the settings and parameters of a current profile.
- Select the desired report profile by clicking on it to make a selection.

- Click on Edit.

- The Statistics report screen, Report Parameters Tab will open.

- Make the necessary changes by changing the settings, using the parameter explanations as explained in the New Profile section of this user manual.
- Click on Save Profile to save the changes that have been made.
- An Information pop-up will appear: Overwrite Profile?

- Click on No to close the pop-up without saving the changes that have been made.

- Click on Yes to overwrite and save the changes that have been made.

- The Information pop-up will close.
- Click on Exit to return to the Current Profile: Stats Report screen.

Delete Profile
Allows the user to remove an existing profile from the list.- Select the desired report profile by clicking on it to make a selection.

- Click on Delete.
- An Information pop-up will appear to ask the user: Delete Profile?
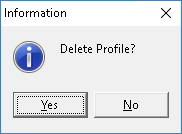
- Click on No to cancel the request, the pop up will close and return to the Current Profile: Stats Report screen.

- Click on Yes to delete the selected profile, the pop up will close and return to the Current Profile: Stats Report screen.

- The selected Profile will be removed from the list.
Print Direct
Allows the user to directly print the report to the screen. This will print as an HTML report.- Select the desired report profile by clicking on it to make a selection.

- Click on Print Direct.
- The Timespan for report screen will open where the dates of the report can be checked and altered if the need arises.
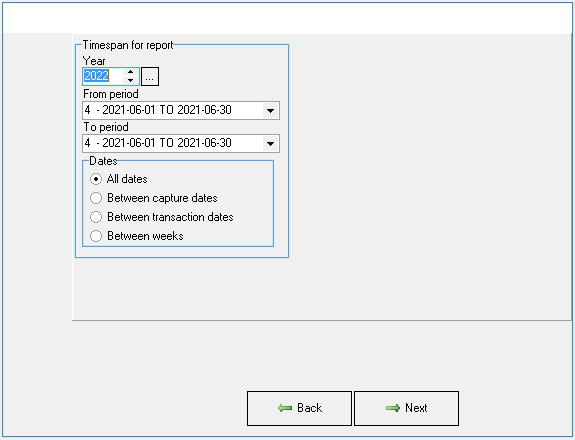
- Click on Next to continue.

- The Debtor Statistics Report will print on the screen.
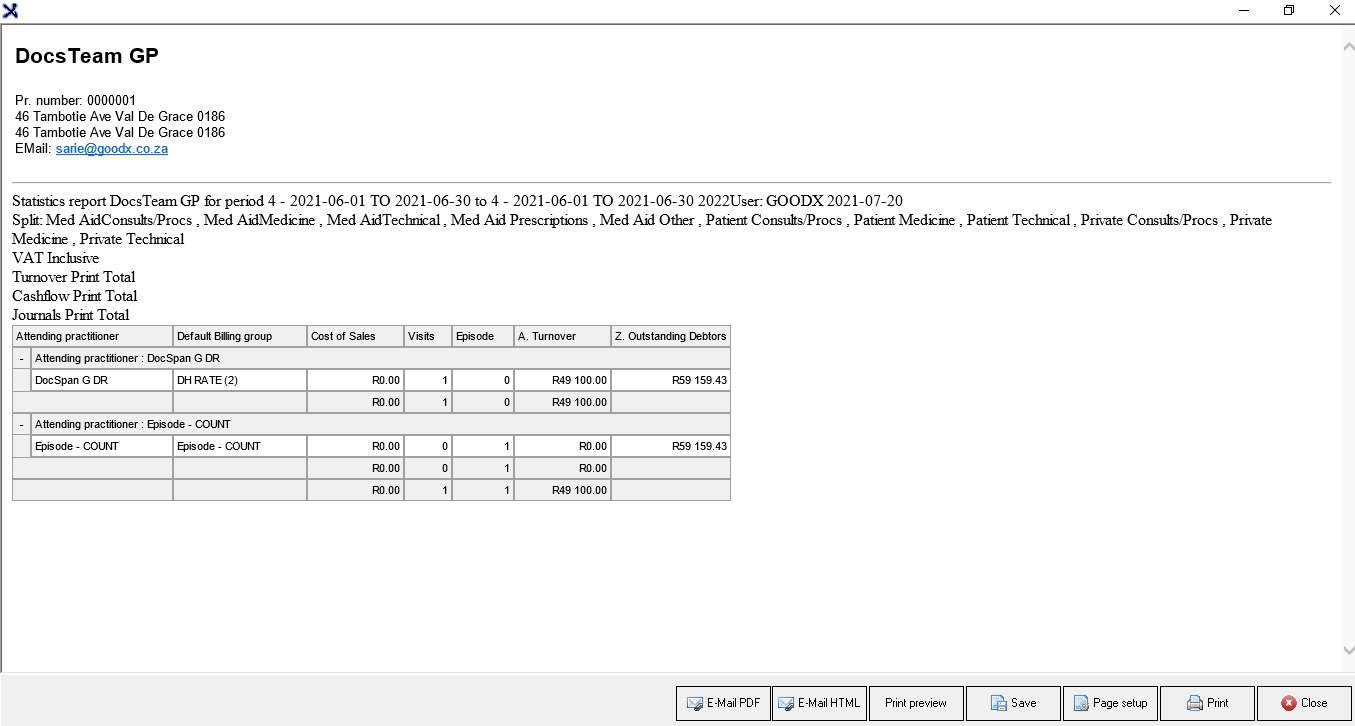
- Print and E-Mail options will be available for the printed report, for more information, please refer to the user manual: Options to Print.
Print to Grid
Allows the user to view the report on the screen and filter the report before printing the report.
- Select the desired report profile by clicking on it to make a selection.

- Click on Print to Grid.
- For an extensive explanation of the Print to Grid function, please refer to the user manual: Monthly Reports: Financial Reports - Debtor Statistics.
Set as Default
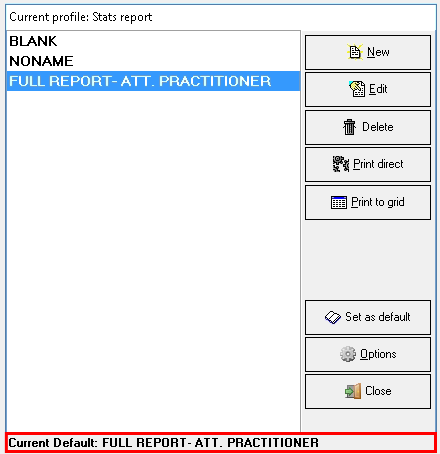
Allows the user to mark a selected report as the default report. When a report is set up as the default report the user will not be able to delete the report.- Select the desired report profile by clicking on it to make a selection.

- Click on Set as Default

- The selected option will be marked as default and this will be indicated on the bottom of the Current Profile: Stats Report screen.
Options
Extra options that are available for the profiles.
- Select the desired report profile by clicking on it to make a selection.

- Click on Options to access the options menu.

- The Options menu will become available:
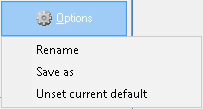
- Rename: Allows the user to give the profile a new name.
- Save As: Will save a duplicate copy of the selected profile with a new name.
- Unset Current default: Will remove the selected profile as the default profile.
Close
Allows the user to exit.
- Click on Close to exit the Current Profile: Stats Report screen and return to the main Financial Reports screen.

