Topic outline
Desktop App Reports


It is vital for any Medical Practice that the Practice Manager ensures that the Critical Business Processes are successfully completed. This will reduce the risk of all kinds of losses, eg Data loss and Financial losses.
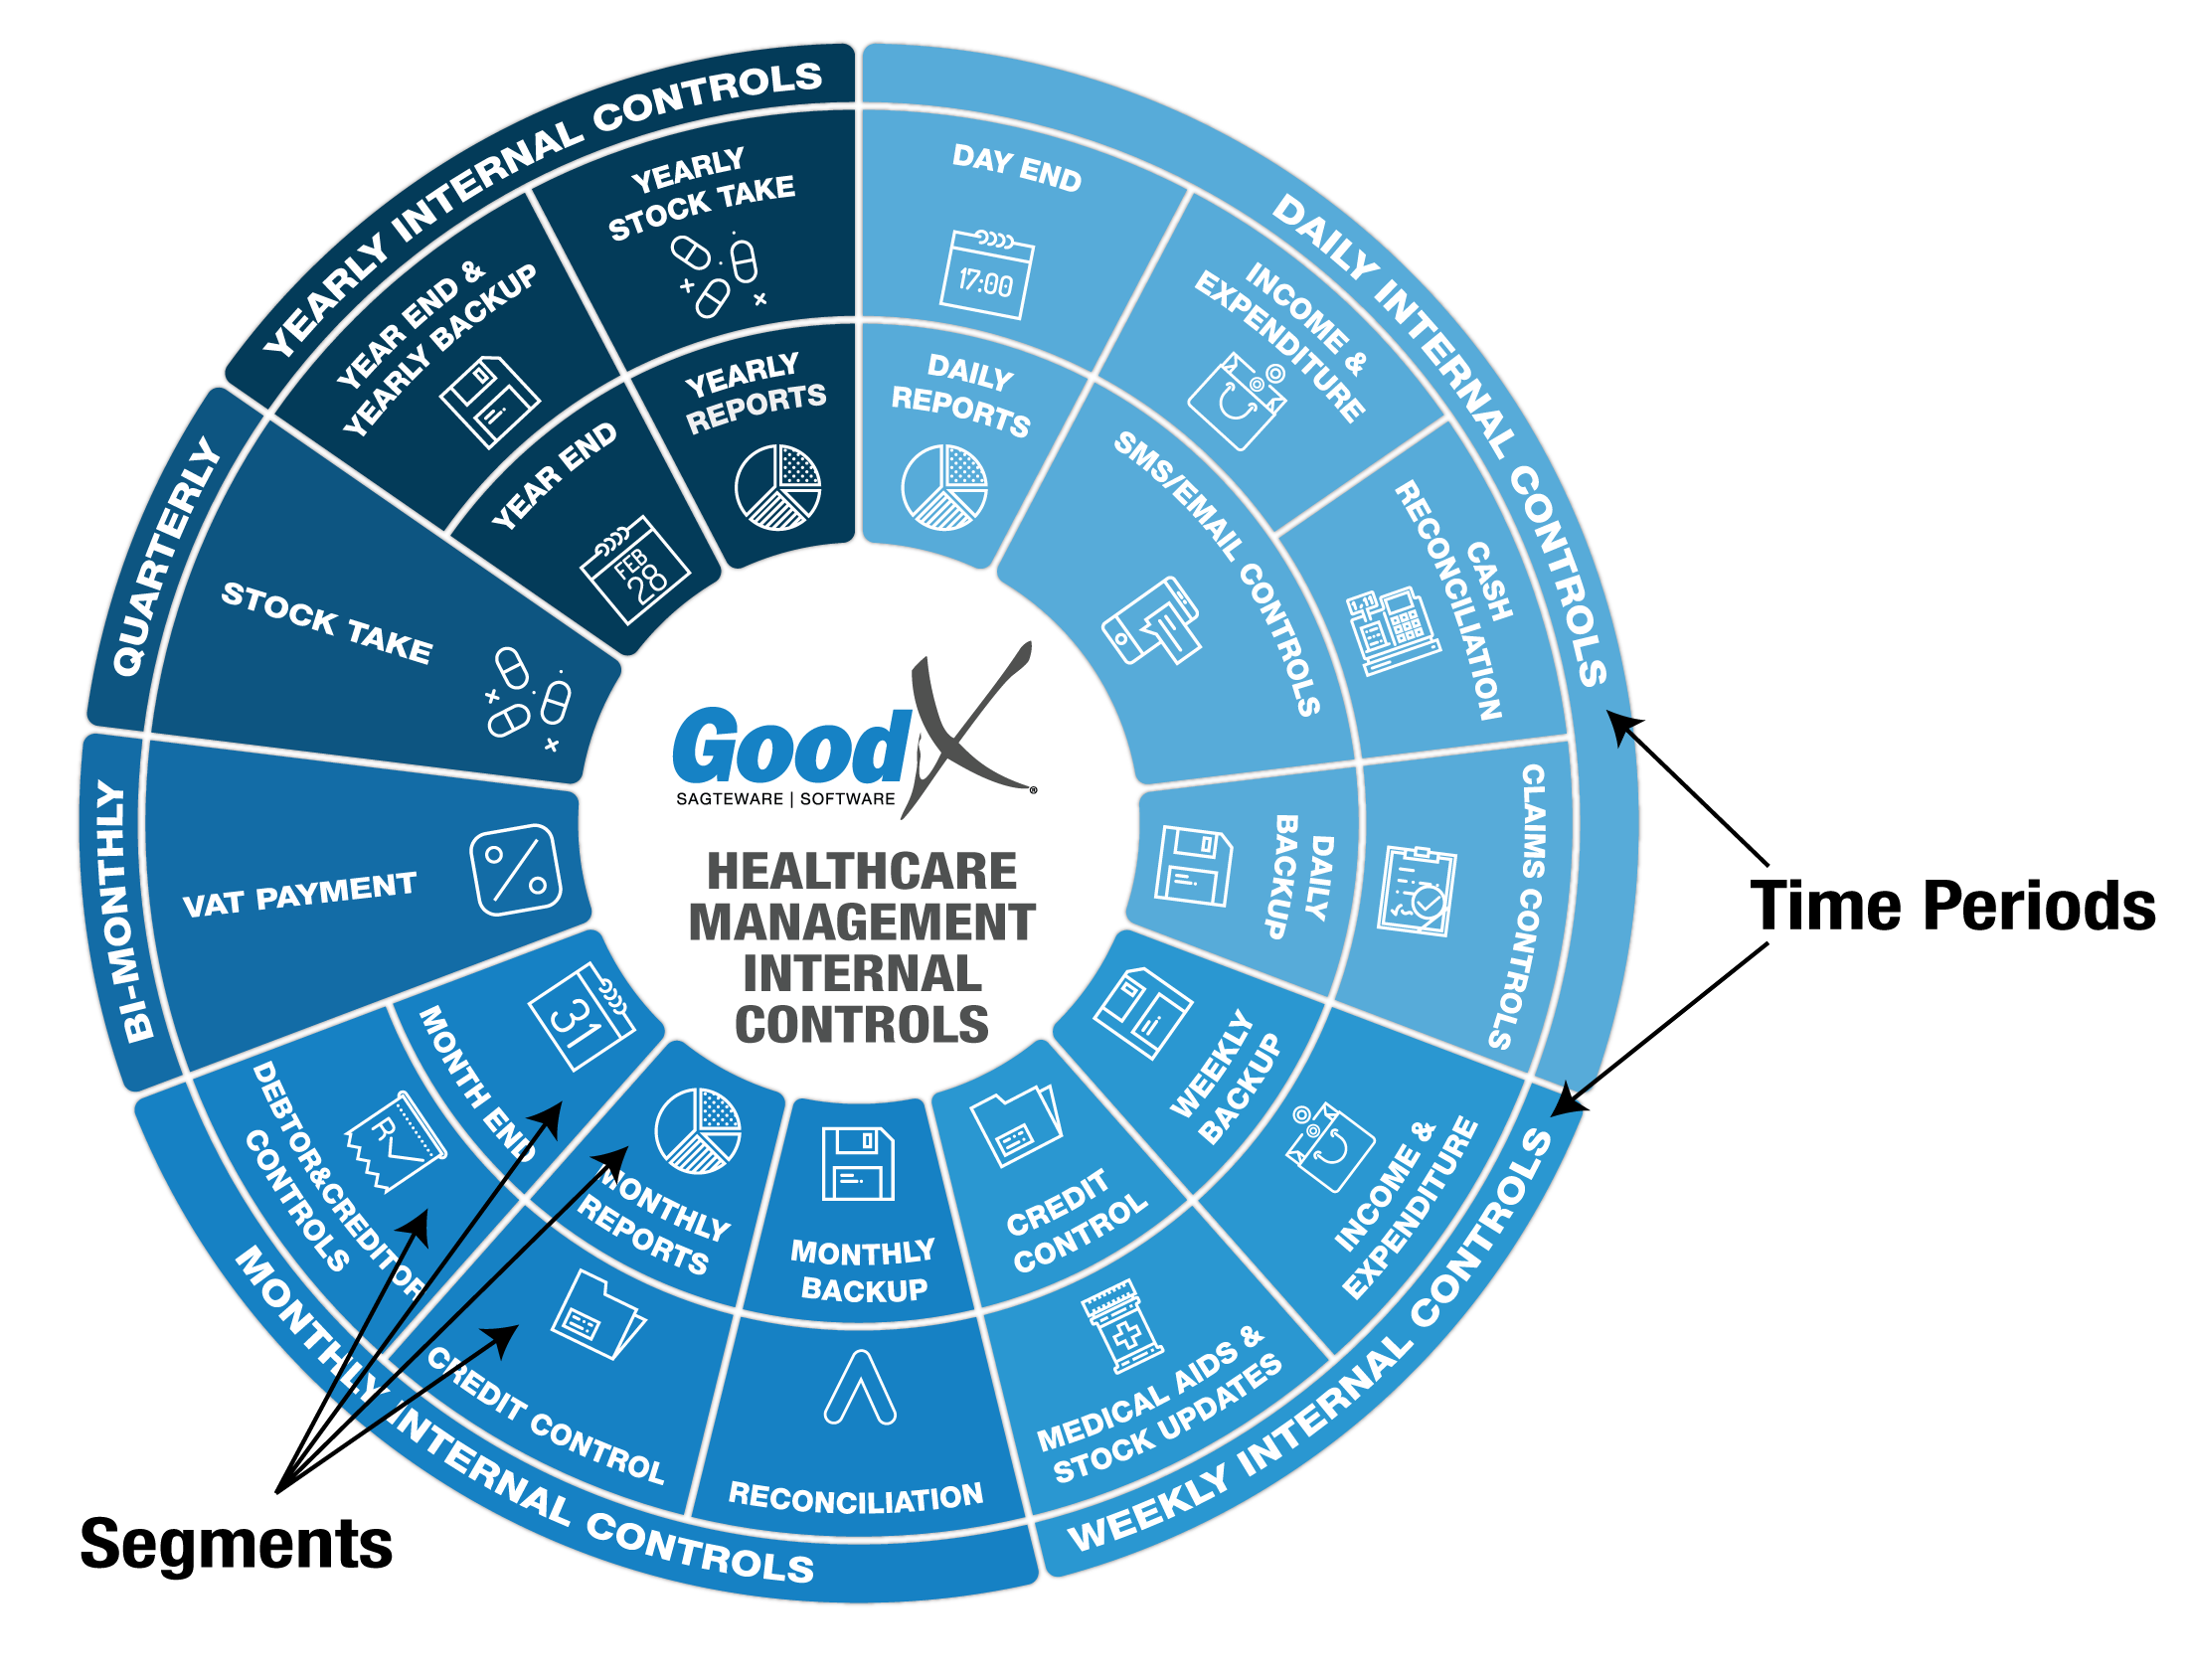
The following diagram gives an overview of the Internal Controls that need to be performed regularly. The Controls are performed by:
- Implementing & Following best practice processes described in the Healthcare Management Internal Controls Guidelines Book;
- Drawing the relevant Reports available on the GoodX Software System - a list of available reports can be found in the Appendix to the Guidelines book;
- Analysing & Interpreting the information in the Reports; and
- Responding to the information, for example, making corrections on the system OR implementing Management decisions based on the information to make the Practice more profitable.

The Internal Controls diagram is divided into six time periods (daily, weekly, monthly etc) during which the Internal Controls are to be performed.
Actions and Reports that share a common emphasis are grouped together into Segments, eg cash reconciliation includes petty cash and cash collected at the cash registers.
Segments are grouped together within the time periods so that the Practice Manager will be able to see at a quick glance which controls must be performed during which time period. As the financial year proceeds, following the Diagram's flow will assist the Practice Manager in completing all the necessary tasks and Reporting to complete the whole year's Internal Controls.
Take Note:
- The Reports are listed according to the periods and segments from left to right and marked with the segment names.
- Reports can be generated in either the Diary or the MedDebs Modules. The heading clarifies which Module they can be found in.
- The Best Practice Guidelines Book can be found under Guidelines on the Home page - an Appendix lists reports that can be generated in the Desktop App.
- Ensure you understand the terminology used to generate and interpret the reports correctly.
- Implementing & Following best practice processes described in the Healthcare Management Internal Controls Guidelines Book;
Monthly Internal Controls
Take Note that the Daybook Drilldown Report (Daybook) listed under Daily Internal Controls is also used in the Monthly Internal Controls.
Yearly Internal Controls
Best Practice Guidelines with regard to maintaining a proper backup regime can be found under the IT & Technical section - IT & Technical: Data Management on the Home page of the Learning Centre.
Take Note:
- It is important to do a backup before doing Year end (marked on the Diagram as the "Year end backup") and then do another backup after Year end (marked on the Diagram as the "Yearly backup"). Keep both backups together for future reference.
- Do only Year-end ONCE. Make sure that you are in the correct financial year and financial period BEFORE YOU START WORKING IN THE NEW YEAR.