Bed Management Screen: Navigation and Use
Bed Management plays a crucial role in the Hospital, ensuring that the location of Patients is known at all times, and the availability of beds is readily accessible. The system also streamlines recurring services, like scheduling bed changes and drip checks for Patients and simplifying processes for the Hospital staff. Bed Management is a valuable tool for Hospital management in making informed decisions and effective planning for Patient care.
Please Note: The Bed Management Setup is done in the GoodX Desktop, make sure the setup is done before continuing with this user manual. For more information on how Bed Setup is done, refer to the user manual: Bed Setup.
- The contents of this user manual will consist of the following information:
- Wards
- Ward List
- Rooms
- Beds
- Patient Information
- Additional Options
- This user manual will start on the Case Management screen.
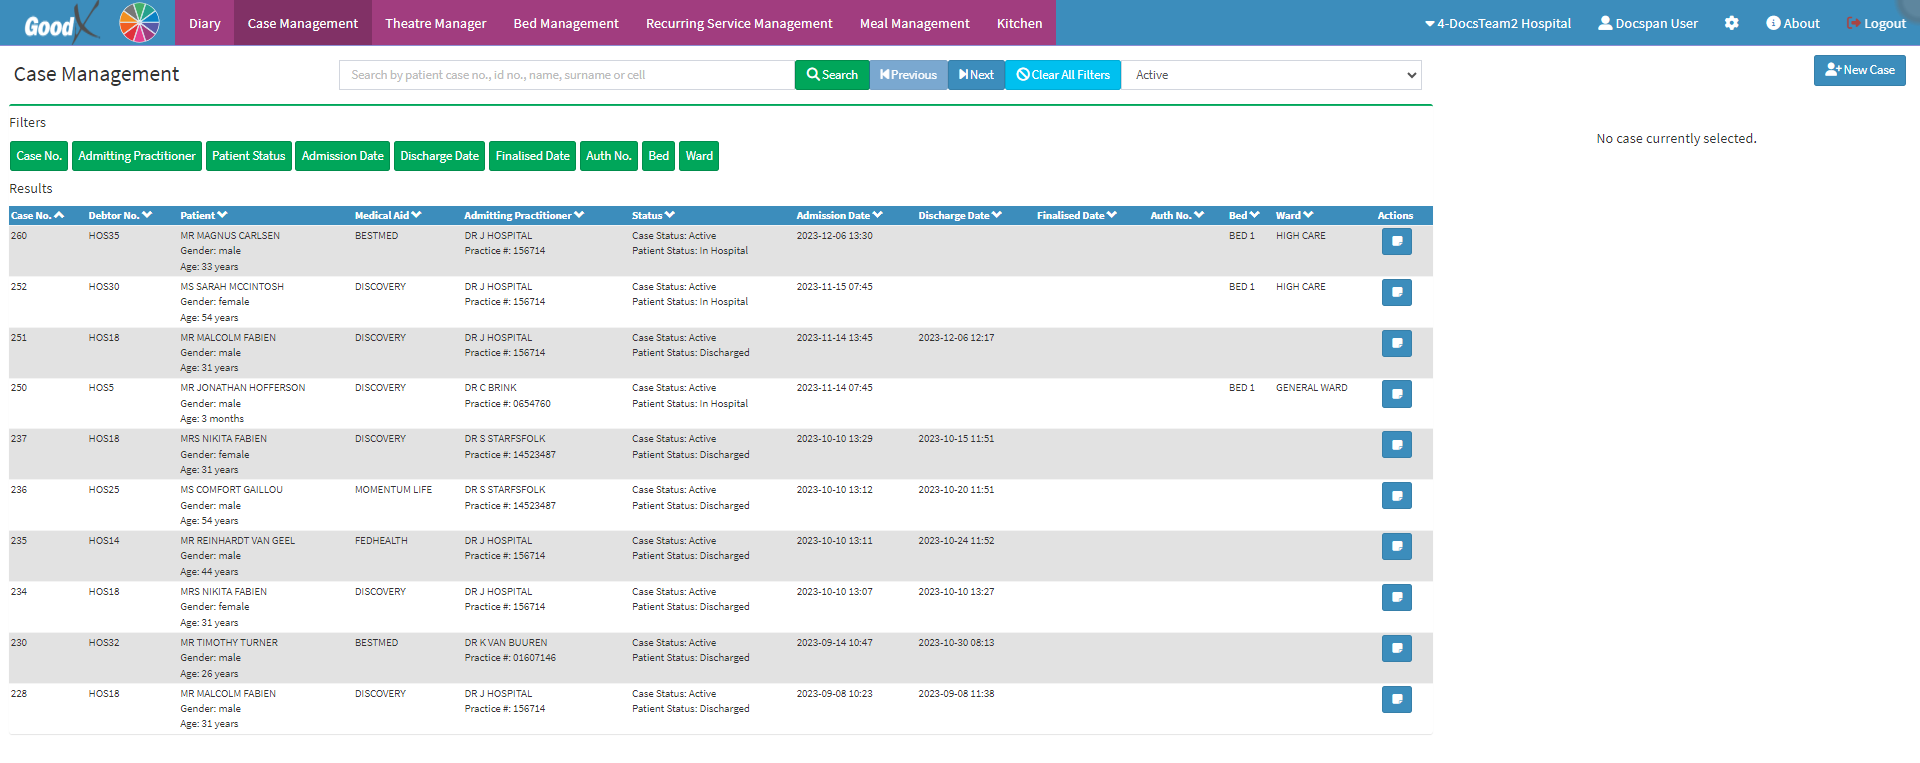
- Click on the Bed Management tab on the Navigation bar.

- The Bed Management screen will open.
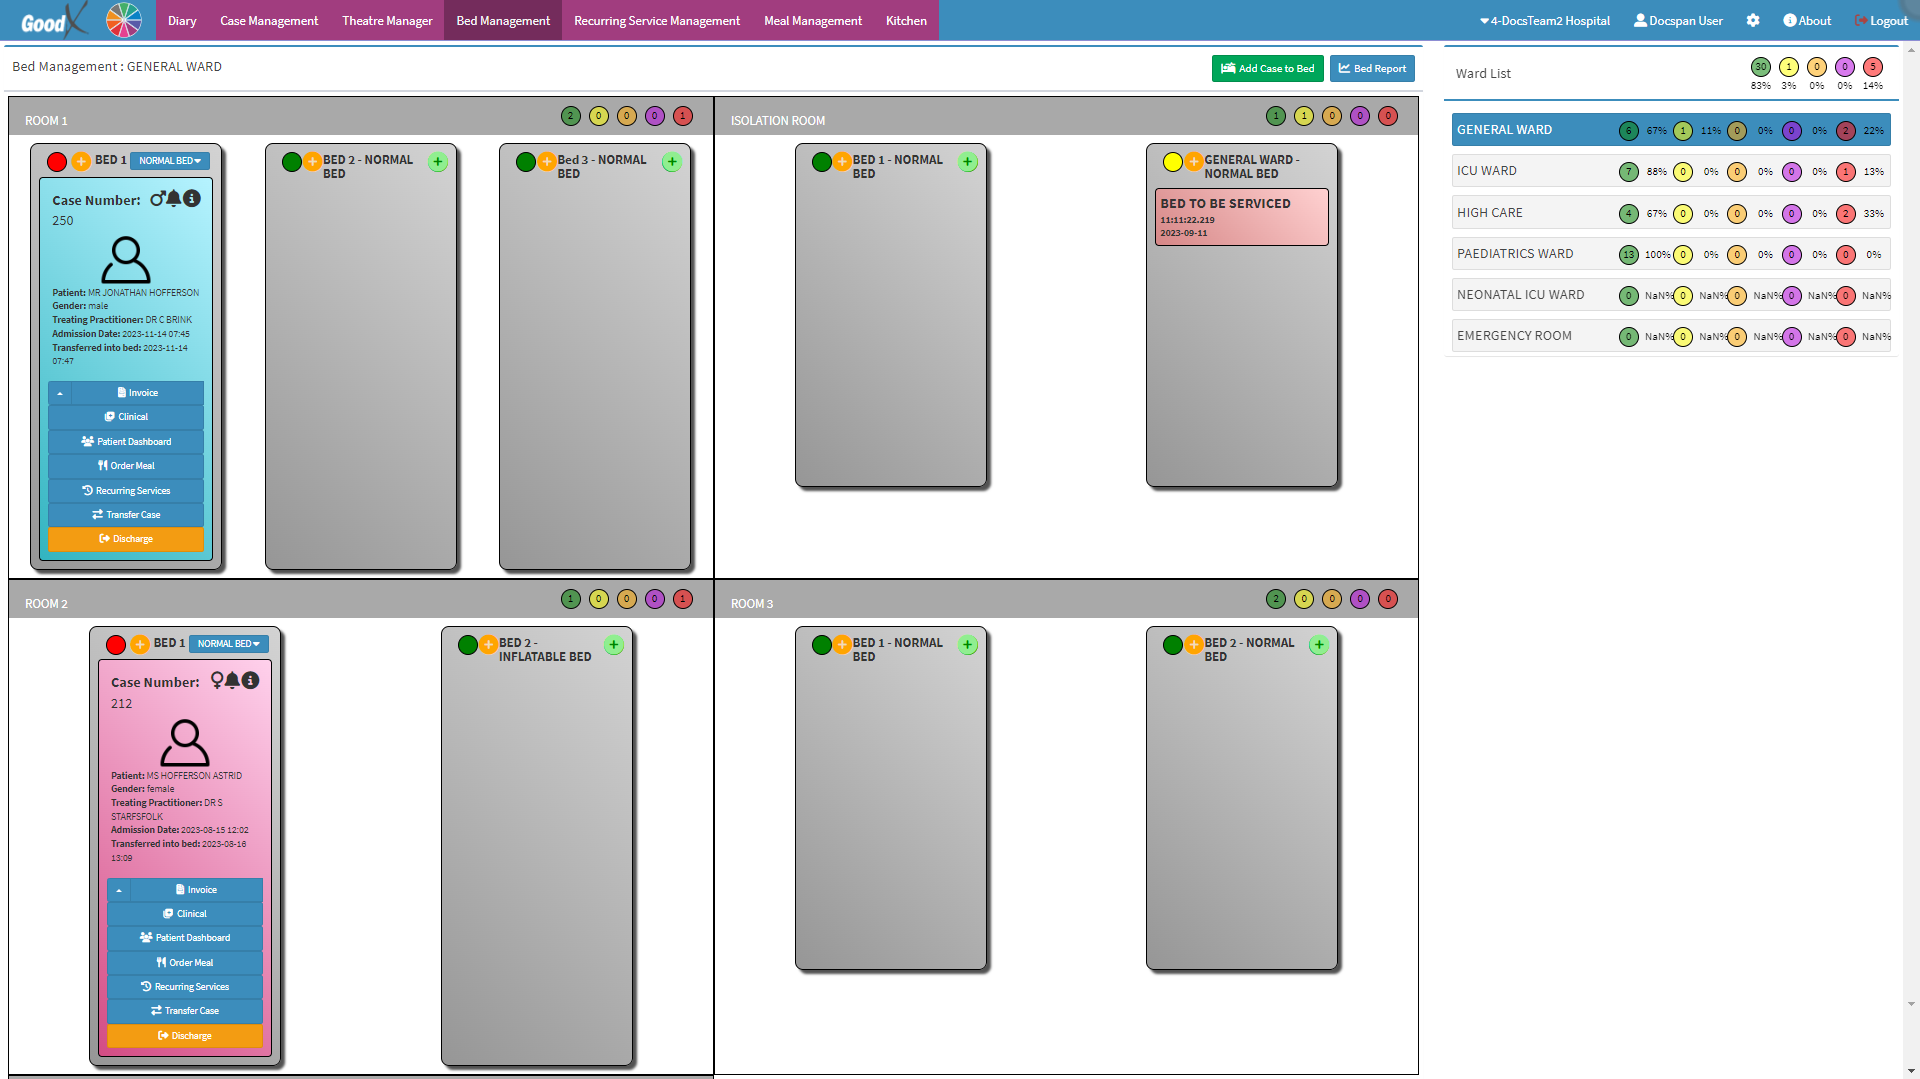
- An explanation will be given for each field, option and section of the Bed Management screen:
Wards
Wards are usually organised into specialised units, each with its own name based on the type of care they offer. These units can include General Wards, Intensive Care Units (ICUs), and High Care Units. The specific names may vary from one hospital to another based on their preferences and the type of medical services they provide.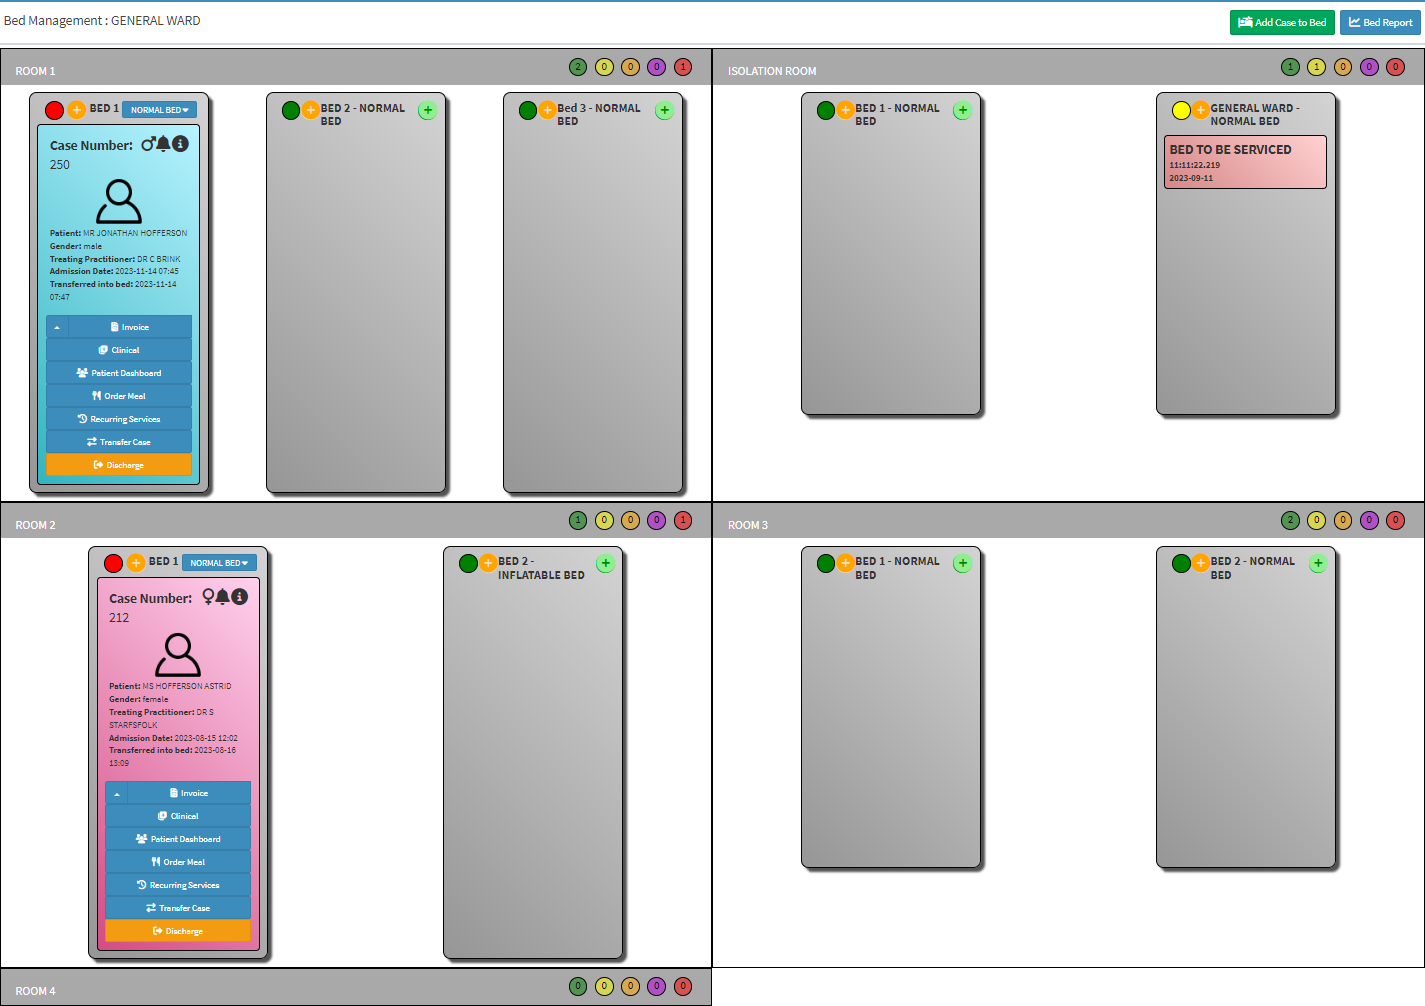
- An explanation will be given for each field and option in the Ward section.

- Bed Management: General Ward: The Name of the Ward the user is currently viewing.
![]()
- Add Case to Bed: Gives you easy access to transfer a Patient from one ward to another or to admit a Patient to a bed.
- For more information on how to create a case, please refer to the user manual: How to Create a New Hospital Case.
- Bed Report: A concise overview of all the rooms, beds, and assigned Patients in each bed, while also indicating the occupancy level of each ward.
- For more detailed information on the Bed Report screen, please refer to the user manual: WA: Bed Management Bed Report .
Ward List
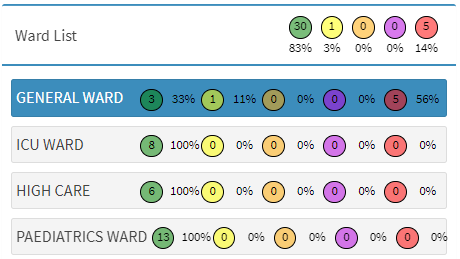
- Wards List: Shows a list of all the Wards that have been set up for the Hospital.
- Click on the desired Ward to view the available beds.

- Status Icons: The ward occupancy percentage and the total number of beds in each ward,
- Green: Available.
- Yellow: Out of Order.
- Orange: Reserved.
- Purple: Soon to be Discharged.
- Red: In Use.
Rooms
Each ward is comprised of Rooms, and the arrangement of each room depends on its unique layout. Various room types can be configured as required to suit the specific needs of the Hospital.

- An explanation will be given for each field and option within the Room section:
![]()
- ROOM 1: The name of the room.
![]()
- Room Status Icons: Indicates how many beds are Available, Out of Order, Reserved, Soon to Be Discharged and In Use in the specific room.
Beds
The configuration of beds is crucial for the Hospital to know exactly how many Patients are currently admitted and how many more Patients can be admitted. Each Patient must be admitted to a Bed and then discharged from that Bed when they leave the Hospital.
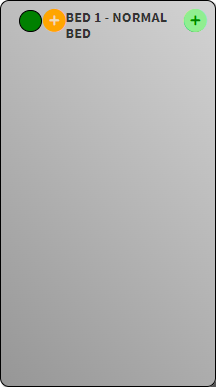
- An explanation will be given for all the information available on each bed:
![]()
- Current Status: Indicates the current status of the bed.
- Click on the Status button to see the different statuses the bed can be in.
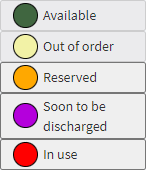
- For more information regarding the Bed Status, please refer to the user manual: WA: Bed Status.

- Add (Yellow): Allows you to reserve a bed for the Patient before they are admitted. For more information on how to Reserve a Patient to a bed, refer to the user manual: WA: Reserve a Bed for a Patient.
![]()
- Bed 1 - Normal Bed: The name and type of bed. For more information regarding Bed Setup and what bed types are, refer to the user manual: Bed Setup.

- Add (Green): Allows you to transfer a case into that specific bed. For more information on how to admit a Patient to a bed, refer to the user manual: WA: Admit a Patient to a Bed.
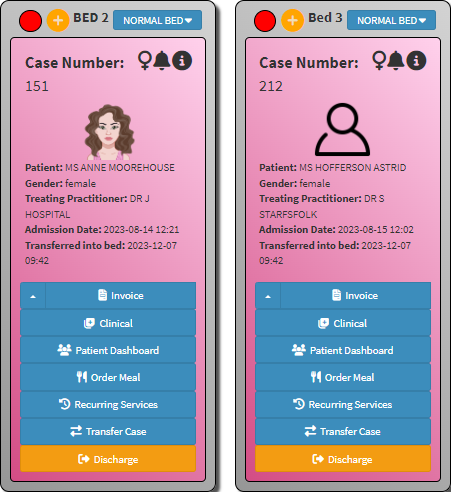
- An explanation will be given for all additional Bed Options:

- Case Number: A unique number automatically generated by the system when a Case is opened for a Patient. The number is used throughout the Patient's stay.

- Gender: Indicates the medical Gender of the Patient by means of the relevant icon and the bed colour will also reflect the Patient gender:
- Pink: Female.
- Blue: Male.
![]()
- Recurring Services Reminder: Indicates that there are recurring services scheduled on the Patient. For more information regarding Recurring Services, please refer to the user manual: Recurring Services Management Screen.

- Information Button: Opens the Hospital Case screen. For more information on the Hospital Case screen, please refer to the user manual: WA: Case Management Screen Overview.
Patient Information
All the information regarding the Patient and their case.
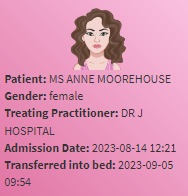
- Profile Photo: Uploaded when the Patient was created on the system. For more information on how to upload a profile Patient picture, please refer to the user manual: Add New Dependants (Patients).
- Patient: The names of the Patient currently occupying the specific bed.
- Treating Practitioner: The main Practitioner who is treating the Patient.
- Admission Date: The date when the Patient was admitted to the Hospital. The Patient's length of stay is calculated from this date.
- Transferred into Bed: Will show the date (yyyy-mm-dd) and time stamp (hh:mm) when the Patient was moved to this specific Hospital bed. The time is important as it has a billing factor attached, when a Patient is admitted to, for example, high care at 12:30 the Hospital will only be able to bill half a day for that specific day.
Additional Options
Extra options that are available on the bed.
![]()
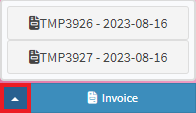
- Invoice: Allows you access to the Invoice screen, where the Patient can be billed. For more information on how to invoice a Patient, please refer to the user manual: The Invoice Screen: Navigation and Use.
Please Note: All previous Invoices that have been billed, can be found in the drop-up menu next to the Invoice button
![]()
- Clinical: Give access to the Clinical document templates, as well as the Medical and Clinical History of the Patient. For more information regarding the Clinical screen, please refer to the user manual: Clinical Case Screen: Navigation and Use.
![]()
- Patient Dashboard: Gives you an overall view and history of the chosen Patient which will assist you with preparing the consultation beforehand. The Patient Dashboard is a great tool for creating a single location for displaying critical medical data. For more information regarding the Patient Dashboard, please refer to the user manual: Patient Dashboard.
![]()
- Order Meal: You are able to order the Patient's meal directly from the bed.
- The meals that are available can be set up in the Meal Management tab, for more information, please refer to the user manual: Meal Management Screen.
![]()
- Recurring Services: This will allow you to book additional services for the Patient/Bed, for example, linen change, bed service, medication administration etc.
- For more information regarding Recurring Services, please refer to the user manual: Recurring Services Management Screen.
![]()
- Transfer Case: This will allow you to transfer the Patient to a different Ward and/or Bed.
- For more information regarding Transfer Case, please refer to the user manual: Transferring a Patient to a New Ward/Bed.
![]()
- Discharge: This allows you to directly Discharge a Patient from the bed.
- For more information on how to Discharge a Patient, please refer to the user manual: WA: Discharge from Bed Management.
Last modified: Thursday, 20 March 2025, 9:25 AM