System Options: Editing eRA
An Electronic Remittance Advice is communication between the Medical Aid and the Practice regarding the payment of a batch of claims. eRAs are used as a reference for a bulk payment run from the Medical Aid and allows the importing of payments received, into the GoodX system. eRAs save time and eliminate errors when capturing payments made by the Medical Aid.
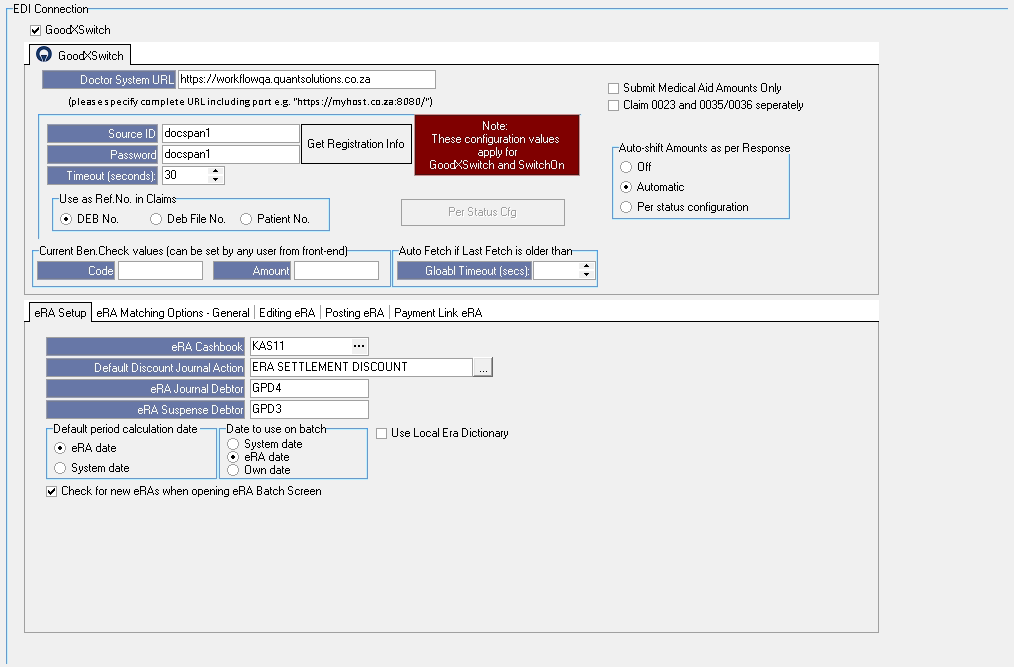
- This user manual will start on the System Options EDI Connection screen.

- For more information on how to navigate to the System Options EDI Connection screen, please refer to the user manual: EDI.
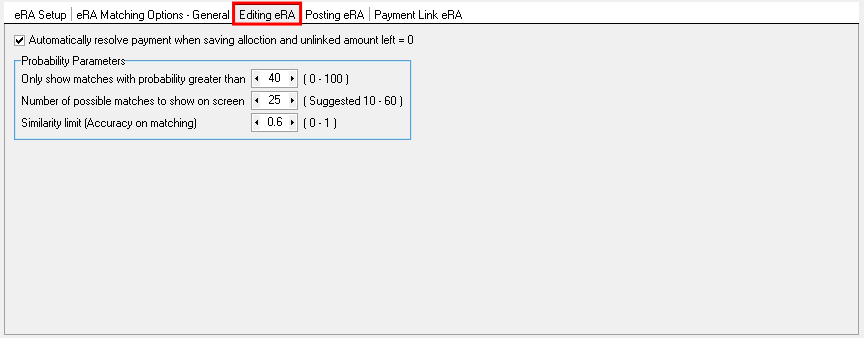
- Click on the Editing eRA tab to open the screen.

- An explanation will be given for each option:
![]()
- Automatically resolve payment when saving allocation and unlinked amount = 0: When an eRA that is imported equals zero, the system will automatically resolve the eRA. The user will not have to manually resolve the eRA when the total amount is zero.
- Probability Parameters: Allows the system to determine how fast and how accurately an eRA is imported using specific preset up criteria.

- Only show matches with probability greater than: If a Debtor's surname is a 100% match and the Debtor's name is a 95% match, the system will add the percentages and give an average percentage of the two. The person with the highest percentage on the outcome of the search will be a match. The user can select a percentage between 0 and 100 to only show the matches within the desired parameters.
- Number of possible matches to show on screen: Allows the user to select the amount of matches that will show on the screen when doing a search. The suggested number is between 10 and 60.
- Similarity limit (Accuracy on matching): The user can set the precision to which the matching of information is done. The match with the highest percentage will be the most accurate match. The limit of similarity can be set between 0 and 1.
Please Note: Changes made to the Probability Parameter should be done with caution, as there could be an effect on how fast and how accurately the eRA is imported.
- Click on the Print Options button to print the setup of all System Options Tabs.

- Click on the Save button to save the changes that have been made.

Please Note: The Save button will only appear if changes have been made to the settings.
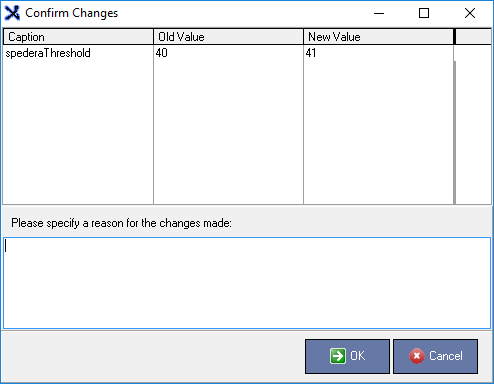
- The Confirmation Changes screen will open.

- Click on the Please specify a reason for the changes made free text field to give a reason as to why the changes have been made.

- Click on the Cancel button to go back to the EDI screen, no changes will be saved.
![]()
- Click on the OK button to save changes that have been made.
![]()
- Click on the Exit button to close the System Options EDI Connection screen and return back to the System Options screen.

Last modified: Tuesday, 12 July 2022, 4:31 PM