Surgeon Billing from Operation
The user manual is currently being updated with new features. An updated version will be available shortly. We thank you for your patience.
Surgeon Billing from the Operation screen allows the Surgeon to bill the Patient directly from the Theatre Booking. Being able to directly invoice the Patient from the Operation screen makes for a quicker, and easier billing process for the Surgeon.
Before the Surgeon is able to invoice the Patient from the Operation screen, the user would need to ensure that the correct type of Practitioner has been set to Surgeon. For more information regarding the set-up of the correct type of Practitioner, please see the user manual: Theatre Setup.
- Log in to the GoodX Web App using your GoodX username and password.
- The Dairy screen will open.
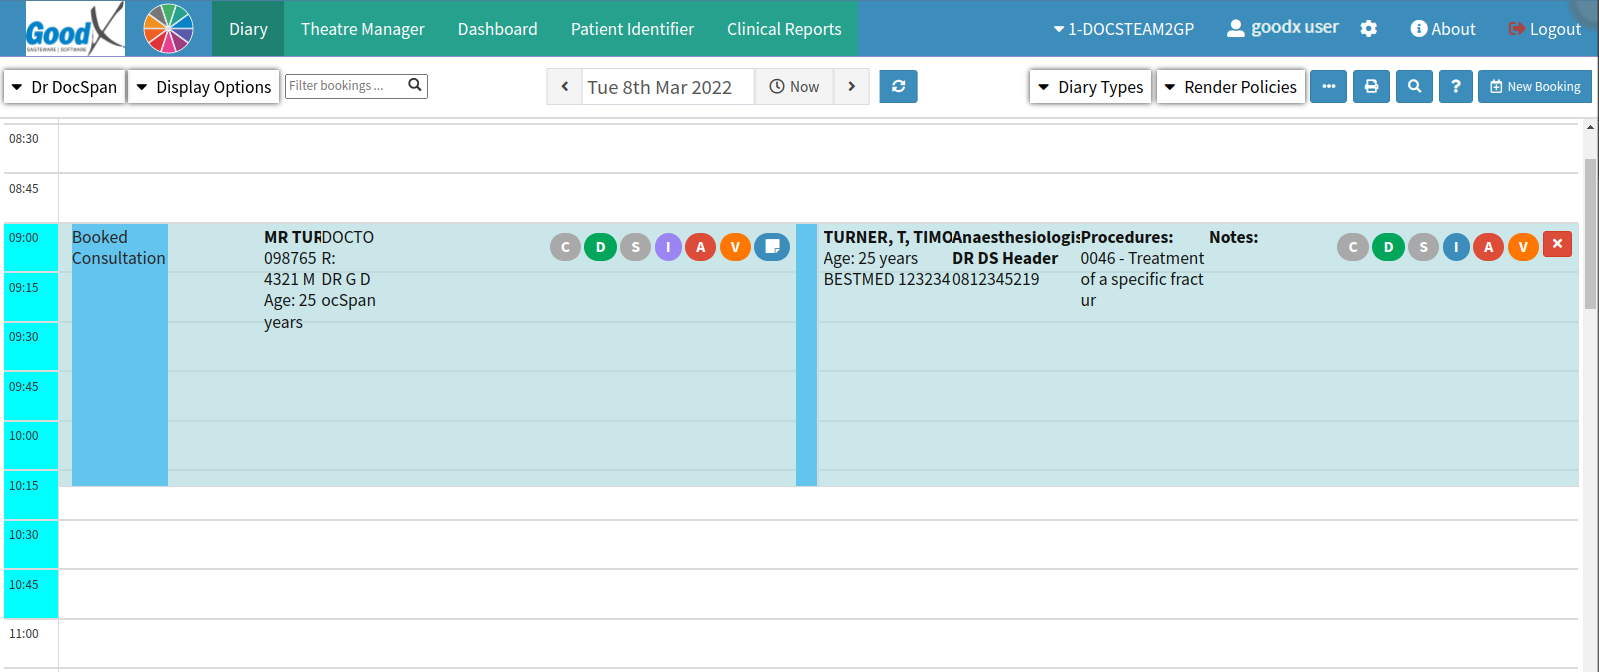
Please Note: The Theatre booking in this user manual was previously set-up, which is a requirement to access the Operations screen. For more information regarding how to set up a Theatre booking, please refer to the following user manuals: Theatre List setup (Step 2) and Book Theatre Patients (Step 3).
- Double Click on the Theatre booking of the Patient that the Surgeon would like to bill.
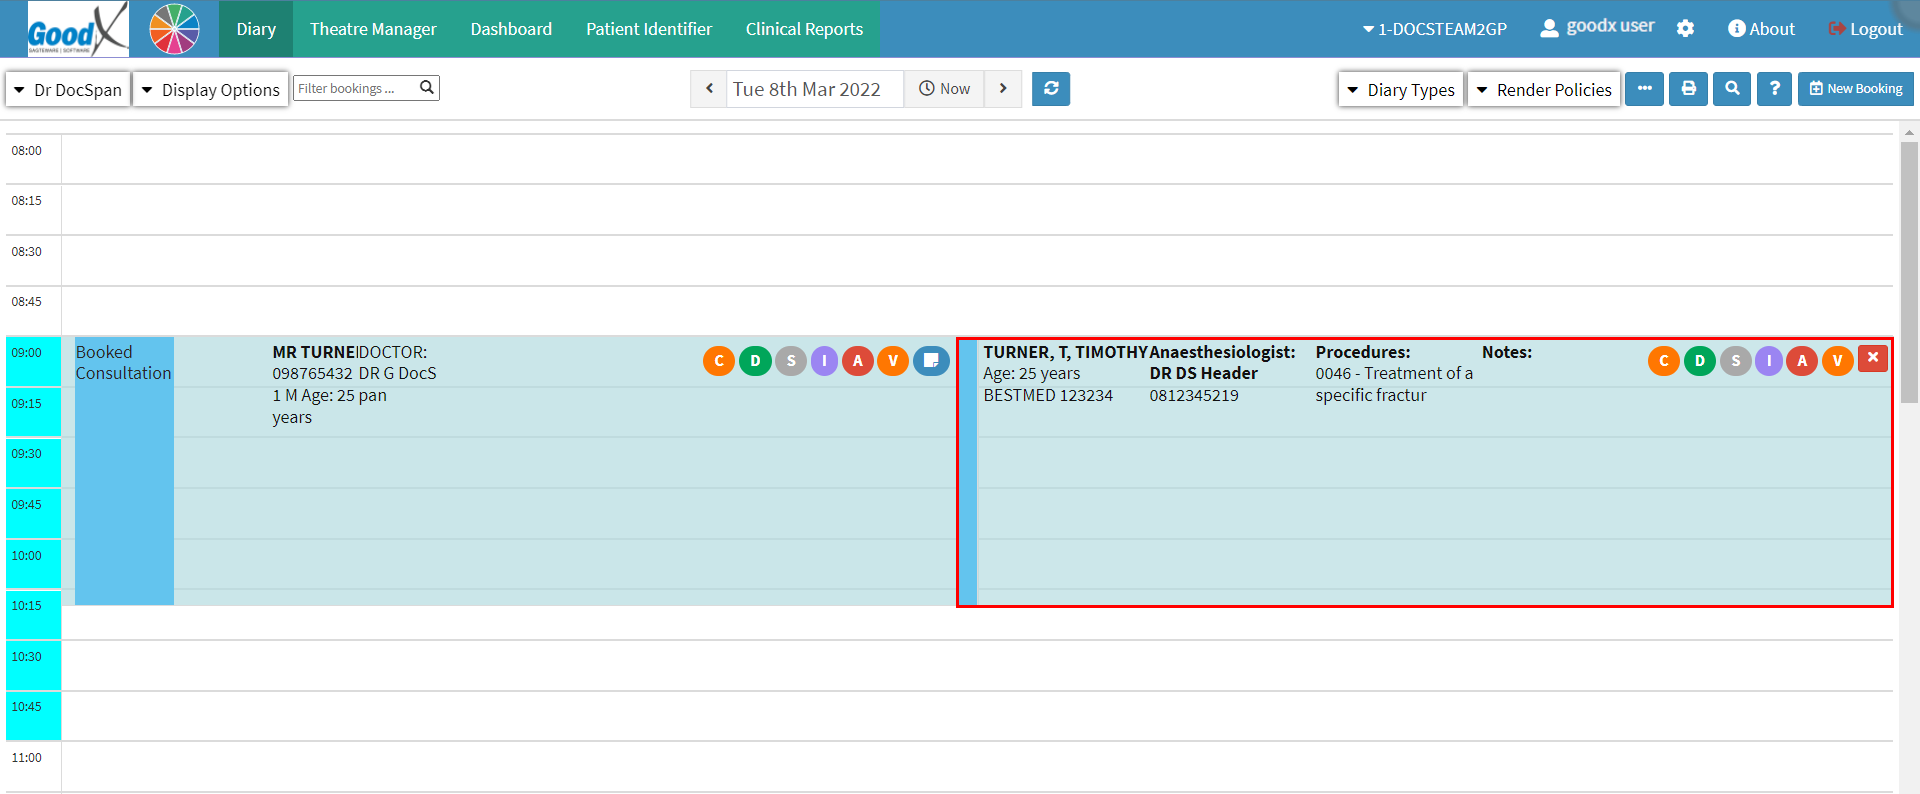
- The Operation screen will open.
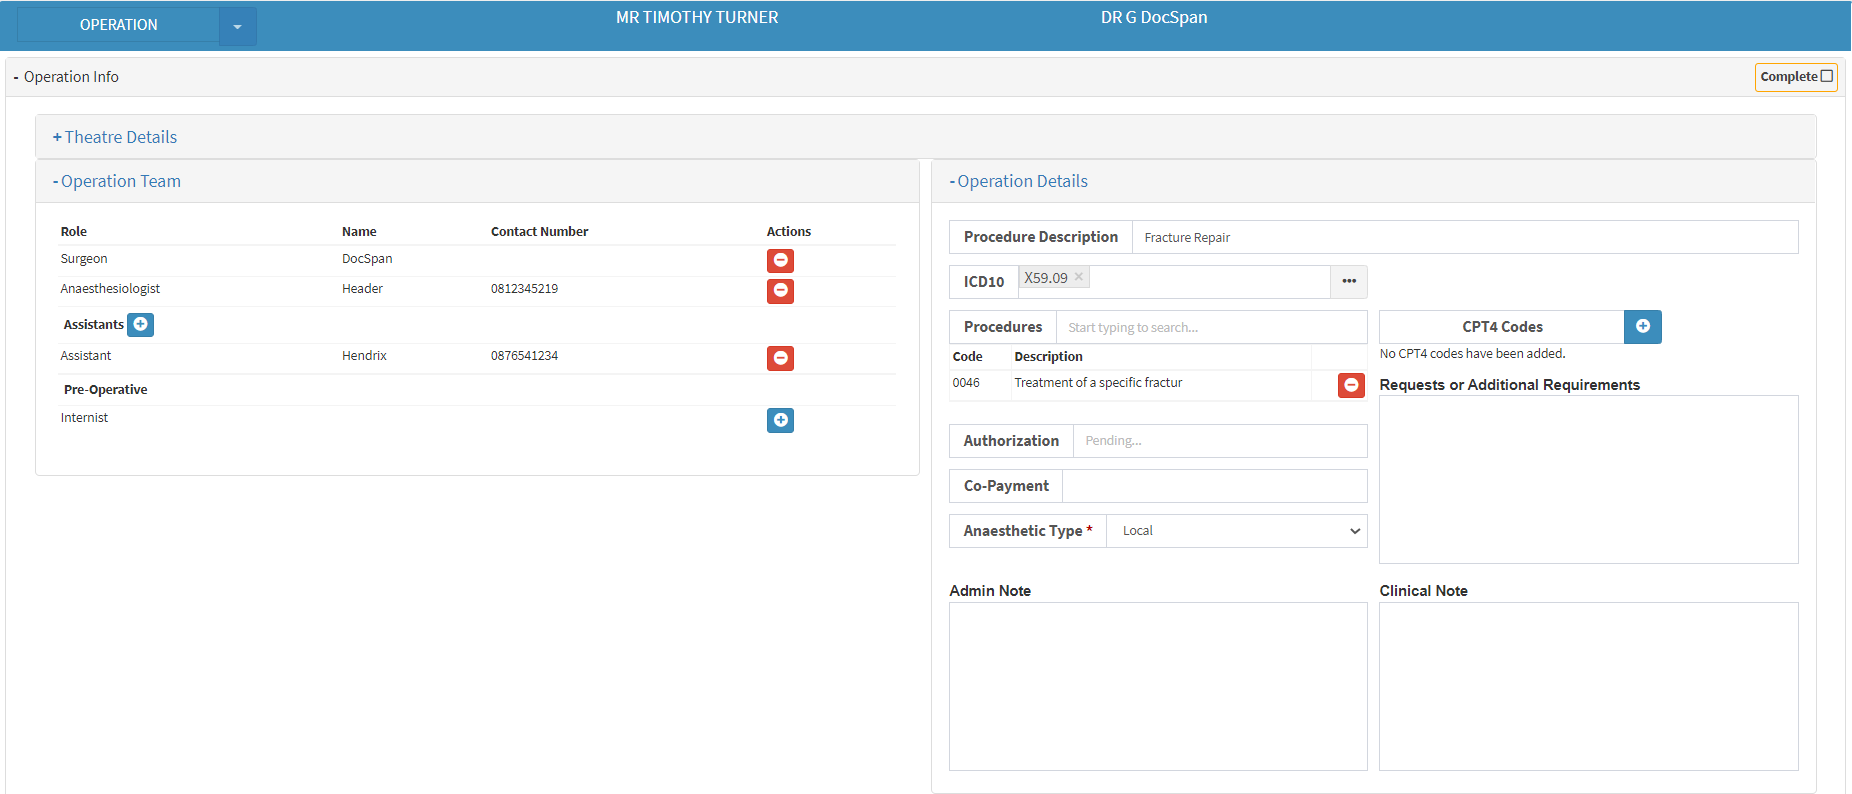
- Complete the Operation Details panel with the necessary information such as the ICD 10 Code, Procedure Code, Anaesthetic Type, etc.
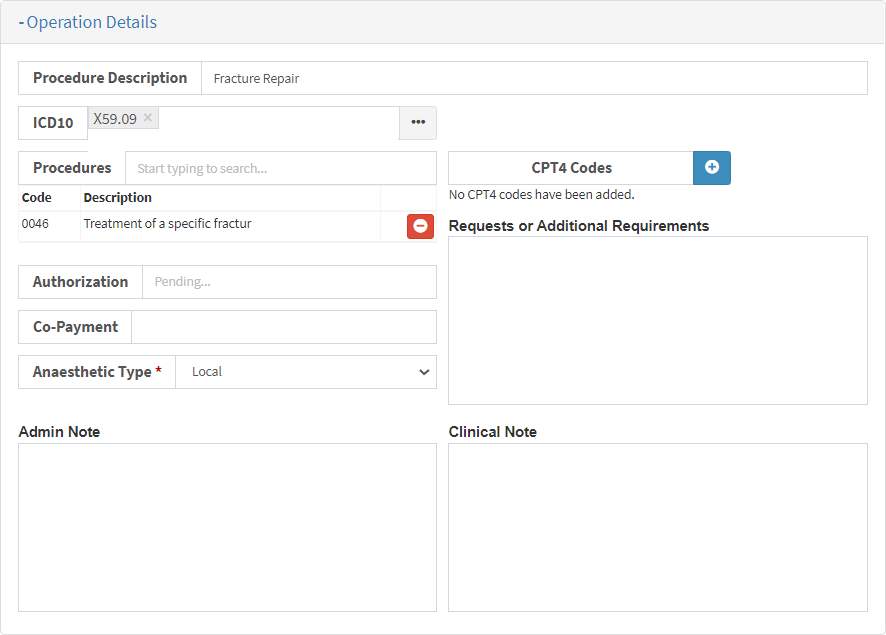
- For more information regarding the Operation Details panel, please refer to the user manual: Operation Details.
- Click on the Billing panel.
![]()
- The Billing panel will expand.
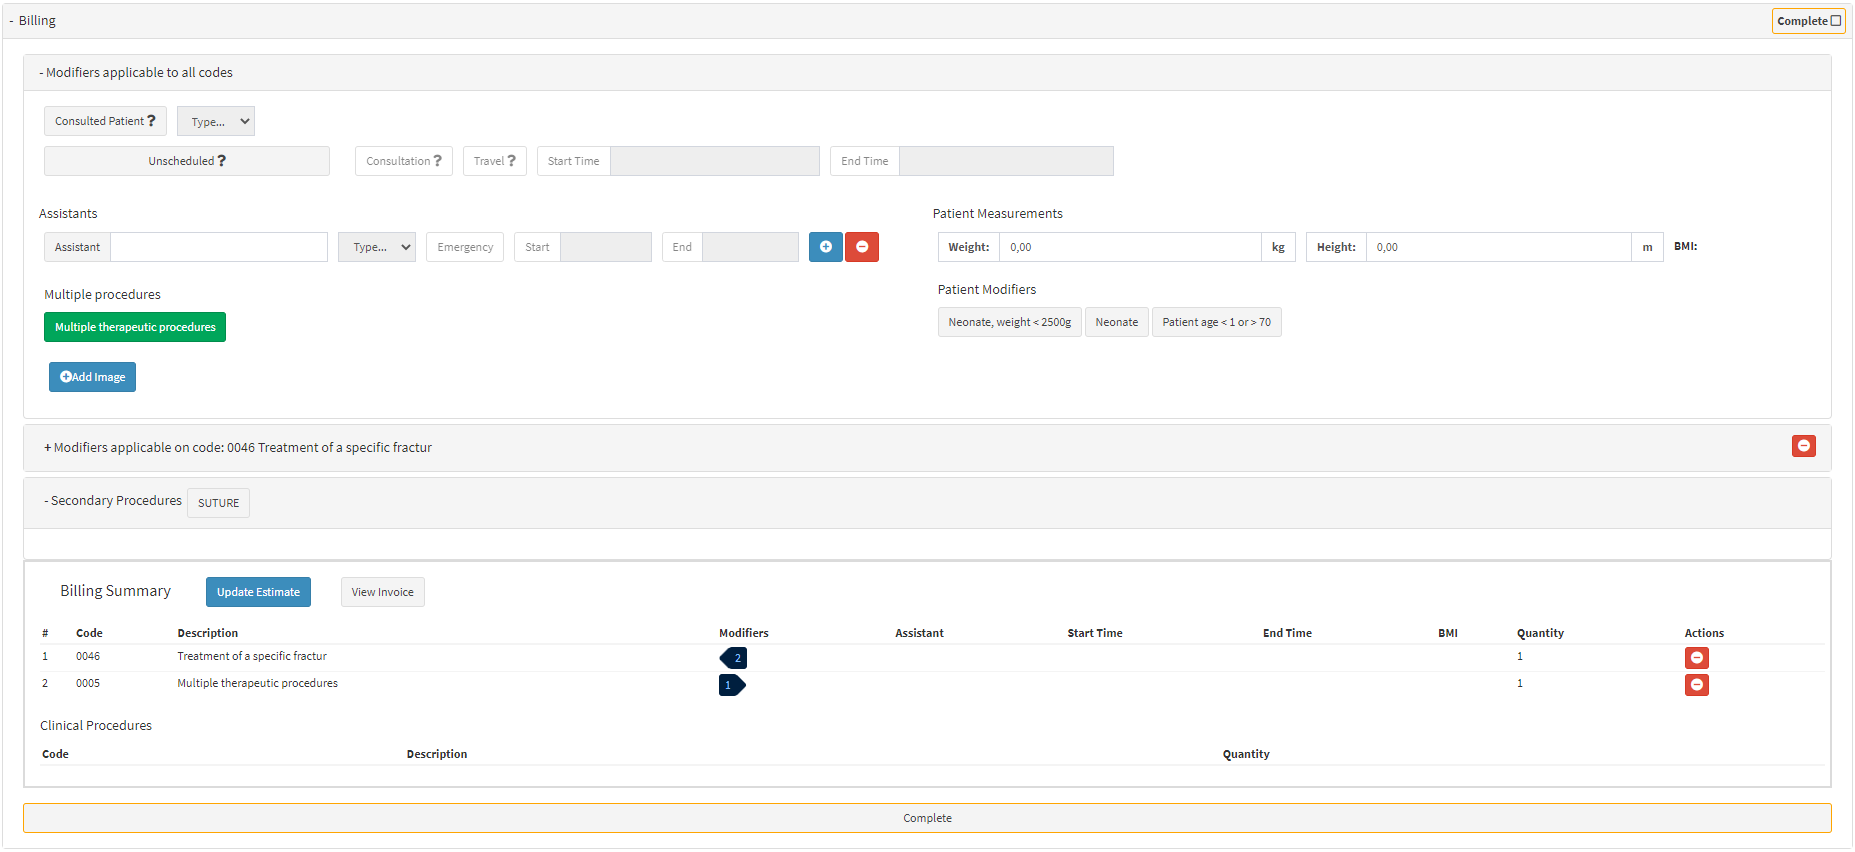
- For an extensive explanation of the Billing panel, please refer to the user manual: Billing from Operation Booking.
- Navigate to the Billing Summary.

- The chosen procedure code from the Operation Details panel will automatically populate the Billing Summary.

- Click the Update Estimate button to save the estimate with any updated procedures.
![]()
- Click on the View Invoice button.
![]()
- The Invoice Details screen will open.
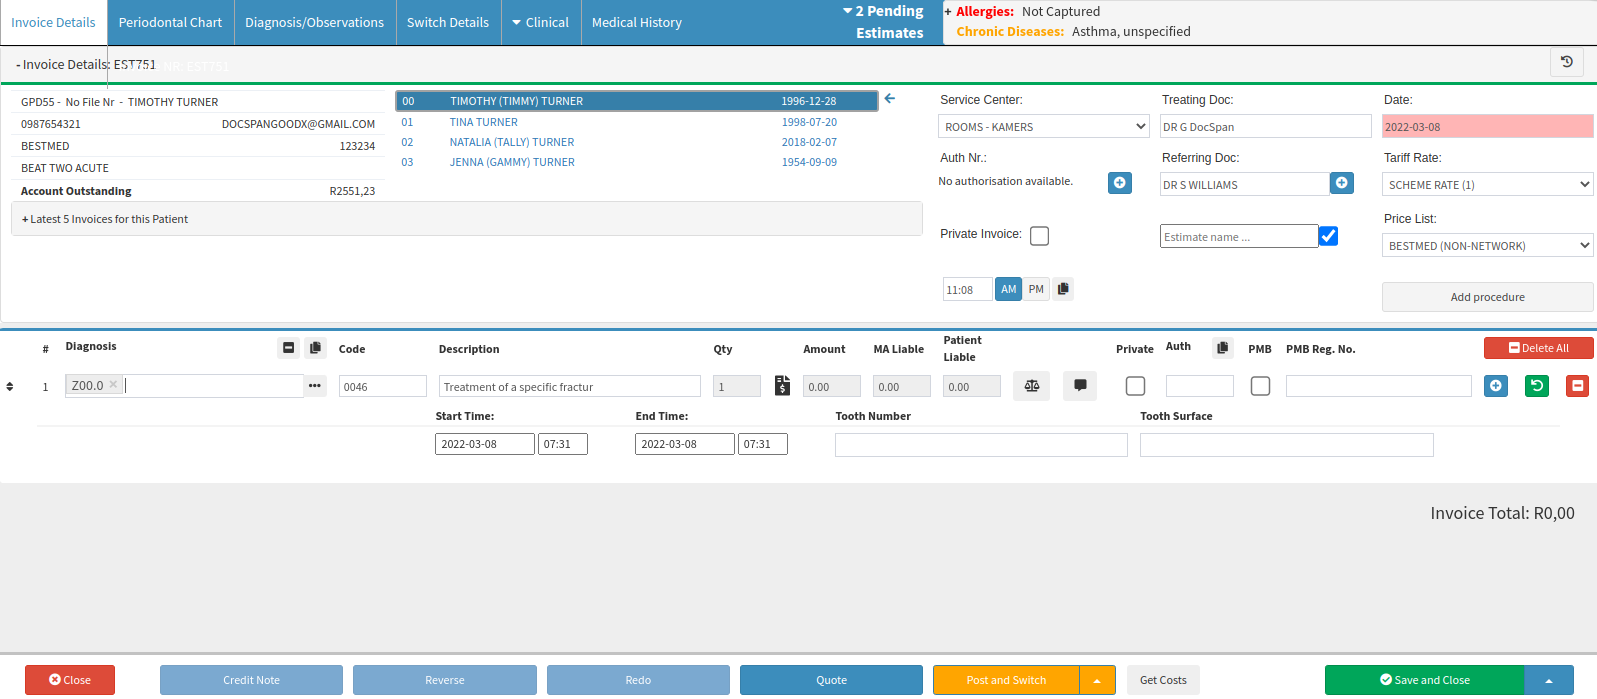
- For more information regarding Posting and Switching the invoice, please refer to the user manual: The Invoice Screen.
- Click on the Close button.

- An Attention! pop-up will appear to advise that the invoice has not been saved and the invoice lines will be discarded.
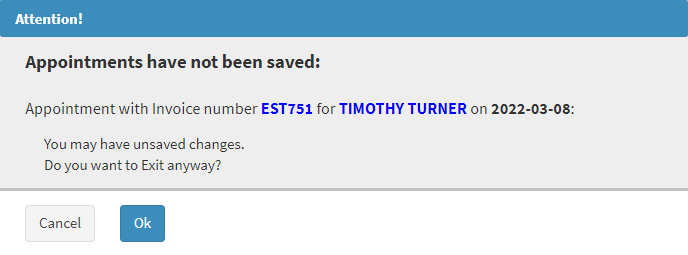
Please Note: The Attention! pop-up will only appear when the invoice has not been posted or saved yet.
- Click on Cancel to close the pop-up and return to the Invoice screen.

- Click on Ok to exit without saving and return to the Operation screen.

- Click on the Save and Close button to save the invoice to the debtor's temporary Invoices.

- The invoice will not post to the system.
- The Invoice screen will close and the user will return to the Operation screen.
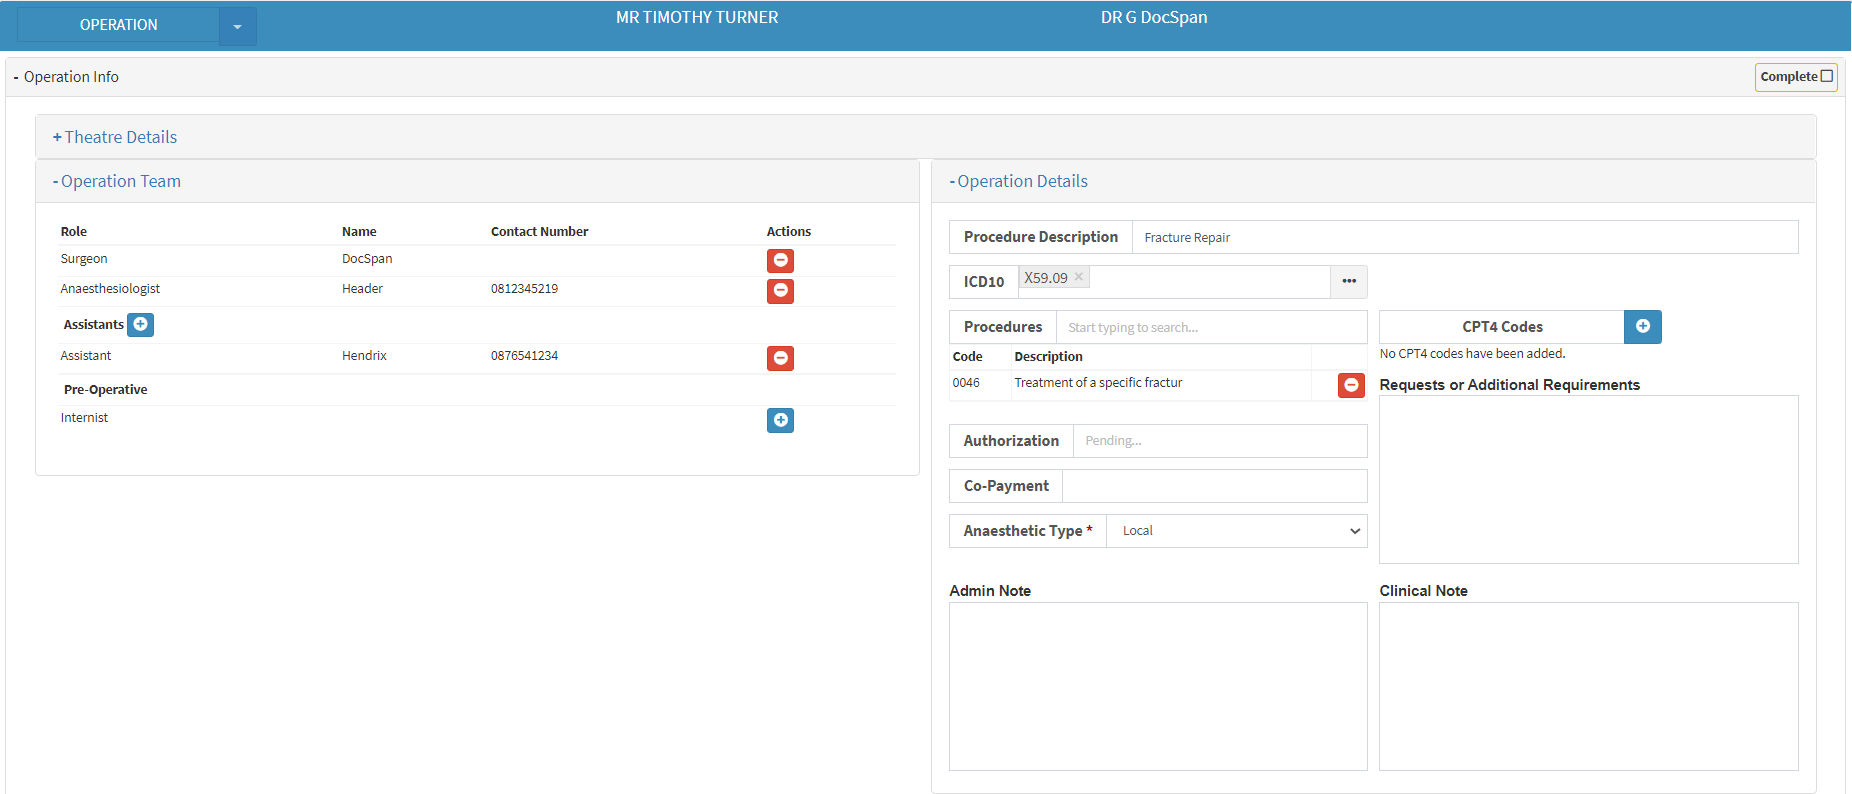
- Click on the Close button to close the Operation screen without saving any changes.
![]()
- Click on the History button to view the Workflow Event History of the Operation screen.
![]()
- Click on the Save button to save any changes made to the Operation screen, and return to the Diary screen.
![]()
Last modified: Monday, 12 December 2022, 2:25 PM